Blurring a video or image can help protect privacy by hiding faces or sensitive details. If you want to hide a person's personal information, use the blur effect. Besides privacy protection, the blur tool can also enhance a video's appearance by creating a softer background and improving visual focus.
Top 5 Blur Video Apps: Quick Overview
| Name | Supported OS | Manual Blur | Tracking Blur | Background Blur | Free Limit |
| MovStash | iOS | Yes | Yes | Partial | Free |
| KineMaster | iOS & Android | Yes | Yes | Yes | Free with watermark |
| Blur Video and Photo Editor | Android | Yes | Yes | Yes | Free with ads |
| Video Toolbox Movie Maker | iOS | Yes | No | No | Free download; Mask Video requires an in-app purchase |
| Skitch | macOS | Yes | No | No | Free |
Best overall free option on iOS: MovStash. It is free with no watermark or in-app purchase, and it supports both manual and face-tracking blur. A very economical option to blur videos on iPhone.
Best face tracking to protect privacy: KineMaster. It offers free AI tracking to lock a mosaic effect to moving objects.
Best for Android: KineMaster and Blur Video and Photo Editor. Both are versatile editors on Android.
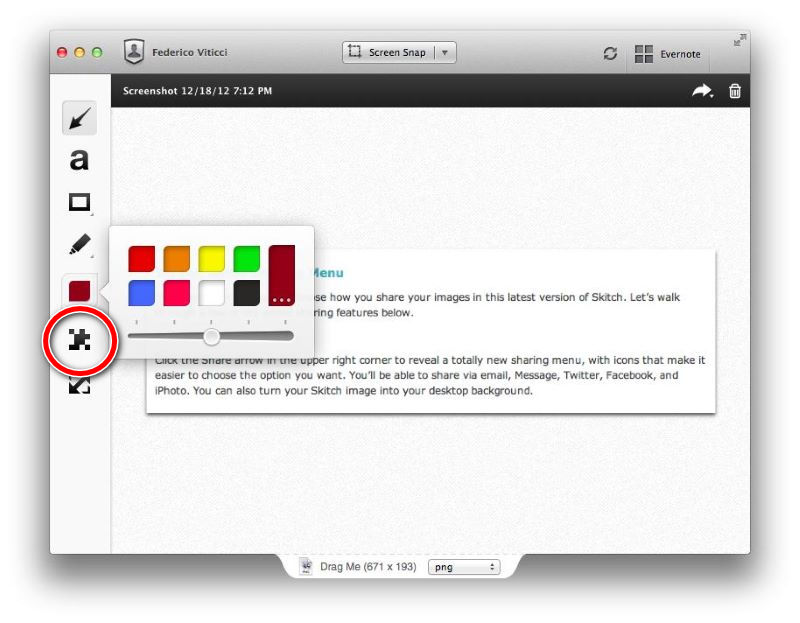
Best for Image Blur: Skitch. It's a free pixelate tool for still images and screenshots on Mac.
Top 1: MovStash
MovStash is both stylish and simple to use. This app is compatible with iOS and can be installed and downloaded free from its app store. This software provides you with simple and efficient management, focusing on what is most important. It's simple to use so that you might enjoy it, and it's compatible with iPhone devices.
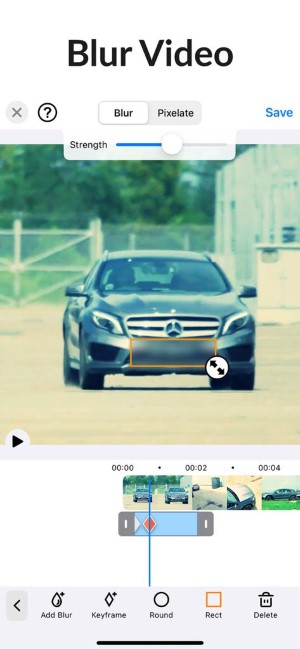
Step 1Open the app and choose a mode from Simple, Timeline, and Face Tracking.
Step 2Select the video you want to blur.
Step 3For Simple mode: Drag the blur area into place. Resize or adjust intensity if needed. For Timeline mode: Add a blur area and set start/end times. For Face Tracking mode: Let the app auto-detect faces, then adjust size and intensity.
Step 4Choose mosaic or Gaussian blur, then tap Save to export the result.
Platform: iOS
- Pros
- It has some excellent features.
- It is safe to use.
- It is getting better over time.
- Cons
- At times, some features are missing.
- It is turned on automatically.
- It occasionally crashes.
Top 2: KineMaster
Suppose you are looking for a versatile tool with a very easy-to-use application. In that case, KineMaster is one of the best options. This convenient tool is free to install and download in any google play store and app store. You can use it without difficulty, whether you have an Android or an iPhone. The app itself also comes with other helpful tools and flexible features. What makes this tool so popular? Because it is a user-friendly editing tool that can alter video effects and transition with quality and precision.
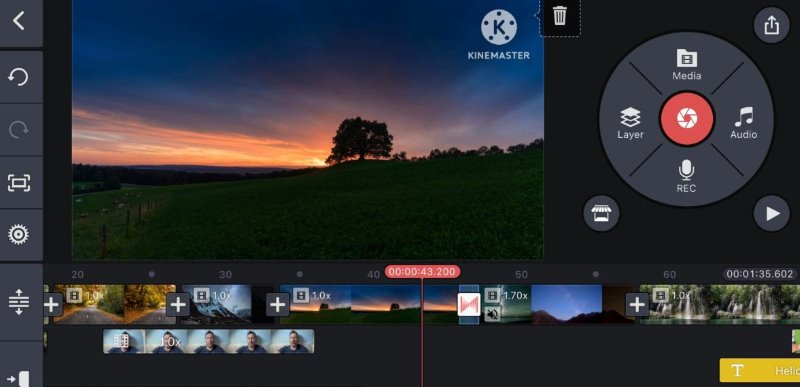
Step 1Create a new project and import your video.
Step 2Tap Layer > Effect and choose Gaussian Blur or Mosaic.
Step 3Resize and position the effect over the face or object you want to cover.
For tracking: Select the effect layer, tap Tracking (AI Tracking), and set the target, or add keyframes and move the blur manually.
Step 4Adjust intensity and duration, then export the result.
Platform: iOS and Android
- Pros
- It is a simple tool to use.
- It is versatile and user-friendly software.
- It has a lot of features.
- Cons
- It is in charge of the pitch and speed of your audio.
- It will not preview your audio edit until you have completed it.
- It cannot edit multiple videos at the same time.
Top 3: Blur Video and Photo Editor
If you're looking for an Android blur video app, this is the tool for you. Blur Video and Photo Editor lets you add blur effects to video clips. It is free to install and download this application on your smartphone. It lets you add blur exactly how you want it to.

Step 1Open the app and select a video.
Step 2Choose rectangle or lasso/pencil.
Step 3Draw or place the blur area over the unwanted parts and adjust its intensity and duration. You can enable object tracking if the subject is moving.
Step 4Choose blur, pixelate, or color, then tap Save to export the result.
Platform: Android
- Pros
- Track-and-blur moving objects
- Simple and easy-to-use UI
- Frequent updates and responses from the developer
- Cons
- Processing speed is slow sometimes.
- Ads in the free version.
Top 4: Video Toolbox Movie Maker
Video Toolbox Movie Maker is on the list if you want to use a blur video app that will undoubtedly help you in the simplest ways. This software can blur out unwanted segments of your clips and improve the quality of your on iOS devices. Yes, this app is only available for IOS users. On the other hand, this app includes all of the essential tools you'll need to edit videos.
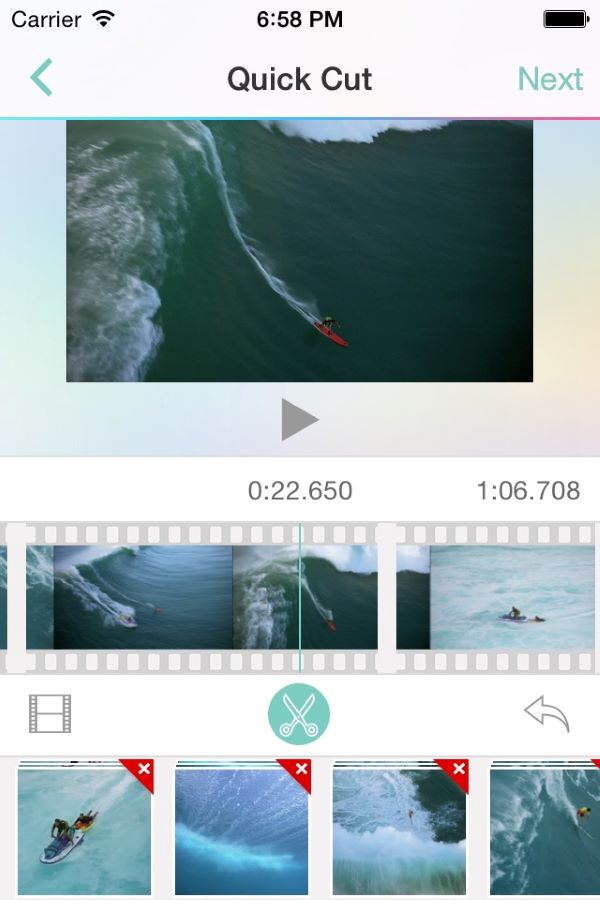
Step 1Import your video to the app.
Step 2Tap the Mask Video tool.
Step 3Draw a customizable mask over the area you want to blur.
Step 4Export the video.
Platform: iOS
- Pros
- It can convert video files to a variety of formats.
- It is both free and quick to use.
- It has professional characteristics.
- Cons
- Every once in a while, crashing.
- It will take a long time to use.
- There are no video effects.
Top 5: Skitch
This software is one of the best if you're looking for pixelate videos on Mac. It is, however, a free app that allows users to get their points across with fewer words by using annotation, shapes, and sketches, allowing ideas to become a reality. It is available for download from the Mac App Store.
Platform: macOS
- Pros
- It is convenient to use.
- It has excellent features.
- It has a fast and fantastic interface.
- Cons
- Cannot use it without the internet.
- Not everyone can use it.
Bonus: Best Blur Video Editor for Windows & Mac
AVAide Video Converter is an all-in-one video toolbox that allows you to merge, trim, compress, and perform other operations on Windows and Mac. Blurring videos is among AVAide Video Converter's excellent capabilities. You can add a rectangular soft blur area and customize its width, height, and intensity.
Unlike the methods listed above, this software does not require internet access to function. Aside from that, it has a user-friendly and up-to-date design interface for the best user experience possible.
The detailed instructions below contain the complete guide.
- It possesses professional characteristics.
- It is easy to use and has an excellent user interface.
- The use of the internet is not required for completing a task.
- It works with both Windows and Mac.

 Secure Download
Step 1Download the Best Software
To begin, click the download button to the right to download and install the tool. This tool is available for download in a matter of minutes.
Step 2Add Media Files
After you've completed the download, click the (+) Plus button to add your media file. You can begin editing your videos in a matter of seconds.

Step 3Edit your Video
To blur your video, click the Star icon, then the Effect and Filter button, then scroll on the filter button, and finally click the Pixelate filter, then click OK.

Step 4Convert your Video
Go to the Convert All tab to convert your video. This tool can help you convert your media files to high-quality formats. It also enables you to convert it in a matter of minutes.

FAQs About Blurring Videos
What is Video Blurring?
By video blurring, you cover parts of a video with effects like soft blur, pixelation, or mosaic.
Why should I blur a video?
You can blur faces in the video to protect personal info and hide sensitive content. You can also create artistic focus on the main subject by blurring the background.
Does the blur video app affect video quality?
It depends on the software you use. The apps mentioned above preserve the quality.
To conclude, this article demonstrated various methods for blurring your video. Along with your editing challenges, we show you how to use them. AVAide Video Converter has been proven and tested to be the best tool among all solutions mentioned. This excellent software is designed to make any task as easy as possible. So take advantage of this opportunity, and your load will undoubtedly lighten.
ABOUT THE AUTHOR

Your complete video toolbox that supports 350+ formats for conversion in lossless quality.
Video Enhancement
- Upscale 1080p to 4K
- Upscale 480p to 1080p
- Downscale 4K to 1080p/720p
- Downscale 1080p to 480p
- Upscale DVD to 1080p/720p
- Fix Bad Quality Video
- AI Video Upscale
- Enhance Video Quality
- Improve TikTok Video Quality
- Best Video Enhancer
- Video Enhancer App for iPhone & Android
- Best 4K Video Enhancer
- AI Upscale Video
- Clean up Video Quality
- Make Video Higher Quality
- Make a Video Brighter
- Best Blur Video App
- Fix Blurry Videos
- Improve Zoom Video Quality
- Improve GoPro Video Quality
- Improve Instagram Video Quality
- Improve Facebook Video Quality
- Improve Video Quality on Anroid & iPhone
- Improve Video Quality in Windows Movie Maker
- Improve Video Quality in Premiere
- Restore Old Video Quality
- Sharpen Video Quality
- Make Video More Clearer
- What is 8K Resolution
- 4K Resolution: Everything Your Need To Know [Explained]
- 2 Amazing Ways to Increase Video Resolution Losslessly
- Video Resolution Converter: Things to Ponder in Getting One
- The Outstanding 5K to 8K Converter You Shouldn’t Miss!
- Remove Background Noise From Video: With Three Efficient Ways
- How to Remove Grain from Video Using the 3 Remarkable Ways