You don't have to throw low-resolution photos into the trash. They could be enhanced to higher quality with the right JPG/PNG quality increaser. In this article, I will introduce 5 ways to enhance JPG/PNG images using online, desktop, and mobile tools. Choose the best solution for you after reading.
- Method 1. Upscale JPG/PNG with Online AI Upscaler (Simple and Efficient)
- Method 2. Enlarge JPG/PNG with Desktop AI Upscaler (More Advanced Controls)
- Method 3. Enhance JPG/PNG Using Photoshop (the Manual Way)
- Method 4. Fix Blurry JPG/PNG Using Stellar Repair (for Damaged Files)
- Method 5. Improve JPG/PNG Quality on Android or iPhone
- Pro Tip: Differences Between JPG and PNG Enhancement
- FAQs on Enhancing JPG/PNG Photo Resolution
Method 1. Upscale JPG/PNG with Online AI Upscaler (Simple and Efficient)
AVAide Image Upscaler Review
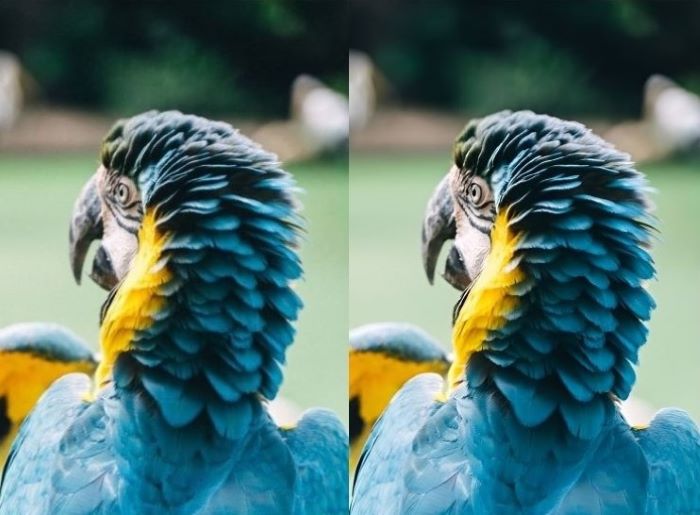
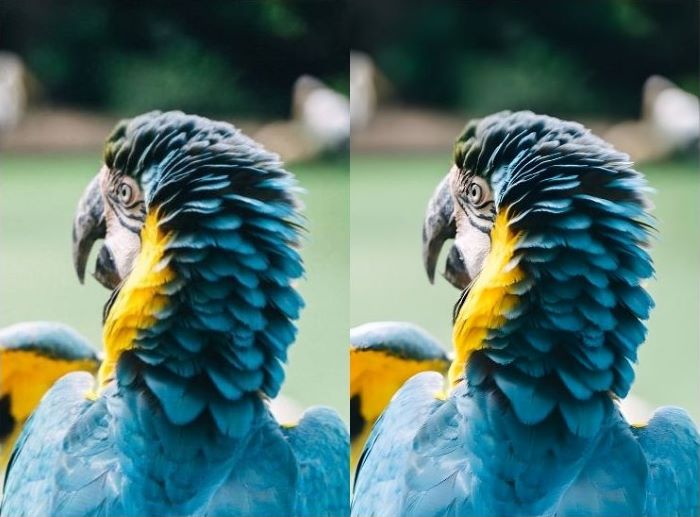
AVAide Image Upscaler is one of the best online JPG/PNG upscalers. Although named an Upscaler, it also works as a JPG/PNG enhancer: it smart-enhances an image's quality while upscaling it. It can understand the photo very well and add details to it wisely. In my test, the process took only seconds with a stable Wi-Fi.
Pros
Completes lost details using AI algorithms.
Can enlarge photos to a tremendous size, up to 8x of the original.
Good at recovering realistic textures.
Cleans up some problems intelligently.
Processes fast, only for a few seconds.
Available on any device and any browser.
Cons
Can be slow if the Internet connection is poor.
Advanced features like batch scaling require an upgrade.
How to Use AVAide Image Upscaler
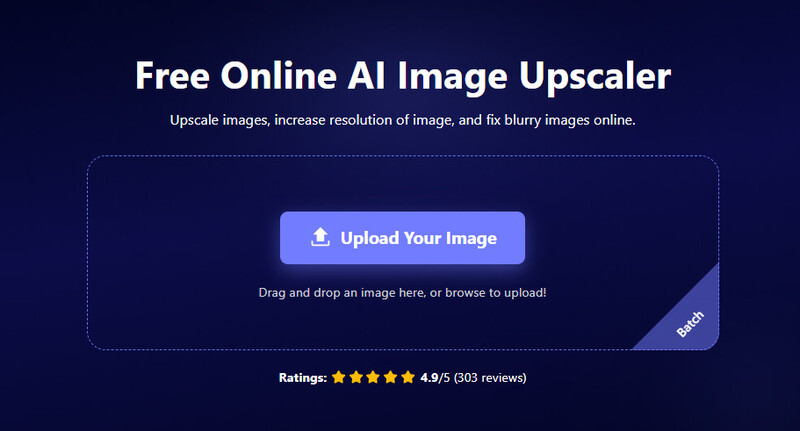
Step 1Go to its official site. Click the Upscale Your Image button in the center of the interface, and choose a photo from your folders. Alternatively, you can drop your PNG/JPG file on it as well.
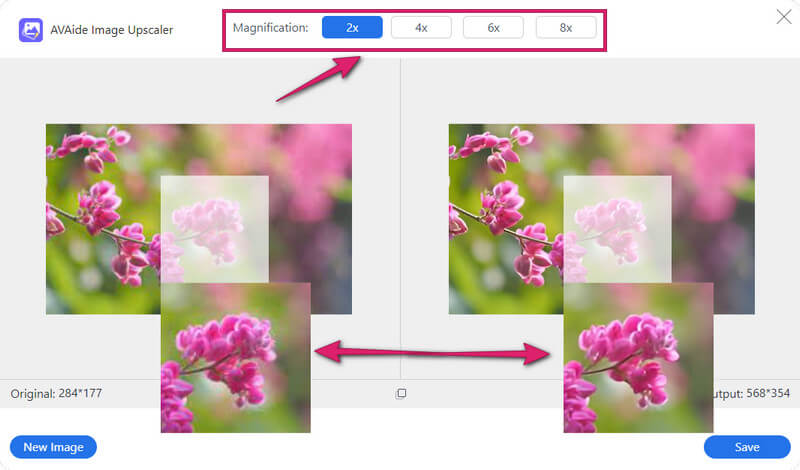
Step 2As you can see, your photo has already been enhanced upon uploading. Now, you can choose to magnify the photo more by changing the enlargement selection at the top, if needed. Otherwise, zoom in and check the difference between your original photo and the new one.
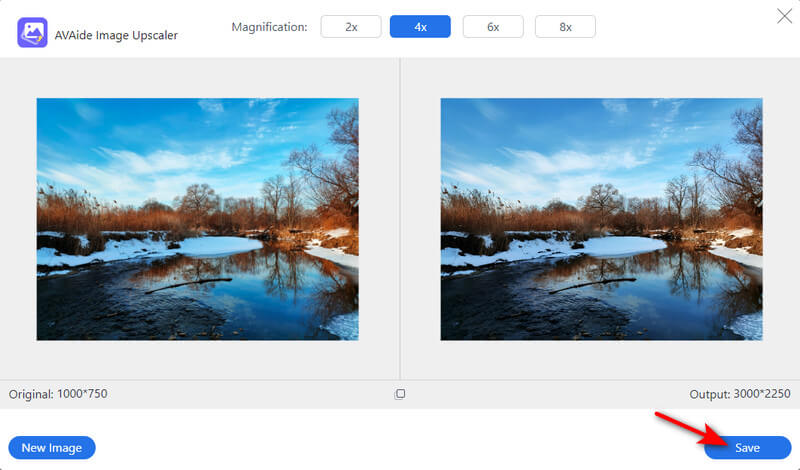
Step 3After that, click the Save button to download your enhanced JPG/PNG.
Method 2. Enlarge JPG/PNG with Desktop AI Upscaler (More Advanced Controls)
Upscayl Review
For upscaling JPG/PNG on a computer, I would recommend using Upscayl. This JPG/PNG upscaler offers a variety of AI modes for different scenarios, such as detail-focused, naturalness-focused, and digital-art specialty.
The proficiency depends on the hardware. I tried it on my Windows 10 with Intel(R) Core(TM) i5-10400 CPU and Intel(R) UHD Graphics 630, and it took approximately 2 minutes to upscale a 65KB JPG to 4x.
Pros
Multiple AI models available for different styles.
Runs locally on your computer offline.
Available for Windows, Mac, and Linux.
Clear user guide and simple workflow.
Free and open-source.
You can add extra models yourself if you want to experiment.
Cons
Results can look unnatural on human faces.
Sometimes oversharpens.
Processes rather slowly if hardware isn't high-end.
How to Use Upscayl
Step 1Install and run Upscayl.
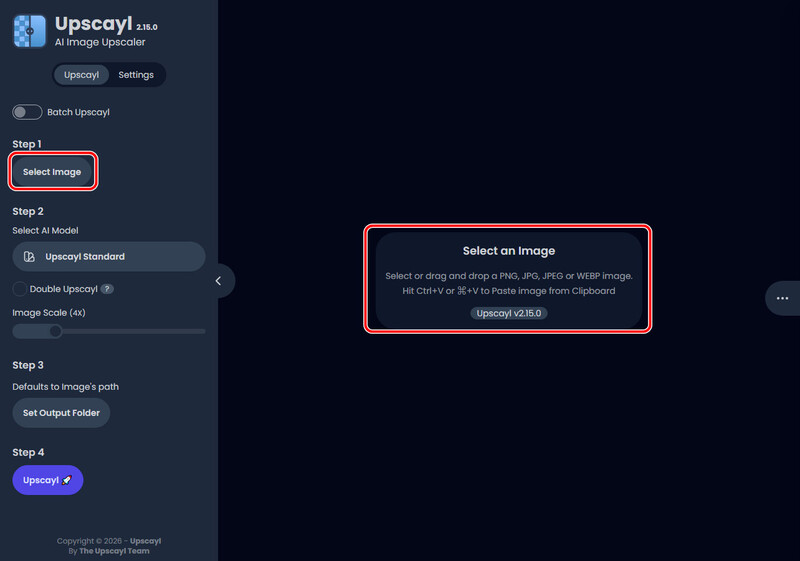
Step 2Add an image by clicking Select Image, or by dropping the file to the workboard.
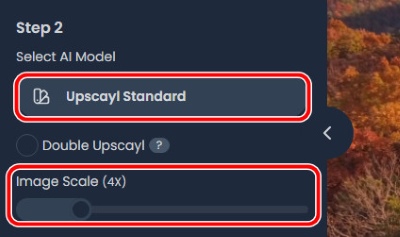
Step 3Select a preferred AI model and a target scale.
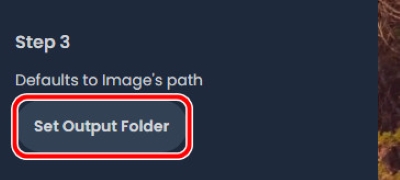
Step 4Click Set Output Folder to set a saving location. This location will remain the default for future upscaling until you change it.
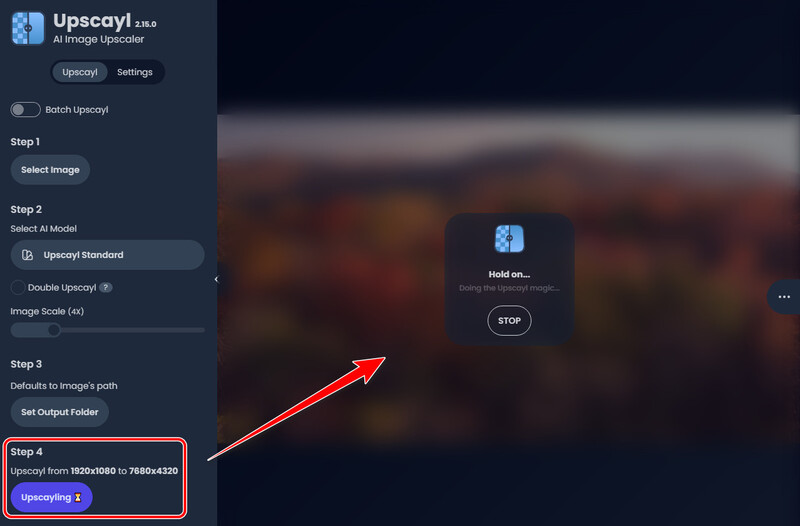
Step 5Check the output resolution to make sure it is what you want. Then click the Upscayl button with a rocket on it, and wait.
Method 3. Enhance JPG/PNG Using Photoshop (the Manual Way)
Photoshop Enhancing JPG/PNG Review
Photoshop has been a king of image editing. To upscale and enhance JPG/PNG, you need to adjust the width, height, and resolution manually. It's a bit more work than the automatic AI tools, but still fairly simple.
This math-enhancing method works differently with AI upscaling. Basically, it regards the existing pixels and guesses what the new ones should look like. It makes the picture bigger, but it can’t create real new detail – it just stretches and softens what was already there.
Note: Photoshop added a new AI image upscaler called Generative Upscale in 2025, and integrated it with Topaz AI in early 2026. I tested it, but the result wasn't impressive compared to AVAide Image Upscaler and Upscayl, so I'm going to introduce the manual way only. If you're interested in this new feature, you can try it yourself at Image > Generative Upscale. Note that it requires Premium.
How to Use Photoshop to Upscale JPG/PNG
Step 1Launch Photoshop and click File to open your JPG or PNG photo. Once the photo is in, click Image and select Image Size from the drop-down.
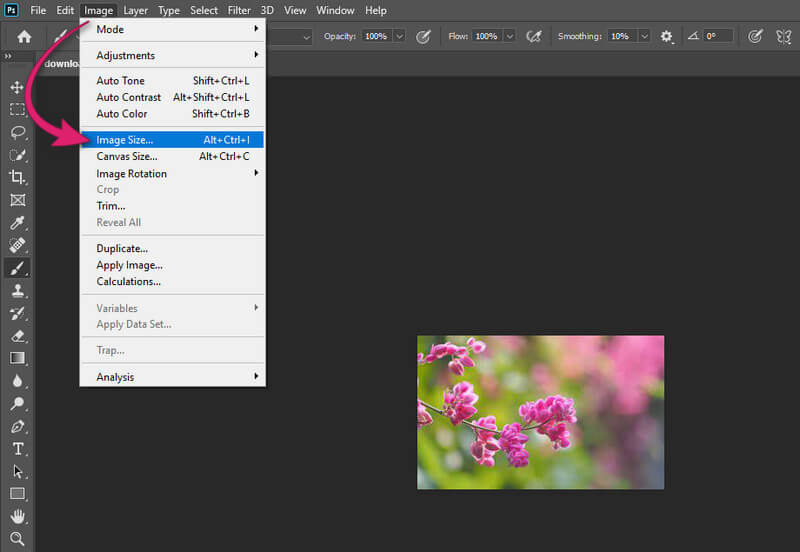
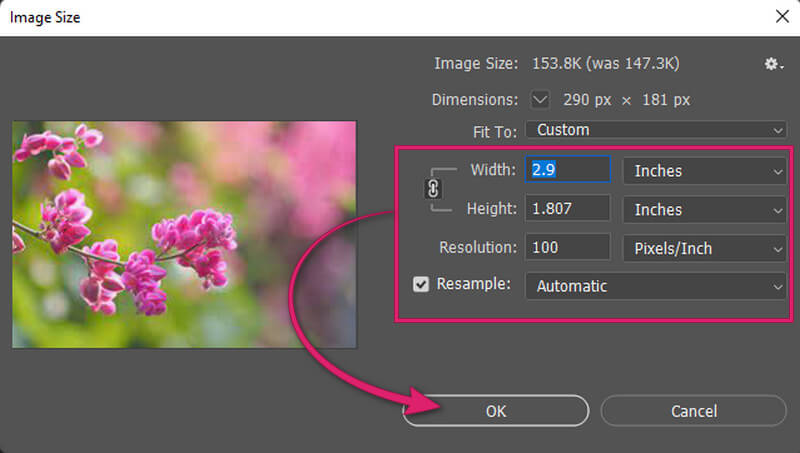
Step 2After that, a small window appears. There, adjust the Width, Height, and Resolution of the photo. Make sure that the Resample selection is ticked. Then, hit the OK button to apply the changes.
Step 3After that, you can save the enhanced photo by pressing Ctrl + S.
Method 4. Fix Blurry JPG/PNG Using Stellar Repair (for Damaged Files)
Stellar Repair Review
This method is for corrupt images specifically. A photo can become blurry or pixelated if damaged, which happens after an interrupted saving or transfer, a sudden power loss, or an improper removal of a USB drive.
Stellar Photo Repair is specialized for these situations. It tries to fix blurry, pixelated, distorted, greyed-out, or grainy photos that stem from file corruption rather than optical blur.
Pros
Repairs JPG/JPEG and many other formats: TIFF, HEIC, and RAW from major cameras.
Batch-repair multiple files at once.
Preview repaired photos before downloading.
Available both on desktop and online.
Cons
Free version is limited.
The online version only accepts files smaller than 20 MB.
Doesn't support PNG.
How to Use Stellar Repair
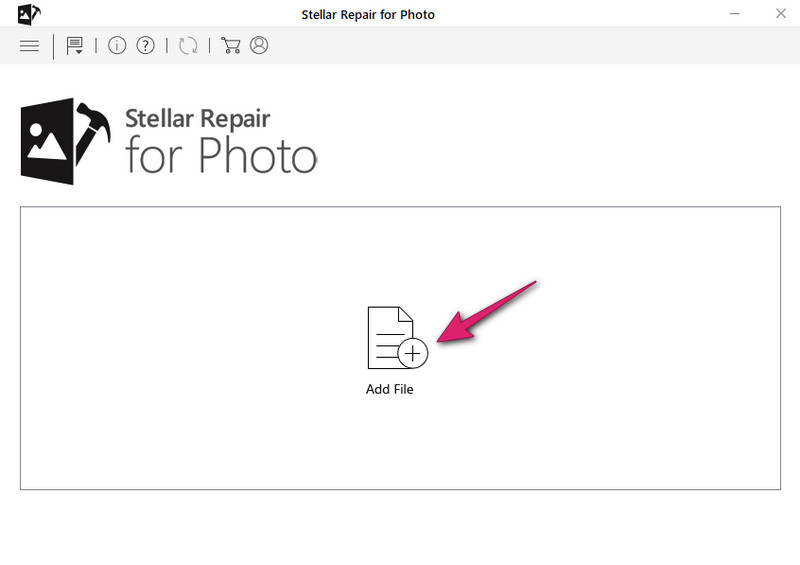
Step 1Open Stellar Repair and hit Add File. Select a photo from your local folders.
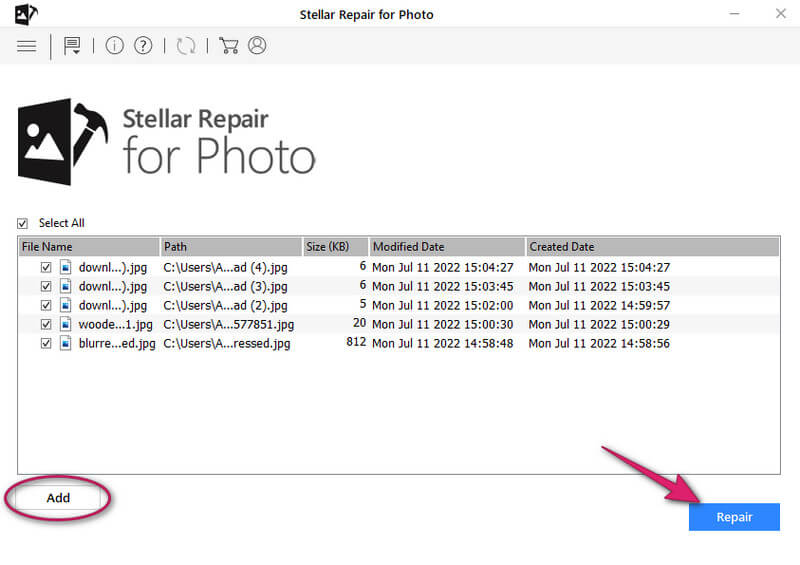
Step 2On the next page, you will see all the photos added. Here, you can add more photos by clicking the Add button. Otherwise, hit the Repair tab to start the process.
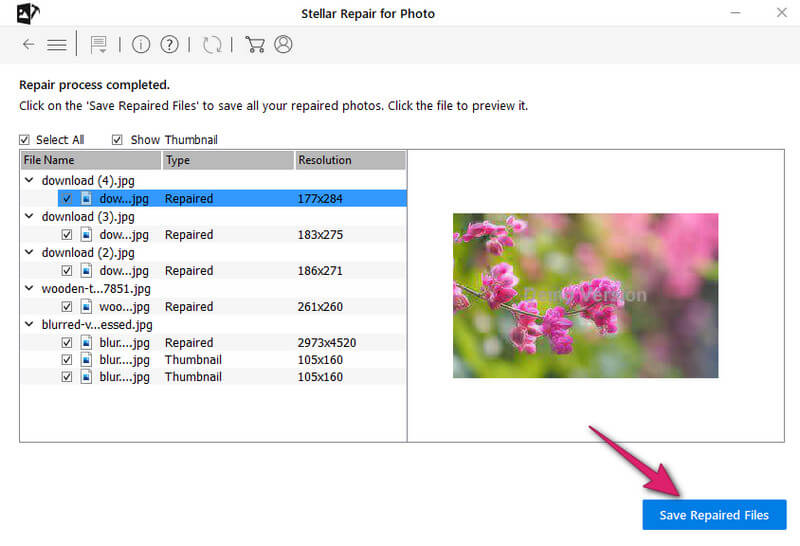
Step 3Once the repair process is done, you may check the photos one by one. Then, click the Save Repaired Files button to export the files.
Disclaimer: The result is not guaranteed. No data recovery tool can recover every file in every situation. Check the preview carefully before downloading.
Method 5. Improve JPG/PNG Quality on iPhone or Android
Browser-based tools such as AVAide Image Upscaler and Stellar Repair are also available on mobile browsers. Aside from them, you can also improve photo quality using the built-in JPG/JPEG/PNG enhancer on your phone.
How to Enhance Photos on iPhone
Step 1Open the Photos app. Tap on the photo you want to enhance and tap Edit.
Step 2Tap the magic wand button to have a quick auto-improvement.
Step 3Adjust other settings like Sharpness and Definition manually, if needed.
Step 4Tap Done to save the result.
How to Enhance Photos on Android
Step 1Open Gallery or Google Photos.
Step 2Select the photo and tap Edit.
Step 3Try Auto/Enhance or AI Enhance first, before you adjust Brightness, Contrast, Sharpness, etc.
Step 4Tap Save.
Pro Tip: Differences Between JPG and PNG Enhancement
JPG (a.k.a JPEG) often reduces quality to decrease file size. They are preferred by photographers and image libraries for their efficient usage of space. While PNG stores exact pixel values. They usually look sharper and support transparent backgrounds, making them popular for graphic design.
The AI tools introduced can detect the file format and adjust their upscaling technique accordingly. But if you're enhancing manually, here are some tips for the two formats:
For JPGs, denoise before sharpening or upscaling. This helps reduce the compression artifacts. When you sharpen or upscale a JPG, keep it mild; otherwise it might look even blockier. For PNG images, you can go stronger on sharpening and upscaling. Their pixels can handle it.
FAQs on Enhancing JPG/PNG Photo Resolution
Will my photo increase in quality after being enlarged?
No, on the contrary, the quality often gets worse after a mere enlargement, because enlarging a picture only adds pixels without recovering any details. So if you want to increase the size of a photo, use the mentioned upscalers. They can keep the details clear.
Can I enhance JPG/PNG using Paint?
No. Paint can help you resize, crop, rotate, and flip your images, but not enhance them. If you want to enhance an image manually, use Photoshop instead.
Is AI upscaling better than traditional editors (like Photoshop)?
Personally, I would say AI upscalers win overall, but it really depends on what you mean by "better". AI tools like AVAide Image Upscaler and Upscayl make it easier to upscale images to very high resolutions. But traditional editing methods are more predictable because they rarely invent details.
We explained 5 ways to enhance and upscale JPG/PNG to improve their quality. AVAide Image Upscaler is an AI-powered JPG/PNG quality enhancer that can increase quality in a click. Photoshop allows you to adjust resolution at will. Stellar Repair fixes corrupt images. The default editors on iPhone and Android help you enhance photos with ease. Next time you have a blurry photo to deal with, you'll know what to do.
ABOUT THE AUTHOR


Our AI technology will automatically enhance the quality of your images, remove noise and fix blurry images online.
PROCESS NOW