Shaky video is a type of footage that is unstable or wobbly due to camera movement. A number of factors, such as handheld filming, unstable camera mounts, or strong winds, can cause it. Shaky video footage can be distracting and difficult to watch and can detract from the overall quality of the content. There are a variety of implements and techniques that can be used to stabilize wobbly videos, such as software-based stabilization or video editing like Adobe Premiere Pro, third-party apps for mobile devices, and more. If you want to learn the tips and tricks on how to use this app that stabilizes video and the perfect alternative tools to use to stabilize video, read thoroughly below.
Part 1. Best Method to Stabilize Videos
One video utility will stand out when it comes to editing videos to their best output. AVAide Video Converter is a refined and reliable application suitable for professionals and those with basic video editing skills. It comes with the best feature for stabilizing shaky videos as it has a dedicated feature. Its video stabilizer automatically reduces jitters in the videos and stabilizes unstable footage to a better-looking output. You don't need to input or click more functions to adjust the video; you only need to import your file and let the tool do the process. Check the guidelines below and see how this tool operates.
Step 1Install AVAide Video Converter
Download and install the app on your PC or laptop by clicking the download button below.

FREE DOWNLOAD For Windows 7 or later
 Secure Download
FREE DOWNLOAD For Mac OS X 10.13 or later
Secure DownloadStep 2Import Video
The next step is to access the main interface of the app. Since the video stabilization feature is an advanced function, access it on the Toolbox option. Browse from the list of features and select the Video Enhancer option. You can click on this, and a new page will appear. Hit the + icon to import or add your video file.

Step 3Stabilize the Video
Let the tool analyze the imported video for the final procedure until four features appear on your screen. Hit or tick the Reduce Video Shaking option. You can select or tick the Preview button to check the appearance of the output video before you can finalize the process. If it suits your liking, click the Enhance option to edit the shaky video.


Part 2. How to Stabilize Video on Adobe Premiere
Adobe Premiere Pro is a robust and full-featured video editing utility that comes with a range of components to help you enhance the quality of your footage. One of the most valuable features of the software is its ability to stabilize shaky videos. The software uses state-of-the-art algorithms such as Warp Stabilizer to analyze your footage and automatically smooth out any shakes or jitters. This can be particularly useful if you are shooting handheld footage or using a camera without a stabilization system. You can also modify the settings to fine-tune the stabilization and get the best possible results.
Step 1First, download the app on your PC. Launch the application and import the video clip you want to stabilize into your Premiere Pro project by accessing the Media Browser. Then, drag the clip onto the timeline.
Step 2Next, right-click on the clip and select Replace with After Effects Composition. It will open up the clip in Adobe After Effects. In After Effects, select the video in the timeline and go to the Effect menu. From there, choose Warp Stabilizer.
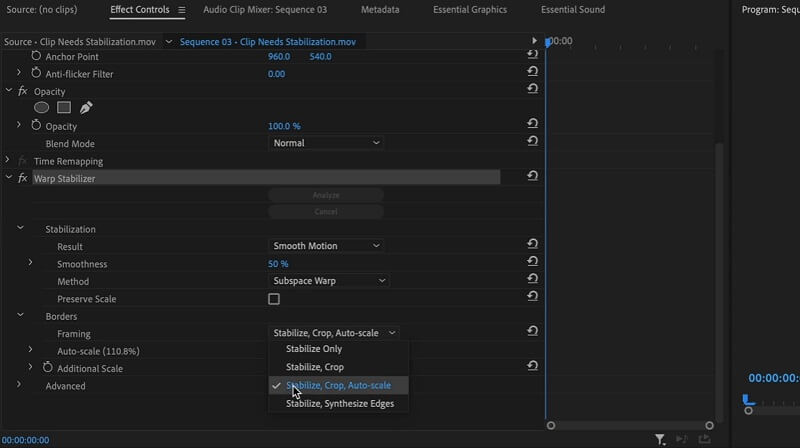
Step 3Once the Warp Stabilizer effect is applied, it analyzes the clip and stabilizes the footage. This process may take some time, depending on the length and complexity of the clip.
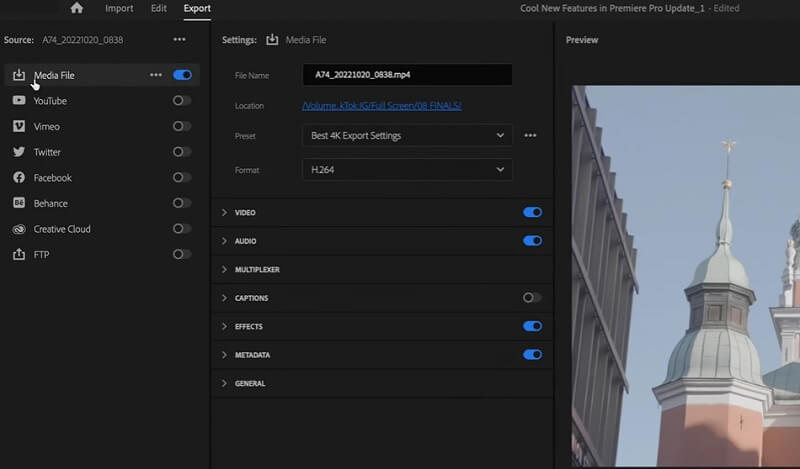
Step 4Once the stabilization method is complete, you can modify the effect's settings to fine-tune the stabilization. This process includes changing the smoothness, crop, and method of stabilization. After you've made your adjustments, save and hit the Export button to finalize the edit.
Part 3. How to Edit Shaky Videos on Mobile Devices
1. CapCut
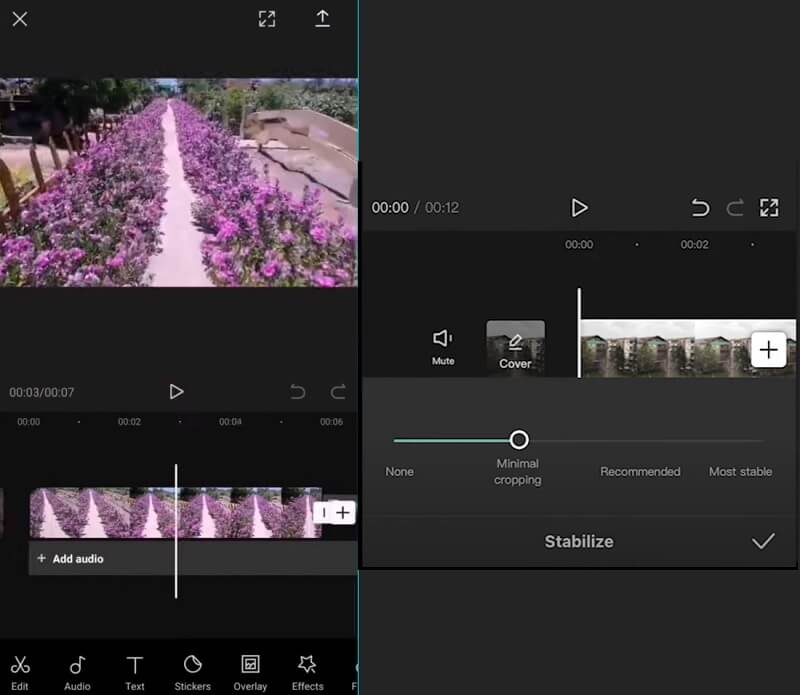
CapCut is an intuitive video editing app that can help you quickly stabilize shaky videos. By using its advanced stabilization feature, you can quickly improve the quality of your footage and make it look more professional. Upload the shaky video to CapCut and apply the stabilization effect. The app will automatically analyze the footage of your iPhone videos and adjust the movement, resulting in a smoother and more stable video. CapCut also offers a wide range of other editing features, such as adding text, music, and special effects, making it a great all-in-one editing solution for beginners and professionals.
Step 1Download the CapCut on your iPhone device by going to your App Store. Please search for the app and hit the Get option to install it on your mobile device. Then, launch the app and import your video by hitting the New Project.
Step 2Select the video you want to edit and hit the Add option. You will be prompted on the timeline editing panel. Click the Edit option and locate the Stabilize feature.
Step 3Please wait for the app to stabilize the video automatically. Tap on the Arrow icon or button to save the effects, and click the Export button to save the file on your Photos app.
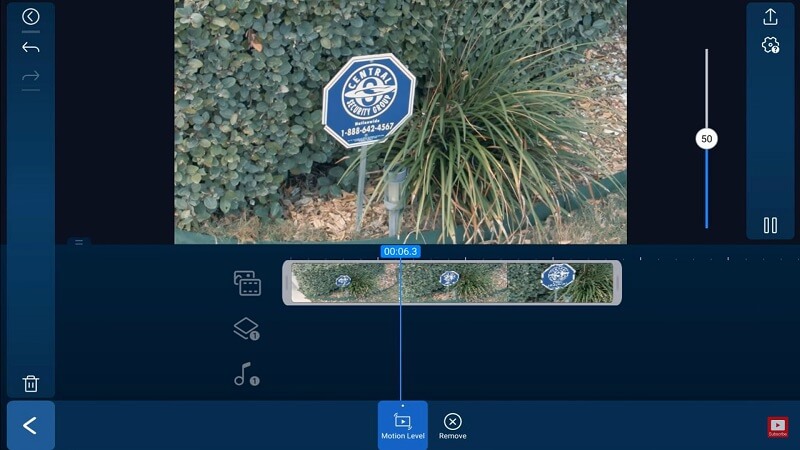
2. PowerDirector
PowerDirector is a widespread video editing app available on Android devices. It offers a powerful video stabilization feature that can help improve the overall quality of shaky footage. The app uses cutting-edge algorithms to analyze the video and smooth out any camera movement, resulting in a stable and professional-looking final product. The process is easy to use and can be done with just a few clicks. In general, PowerDirector's video stabilization feature is an outstanding tool for enhancing the quality of your clips on Android devices.
Step 1The first step is to download the PowerDirector app on your Android device. You can go to the Google Play Store and search for the app. Hit the Install option and launch the tool once installed.
Step 2Then, import your video by tapping the Media icon and going to the Video tab to search for the video you need to stabilize. The video will then be imported to the timeline panel.
Step 3Lastly, below the timeline panel, you will see the editing features. Hit on the Stabilizer option and glide the slider to indicate the motion level to stabilize your video. Click the Arrow icon to save and export the video to your gallery.
Part 4. FAQs About Stabilizing Videos
Why do my videos look shaky?
Videos can look shaky due to a number of reasons, such as camera movement, unstable shooting position, and poor stabilization techniques.
How can I stabilize shaky footage?
Shaky footage can be stabilized using video editing software tools such as Warp Stabilizer in Adobe Premiere Pro, Mercalli in VEGAS Pro, or the stabilization feature in Final Cut Pro.
Are there any tips for shooting stable videos?
Yes, some tips for shooting stable videos include using a tripod or stabilizer, maintaining steady body posture, shooting in good lighting conditions, using a camera with image stabilization, and avoiding sudden movements or jerky pan or zoom shots.
That's it. We have already analyzed the best solution to stabilize a shaky video. For PC or laptop, it is recommended to use AVAide Video Converter and Adobe Premiere Pro as your leading apps to edit and enhance the output file of your project video. In addition, you can edit shaky videos on your mobile apps. You can use CapCut, which is suitable for iPhone users. On the other hand, PowerDirector is a leading video editing tool recommended for Android devices.
ABOUT THE AUTHOR

Your complete video toolbox that supports 350+ formats for conversion in lossless quality.