MP4 to VOB conversion is kinda handy when you want to get videos ready for DVD-style playback. This little guide walks through what you really need, a few dependable ways to convert, and some real-world fixes for usual problems like device compatibility and general quality, stuff that can feel annoying.
Part 1. Do You Really Need to Convert to VOB?
Before you convert anything to VOB, it is also smart to stop for a sec and ask if that conversion is even needed. VOB is mostly tied to DVD video, so doing it when you do not have to can end up making files bigger or, you know, reducing the overall quality, too. Try these three questions first, and do not skip them:
1. Are you burning a physical DVD, or just playing on a computer or TV?
VOB is mostly made for DVD-Video discs. If you are doing normal playback on a computer, a smart TV, or another newer device, then MP4 (and similar formats) are often more practical and much more broadly supported.
2. Does your DVD player actually support MP4?
Some newer DVD players can play MP4 files directly from USB drives or certain discs. If that is your case, you might not need to convert to VOB at all. Checking the model specs up front can save time and avoid an extra step you might not need.
3. Are you willing to accept significant quality loss?
Converting to VOB may require re-encoding, which can degrade quality. How much it drops depends on the original file and on the conversion settings. If keeping the original look matters, then think twice about whether DVD compatibility is worth that compromise.
Part 2. Three Things You Must Know Before Converting
1. Video Codec Must Be MPEG-2
Most DVD players expect MPEG-2 video, as it is the default language.
Why it matters:
- It boosts compatibility with ordinary DVD models.
- Other codecs may not decode correctly, or may play with weird stutters.
Note: Just renaming the file from something else to VOB will not magically make it DVD-compatible.
2. Resolution Must Drop to Standard Definition
If your source is HD or 4K, you need to reduce it to DVD standard resolution.
- For NTSC: 720 × 480
- For PAL: 720 × 576
Keep in mind: Some image nuance can vanish during the downscaling, even if it still looks okay.
3. Audio Format: Use AC-3 for Best Compatibility
AC-3, also known as Dolby Digital, is a widely supported audio format for DVD playback.
Why use it?
- It works with most DVD players.
- It also supports decent stereo and even surround setups.
Best practice: Match MPEG-2 video with AC-3 audio, as this combo usually yields calmer, more reliable DVD playback.
Part 3. Which Method Should You Choose?
- Method
- AVAide Video Converter
- VLC Media Player
- DVDStyler
- Clideo
- FFmpeg
| VOB Conversion | Output Settings | Batch Conversion | Video Editing | Format Support | Ease of Use | Best For |
| ✓ | ✓ | ✓ | ✓ | ✓ | ✓ | Fast, flexible conversion |
| ✓ | ✓ | ✗ | ✗ | ✓ | ✓ | Simple free conversion |
| ✓ | ✓ | ✓ | ✗ | ✓ | ✓ | DVD authoring |
| ✗ | ✗ | ✗ | ✓ | ✓ | ✓ | Online video editing |
| ✓ | ✓ | ✓ | ✗ | ✓ | ✗ | Advanced processing |
1. AVAide Video Converter
AVAide Video Converter is the most convenient choice for people who want an easy way to convert videos while still maintaining a decent level of control over the output. It supports more than 1,000 formats, batch conversion, high-resolution results, GPU acceleration, and even some built-in editing features.

FREE DOWNLOAD For Windows 7 or later
 Secure Download

FREE DOWNLOAD For Mac OS X 10.13 or later
Secure DownloadStep 1Download and Install
Grab the software from the official AVAide website, then install it on your computer. Open the program after the installation finishes.
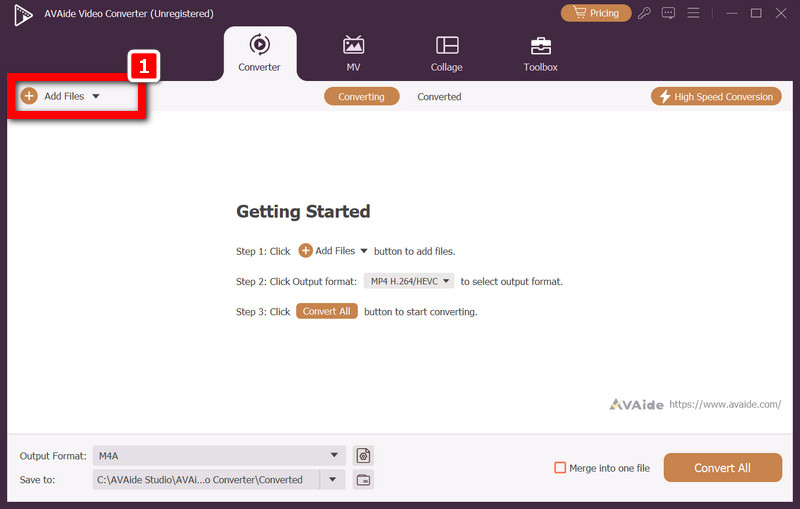
Step 2Add the Video
Tap Add Files, then bring in the video you want to convert.
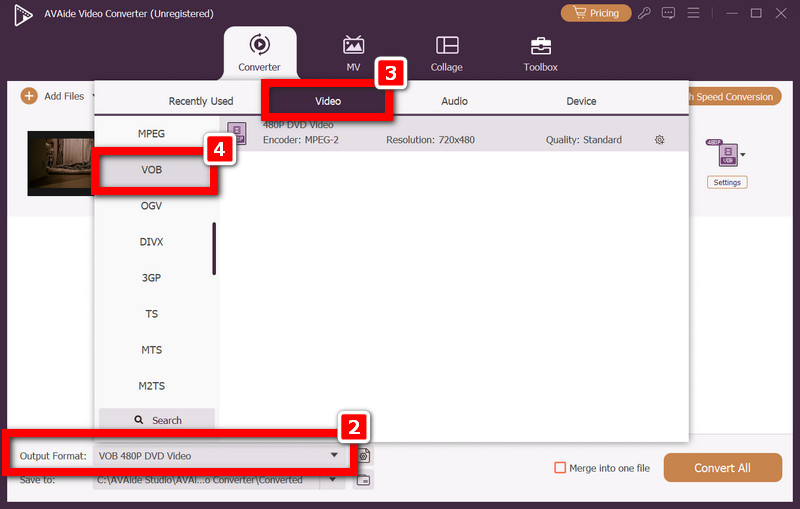
Step 3Select the Output Format
Open the Output Format list, and pick VOB under the Video tab. Tweak the video and audio options too, to better match what your DVD workflow needs.
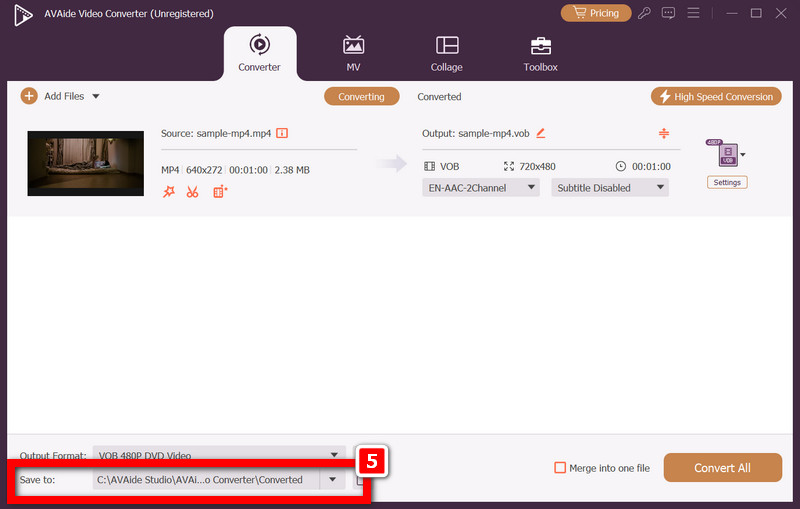
Step 4Choose the Output Folder
Pick the folder where the converted file will land.
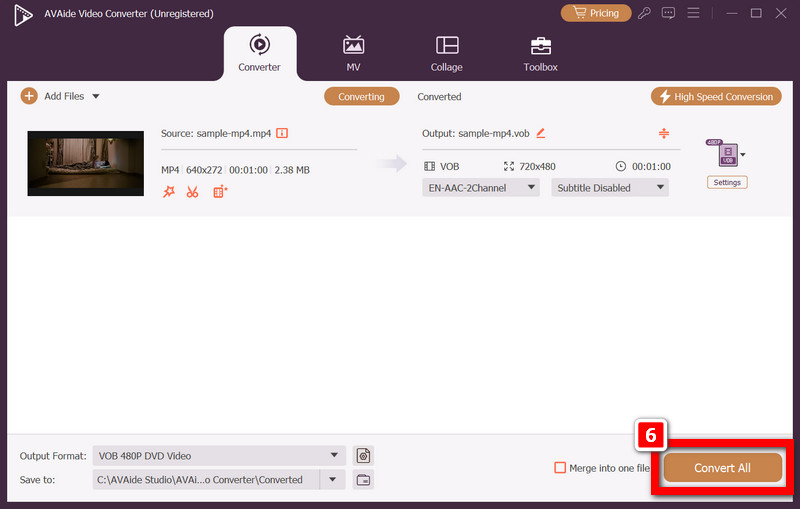
Step 5Start the Conversion
Hit Convert All to kick off the process. Since it performs batch conversion, it can process multiple files simultaneously.
Why choose it?
AVAide Video Converter is the strongest all-around option because it covers conversion, basic edits, wide-format support, and batch processing in one place, and you do not have to deal with any command-line stuff.
2. VLC Media Player
VLC Media Player is a free, well-known media player that also supports converting stuff. It can be handy for those once-in-a-while conversions, though the conversion screen feels less focused than what you would get from a dedicated video converter.
Step 1Open VLC and go to Media > Convert/Save.
Step 2Hit Add, select the source video, then choose Convert/Save.
Step 3Select a suitable profile, then tweak the video and audio codecs, as well as any other options you can see.
Step 4Type in a destination file name, and decide where the converted video should land.
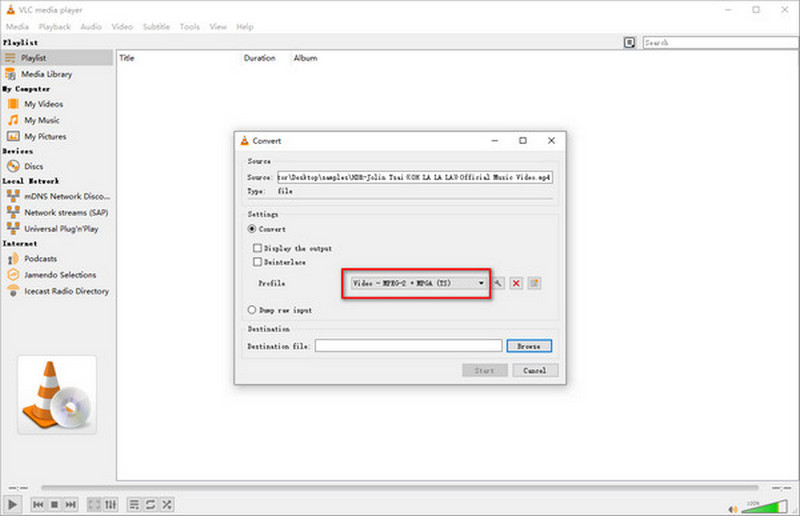
Step 5 Click Start, and let VLC process the file.
3. DVDStyler
DVDStyler is better suited to creating a real DVD project than to converting a single video file. Its big perk is that it lets you build custom DVD menus, chapters, and navigation parts, basically all the where do I click next things.
Step 1First, install DVDStyler, then open the program and start a fresh DVD project.
Step 2Pick the right video standard and aspect ratio, and match the disc capacity to fit.
Step 3Import your videos, and then line them up in the order you want.
Step 4Use a template if you like, or build a custom menu with buttons and navigation bits; there are options for that.
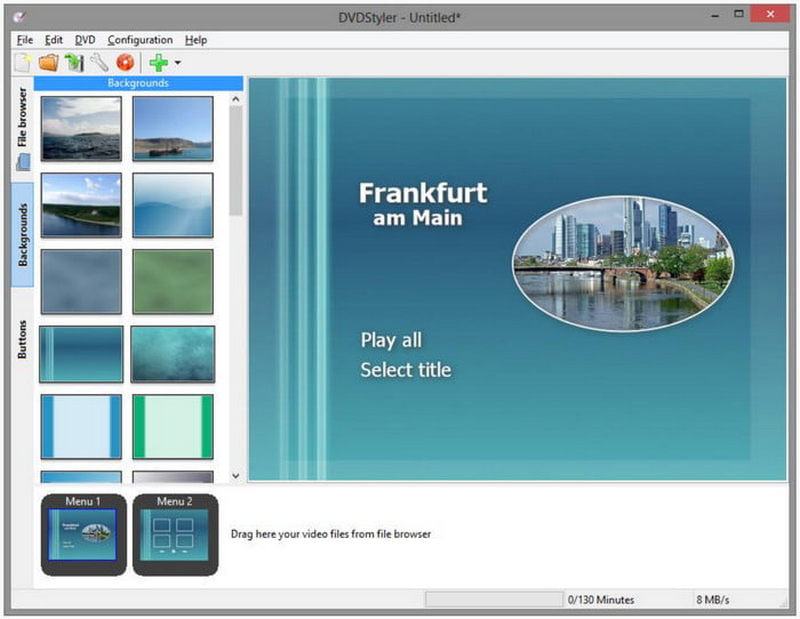
Step 5Hit the option to generate or burn the DVD. DVDStyler then prepares the media files using the DVD settings you chose.
4. Clideo
Clideo offers browser-based video tools without requiring any desktop software to be installed. It is handy for everyday online video processing; however, it is not the best pick if you truly need a specific VOB output.
Step 1Go to the Clideo video page, open it in your web browser.
Step 2Hit the Upload button and choose the source video from your computer, like, wherever you saved it.
Step 3Use the available editing or conversion options and set everything the way you need it.
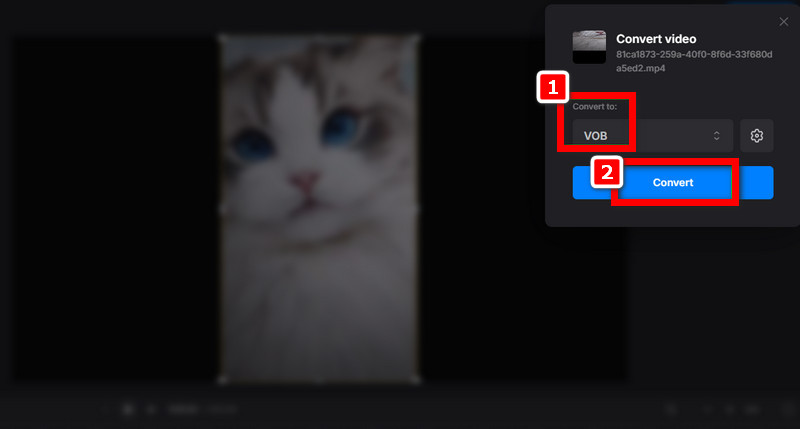
Step 4Tap the appropriate processing button, then wait while the online service works on your file; it takes a bit.
Step 5Once it finishes, download the finished video.
5. FFmpeg
FFmpeg is a really capable command-line multimedia framework; it gives you very precise control over video and audio transformations. It is a solid pick if you want exact settings and automation, or if you keep encoding the same content repeatedly.
Step 1Download the correct FFmpeg package and install it, or unpack it on your computer.
Step 2On Windows, open Command Prompt; on macOS/Linux, use Terminal. Then navigate to the folder containing the source video.
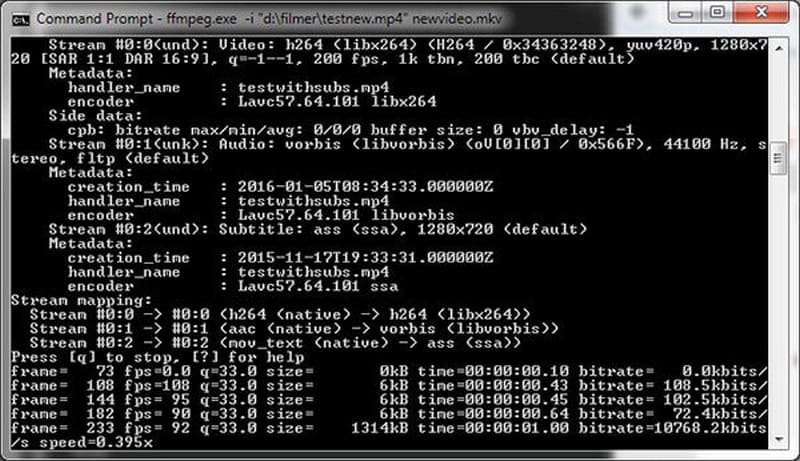
Step 3Type the FFmpeg command now, but make sure to include the required video and audio codecs, the resolution, and the output file name.
ffmpeg -i input.mp4 -c:v mpeg2video -target ntsc-dvd -c:a ac3 output.vob
Step 4After that, press Enter, and the conversion should start.
Part 4. Troubleshooting: Why Is It Not Working?
Problem 1: DVD Player Says Cannot Play This Disc
This usually shows up when the disc was not made according to the DVD-Video standard, even if the video file you see is in VOB format. It may look right on the computer, but the player may still refuse it, especially after a VOB-to-FLV conversion.
Try these fixes:
- Check if the video uses MPEG-2.
- Make sure the resolution aligns with the chosen NTSC or PAL standard.
- Use AC-3, or another audio format that the DVD system can digest.
Problem 2: The Video Looks Terrible
DVD is limited to standard-definition resolution, so yes, converting an HD or 4K video will naturally lose some sharpness. But incorrect encoding choices can make it look even worse than it should.
Try these fixes:
- Begin with the best quality source you can.
- Do not keep converting the same video repeatedly.
- Use a proper MPEG-2 bitrate.
Problem 3: No Sound in the Converted VOB
Sometimes, no audio plays because the codec is incompatible, the audio settings are incorrect, or there is an encoding issue in the background. Like, it is pretty common actually.
Try these fixes:
- Verify that an audio track is actually included in the output.
- If possible, use AC-3 (Dolby Digital) for wider DVD support.
- Double-check the audio channel layout and the sample rate options.
Problem 4: VOB File Is Way Too Big
A VOB can become extremely large because DVD video typically relies on a less efficient compression scheme than modern formats like H.264 or H.265. So yeah, the size can sneak up on you.
Try these fixes:
- Lower the MPEG-2 video bit rate.
- Remove any audio tracks you do not really need.
- Do not keep duplicate content in the DVD project when preparing files for conversion from MOV to GIF.
Problem 5: VLC says Cannot Find Suitable Encoder
This message typically appears when VLC cannot find an encoder that matches the conversion profile or the output settings you selected. It is basically like VLC is refusing the recipe.
Try these fixes:
- Check the selected video codec and audio codec.
- Pick a more basic conversion profile, something less fancy.
- Update VLC to the newest version available.
- If VLC keeps rejecting it, try a different converter.
An MP4-to-VOB format converter makes DVD prep easier by ensuring playback compatibility. When you choose appropriate settings and reliable tools, you can maintain consistent quality, increase the likelihood of smooth playback, and reduce the usual headaches of conversion.
ABOUT THE AUTHOR

Your complete video toolbox that supports 350+ formats for conversion in lossless quality.