Since the early 20th century, humans have been fond of watching televised and recorded videos in the comfort of their homes. Back then, videos and photos were much more likely to be grayish in color with monotonous black and white colors. Nowadays, these black and white, grayscale, and different classic video colors are accessible to apply even with your mobile device or computer. If you want to get the nostalgic feel of your videos and photos, the vintage movie effect is a suitable filter to achieve that specific tone. As this filter is still a popular effect to use to induce classical and evocative sensations for your media files, we will teach you how to easily apply one. Read through the guides and tools below on how you can perfectly execute different ways to apply vintage filters.
Part 1. What Is Vintage Effect & Where to Use It
The vintage effect is a visual effect that mimics the look and sensation of older photographs, videos, or designs from previous decades. This style often incorporates elements such as faded colors, sepia or warm tones, grainy textures, vignettes, and slight blurring to evoke nostalgia and a sense of timelessness. The effect is well-known for video enthusiasts and photographers to induce a retro or nostalgic connection to the viewers and audiences. You can use the vintage visual effect in various creative projects, including media posts, project videos, photography, and more. It works particularly well for video enthusiasts aiming to convey authenticity, heritage, or a classic aesthetic.
Part 2. Add Vintage Effect to Videos on AVAide
When we mention applying vintage movie effects on your video files, let's not forget the app that paved the way for normalizing adding effects on project videos, AVAide Video Converter. This computer software, which is available on Mac and Windows, is a highly recommended video editing tool for novice and professional users. With its intuitive facade and buttons, users can easily apply vintage effects within a few minutes upon uploading their project video. In addition to that, it already contains a preset filter that will save you on editing different video hues and colors, only to achieve the vintage effect that you needed to use. What is more, the effects are free, and no need to buy different effects within the app just to use its plethora of vintage filters. Read through the steps below to learn how to add vintage effects to your media files.

FREE DOWNLOAD For Windows 7 or later
 Secure Download
FREE DOWNLOAD For Mac OS X 10.13 or later
Secure DownloadStep 1Get AVAide Video Converter
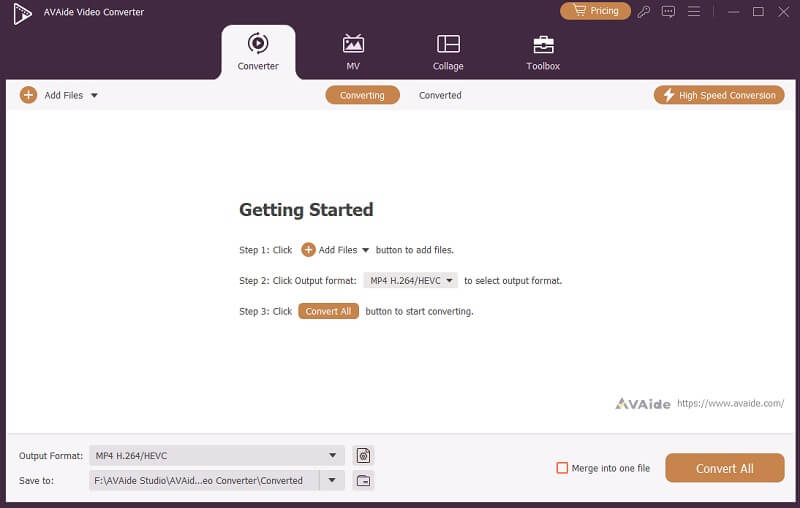
The first step to add a vintage effect to photos is to download and install AVAide Video Converter on your device. The app is compatible with Windows and Mac devices. Just click the Free Download button above that is compatible with your current device's OS. Finish the installation prompts and access the main interface of the app.
Step 2Add the Project Video
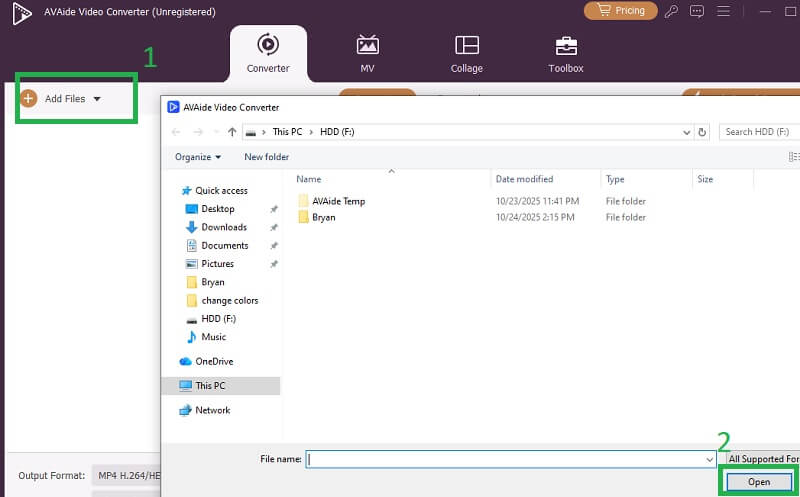
At the upper left part of the tool, click the Add Files button. This will open a folder on your device, which you can use to search for the project video. Select the file and hit Open to add the video that needs to be edited.
Step 3Apply Vintage Effect
Lastly, click the Edit button to access the set of parameters for the project videos. Access the Effects and Filter option to view the list of filters that are pre-installed within the app. If you want to have a better vintage and nostalgic feel for your videos, we recommend using the Memory filter, Movie Teller, and Gray effect. Click OK and Convert All to finish the process.

- While the app has a preset and filters, you can still adjust the contrast, brightness, saturation, and hue of your video. Use the slider on each parameter to glide the perfect amount of colors within your project video.
Part 3. How to Add Vintage Photo Effect on Pixlr
Pixlr is one of the most well-known free cloud-based vintage effect tools that provides users with basic editing features for their media files. This media editing tool contains AI editing techniques and AI generation enhancements. The filters are presets as well; the only thing you need is to select one that is according to your favored filters. Nevertheless, the most popular use of Pixlr is its different color parameters. Instead of using its built-in filters, adjust the tone, brightness, contrast, and hue of your video or photo. It works like Photoshop, but in a lightweight mode. Just to remind you as well, Pixlr contains subscription fees for you to be able to use its editing features, though you can always utilize its 7-day trial period. Follow the guide below to know how to edit the vintage photo effect in Pixlr.
Step 1Access Pixlr using your web browser - any browser will do. Access its main interface and sign up using your email.
Step 2Once you have already gained access to the interface, click File to upload the image or video you want to apply a vintage effect to.
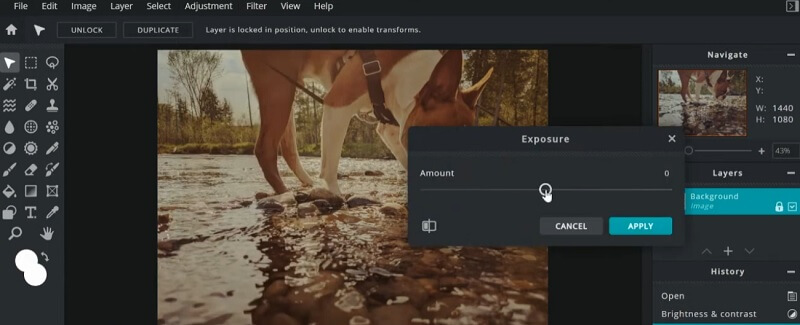
Step 3Lastly, click on the Adjustments tab, select the Brightness and Contrast option. There will be a pop-up feature that you can utilize to adjust the brightness and contrast of the photo. Do the same process on Temperature Tint, Exposure, and more.
Part 4. Other Online Tools to Add Vintage Effect
Since Pixlr is a subscription-based tool to edit and apply a vintage style on your videos or photos, we have collected a few alternative tools you can use to apply nostalgic effects.
1. Clideo
Clideo, a lightweight online-based tool that provides a plethora of features when it comes to editing videos and adding vintage picture effects. With a few clicks on different presets, you will be able to achieve the nostalgic filter that you need. You can also utilize its previewer to compare the output and choose among its featured filters built for the online editing tool. The tool also has an AI upscale video enhancer feature, which further improves your output video. Since this is an online-based editing tool, you no longer need to install software, which is suitable for users with low-end processors and devices. Learn more below on how Clideo works on applying vintage effects.
Step 1Open your browser and search for Clideo. Access its interface to see the Choose File button.
Step 2Upload the project video you need to edit or apply effects to.
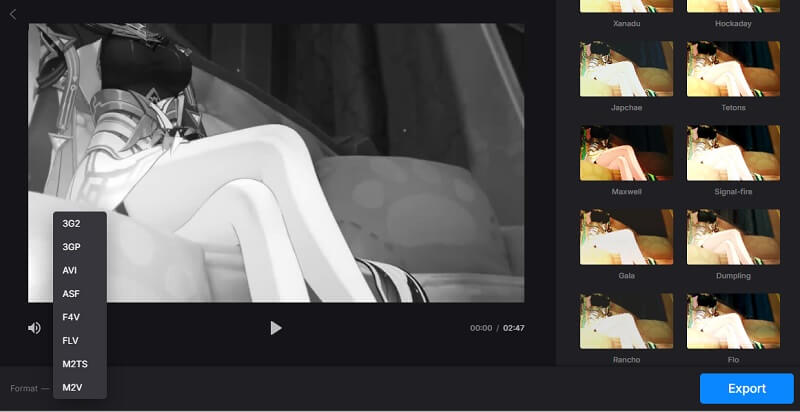
Step 3Select video filters within the app. Click on Export to save the file.
2. Clipchamp
Clipchamp offers a range of features to help users add vintage effects to their videos, making it easy to achieve a vintage camera effect and retro look. It is an online-based tool that offers a timeline section to perform editing within the app. Clipchamp lets you stack multiple filters, overlay film grain, and brighten video, contrast, hue, and saturation to enhance the vintage sensation. With its user-friendly interface and real-time preview, the tool makes it simple for anyone to add authentic vintage effects to their videos without any advanced editing skills. The steps are presented below to learn how to use Clipchamp to edit your videos and apply vintage effects.
Step 1Access your web browser and look for the Clipchamp official website.
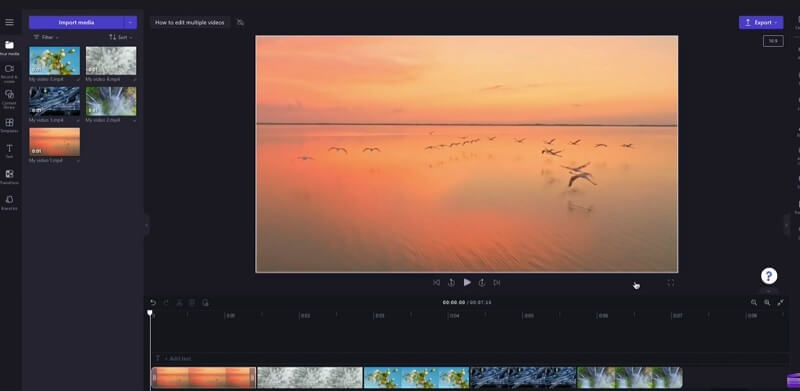
Step 2Log in using your email or Microsoft account to access your personal videos. Click on Import Videos to add your project file. Once uploaded, drag it to the Timeline panel.
Step 3Navigate to the Filters tab, where you'll find a variety of preset vintage filters. Applying any of these filters instantly transforms your footage.
Adding a vintage effect to your media files is a creative way to evoke nostalgia and give your photos or videos a timeless and classic appearance. With the range of tools presented in this article, you can definitely be able to apply this effect to your project videos easily. In addition to that, following the steps outlined in this guide, you can experiment and play with different filters to match your desired output. It is for you to explore and innovate your techniques on how you can evoke a nostalgic vintage effect with your videos.
Your complete video toolbox that supports 350+ formats for conversion in lossless quality.