Have you ever gone live only to realize your audience is watching a blurry, pixelated stream? Learning how to improve Instagram video quality is essential if you want your content to look professional and keep viewers engaged. Many creators face the same frustration, grainy visuals, laggy motion, or poor lighting ruining an otherwise great moment. The good news is that these issues are avoidable with the right preparation and settings. By adjusting your recording setup, editing with proper export values, and uploading the right way, you can ensure your videos look sharp, smooth, and clear on Instagram.
Part 1. Why Your Instagram Videos Look Blurry
When you share a video on Instagram, the app automatically crunches your file to keep things snappy on both storage and playback. Loading speed is the upside, but that speed comes at the cost of lowered bitrate and reduced detail.
The key points that shape your video clarity include:
• Original Recording: If your source starts weak, think low res, poor lighting, and shaky handheld, that is the image the algorithm has to work with. Shoot at a higher resolution, keep lighting even, minimize camera wiggle, and you give the compression engine a fighting chance to keep detail intact.
• Export Details: Incorrect export settings can trigger triple-duty compression. Deviating to non-square resolutions or intentionally low bitrates will strip data. Following Instagram's export recommendations adds a level of finesse that protects definition.
• Submission Path: Slinging your file over shaky public Wi-Fi or routing through a third-party app can trigger another round of loss. The most reliable path is loading your video directly in the Instagram app and on a solid, well-ventilated internet connection.
For sharper playback on your grid:
• Capture at 1080p or higher, with even lighting and steadiness.
• Export as MP4 with H.264 in a bitrate window of 8-12 megabits.
• Submit the file through the Instagram app on a solid WiFi connection.
Part 2. Before Recording - Capture High-Quality Footage
To dodge those smeared, fuzzed-out Instagram clips, you have to nail your record quality right up front. Once that clip sinks into your camera roll, even the fanciest editing tool can only chip away at the damage. So, tweak your camera controls first, flood your scene with nice light, and if needed, resize video for Instagram before you press the shutter.
1. Make Your Phone Camera Instagram-Ready (iPhone or Android)
Setting your phone's video settings is non-negotiable. The tweaks that seem minor can turn your post from basic to pin-sharp glory, even after Instagram compression takes a swing at it. Pocket the basics, resolution, frame rate, and HDR, so the moment is locked for real display, not wishful thinking.
Step 1Dig into Your Phone Camera Settings:
On iPhone: Head to Settings and tap Camera.
On Android: Over in the Camera app, hammer that Gear button to pull up the arsenal.
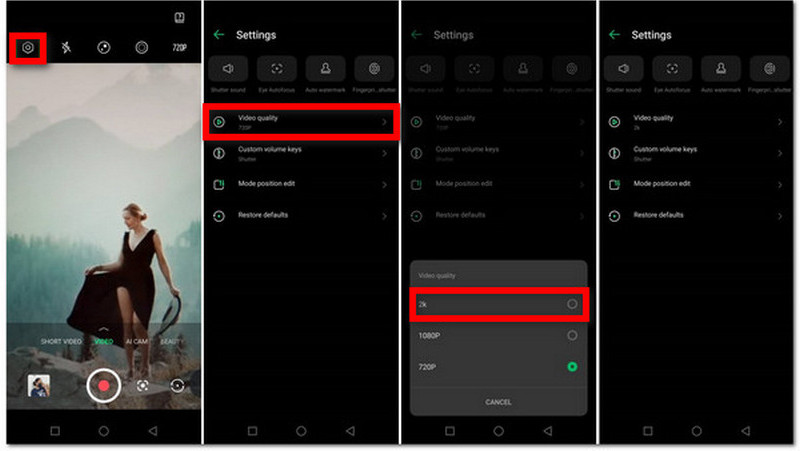
Step 2Queue up Record Video/Video Resolution. Pick the 1080p (Full HD) at 60fps option for the cleanest, smoothest playback. If 60fps waves adiós, lock in the trustworthy 1080p at 30fps and still be good.
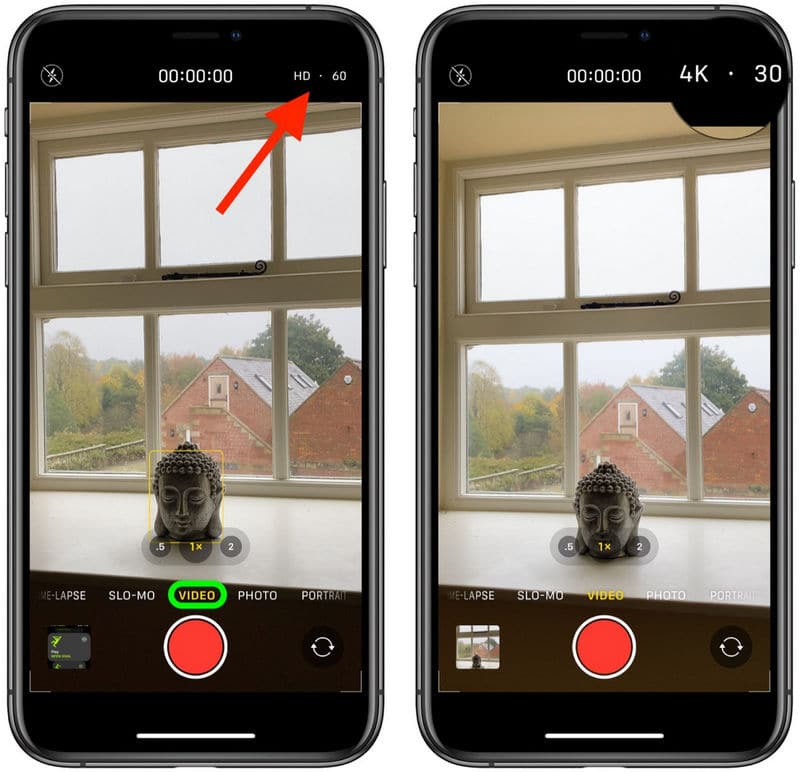
Step 3Please adjust the settings on your phone:
On iPhone: Enable Smart HDR or HDR Video, make sure that it is set to ON.
On Android: Look for the HDR or Auto HDR option in Camera settings and ensure it is toggled on too. Labeling changes across brands, so search for that quick security setting.
Step 4Fire up the Camera app, swipe over to Video mode, and hit that Record button. Just remember, the better the light, the better the video looks.
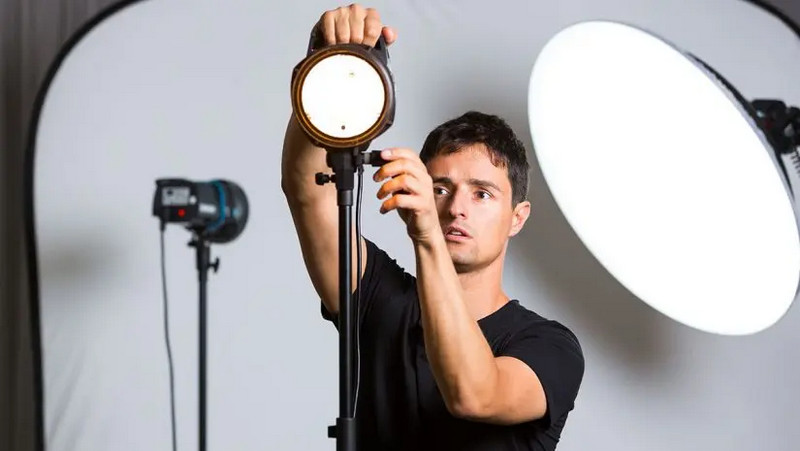
2. Lighting Techniques
Good lighting can instantly elevate the quality of your videos, making them look more professional and reducing noise or graininess.
• Use natural light whenever possible, positioning your subject so light falls evenly.
• For indoor or night shoots, consider affordable gear like LED ring lights or softbox kits to create consistent and flattering illumination.
Part 3. Editing for Maximum Quality
1. Optimal Export Settings for Instagram
To keep your videos sharp after Instagram compression, use the following recommended export settings, and when necessary, upscale 480p to 1080p for clearer results:
| Setting | Recommended Value | Notes |
| Resolution | 1080×1350 (portrait) or 1080×1080 (square) | 1080×1350 gives more screen space for vertical videos. |
| Frame Rate | Match original footage (30fps or 60fps) | Keeping the same frame rate prevents stuttering or loss of smoothness. |
| Bitrate | 8-12Mbps for standard clips (higher for reels) | A higher bitrate keeps details sharper but increases file size. |
2. Best Editing Tool: AVAide Video Converter
To get the very best quality for your social-media uploads, AVAide Video Converter is the go-to option. Packed with everything you need in one interface, it lets you convert, trim, shrink, and boost the visual punch of your videos while keeping quality locked in. With support for more than 300 file types and output up to 8K, it preps Instagram videos that pop every time.
- Convert to 300+ formats, including MP4, MOV, and mobile presets.
- Export up to 8K, 5K, 4K, or 1080p with sharp detail and accurate colors.
- Crop, rotate, trim, merge, and add filters or watermarks with ease.
- Compress files to meet Instagram limits without losing quality.
- Enhance videos by upscaling, reducing noise, and adjusting brightness/contrast.

 Secure Download
Step 1Download and Install
Begin by heading over to the AVAide homepage and grab the installer for AVAide Video Converter, choosing Windows or Mac based on your setup.
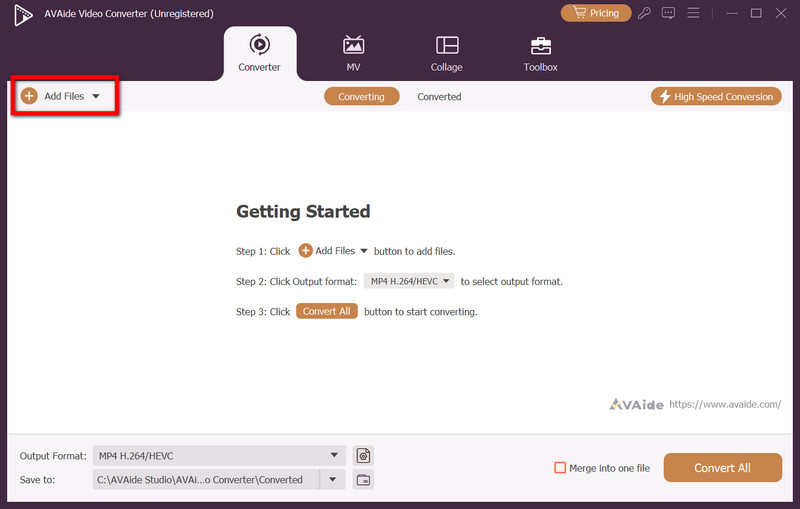
Step 2Import Your Video
With the application running, you will see the main workspace. Use the Add Files button or drag your video file directly into the main window to load your clip. The layout is drag-and-drop friendly so that you can process gigs easily.
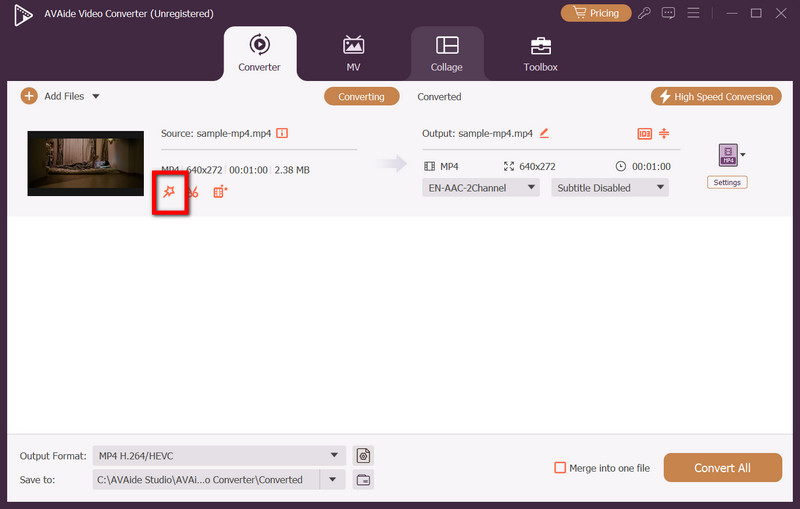
Step 3Adjust Video Settings
Click the Edit button beside the video thumbnail to open the adjustment settings. Keep the frame rate the same as the source, set to either 30fps or 60fps. Select a video bitrate of 8, 10, or 12 Mbps progressively to control size and quality.
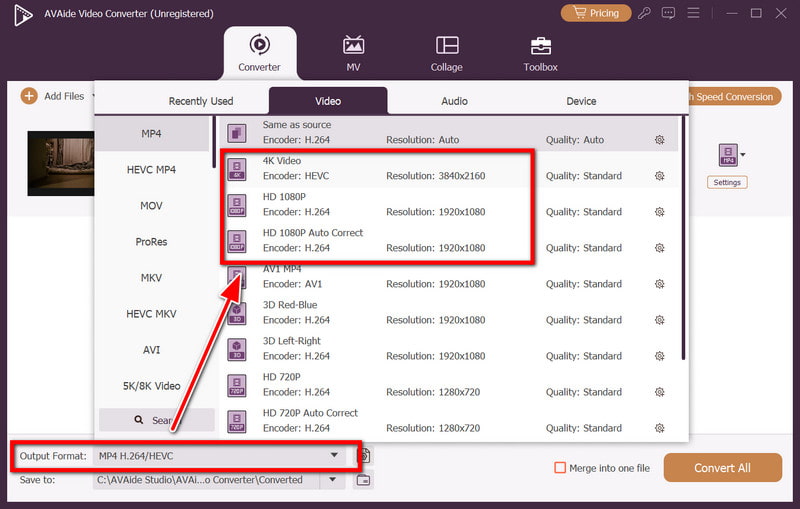
Step 4Choose the Output Format
Head to the Output Format button on the lower left, and from the preset list, pick MP4 with H.264 codec and 1080p quality. This snappy menu option keeps files upload-friendly, so your video plays back perfectly as soon as it hits Instagram.
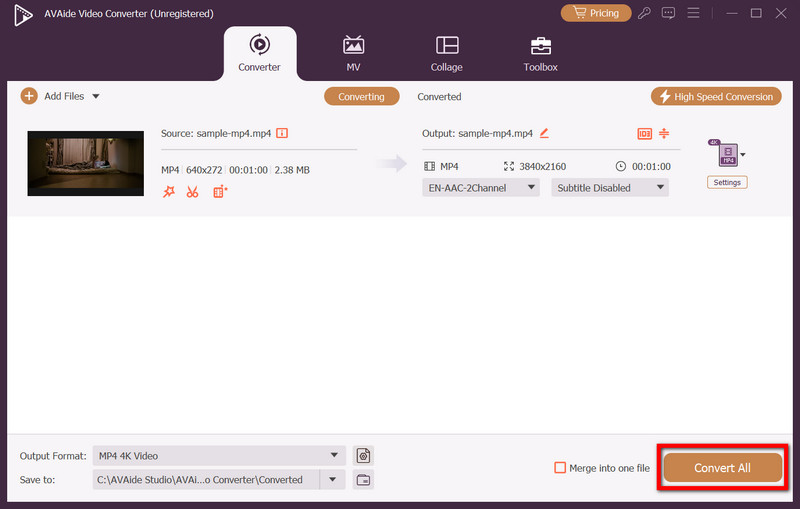
Step 5Export and Save
Finally, select your output folder and hit Convert All. Once processing is complete, transfer the video to your phone, and it's ready for upload to Instagram.
In the end, knowing how to improve video quality for Instagram can make a huge difference in how your content is received. From recording in high resolution with proper lighting to editing with the right export settings, every step helps you preserve sharpness and clarity. Using tools like AVAide Video Converter also ensures your clips stay professional and eye-catching even after Instagram's compression. With the right approach, you won't just avoid blurry uploads, you will create videos that stand out, engage viewers, and truly represent your brand.
Your complete video toolbox that supports 350+ formats for conversion in lossless quality.