With Adobe Flash being phased out, you might be one of those users who want to convert SWF files into usable formats, like JPG images. In fact, converting Flash animations into JPG images has become an essential skill for graphic designers, saving assets from old projects, or an educator preserving Flash-based learning materials. Therefore, this post guides you through the simplest conversion methods and workarounds to turn your SWF files into useful formats. Explore here how to breathe new life into your Flash files by learning about the best SWF to JPG converters.
Part 1: What Is a SWF File?
If you are unsure about SWF and what its deal is, there is a reason you bumped into this page. SWF, short for Small Web Format, was a Shockwave Flash dedicated to making animations and interactive content. This file contains raster graphics, vector graphics, text, and interactive elements, which were written in ActionScript. SWF includes clickable links, buttons, and even simple games. It was primarily created for the delivery of graphics and animation over the web due to its small file size. That is right. This file was lightweight and optimized for web use. That is why it was ideal for slow internet connections.
But with the decline of Adobe Flash in 2020, SWFs were obsolete for web use. Modern browsers no longer support Flash due to performance issues, security risks, and the rise of HTML5. The advancement offers similar functionality without the help of plugins. In spite of the discontinuation, SWF files are still encountered in legacy e-learning courses, digital art and animations, archived web projects, and more. Since it no longer runs natively in browsers, there is a need to convert them to modern formats, like JPG or JPEG, to foster accessibility. In the next section, you will learn how to convert SWF files to JPG efficiently.
Part 2: The Easiest Way to Convert SWF to JPG on Windows and Mac
AVAide Video Converter is one of the reliable ways to convert SWF to JPG on both Windows and Mac systems. This program effectively extracts high-quality JPG images from SWF animations with just a few clicks. That is possible with the app's intuitive interface, allowing YouTube to convert an entire animation into multiple JPG files effortlessly. Moreover, its ability to preserve image quality during conversion ensures your JPG files remain clear and sharp. That means the tool can keep all the details nice and clean.
Additionally, you can easily select your target frame from the SWF file and have control over which parts of the animation to save as images. Plus, it supports batch conversion to export multiple frames from a single SWF into individual JPG images in one go. This tool is perfect if you want to break down animations into separate image stills perfectly. Here is how to convert SWF to JPG using this program:
Step 1Download and install AVAide Video Converter on your computer using the Free Download link provided below. Then, launch it.
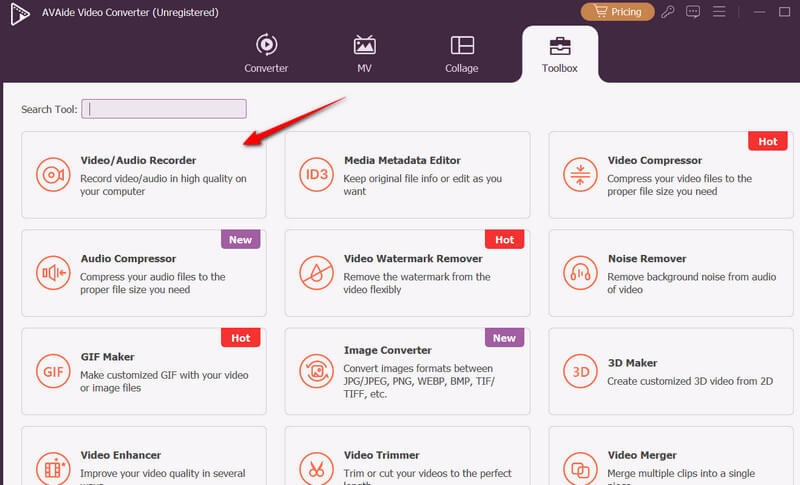
Step 2This time, open the Toolbox tab of the app and access the Video/Audio Recorder tool from the list of tools. The screen recorder window should appear afterward.
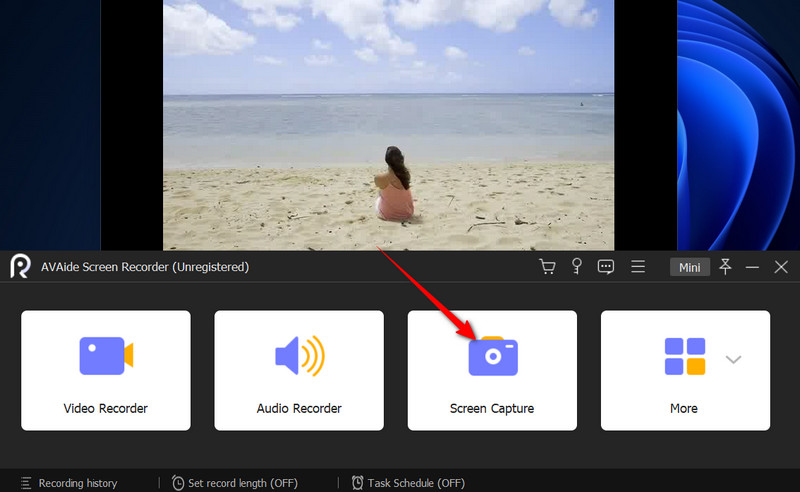
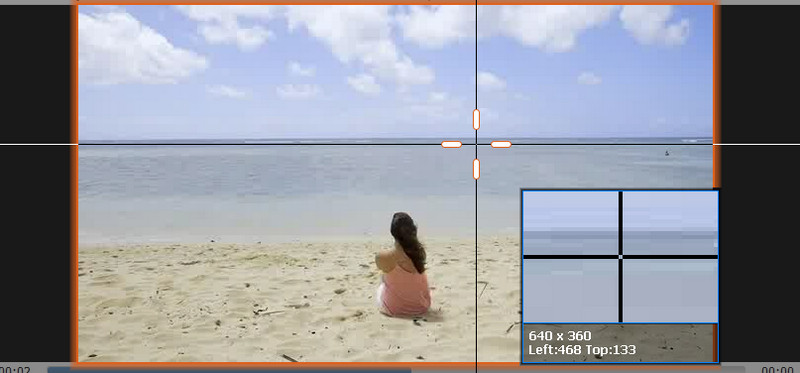
Step 3Next, play the SWF video on your computer. Then, click the Screen Capture button of the app and take a snapshot of the frame you wish to keep.
Step 4Now, hover the frame selector over the video, and it will fit instantly. Next, left-click on your mouse to take a screenshot. Preview the snapshots you took afterward.
Part 3: How to Convert SWF to JPG with Premiere Pro
If you are used to Adobe's ecosystem, Premiere Pro is a powerful solution for converting your legacy SWF animations to high-quality still images. Despite being a video editing tool, this app extracts frame-accurate and crisp stills from SWF files with precision. What sets it apart is that it is capable of exporting multiple files in a batch. Users can set in or our points across multiple frames and export as separate JPGs at once. The tool may require more steps than dedicated converters, yet delivers professional-grade image quality. Additionally, you can integrate it with other Adobe Creative Cloud products seamlessly. That said, here is how you get some stills from your SWF files using Premiere Pro:
Step 1Download and install Premiere Pro on your computer. Launch it afterward. Once it is launched, load the program and insert it into the Timeline.
Step 2In the timeline, align the playhead (blue line) to the part of the SWF that you wish to convert to JPG.
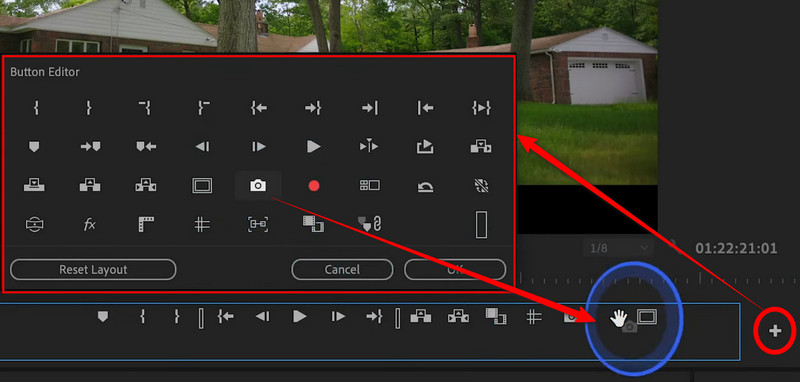
Step 3Now, click the Plus button on the right side and look for the Export Frame button. Next, drag and drop it to the timeline menu underneath the preview panel.
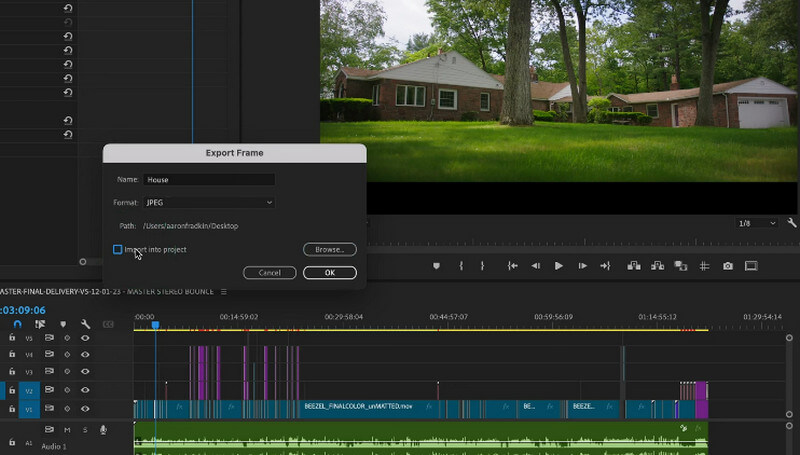
Step 4This time, click the Export Frame button, and a dialog box will appear. In the Name field, type in the name you want for the snapshot, choose JPEG as the output format and set an output location by clicking the Browse button.
Step 5Finally, hit OK in the dialog box to save the output photo. Do the same with the rest of the parts you wish to keep. In this way, you can screenshot to JPG for every video you wish in Premiere Pro.
Part 4: How to Convert SWF to JPG Free Online
Ezgif supports SWF and can extract multiple JPG images directly from the web. It is a perfect choice if you are looking for a way to convert SWF to JPG for free. This online tool handles frame-by-frame instructions by breaking them into separate JPG images per frame. Additionally, users can access basic editing tools, including cropping images, adjusting brightness, and contrast, before exporting. On top of that, it works without sign-ups or watermarks in your downloads. Check out the tutorial below to learn how this SWF to JPG converter software, free to download, works.
Step 1First, you need to visit the official page of the program. To do it, open your favorite browser on your computer and type in the name of this tool in the address bar.
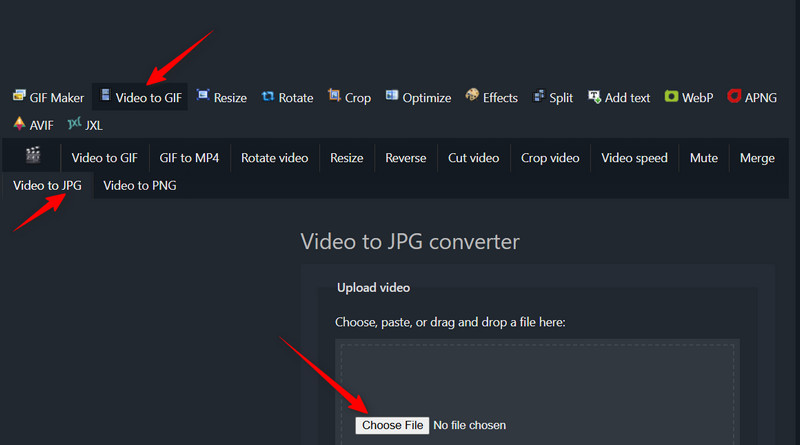
Step 2Then, select the Video to JPG option in the menu provided on the homepage. After that, select Video to JPG.
Step 3Now, click the Choose File button and open your target SWF file to convert to JPG. Then, click the Upload video button to confirm.
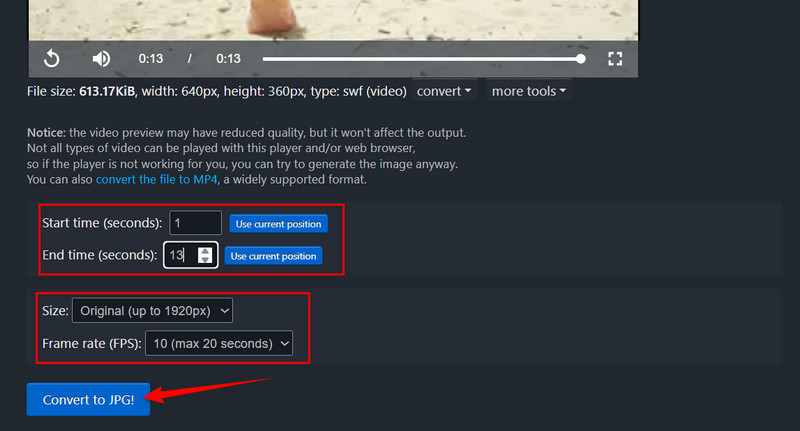
Step 4This time, set the Start and End times by typing the number in the field. For additional settings, adjust the Size, Frame Rate, and Method to optimize the output according to your preference. Finally, click the Convert to JPG button. You may also convert SWF to MP4 here with its tools.
That wraps up the guide for SWF to JPG conversion. Two different approaches are introduced for your convenience. There is an ideal desktop tool that lets you play and take screenshots of frames in your SWF file. While Premiere Pro requires manual settings, you can extract your JPG files effectively. Now, if you are not into desktop tools, you may do this conversion using an online program.
Your complete video toolbox that supports 350+ formats for conversion in lossless quality.

 Secure Download