The mirror camera effect is what you see when your front camera shows a reversed, mirror-like preview of yourself. This is often called Mirror Front Camera, and it simply means your image is flipped so movements feel natural, like looking in a mirror. In this guide, we explain why it happens and how to mirror or un-mirror videos.
Part 1. Why Front Cameras Show a Mirrored View by Default
Explanation
When you fire up the front-facing camera, what you see is typically a mirrored image of you. This feels right because our brains associate the mirrored view with a familiar process: standing in front of a real mirror. If the camera showed a non-mirrored view, moving your right hand would appear in the opposite direction, and that reversal can feel unsettling.
The Psychology
Showing the image the way you usually see yourself in real life lowers the This is New alert in your brain, making the preview easy to process. Phones exploit this mental shortcut. But the moment you take a shot, the device flips the image to real-world coordinates so that any printed text, logos, or subtle landmarks are oriented the way they would be to an outside observer.
Familiarity vs. Reality
| Aspect | Mirrored View | Non-Mirrored View |
| Perception | Matches how you see yourself in a mirror. | Matches how others see you in real life. |
| Comfort | Feels natural for posing and adjusting. | May feel off or reversed. |
| Practicality | Good for adjusting hair, makeup, or gestures. | Better for photos/videos with text or scenery. |
| Accuracy | It can distort how others will perceive you. | Displays the true, real-world orientation. |
When You Might Want to Un-Mirror
1. Recording a video with text in the background, like signs, books, or shirts.
2. Creating content where accurate orientation matters.
3. When taking selfies, you want to appear exactly as others see you.
4. Avoiding confusion with directional gestures like pointing left/right.
Part 2. How to Un-Mirror Existing Videos
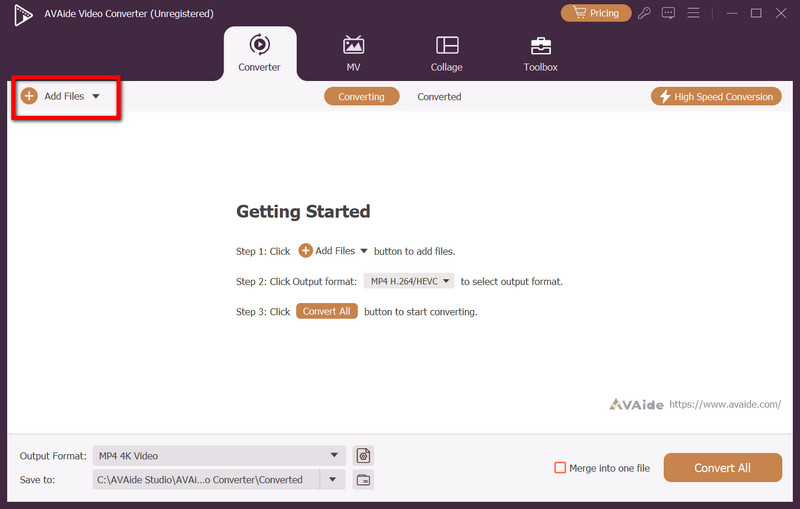
AVAide Video Converter serves as a versatile media toolkit perfect for transforming and fine-tuning your video content. In addition to supporting more than 300 output formats, it brings a suite of intuitive editing tools, allowing you to crop, rotate, flip, trim, enhance, and compress your clips, all without sacrificing original quality. This combination makes it especially handy for straightening out mirrored footage.
- Instantly un-mirror or flip videos horizontally/vertically.
- Un-mirrored videos retain original resolution, even up to 8K.
- Flip multiple mirrored videos at once to save time.
- Improve video quality while un-mirroring.
- 30× acceleration ensures quick editing, even for large video files.

 Secure Download
Step 1Download and Set Up the Application
Visit the official AVAide website, grab the installer for AVAide Video Converter, and run the setup on either your Windows or Mac device.
Step 2Start the Software and Load Your Clip
Launch the application, click Add Files or simply drag your mirrored video onto the interface to load it.
Step 3Open the Editing Interface
Locate and click the Edit button beside the video thumbnail. A dedicated editing window will load.
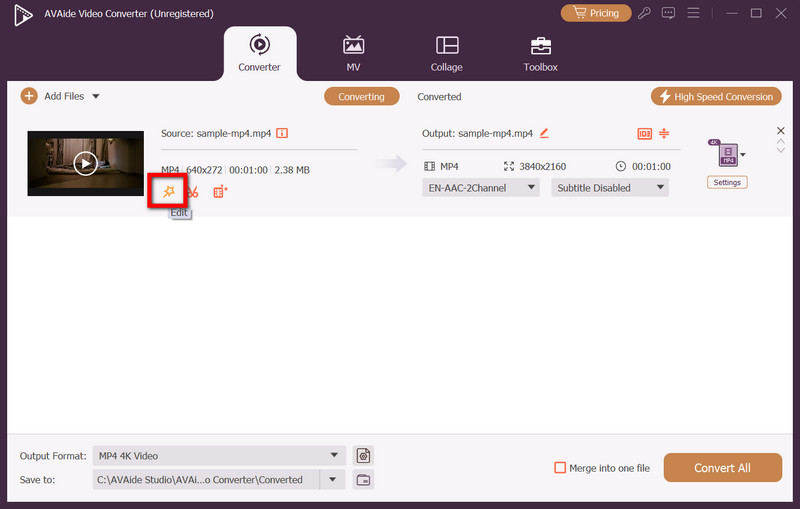
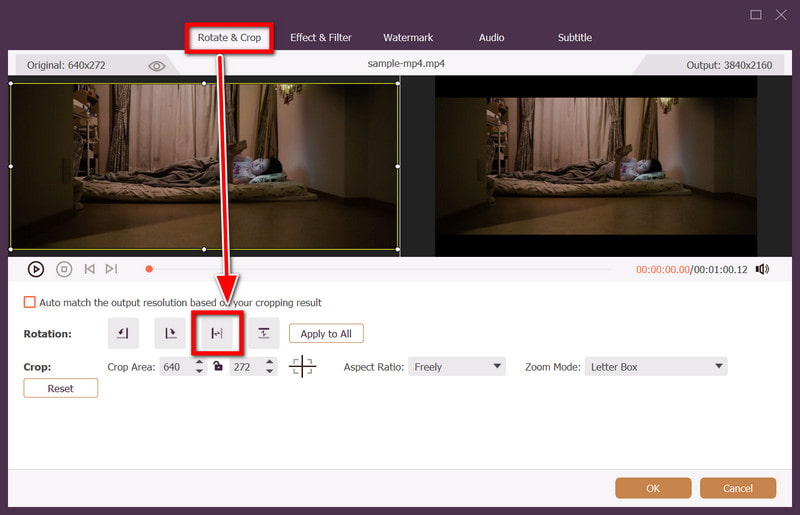
Step 4Correct the Mirroring
Within the Rotate & Crop section, select the Horizontal Flip option to reverse the mirror effect. You will see the correction play back instantly in the preview. After that, click OK to apply.
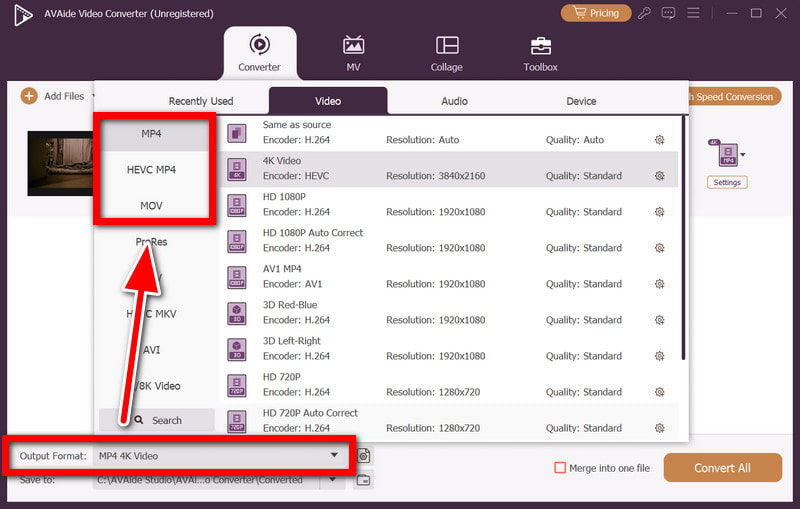
Step 5Finalize Format and Export
Pick the Output Format you want, MP4, MOV, or whichever suits you, and set the resolution; if the device permits, you can go all the way up to 8K. Press Convert All, and your mirrored clip will be processed and ready for downloading.
Part 3. How to Mirror/Flip Front Camera Video on iPhone
1. Native Camera Settings
Starting with iOS 14, your iPhone can let you decide if your selfies and videos stay mirrored or are oriented to the actual real-world perspective. That way, the image you want to keep can be saved already flipped, or you can use the flip video option if that’s your preference.
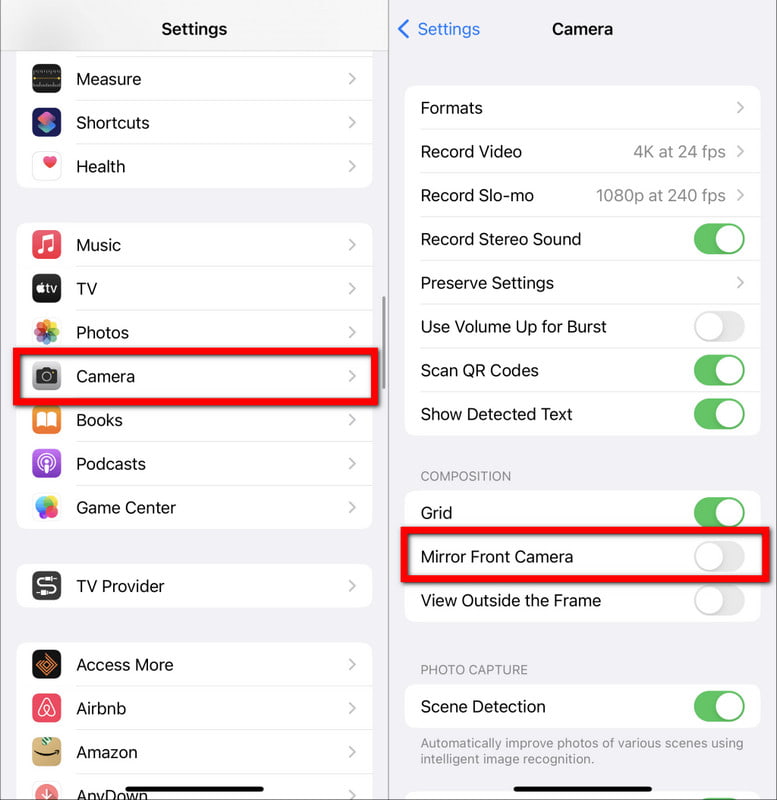
Step 1Launch the Settings app by tapping the gray gear button you see on your home screen.
Step 2Scroll through the options and press Camera to reach all relevant recording preferences.
Step 3Locate the Composition section and see the switch for Mirror Front Camera; flip it to the right to switch on saved mirroring.
Step 4Fire up the Camera app, tap the front lens, and shoot your video. The selfie will now save mirrored, minus an extra edit.
2. Editing in Photos App
When you decide to flip a previously shot video, the built-in Photos app can manage the job in a few more taps.
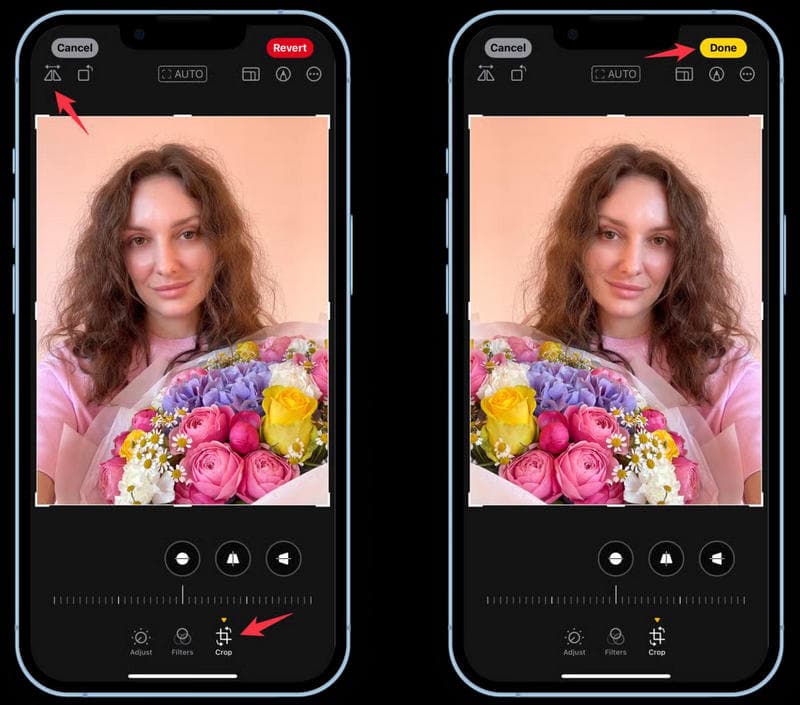
Step 1Open Photos, then swipe through your library, locating the video you wish to mirror after the fact.
Step 2In the upper-right corner, you’ll see the Edit button; tap it to load the video in the editing screen.
Step 3Select the Crop/Rotate tool from the bottom menu to access flipping and rotation options.
Step 4Tap the Flip button once to instantly mirror your video and check the preview to confirm the change.
Step 5Tap Done in the bottom-right corner to save the flipped version permanently to your Photos library.
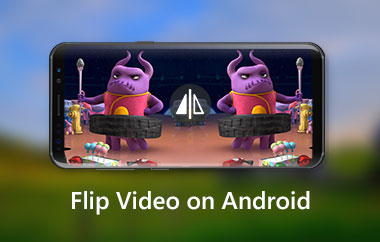
Part 4. How to Mirror/Flip Front Camera Video on Android
1. Adjusting Camera Settings
Most Android smartphones, like Samsung, Google Pixel, or Xiaomi, let you choose how your selfies and front-facing videos are saved, mirrored or as real-life views, and also provide simple tools to flip or rotate videos on Android when needed.
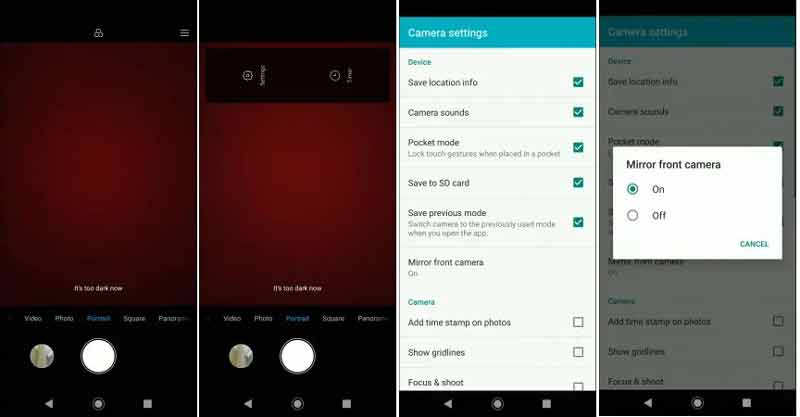
Step 1Grab your Camera app.
Step 2Flip to the front-facing lens.
Step 3Search for an option labeled save flipped or mirror effect. Its exact label changes by manufacturer.
• On Samsung, check Settings > Save selfies as previewed.
• On Pixel, head to Settings > Save flipped selfies.
Step 4Hit Record. The camera stores the clip following the preference you set.
2. Using a Third-Party App
If the built-in camera skips a mirroring option, a third-party app can do the job. InShot, for instance, handles quick flips.
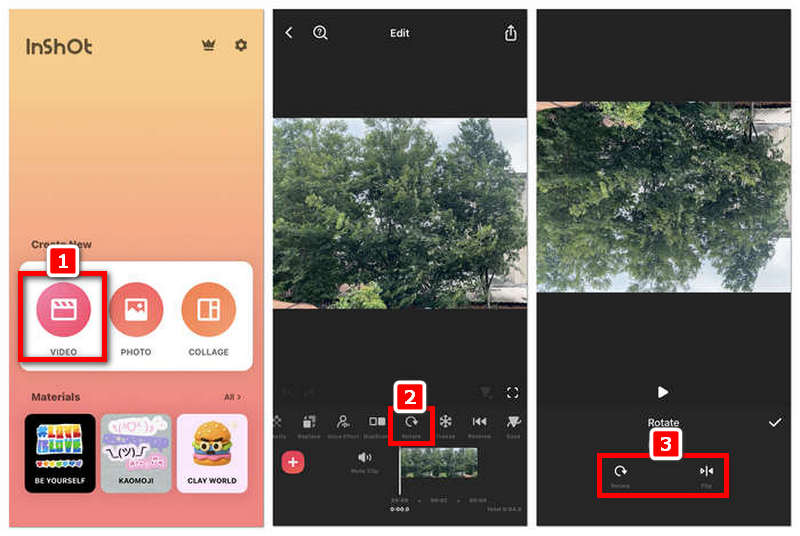
Step 1Get the InShot app from Google Play, then launch it.
Step 2From its home screen, choose Video to start your edit.
Step 3Scan your gallery for the front-camera video and tap to import it.
Step 4Locate the Flip button, tap it, and watch the video mirror itself. Preview it to make sure the change is what you wanted.
Step 5Adjust other edits if needed, such as trimming or filters, then tap Save to export the finished video to your device.
Learning how to mirror front camera video gives you full control over how your selfies and recordings appear. Whether on iPhone, Android, or using AVAide Video Converter, you can easily flip, un-mirror, and enhance videos for clearer, more accurate results.
Your complete video toolbox that supports 350+ formats for conversion in lossless quality.