Reversing a video is among the most popular video editing processes you can do to make your video unique and appealing. It can even let you create a satisfying loop, seamless transition, and perfect illusion. If you are interested in editing and reversing your video, you must use an amazing video reverser, like CapCut. Well, this editor can offer its video reverse feature, letting you edit your videos based on your preferences. So, do you want to learn how to use this tool to reverse your videos? Worry no more! Read this article and explore the best methods on how to reverse a video on CapCut.
Part 1. How to Reverse Video on CapCut Using a Laptop
CapCut is an exceptional video editor you can access on various platforms, including a laptop or a desktop. With this tool, you can ensure that you can reverse your videos easily and instantly. In addition to that, in terms of reversing videos, there are various reverse effects you can access. Some of them are even free to use, allowing you to enhance your clips without spending a penny. Plus, what we like here the best is that, besides reversing a video, there are more video editing functions you can access. You can access a video cropper, trimmer, cutter, add subtitles, effects, filters, and more. Thus, if you want to improve your videos, there is no doubt that CapCut is among the best editors you can access on your laptop.
To learn how to reverse video on CapCut, see the detailed steps below.
Step 1Download and install CapCut on your laptop. After you install it, launch the video editor to start reversing your videos.
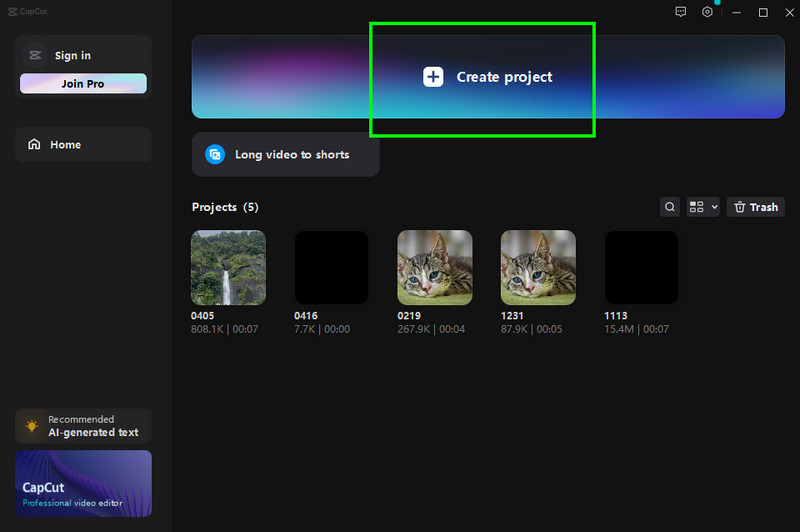
Step 2From the primary interface, click the Create Project button. Once your file folder shows up, click and add the video you want to reverse to the Timeline section.
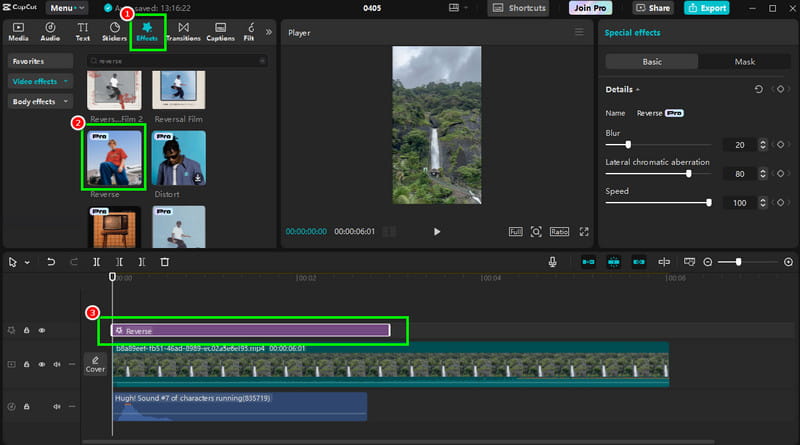
Step 3When the main interface shows up, go to the Effects section and search for the Reverse effect. Then, click the Plus sign to insert the effect into the timeline.
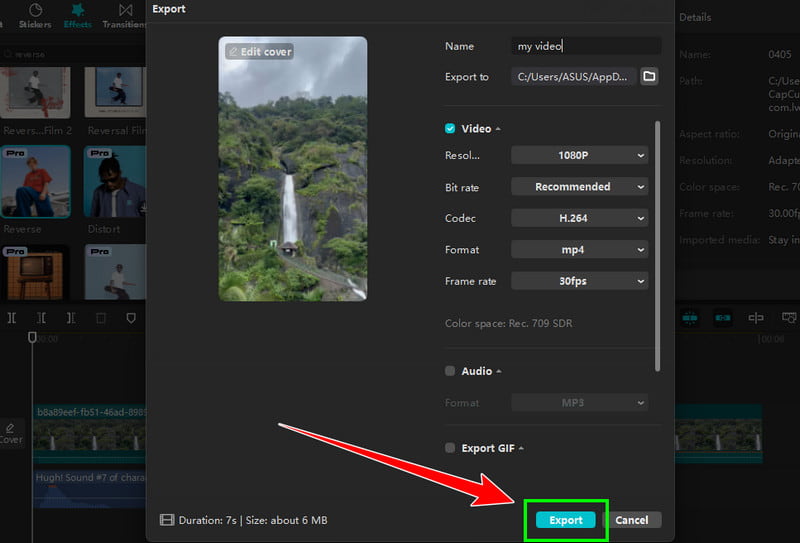
Step 4If you are satisfied with the result, click the Export function above. You can even choose your preferred format, quality, frame rate, and other parameters. Lastly, click Export to save the reversed video on your device.
You have now discovered how to reverse a video on CapCut on a PC. However, you must take note that when using the software's free version, you will see a watermark on your videos. Thus, if you want to remove the CapCut watermark, use its premium version.
Part 2. Reverse Video on CapCut Using Phone
If you prefer using your phone to reverse your videos, you can do so. Besides the CapCut desktop version, you can also access its mobile-based version to edit your videos. The good part here is that its layout is also simple to understand. Plus, you can access various easy-to-use features allowing you to enhance your videos based on your preferred outcome. What makes it more ideal is that you can save your reversed and edited video to an excellent quality, such as 720p, 1080p, and even 4K. There are even more functions you can use to improve your clips. You can flip the video, insert subtitles, reduce noise, stabilize the video, and more.
So, if you want to explore how to reverse video in CapCut mobile, check the instructions below.
Step 1Download CapCut on your Apple Store or Google Play Store. Then, after the installation, run it on your mobile device.
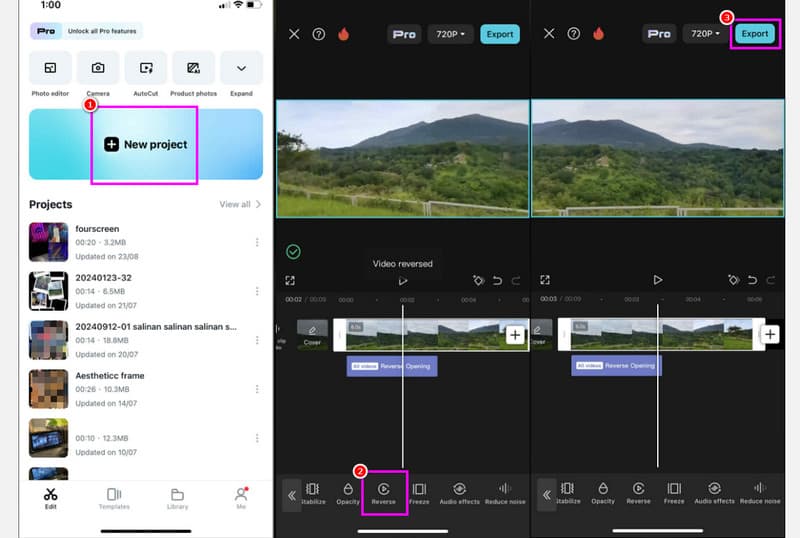
Step 2From the interface, press the New Project button to add the video from your phone.
Step 3Go to the bottom interface and slide the features from right to left, and press the Reverse function. Then, the video reversing process will start.
Step 4After the process, go to the Export button above and press it to start the saving process.
Part 3. Tips and Troubleshoots about Reversing Videos on CapCut
There are times when you might encounter some errors when reversing a video on CapCut. So, you can check the information below to see some troubleshooting processes you can do to solve a certain problem.
Problem 1. Reverse Button is Missing
If you are dealing with multiple videos, there are some circumstances in which you won't encounter the Reverse feature.
Solution:
To solve the issue, the best thing to do is to press a certain video to the timeline, and you will see the reverse button.
Problem 2. Reversed Video Looks Laggy
Are you dealing with a video with a lower frame rate? Then, your video might look choppy and laggy. This problem might lead to unsatisfying video playback.
Solution:
The best solution you can do is to check your Settings. Ensure that the frame rate is set to high. Then, it would be better to use long, higher-quality clips when using the CapCut editor.
Problem 3. The audio sounds weird
Getting a weird sound after reversing a video is normal. It is because the tool also reverses the audio along with the video.
Solution:
To remove the annoying sound, it would be better to detach the audio. You can use another audio or background music that can make your clip lively.
Part 4. Best Alternative to CapCut to Reverse a Video
CapCut is an amazing video editor. However, when using the free version, you will see a watermark on your video. So, if you want to reverse a video without a watermark for free, then the best alternative you can use is AVAide Video Converter. This program can offer its Video Reverse feature, allowing you to reverse your videos and save them with the best quality for up to 4K. What we like here is that while reversing your videos, you can also use more functions that can help you improve your videos. You can attach effects, filters, rotate video, and more. You can even choose your preferred output formats, like MP4, MKV, MOV, FLV, WMV, and more. With that, if you want to reverse and edit your videos, it is highly recommended to access this program.
To start reversing your videos, see the detailed steps below.
Step 1After you download AVAide Video Converter on your Mac or Windows, run it to start the video editing process.

FREE DOWNLOAD For Windows 7 or later
 Secure Download
FREE DOWNLOAD For Mac OS X 10.13 or later
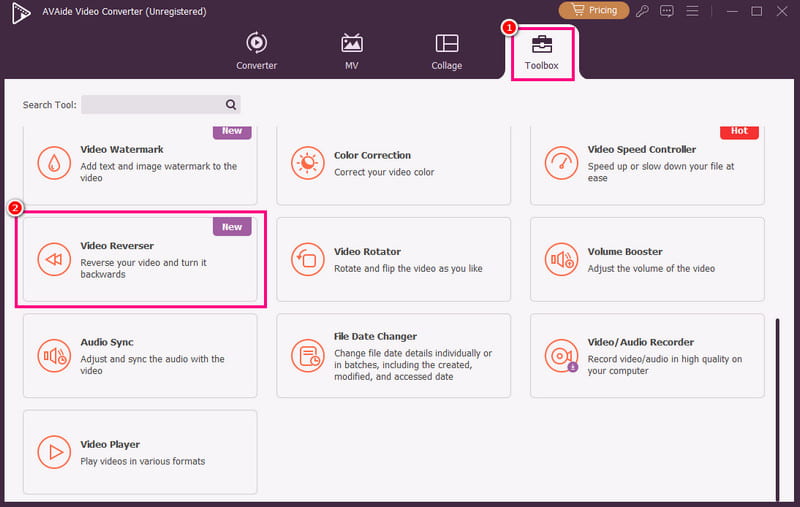
Secure DownloadStep 2Go to the Toolbox section and hit the Video Reverser feature. Then, another interface will appear on your screen.
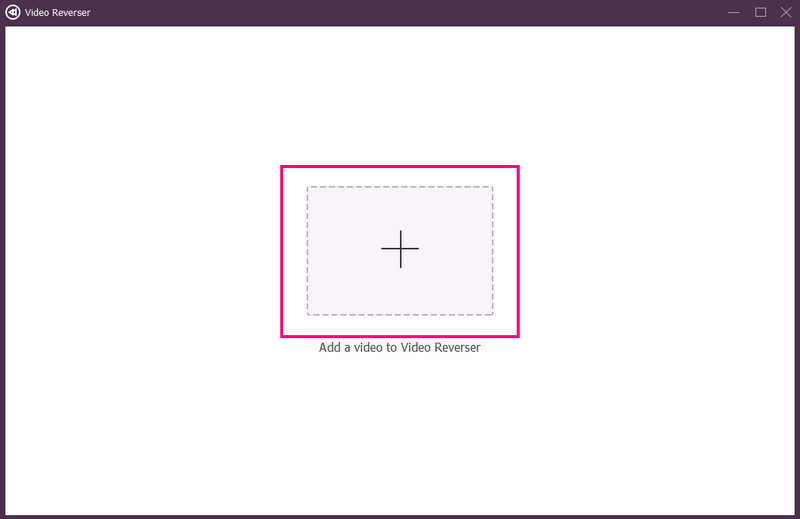
Step 3Now, hit the Plus symbol from the center interface. When your computer folder shows up, click the video you want to reverse and hit OK.
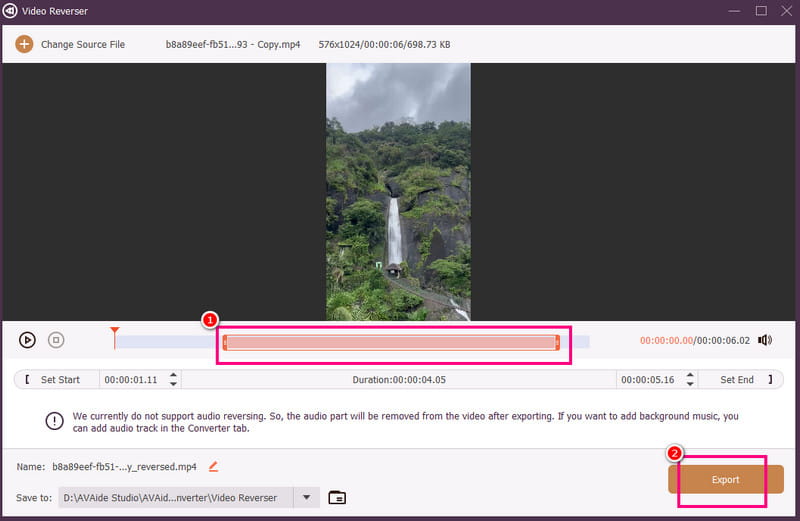
Step 4You can now use the adjustable slider below to reverse your video. You can reverse a portion of your video or the entire clip. Once satisfied, click the Export button below.
Now you have learned how to play video in reverse on CapCut, especially on desktop and mobile devices. With that, you can ensure that you can get your desired result after the process. However, when using the tool's free version, you will see the CapCut watermark on your videos. So, if you want the best alternative to CapCut that can help you reverse a video without any watermark, we suggest using AVAide Video Converter. You can reverse your video and won't encounter any disturbing elements, allowing you to enjoy your reversed videos.
Your complete video toolbox that supports 350+ formats for conversion in lossless quality.