If you've ever used iMovie and asked how to make a great movie on iMovie, then you're definitely not alone. A lot of new users are intimidated by the user interface and don't know where to begin. Fortunately for those users, iMovie was created with the purpose of making video editing as easy as possible, regardless of whether you are using an iPad or a Mac.
In this article, you'll be shown step-by-step instructions on how to create a movie in iMovie using both your iPad and your Mac. Additionally, we'll show you how to create a movie on your Mac (if you want more options) if you don't have iMovie installed.
Part 1: How to Make a Good Movie on iMovie on iPad
Creating an iMovie using an iPad is as simple as having a clear storyline and a specific feeling you would like to have in your movie, along with editing clearly and efficiently. Following the steps below should result in a movie that has been edited well, upon knowing how to make a good movie on iMovie.
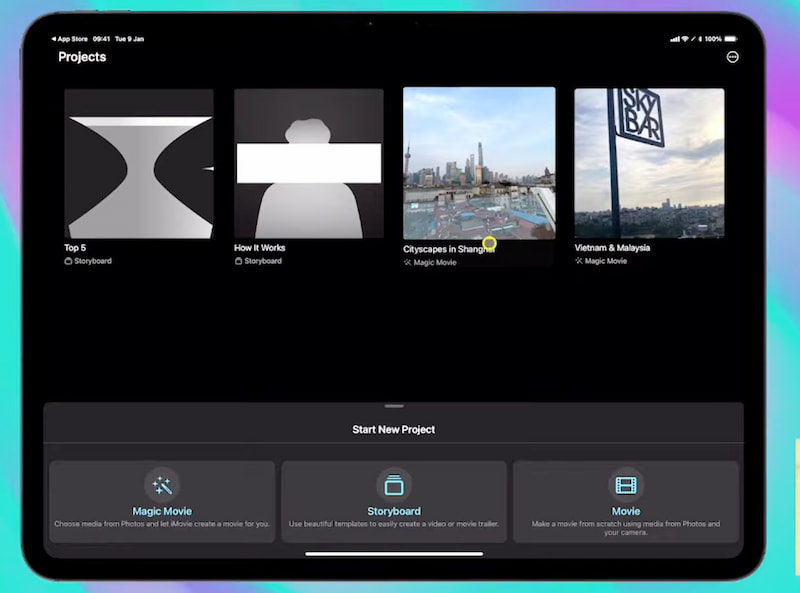
Step 1Create a New Project
First, tap on Start New Project from the main screen of iMovie when it is fully loaded. If you want to have full control over your clips and tools for editing, select Movie. Then, a timeline for your video project will appear.
Step 2Import Your Photos and Videos
Now, pick all of the clips you would like to include in your movie. Then, tap Create Movie. Then see your clips, placed at the bottom of the timeline in the order in which they were chosen.
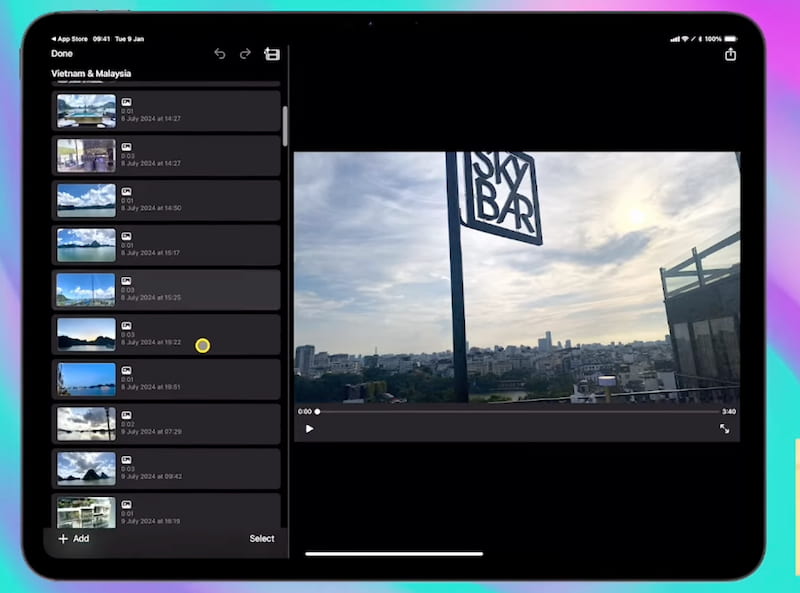
Step 3Trim and Arrange Clips
You can split a clip with the Split option, which will allow you to edit out some of the middle of a clip.
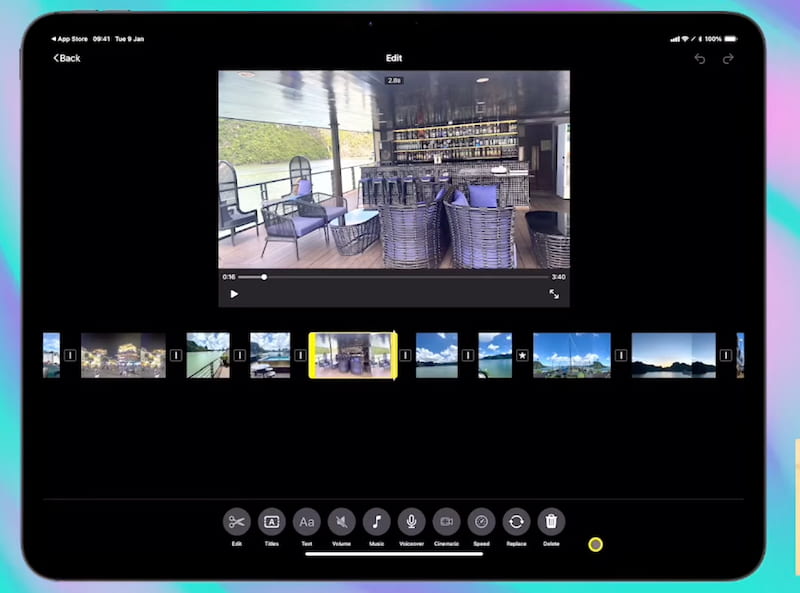
Step 4Add Transitions
Click the Transition button located on the toolbar, which will allow you to choose a variety of options such as dissolve, slide, and more.
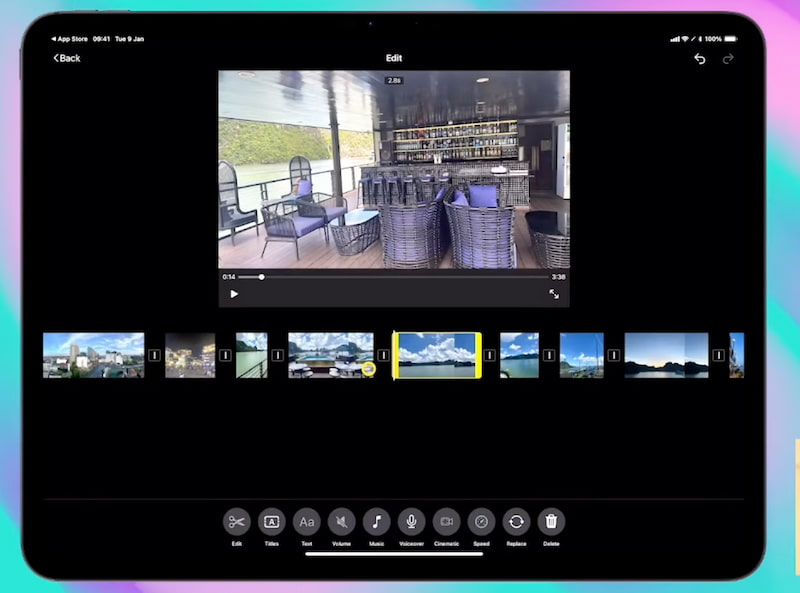
Step 5Insert Music and Sound Effects
Select the Plus button and select Audio from the options displayed in order to locate and open sounds, music, and soundtracks located on your computer.
Step 6Add Titles and Text
Tap on a clip and go into Titles to see different options for style. Then pick an option, edit the text, move it around on the screen, and select how long you want it to be visible.
Step 7Adjust Speed and Basic Settings
Make some minor adjustments to your film to help with your pace, how well you show what's happening, and the overall quality of your film. One great element you do is learning how to change the aspect ratio on iMovie. This keeps your video looking suitable and professional for whatever reason you may use it.
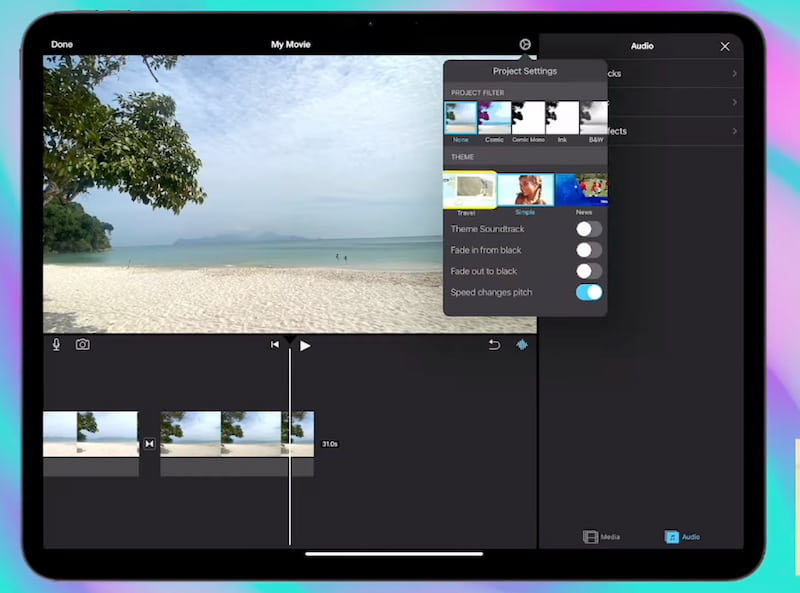
Step 8Export Your Movie
Once you finish all of the steps above, you can now tap the Done button. This will return you to the project overview. From there, click Share and choose Save Video.
Part 2: How to Make a Movie in iMovie on Mac
If you prefer using desktop applications to edit movies, then you will need to follow these steps on how to make a movie in iMovie on a Mac. Desktop applications offer more precision when it comes to editing and also give users the option to make more advanced changes. Since the Mac offers a larger workspace compared to mobile devices, it makes it easier for the user to be able to manage several video clips at one time, as well as multiple audio tracks and multiple effects at once.
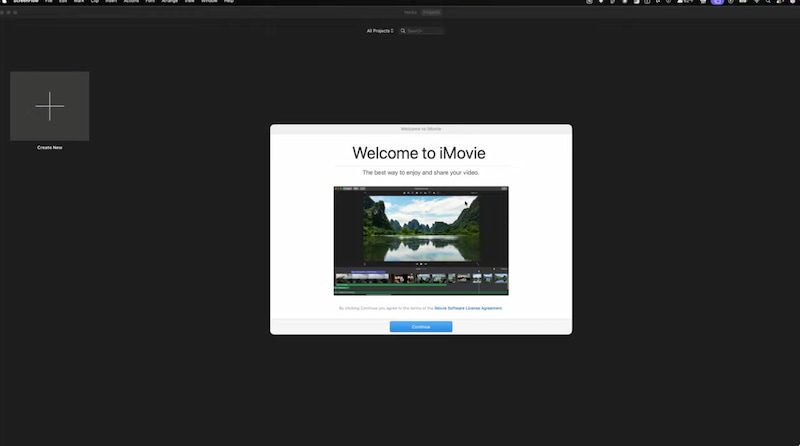
Step 1Start a New Project
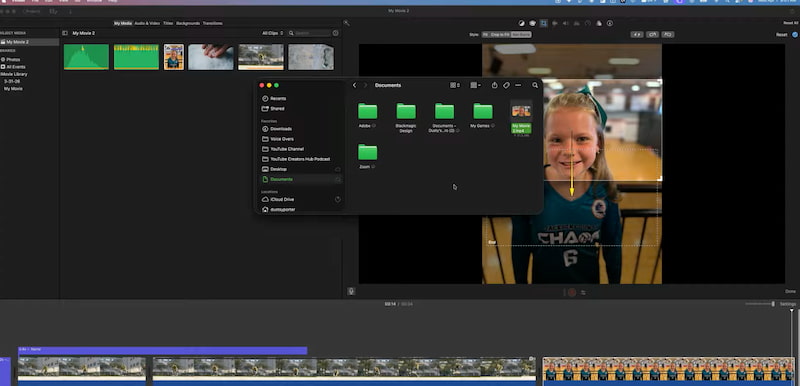
Open the app and wait for the Projects Dashboard to load, then click Create New and choose Movie to access a blank timeline with full editing control instead of preset templates. Next, use the Media Library on the top left to access your files.
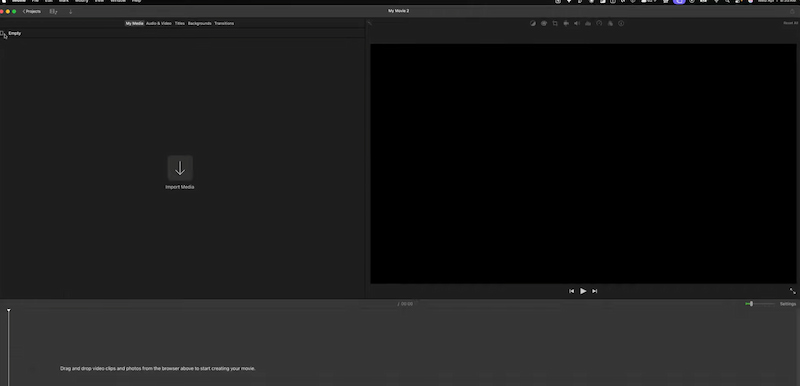
Step 2Import Media
Choose Import Media and add media files from your PC, external hard drive, or USB drive. Drag the media into the Timeline area of your project. Use Trim and other edit features in the Timeline to further customize your edit.
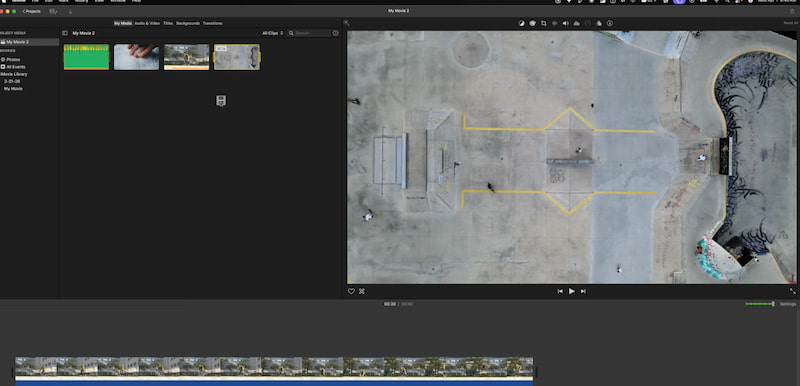
Step 3Edit and Trim Clips
You can now use Command + B to cut the video up using the playhead for very accurate cuts.
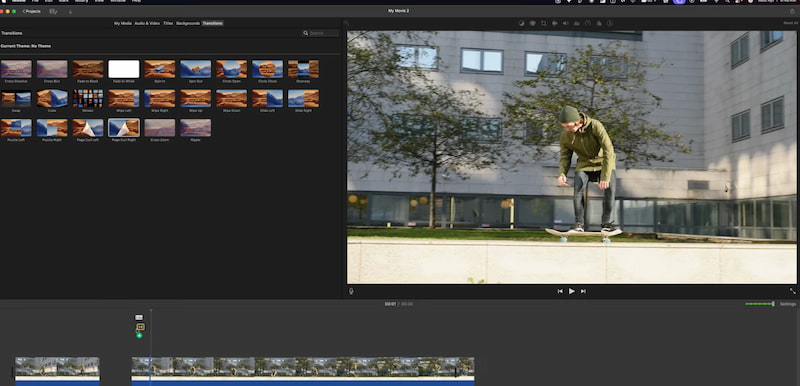
Step 4Add Transitions and Effects
You can create a professional-looking video by adding Transitions to it. In addition to creating a smooth transition, you can also use the Color tab to correct the color temperature for consistent lighting and natural skin tones.
Step 5Export Your Final Video
To complete the final editing step using iMovie on a Mac, click Share and then select either File to save the edited video directly to your computer.
Part 3. Tips to Make a Great Movie on iMovie
Regardless of whether you are using iMovie, Final Cut Pro, Avid Media Composer, Adobe Premiere Pro, or another software program, there are some universal strategies for creating more cohesive and professional results when producing videos on your computer:
1. Maintain consistent resolution and aspect ratio
Maintaining consistent settings for your video will ensure it has a professional appearance and will prevent awkward framing problems. Ultimately, strong storytelling is much more valuable than fancy tools. Your viewers will remember your clearly told story, the even pacing of your video, and the good balance of your audio better than they will remember a video with lots of overused effects. In line with that, learning how to change the aspect ratio on iMovie is easy.
2. Plan your story before editing
This will allow you to outline the order in which the events of your story occur, and/or the most critical or memorable moments you wish to highlight, so that your video clips seem related and meaningful (rather than random).
3. Keep clips short and focused
Good editing helps keep the viewer's focus, helps control the pacing of the video, and prevents it from becoming too slow or too repetitive.
4. Use background music to enhance emotion, not overpower dialogue
The music should fit the mood of each segment of your video, but should not obscure your voice or other important sounds.
5. Avoid excessive transitions and effects
Too many visual effects can detract from the message of your video, and can make it appear cluttered (as opposed to polished).
Bonus: How to Make a Movie on a Mac Without iMovie
If you're searching for how to make a movie on a Mac without iMovie, you'll need another video editor that also provides ample editing options but isn't too difficult to learn. AVAide Video Converter is one reasonable option because it includes both video conversion and video editing functions in one very easy-to-use interface. AVAide has enough video editing features so that you can edit your films by importing numerous clips, organizing those clips in order, and then adding the editing effects you choose - all without having to use Apple's default (iMovie) software.
AVAide is able to edit videos in many formats besides MP4 and MOV. This means that you have access to additional formats such as MKV, AVI, FLV, WMV, etc. for footage you've recorded with various types of camera(s), your computer screen recorder, or after downloading files. In addition, if you're working with multiple format projects or a batch of videos, this will help save you time and reduce potential quality loss due to converting back and forth between formats repeatedly.
Here is a step-by-step procedure on how to make a movie with AVAide:
Step 1Install the Software
To start, click on the download button below to download the software.

FREE DOWNLOAD For Windows 7 or later
 Secure Download
FREE DOWNLOAD For Mac OS X 10.13 or later
Secure DownloadStep 2Upload Your Video
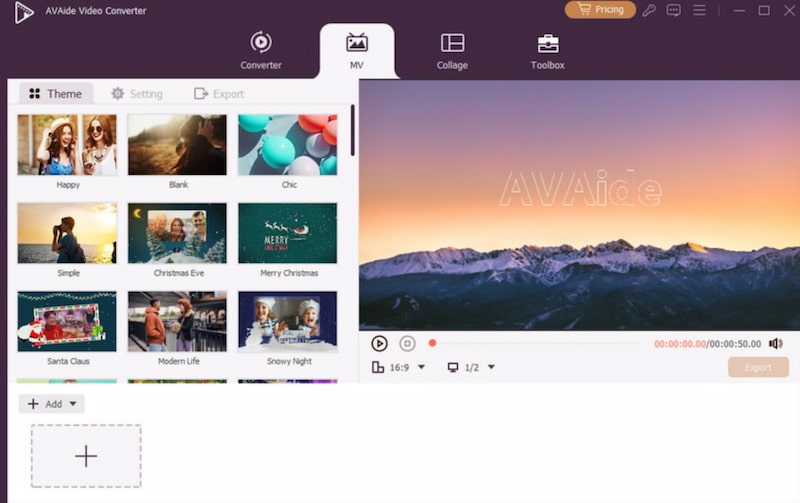
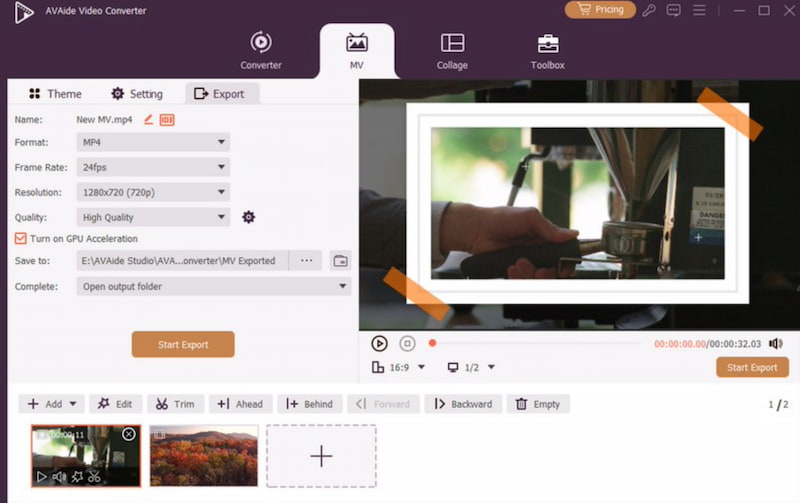
Next, after you have installed AVAide, click the MV button (to upload your video), then the (+) button to select the video you would like to edit with this outstanding editing software.
Step 3Select the Theme
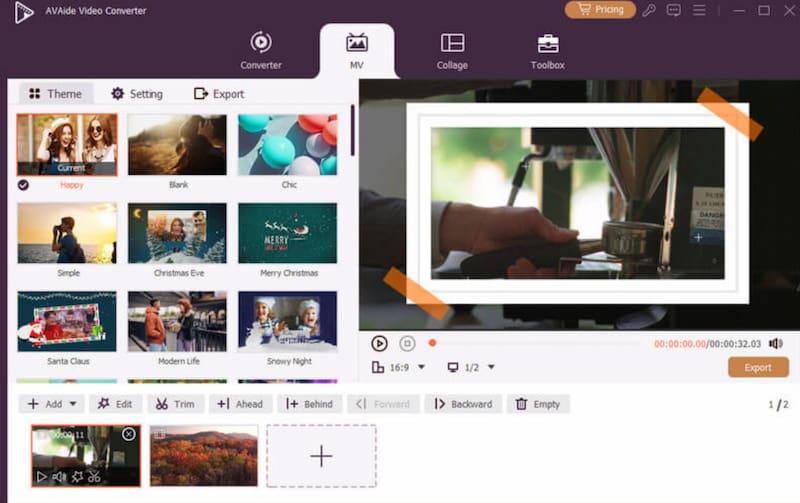
Once you have loaded your video, you may now select a theme for your video by selecting the Theme option from the menu bar and then browsing through the many options of articles available.
Step 4Add Background Music
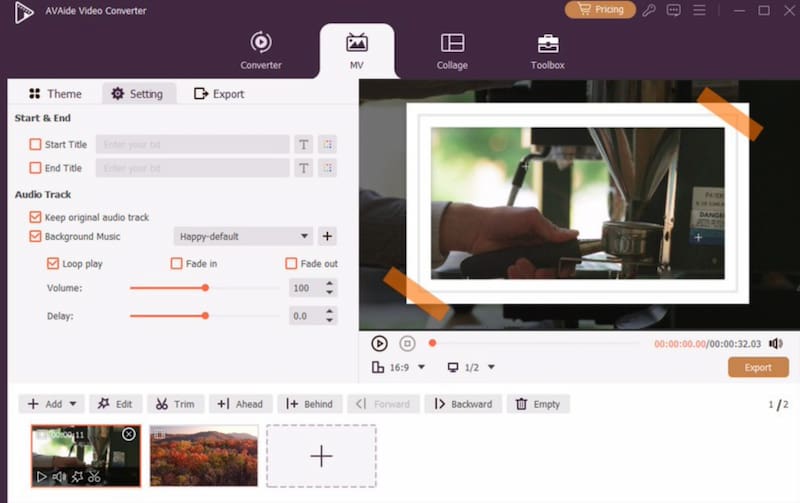
Selecting an additional audio option is easy; simply click on the Plus button to add audio to your video. In addition to adding background music, you can also adjust the volume and timing (delay).
Step 5Begin Exporting
Lastly, once you are ready to export your video, you will be able to do so using the software; in addition, you will be able to adjust the preset (s) and format of your video file.
If you are searching for a guide on how to make a good movie on iMovie, start with the basics. The iMovie for iPad has a very user-friendly and touch-friendly interface. iMovie for Mac has a much more precise interface and many more advanced tools that help create professional movies.
ABOUT THE AUTHOR

Your complete video toolbox that supports 350+ formats for conversion in lossless quality.