Vertical videos are now everywhere, from TikTok and Instagram Reels to YouTube Shorts. If you are an iMovie user, you might be curious about how iMovie vertical video editing works. Find out that here!
This post will teach you how to make vertical videos in iMovie on both iPhone/iPad and Mac. We will also share a great alternative that works not just on Mac but also on Windows, so that you can create vertical videos easily on both systems.
Part 1: Does iMovie Support Vertical Video
Yes, iMovie can support vertical video, but not in the same easy way it manages horizontal ones. The app uses the 16:9 format by default, so you will need to use simple workarounds to make your video look right without black bars.
In the following parts, you will learn the exact steps to make vertical videos on both iPhone/iPad and Mac in an easy way.
Part 2: How to Make Vertical Video in iMovie on iPhone/iPad
If you are trying to export or make iMovie vertical on iPhone or iPad, you might notice that the app does not support full portrait mode. It often shows your video in a square frame with black bars on each side. But do not worry; there is a simple way to fix that. You can still edit your video in iMovie and then make it full vertical using the Photos app.
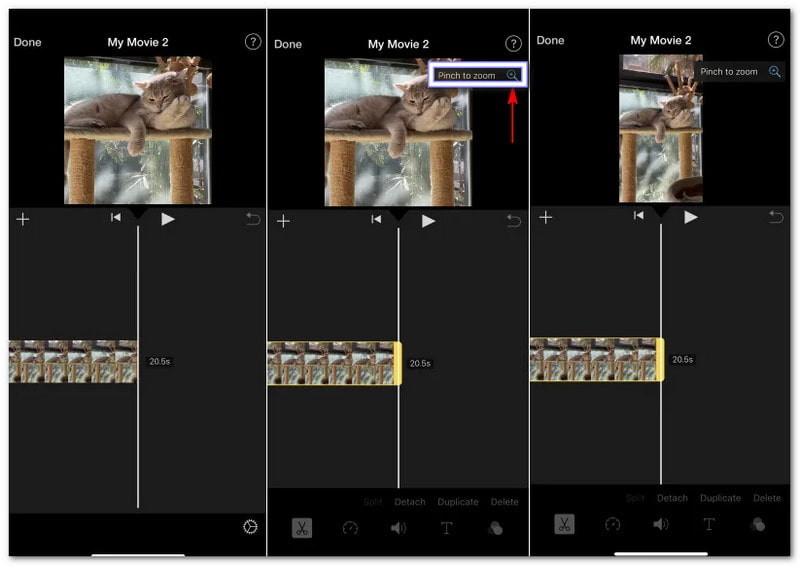
Step 1Open iMovie on your iPhone or iPad. Press Add to create a new movie. Choose Movie, then select the vertical video you want to edit from your gallery. After that, press Create Movie at the bottom of your screen.
Your video will open inside iMovie's editing window, but you will notice it looks cropped or square.
Step 2To fix that, tap on your video in the timeline to highlight it. Then, tap the Pinch to Zoom button in the top-right corner. Use two fingers to pinch or zoom out on your screen until the full vertical video fits properly.
It helps you bring back the video's original portrait ratio. Take your time to adjust it so that your video looks right and is not cut off.
Step 3Once your video looks vertical again, start editing it as you like. You can add titles, backgrounds, transitions, or filters. You can also adjust the sound or trim parts of the clip.
Once you are happy with your edit, press Done in the top-left corner. Then, tap Share and select Save Video to export it. The saved video might still have black bars on the sides, but that is easy to fix in the next step.
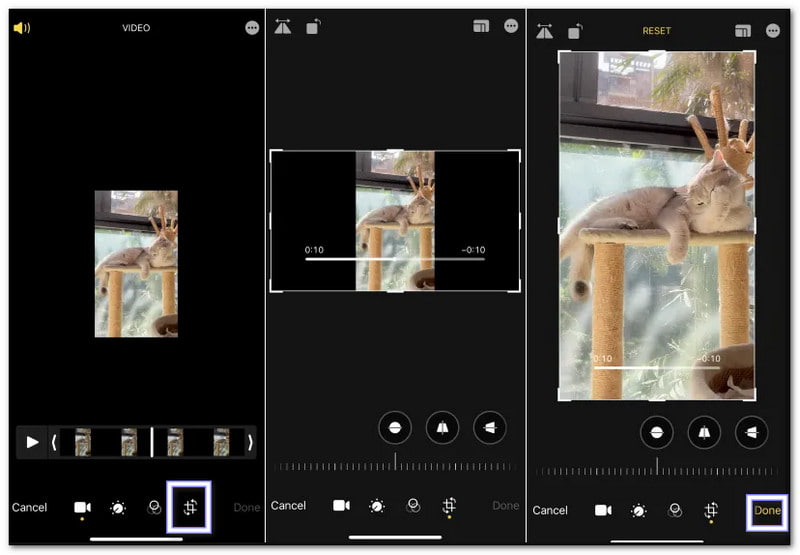
Step 4Go back to your home screen and open the Photos app. Find the video you just saved from iMovie. Tap Edit in the top-right corner. Then, press the Crop button at the bottom. You will see guides that let you crop out the unwanted black bars. You can drag the corners until only the vertical part of your video is left.
Step 5Once you are done cropping, tap Done to save your new version. Now, your video is fully vertical: no black bars, no sideways frame.
Part 3: How to Make Vertical Video in iMovie on Mac
If you want to know how to make iMovie vertical or change the aspect ratio on your Mac, there is a special feature that can help. It is called App Preview, and it is often overlooked. But the good news is, you can also use it to make vertical videos easily, without black bars. It gives you a clean portrait setup so your video looks great on phones and social media.
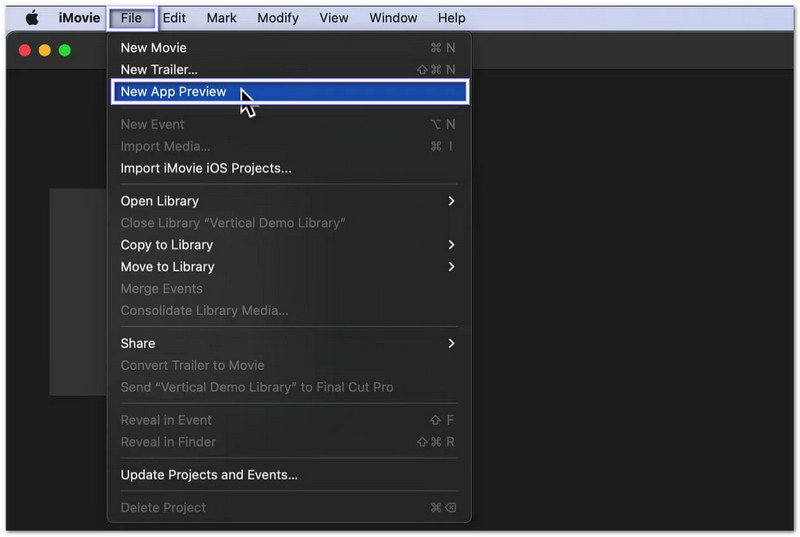
Step 1Open iMovie on your Mac. At the top menu bar, click File, then choose New App Preview. It is where you will set up your vertical project.
The App Preview window gives you the portrait mode layout, which is perfect for vertical videos. It is the easiest way to start editing without needing to rotate or crop your clips later.
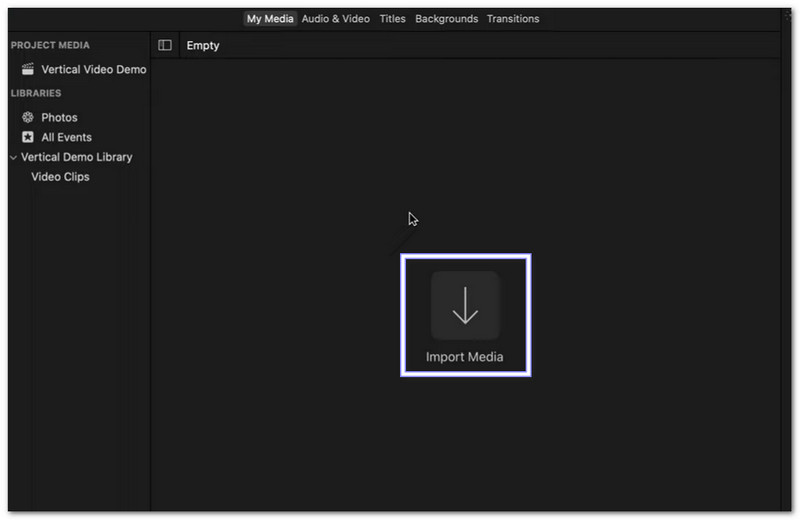
Step 2After creating the App Preview project, you can now import your vertical video. Click the Import Media button or drag your video file straight into iMovie.
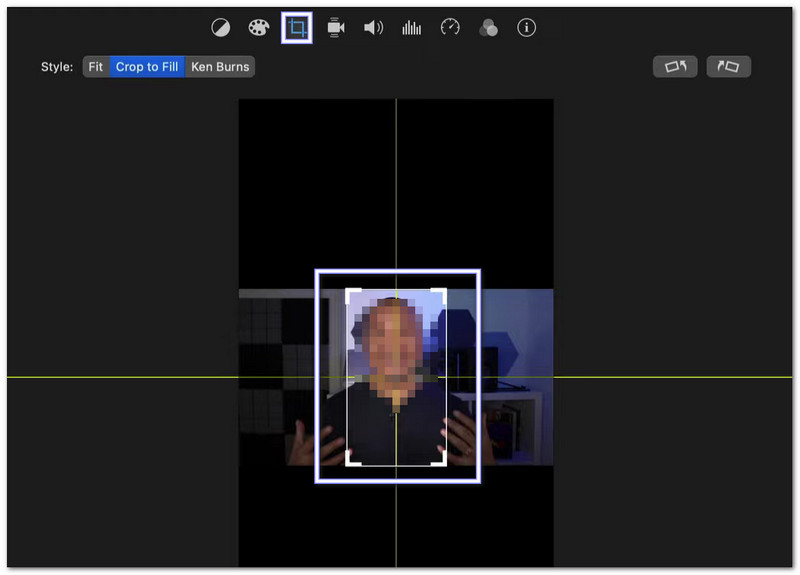
Once imported, drag your clip into the timeline at the bottom. You will notice that the video fits nicely into the portrait frame without any black borders on the sides.
Step 3Can iMovie edit vertical video? Yes! You can do all your usual edits just like you would with a landscape video. Add titles, music, filters, or transitions. You can also adjust color, speed, or use Ken Burns zoom to add motion.
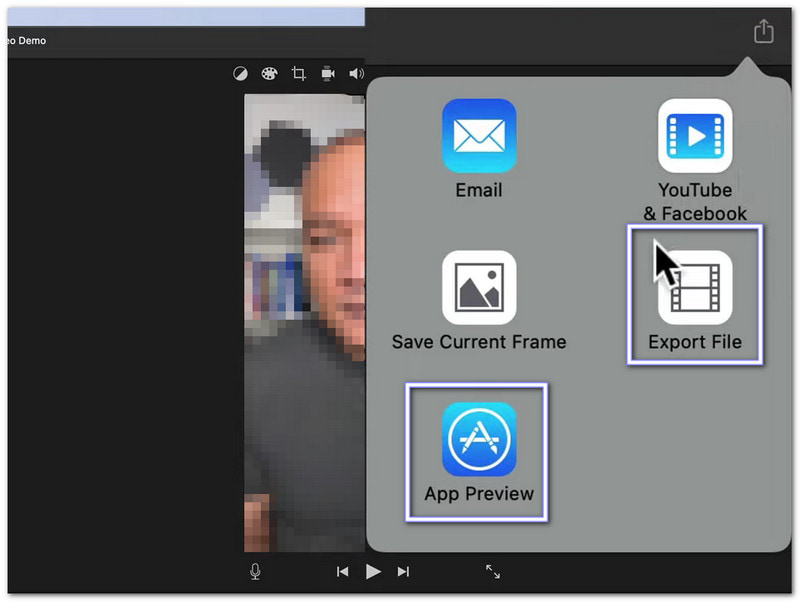
Step 4Once you finish editing, click the Share button in the top-right corner of iMovie. From the options, choose App Preview or Export File. If you want to keep the best clarity, pick App Preview. The Export File option sometimes lowers the clarity, especially for HD clips, so it is better to use App Preview to keep your video clear and sharp.
Step 5After exporting, your vertical video is ready to use. You can find it in your chosen output folder.
Part 4: The Best iMovie Alternative to Make Vertical Video on Windows and Mac
It takes extra steps for iMovie vertical video editing to work. That is why AVAide Video Converter is the best alternative for both Windows and Mac users. It lets you turn a horizontal video to vertical or create a vertical video right away without hassle.
The program includes many easy-to-use editing tools and smart AI features to enhance your video clarity. It also supports full HD 1080p and even 4K vertical videos, giving you clear and professional results.
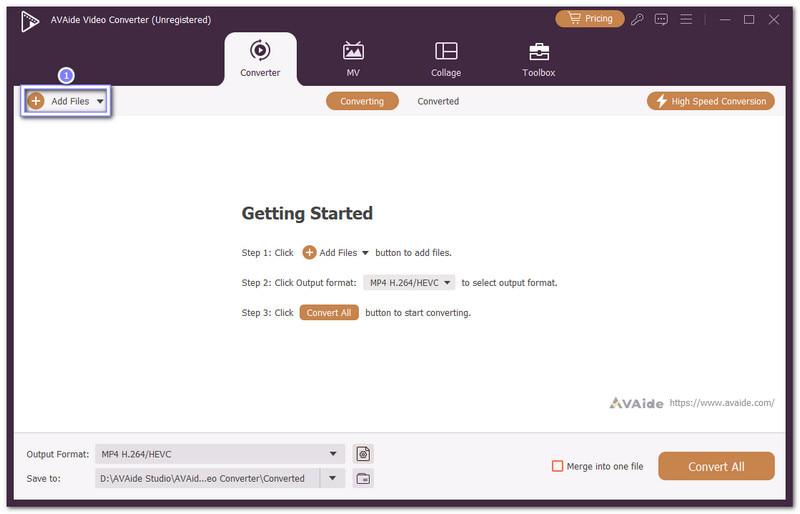
Step 1Launch AVAide Video Converter on your computer once downloaded and installed.

FREE DOWNLOAD For Windows 7 or later
 Secure Download
FREE DOWNLOAD For Mac OS X 10.13 or later
Secure DownloadStep 2Hit Add Files to import the video you want to edit. Once added, open the Edit button that looks like a magic wand.
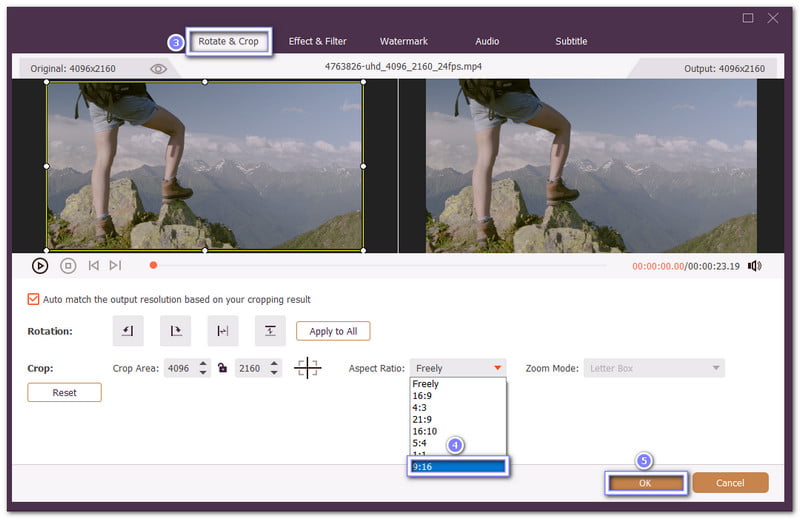
Step 3Head to the Rotate & Crop tab. Under Aspect Ratio, select 9:16 (Portrait) to change your video to a vertical orientation. You can resize the cropping box to keep the main subject centered. Once finished, press OK to save the changes.
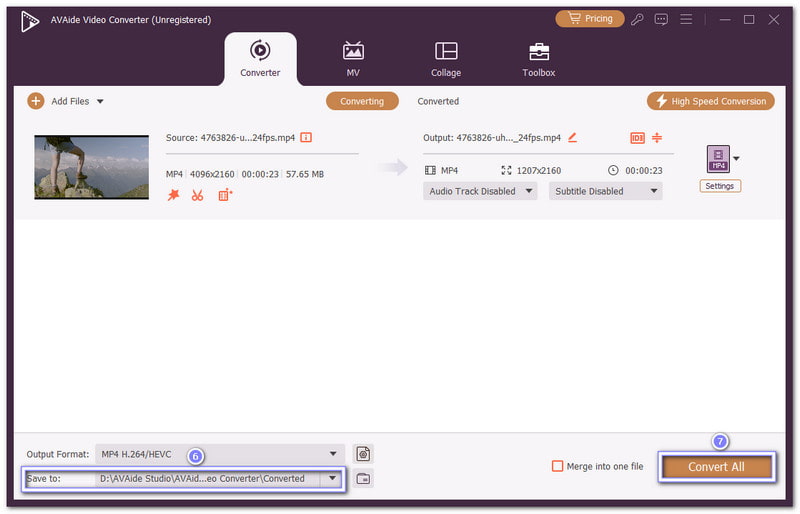
Step 4Back on the main screen, choose your output format, like MP4, which works well for most social media platforms. Pick a destination folder, then click Convert All to export your vertical video.
iMovie is only available for Mac, which can be limiting if you use Windows. For that reason, you can also consider AVAide Video Converter as your iMovie for Windows. It has the same editing tools that iMovie offers, but even more. You can trim, crop, add filters, and enhance your video with AI tools in one place.
The steps on how to make iMovie vertical video on iPhone/iPad and Mac can be quite long since it still depends on other tools to finish the process. That is why using AVAide Video Converter is a better choice. It lets you create and edit vertical videos in one place without switching between apps.
Your complete video toolbox that supports 350+ formats for conversion in lossless quality.