Editing videos in iMovie gives you a smooth experience. That is why many Apple users use iMovie yet still face issues with .mov files or unplayable projects. The truth is, Apple loves MOV and ProRes video files. But when it comes to cross-platform playback, file size efficiency, and web uploading, MP4 remains the undisputed gold standard. Stick around to learn how to export iMovie to MP4 in this guide. You'll also learn some troubleshooting for export issues.
Part 1. How to Export iMovie to MP4 on Mac
Step 1Open iMovie on your Mac computer and launch the project you want to convert to MP4. Then, add the video from the library to the timeline.
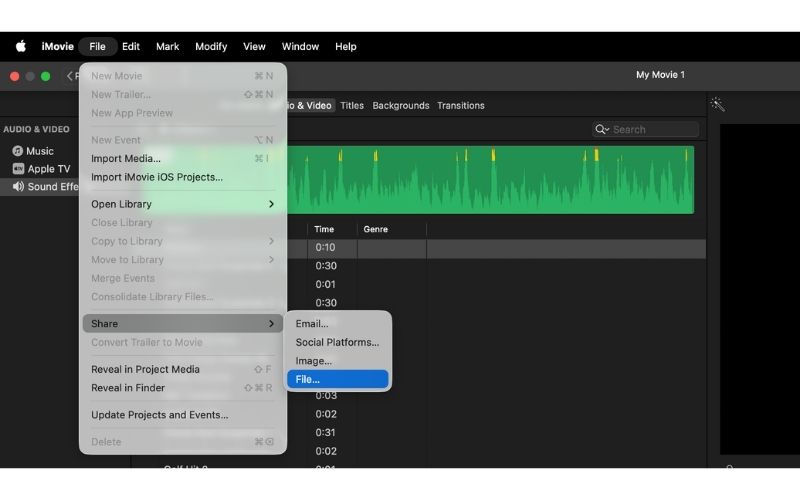
Step 2Click the Share button in the top-right corner of the window. It looks like a square symbol with an upward-pointing arrow. Choose Export File from the selection to access the export settings. You can access the same settings by going to File > Share > File…
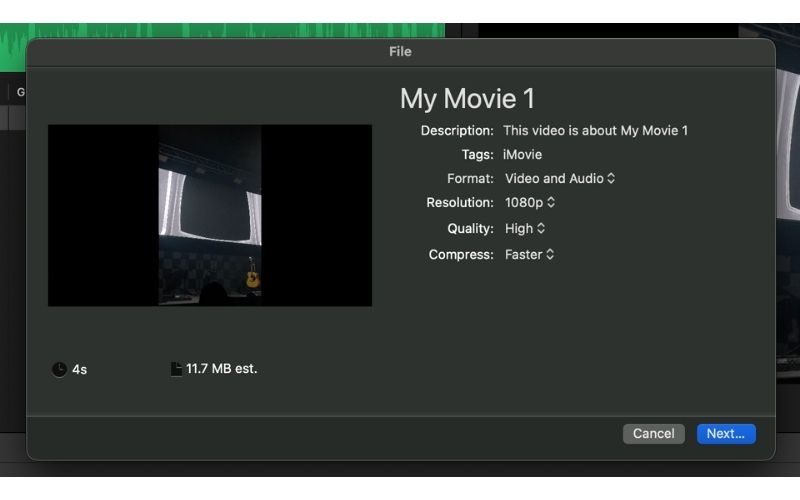
Step 3Now, adjust the Description, Tags, Format, Resolution, Quality, and Compress. These are the properties commonly used to export a file. After that, adjust the Format to Video and Audio, the Resolution to 1080p, the Quality to High, and Compress to Faster.
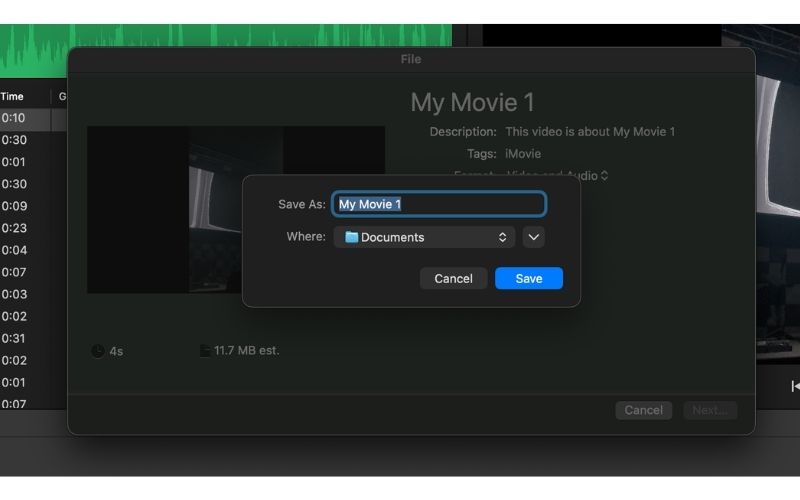
Step 4Hit the Next button at the bottom of the window, give your file a name, and choose a location to save the final video. Finally, hit Save to render the file.
Export Settings Explained & Custom Export Settings (Advanced)
You are presented with several options when the export window appears. Unexpected file format or massive file size typically stems from the wrong combination of settings. Here is the explanation of each setting provided earlier:
- Format: The video and audio options are the standard settings for video output. That is why projects that are exported as video use this format.
- Resolution: The video resolution depends on the highest resolution in the timeline. It controls the video frame size, and editors can set videos to 720p, 1080p, or up to 4K, depending on the video recorded. The higher the resolution, the sharper the image, and the larger the file size.
- Compress: There are two options for the Compress setting. One is Faster, which uses quick single-pass encoding. If you will use the video for quick uploads, it's better to use the faster compression option. Another is Better Quality, which takes longer to render. Unlike Faster Compression, it analyzes the video in multiple passes to achieve clearer, smoother visuals.
- Custom Export Settings (Advanced): One of the important controls editors are granted with using iMovie is Quality. This setting comes with four options, including Low/Medium/High, Custom, and Best (ProRes). Choosing Low/Medium/High quality uses H.264 compression, which makes it highly compatible with Windows, social media, and the web. In the same way, Custom retains the MP4 format for the video but with additional settings. It unlocks a manual bitrate slider. This option enables editors to reduce the file size, which is perfect for email or platform upload limits.
With Best (ProRes) quality, exports are in Raw Apple Pro Resolution format. This format produces uncompressed, massive files for professional mastering. This format is 5x to 10x larger than a typical MP4 video. In addition, it may not play on non-native Apple devices. Therefore, to ensure MP4 video output in iMovie, it is recommended to use Custom or High quality.
Part 2. How to Export iMovie to MP4 on iPhone
There are also ways to export MP4 from iMovie using just your phone. Instead of switching to your Mac, you can conveniently save MP4 videos right at your fingertips. Take a look at the guide below:
Step 1The first step is to download the iMovie app from the App Store if you haven't already. Once installed, have the app launched and open a project that contains your video.
Step 2You may further improve the project by tapping the Edit button or playing the video to preview where you left off.
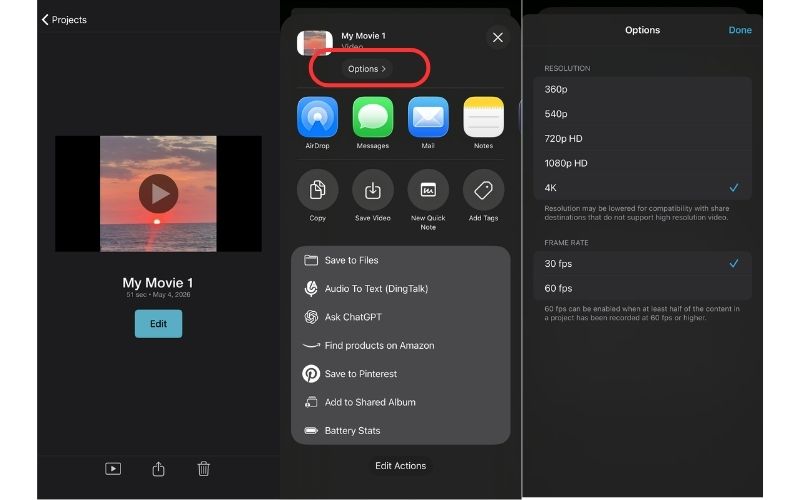
Step 3When satisfied with the results, tap the Share button at the bottom-middle part of your screen. Then, select Save or Share Video to additional settings.
Step 4Next, tap Options and adjust the Resolution according to your preference. You may also choose between 30 fps or 60 fps for the Frame Rate. After that, tap Done at the top-right corner.
Step 5To save the final output, tap Save Video to save it to your Gallery, or tap Save to Files to save it to your Files folder. You just have turned iMovie output into MP4.
iPhone Export Options
Before exporting, you can customize some export options. Take a look at the settings below:
- Type: iMovie allows users to save projects ready to play on any player, just like you would normally do with a video. In addition, the project can be saved as an editable video for further enhancement elsewhere.
- Resolution: The resolution can be customized, allowing users to choose between 720p, 1080p, or 4K to increase the sharpness.
- Format: What's good about iMovie on mobile is that it automatically packages H.264 video into a standard MP4/MOV container. That means the video is playable on almost all platforms. To convert iMovie to MP4 on iPhone, save the video as usual.
- Saving to Files vs. Photos: When exporting the video, you can choose where the video is saved. Select the Save Video option if you wish to use it for quick uploads on social media networking sites. Also, saving to Files will be best for organizing folders, attaching to emails, or transferring to a PC or Google Drive. That is how to turn an iMovie into an MP4 on an iPhone.
Part 3. What If You're on Windows?
1. Can You Export an iMovie to MP4 on Windows?
iMovie is Apple-exclusive software. You cannot run iMovie on Windows. But you can export the project on a Mac, iPhone, or iPad first, then transfer the MP4 file to your Windows PC.
2. How to Transfer iMovie Exports to Windows?
Here are some effective tools that will help you export iMovie videos using your Windows computer:
- Cloud Services
- iCloud Drive
- AirDrop / Email
- USB Cable
3. How to Convert iMovie Videos to MP4 on Windows?
While iMovie does not have a Windows counterpart, Windows users may use iMovie or MP4 alternatives, such as AVAide Video Converter. This tool offers a simple yet effective way to change your videos' formats. Also, the program is very compatible with Mac. Therefore, you may convert any video to MP4 in no time. Additionally, this tool can handle batch processing, allowing you to convert an entire folder of iMovie videos to MP4 at once.
Step 1Get the program by clicking the Free Download button. Next, install the app by following the setup instructions. After setting up, launch the tool on your computer.

FREE DOWNLOAD For Windows 7 or later
 Secure Download
FREE DOWNLOAD For Mac OS X 10.13 or later
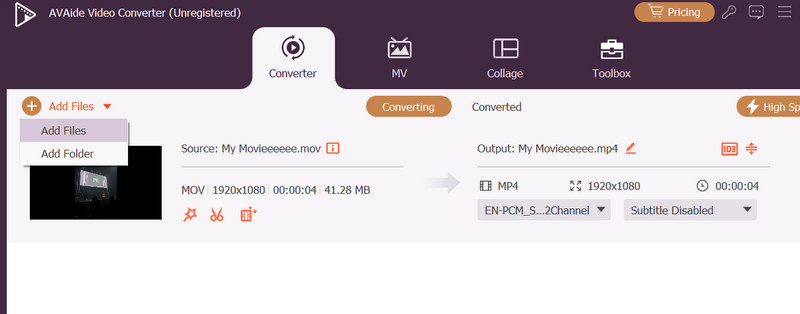
Secure DownloadStep 2Add the iMovie video by clicking the Add Files button on the interface. From your file explorer, select the video you want to export as MP4.
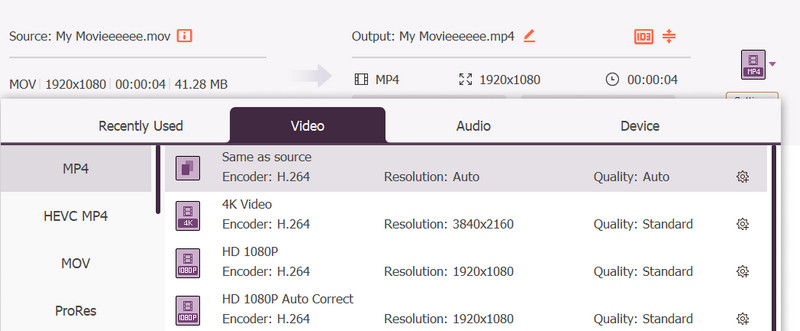
Step 3Now, access the Format settings and select MP4 as the output format. From the selection, you can also choose the format and resolution that best suit your needs.
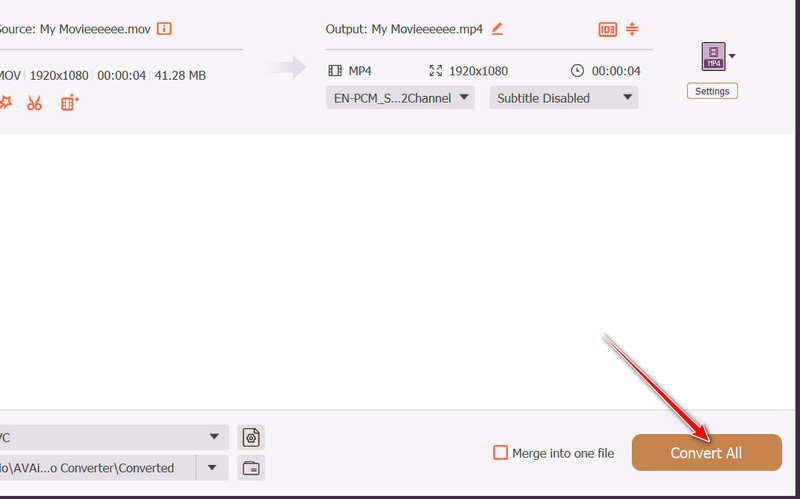
Step 4Click the Convert All button in the bottom-right corner of the interface to save the final video. There is much more to choose from if you need an alternative to iMovie on Windows.
Part 4. Troubleshooting Common Export Issues
When exporting with iMovie projects, you may run into some problems. With that, you may employ these simple fixes to solve common problems.
1. Export option is grayed out
The export option is usually grayed out when a track or clip is highlighted. There are also instances where iMovie is still rendering background effects, which could also be the possible culprit. To solve this, wait a little while if you notice that iMovie is still loading or rendering background tasks. Also, you can click an empty gray area in the timeline to clear any highlights. If these did not work, try closing and reopening.
2. Exported video is low quality
When the exported video is too low, the export resolution is set too low. Make sure Resolution is set to 1080p or 4K in the export window to avoid running into the same issue. You may also change the quality to High and Compress to Better Quality. But at some point, format can be a factor. That is why some users convert MP4 to MOV back for this specific reason and play them on a specific player or platform.
3. Cannot find the exported file
If you cannot find the exported file, it may still be processing or have been saved to a default folder you didn't intend to use. You may press Cmd + Space to Spotlight and locate the export video by typing the exact name of your video.
4. The file is too large
This issue is common when the device you're using is out of storage, or there are special characters in the file name. To avoid running into the same issue, remove special characters in the names of the files and projects. Symbols, including #, / , : , , * , or ? must be omitted. Also, free up some disk space to ensure there is enough space for the exported file.
5. iMovie says "Export Failed"
One of the reasons the file is too large is that you chose 4K resolution and 60 fps, or accidentally selected the Best (ProRes) quality setting. To solve this issue, always ensure that the Quality is set to High, not Best (ProRes). You may also drop the resolution from 4K to 1080p to shrink the file size. Additionally, setting the quality to Custom lets you reduce the file size by dragging the bitrate slider.
The process takes less than a minute if you are looking for how to convert iMovie to MP4 on both Mac and iPhone. There is no secret; it's all about choosing the right quality so Apple doesn't default your files to heavy ProRes or MOV formats.
ABOUT THE AUTHOR

Your complete video toolbox that supports 350+ formats for conversion in lossless quality.