One of the biggest challenges during post-production is when the audio and video tracks are out of sync. In Adobe Premiere Pro, the problem becomes essential when working with several clips or different audio recordings that do not sync with the video accurately.
Fortunately, there is good news here: if you comprehend how to sync audio and video in Premiere Pro properly, you will save your time and energy and guarantee your project will look and sound professional, from manual and automated methods within the program to useful tips and steps for remedying the most persistent sync problems one might encounter.
Part 1: Learn How to Sync Audio and Video in Premiere in the Merge Clips Method
Merge Clips allows one to merge a video clip with an audio clip into a merged clip that will automatically become in sync with the two constituent parts. There are some common points, such as audio waves when the external audio syncs with the video's built-in audio, or it might sync the vids based on time code or sometimes even with set marker points of the two. This thereby allows the desired video to sync with the external audio without doing it manually throughout the video. Realize how to sync audio and video in Premiere Pro using this first method;
Step 1Go to Tools > Project window, where you will find the video and audio you want to merge. To merge selected clips, right-click on them and select merge clips. If you like, you can rename the new merged clip.
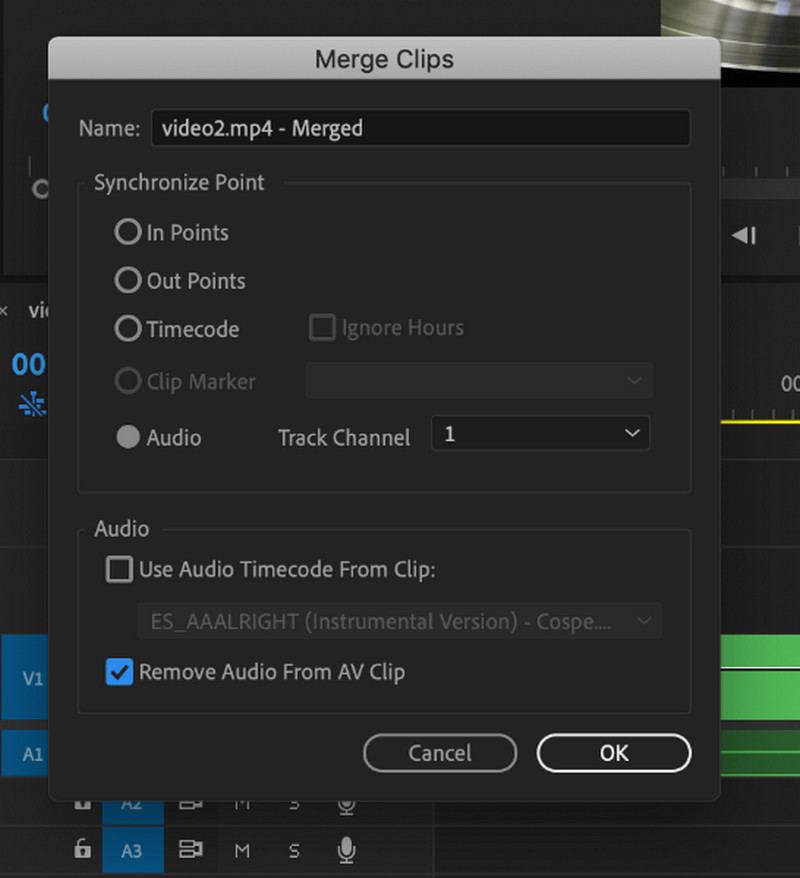
Step 2Inside the Merge Clips dialog box, pick the Track Channel based on your input amount, usually 1. Uncheck the Remove Audio from the AV Clip check box so that all the camera audio is removed and the external audio is used. Now, you can select OK to create a new clip, and simultaneously, the clip will open in different players.
Step 3Select the newly merged clip with the help of your timeline in the Project panel. And clicking on the modify option. The subtype is Audio Channels. Decrease the count of Audio Clips from 2 to 1, ensuring that only one channel has been selected. Click OK to save.
Step 4Drag the clips merged into the timeline from the project panel offered on the screen. At this stage, you can change, delete and crop it just like you did while addressing other media.
Part 2: Use Synchronize in Premiere to Sync Audio and Video
Synchronize in Adobe Premiere Pro is the technique of syncing clips into a sequence primarily matching by audio without creating a new clip. It is very useful with external microphone recordings for speech-to-voice-over videos that are not exactly related to key frame-matched audio and video but require perfectly matched clip segments. Here is an optimized guide toward Premiere Pro sync audio and video in making use of this feature:
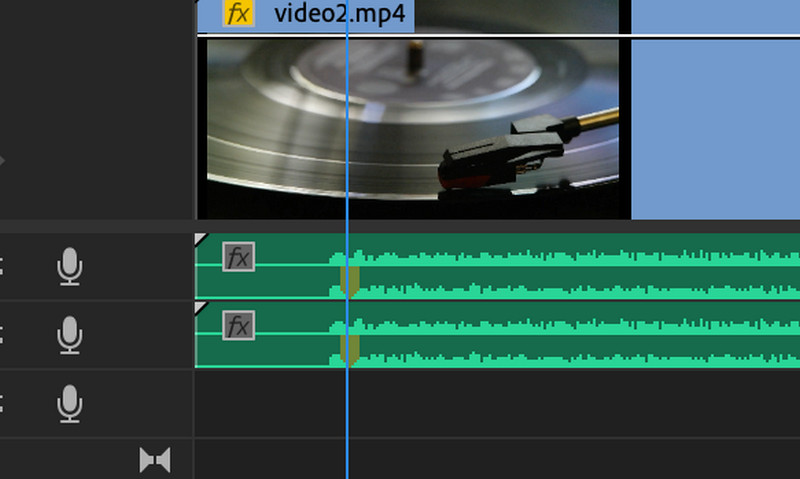
Step 1To work with multiple video or audio files, drag your video and the audio files on the timeline window but on different tracks. Ensure that the video and the external audio are on two tracks, with the reference audio distinguishable.
Step 2Make sure the video and the audio you want to lock are selected. Select the required data section, right-click it, and select Synchronize from the drop-down list.
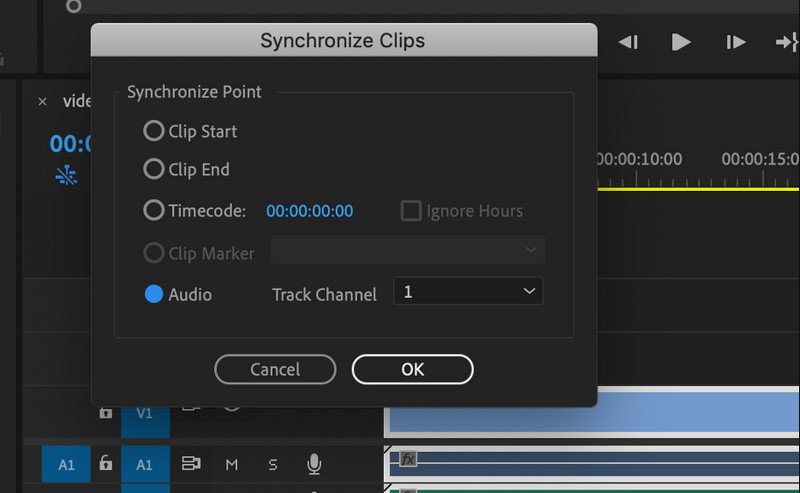
Step 3On the Synchronize Clips window, choose Audio to match the start of the blue markers with the corresponding waveforms of the clips. Select the track with reference audio and press OK to align the clips.
Step 4Once you finish the capturing,g, repeat the clips several times and ensure the synchronization is perfect. If the sync is correct, click AV clip and select unlink to remove the video from its reference audio track. When they no longer need to be heard in the video, highlight the sync section and right-click the Link on the video and audio.
Part 3: How to Manually Sync Audio and Video in Premiere
If the automatic version does not work well, we suggest you do it manually. Here are the steps on how Adobe Premiere Pro syncs audio and video;
Step 1Place the video in the timeline and then again import the two sound clips to have one for each track.
Step 2Go through the audio channel for the two files; stop and look for a specific sound, like clap, which gives a peak on the screen. Synchronize the two clips and mark the point by choosing both and hitting M.
Step 3Try to place both clips at a point defined by the sync markers on the timeline. Review the clips to ensure you have the correct audio when the video is played.
Step 4After synchronization, go to the Unlink option in the right-click menu and unlink the AV clip to the reference audio. Next, remove the reference audio, select the video and the respective audio clips side by side, and right-click on the clips in the timeline to link them. If you try to add MKV because it is the file you want to sync, and it keeps showing MKV unsupported on Premiere Pro, you will need to troubleshoot the tool.
Part 4: The Best Premiere Alternative to Sync Audio and Video
As you may see, the Premiere Pro syncs audio to video and offers you three methods, so managing to use it is surely a great advantage. Thus, the product costs a fortune, so many users are looking for an alternative to solve the problem of audio and video being unsynced. With AVAide Video Converter, the syncing problem can be solved much cheaper but with the same result as the Premiere Pro. Moreover, if you are a beginner who does not want to go to the intricacies of the Adobe tool, then use the steps that we have mentioned below;
Step 1Get the app on your Windows or Mac by choosing the appropriate download button here. Then, install the program to your system and run it by clicking it twice or Start Now.

FREE DOWNLOAD For Windows 7 or later
 Secure Download
FREE DOWNLOAD For Mac OS X 10.13 or later
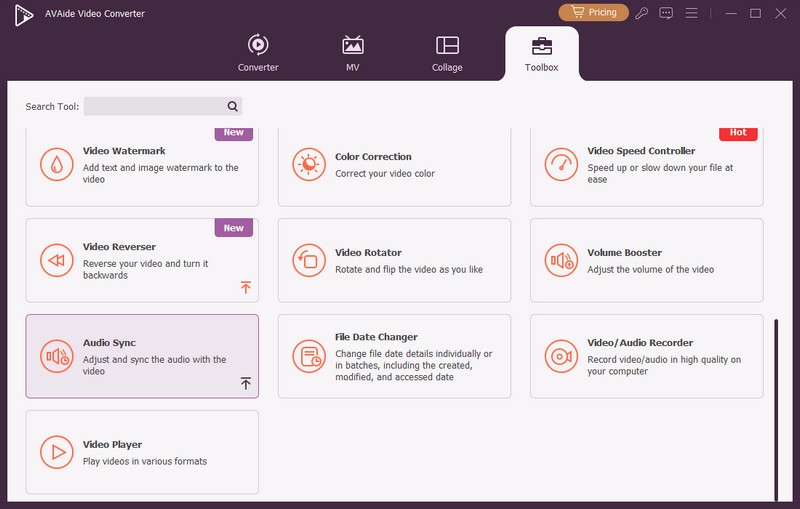
Secure DownloadStep 2Afterward, go to More Tools and click the Audio from the options that appear to open the app's Audio Sync feature.
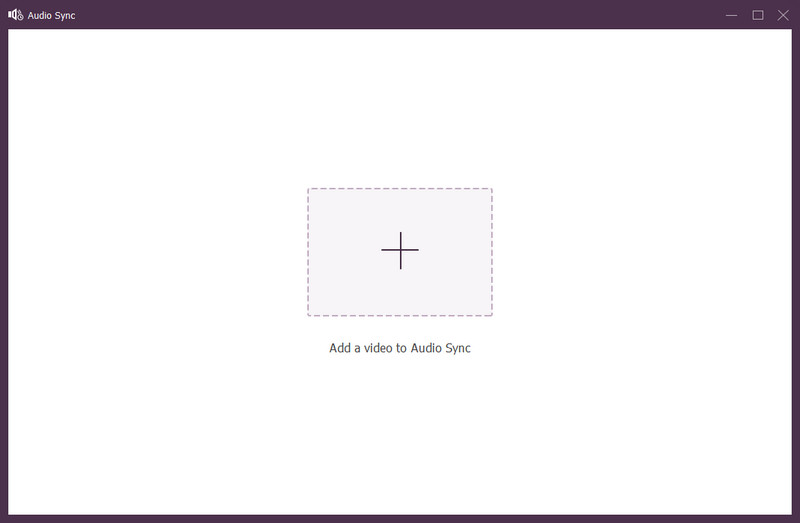
Step 3Next, click the + button to import the unsynced file from the file folder that appears on your screen. Then, click it and Open.
Step 4Drag the slider button to the left or right to adjust the audio delay and make it match the video.
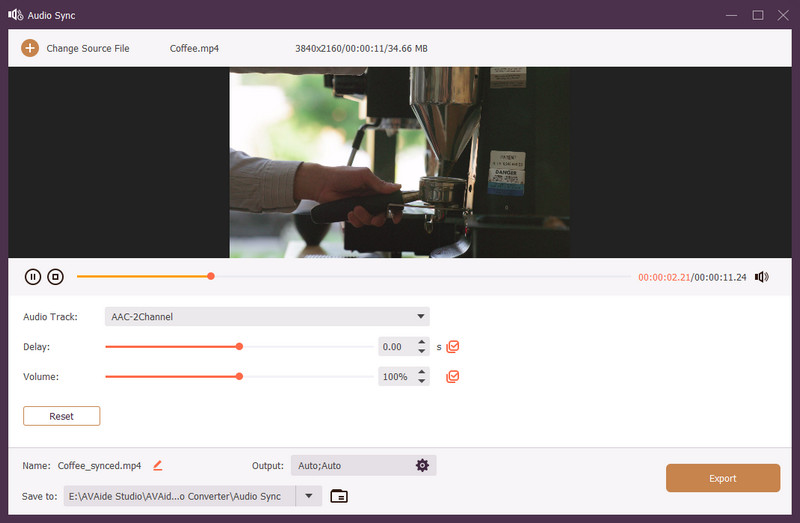
Step 5If you are pleased with the result, click Export to save the fixed audio and video that are out of sync.
Syncing audio and video in Premiere can be done with the help of the tutorial that we have mentioned here. If you feel the steps could be clearer, we suggest you use an alternative to sync your video and audio, but the result remains amazing.
Your complete video toolbox that supports 350+ formats for conversion in lossless quality.