Video denoising is a necessary process that helps to remove noise from video footage. It is beneficial for videos shot in low-light conditions or with a high ISO setting, often resulting in a grainy or pixelated image. Removing this noise can improve the overall quality of the video and make it more visually appealing. Overall, video denoising is an essential tool for enhancing the quality and accuracy of video content. The main reason we created this article post is to give you solutions on how to denoise a video effectively. Please learn more about these solutions as we investigate their function and walkthroughs.
Part 1. The Difference Between Luminance and Chrominance Noise
Luminance noise primarily degrades sharpness and detail, while chrominance noise mainly compromises color purity. In practical noise reduction processing, chrominance noise is typically suppressed first to minimize impact on detail. Next is the detailed difference.
Luminance Noise: Appears as unevenly distributed grains or “snow” across the image, primarily affecting brightness information (black-and-white levels). It is most noticeable in dark areas and resembles film grain.
Chrominance Noise: Appears as unnatural colored specks or patches, primarily affecting color information. Commonly observed along red, green, or blue edges, or within shadow areas.
Part 2. Best Denoiser Software on PC
What is the best and most reliable method to denoise a video on your device? Use AVAide Video Converter. The video noise reduction feature primarily employs built-in AI optimization algorithms to intelligently identify and process random image noise, compression artifacts, and graininess caused by low-light conditions. It automatically balances sharpness and smoothness without significant loss of detail, reducing visual noise and color block artifacts to enhance overall clarity and visual stability.
AVAide Video Converter's video noise reduction feature primarily employs built-in AI optimization algorithms to intelligently identify and process random image noise, compression artifacts, and graininess caused by low-light conditions. It automatically balances sharpness and smoothness without significant loss of detail, reducing visual noise and color block artifacts to enhance overall clarity and visual stability.
- Eliminate visual noise to deliver a cleaner, higher-quality output.
- Enhance video clarity, resolution, format, and overall quality after noise reduction.
- Automatically keep audio and video perfectly synchronized—no manual adjustment needed.
- Export in 300+ formats for broad compatibility with mainstream media platforms.

 Secure Download
Step 1Get AVAide Video Converter
Begin downloading AVAide Video Converter on your device by clicking the download button above this step. It will give you the file installer of the app, which will help you get the tool efficiently. Run on your device and finalize its prompts by enabling different permissions and conditions.
Step 2Import Your Video
What's next is to launch the app on your computer and access its main interface. Hit the Toolbox option to give you the list of advanced features. Locate the Video Enhancer option to import your files.

Step 3Denoise Your Video
Once your video is imported, choose the Remove Video Noise to denoise your video. You can pick the Preview option to check and see the result even if you haven't performed the process yet. Afterward, hit the Enhance option to finalize the process. You can go to the tool's output folder and preview the output file.


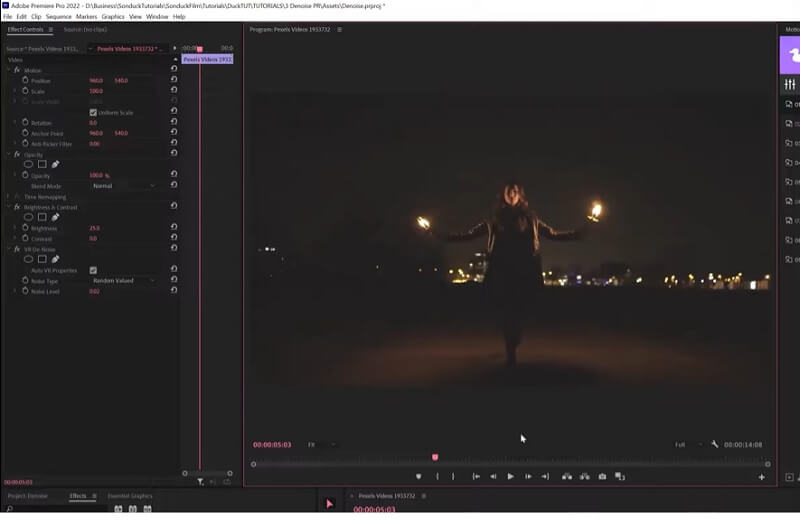
Part 3. Denoise Video in Adobe Premiere
If you're looking for professional-grade video editing software to denoise your video, Adobe Premiere Pro is a great option. This software is widely used by specialists in film and other similar industries and provides advanced video editing functions, including the ability to denoise your video. You can use the built-in Reduce Noise effect to denoise your video in Adobe Premiere Pro.
Step 1Import your video into Adobe Premiere Pro and drag it onto the timeline panel. Go to the Effects panel and search for Reduce Noise. Drag the effect onto your video clip in the timeline.
Step 2In the Effect Controls, modify the settings for the Reduce Noise effect to your liking. You can adjust parameters such as the amount of noise reduction, the size of the noise reduction, and the sharpness of the video.
Step 3Preview your video to see how the Reduce Noise effect has affected your footage. If you're happy with the results, hit the Export option to save your video.
Part 4. How to Denoise Video on Mobile
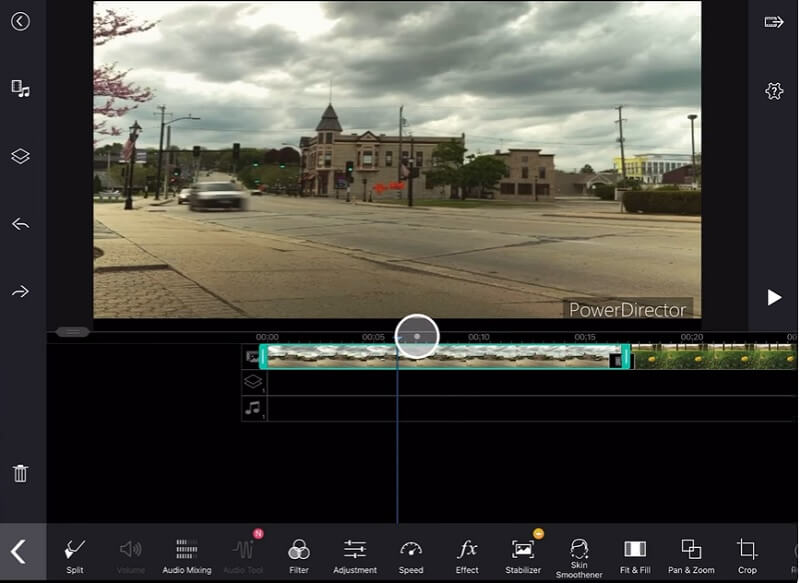
1. PowerDirector
PowerDirector is an awesome video editing software that provides a range of functions to enhance your video. Whether you want to adjust the brightness and contrast, add special effects, or improve the audio quality of your video, PowerDirector has got you covered. The application comes with a video stabilizer, which can remove shaky and grainy videos and stabilize them in an acceptable outcome. You can check the steps below on how to use this app on your Android devices.
Step 1 Install PowerDirector on your Google Play Store to acquire the tool. Open it on your Android device, tap on the Create a New Project option, and select an aspect ratio. You will be able to see the entire videos saved on your Android device. Import your video into PowerDirector and drag it onto the timeline panel.
Step 2Select the Edit icon and select the desired effects you wish to apply to your video. You can pick from a range of effects, such as color correction, stabilization, and audio enhancement. Apply the effects to your video by tapping on the effect and adjusting the settings for each effect to your liking.
Step 3You can modify parameters such as brightness, contrast, and more, as well as the volume level and audio quality. Preview your video to see how the effects have affected your footage. If you're happy with the results, tap on the Produce option to save your video.
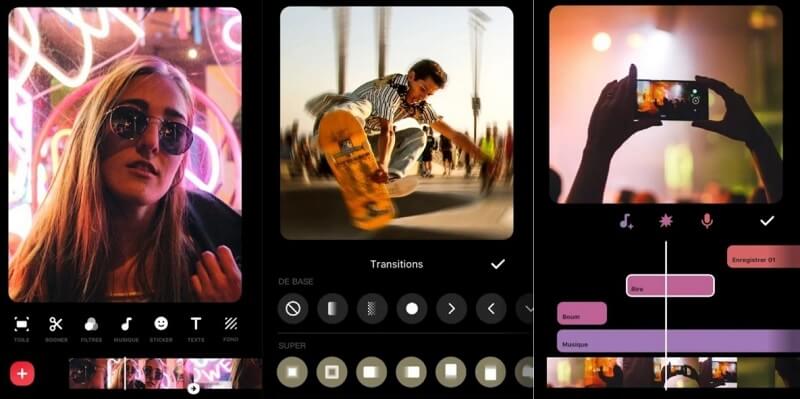
2. InShot
When editing grainy videos, InShot can be a great tool. One way to improve the quality of your footage is to adjust the brightness and contrast levels. Additionally, InShot offers a variety of filters that can help reduce the formation of noise and grain. It can also try to crop the footage or zoom in to remove some grainy areas.
Step 1Install the InShot on your App Store and launch the tool on your iPhone. On its interface, hit the Video option. Then, the entire video files listed on your Photos app will be prompted on your screen.
Step 2Select the file you want to enhance and click the Check icon. You will be prompted on the main editing panel of InShot. Go to the Filters option and hit the Adjust menu to locate different parameters to enhance or denoise your video.
Step 3Modify the brightness, contrast, and sharpness of the video effectively. If you are satisfied with the result, you can preview the file and play it on the timeline panel. Hit the Save icon to export the file and save the changes.
Part 5. FAQs About Video Denoise
Why is denoising a video necessary?
Denoise video is necessary because it can significantly improve the overall quality of a video. Removing unwanted noise makes the footage more precise and visually appealing. This is especially important for professional videos, where quality is paramount.
What are the benefits of denoising a video?
The benefits of denoise video include improved visual quality, reduced visual artifacts, and a more professional-looking final product. Additionally, denoising can ensure that the video is suitable for various platforms and devices, as it can help optimize the video for different viewing scenarios.
Does denoising a video significantly increase export time?
Yes. Denoising is computationally intensive and often increases export time by 2–5×, depending on the algorithm, resolution, and whether GPU acceleration is enabled.
How can I fix "dancing pixels" in dark areas of a video?
"Dancing pixels" are usually chrominance noise in shadows; reduce color noise, apply temporal denoising, and slightly lift shadows before denoising to stabilize the image.
Overall, denoising a video is necessary for most video enthusiasts to consider. With this method, you can enhance low-light videos and those that are low-quality footage. Luckily, the techniques for best denoise software for video are verified and easy to follow. Try them and check the fantastic results of the tools mentioned above.
Your complete video toolbox that supports 350+ formats for conversion in lossless quality.