Having those great quality videos saved on your Mac or any device can do you more harm than good. While you keep saving them, the next thing you know, they start eating up computer storage space. That is one of the reasons why our devices also start to work slow or feel laggy. Meanwhile, we know how important those videos are. That is why we will not ask you to upload them to the cloud. Instead, we will help you reduce the file size to keep them on your computer and enjoy viewing them offline. In this tutorial, you will learn to compress a video on iMovie without putting in so much effort.
Part 1: How to Compress a Video on iMovie on Mac
iMovie is a simple program that can help you accomplish basic and some advanced editing tasks. This program is dedicated to Apple devices, including Mac, iPad, and iPhone. You can access all its features without paying a dime as long as you are using an Apple device. With its recent updates, you can enjoy a variety of features, such as Magic Movie. This feature enables users to upload a bunch of video clips and automatically edit them into a single cohesive video. Furthermore, you can adjust the clips and customize them according to how you like them. Of course, you can decrease the video size, allowing you to insert your video files into PowerPoint or share them with others online without worrying about the size restriction policy. Without further ado, here are the steps on how to compress an iMovie video.
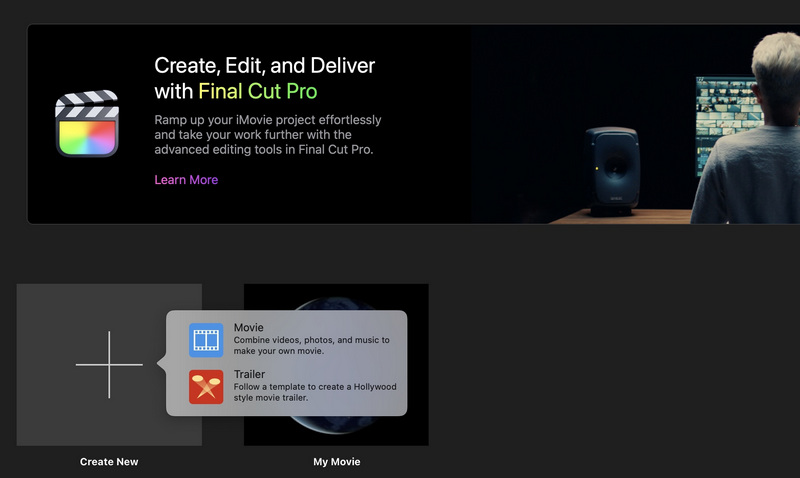
Step 1On your Mac, open iMovie and set it up. Look for the Projects menu, and click the + button in the upper left portion of the interface. Next, choose the Movie option, followed by naming the file.
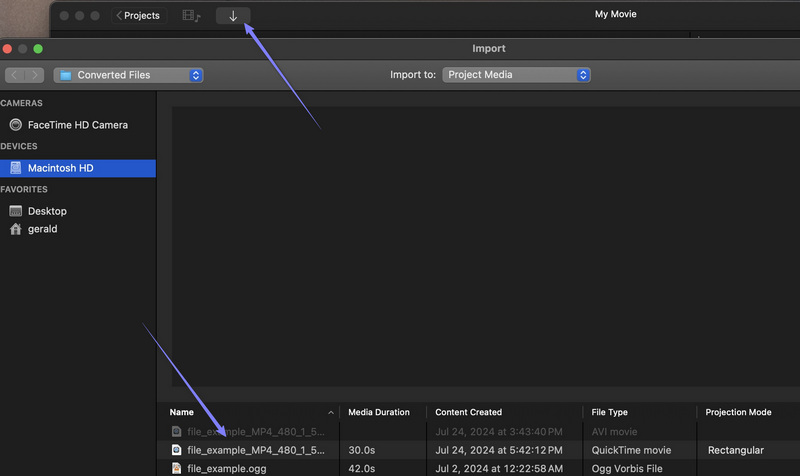
Step 2This time, click the downward-facing arrow in the upper left-hand corner and import your video file. After that, drag and release on the timeline until you see a yellow border appear.
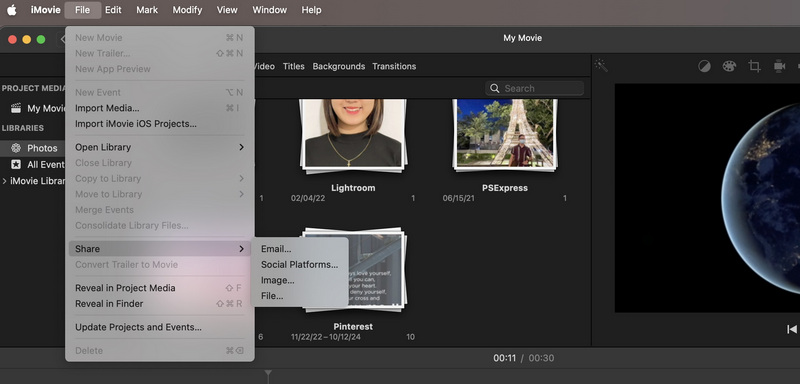
Step 3Next, click on the File from the main menu and hover your mouse over the Share option. Then, select the File option from the menu list.
Step 4A dialogue box should appear that lets you adjust the properties of the video. Now, lower the resolution and quality to make the video smaller. Notice that the file size is changing depending on the resolution and quality you are setting. Then, hit Next…, followed by the Save button.

Part 2: How to Compress a Video on iMovie on iPhone or iPad
iMovie also has a mobile app, available for both iPad and iPhone, so that you can edit videos easily on your device. The latest update adds the Magic Movie feature. In addition, iMovie offers Storyboards with various templates for video types like films, wellness, trips, celebrations, and more. When you select a template, it lists the different shots needed for that template and guides you through the process. Here is a guide on how to compress iMovie videos from your iPhone or iPad.
Step 1Make sure that you have the app on your mobile device first. If you haven't yet, you can get it from the App Store on your iPhone or iPad. Next, launch it on your device.
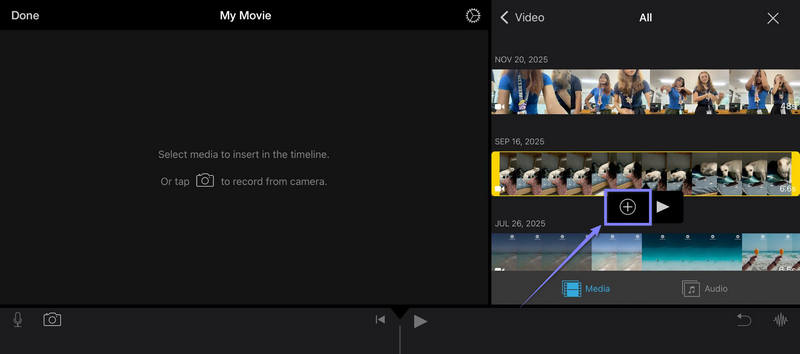
Step 2Import the video you wish to compress. You can also open a movie or video you are currently editing from your iMovie library. After that, you will be directed to the app's timeline.
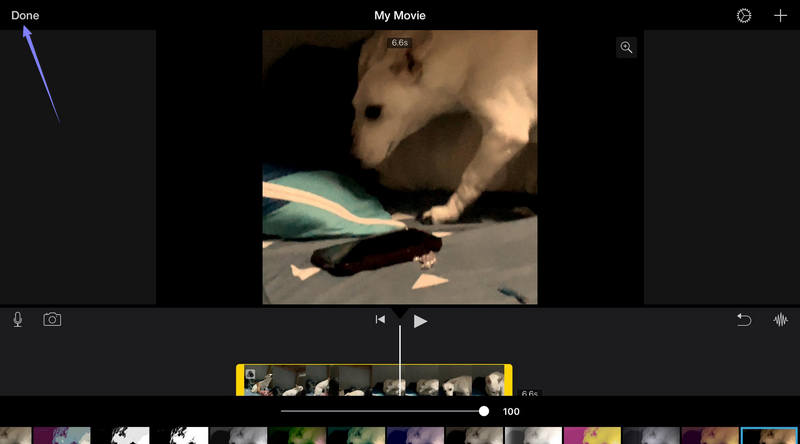
Step 3Optionally, you may edit the video before compressing it. You may trim, apply effects or filters. Then, press the Done button in the upper left-hand corner.
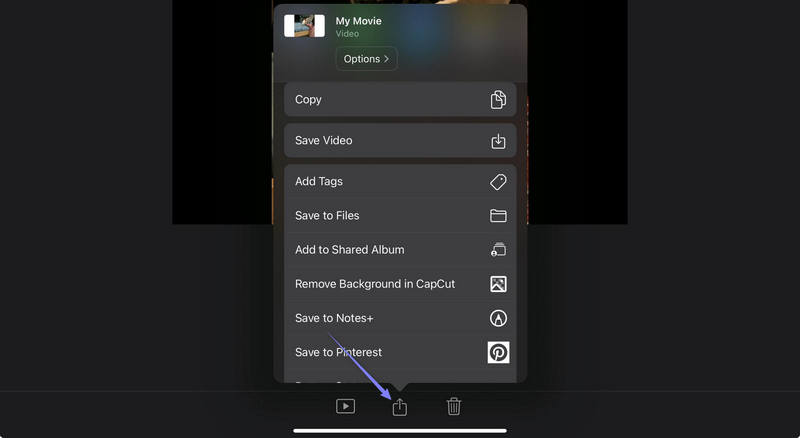
Step 4Now, press the Share button at the bottom middle, from where you can export iMovie videos to MP4 and compress a video file. Select the Save or Share Video option.
Step 5From the menu that will appear, expand the Options panel. Now, reduce the resolution and quality to significantly reduce the file size. Press Done in the upper right corner.

Step 6Going back to the Options panel, select and press Save Video to save the output.
Part 3: Best iMovie Alternatives to Compress Videos on Mac and Windows
If you are not fully satisfied with iMovie's features or functions, there are alternative tools available. The following list highlights two effective video file compressors that can significantly reduce your video file sizes.
1. AVAide Video Converter
When it comes to compressing a video file, AVAide Video Converter will not disappoint. The program provides a simple yet effective way to reduce videos to a smaller file size. The tool features a slider for easily adjusting video size. This makes adjustment intuitive, allowing users to view the range and observe real-time changes by dragging. You can also input a file size value for precision. Additionally, the tool compresses videos with no noticeable quality loss using advanced encoding technology. Therefore, you don't need to worry about minimizing video file sizes with this tool. It is user-friendly and requires no technical expertise. Moreover, you can use the program on both Mac and Windows systems. Proceed with video compression by following the steps provided:
Step 1Get the file's installer by clicking the Free Download button. Install the app on your computer and open it. After that, access the Toolbox tab from the main interface of the program.

FREE DOWNLOAD For Windows 7 or later
 Secure Download
FREE DOWNLOAD For Mac OS X 10.13 or later
Secure DownloadStep 2From the Toolbox tab, find the Video Compressor option and select it. Next, upload your target video file to compress by clicking the Plus button.
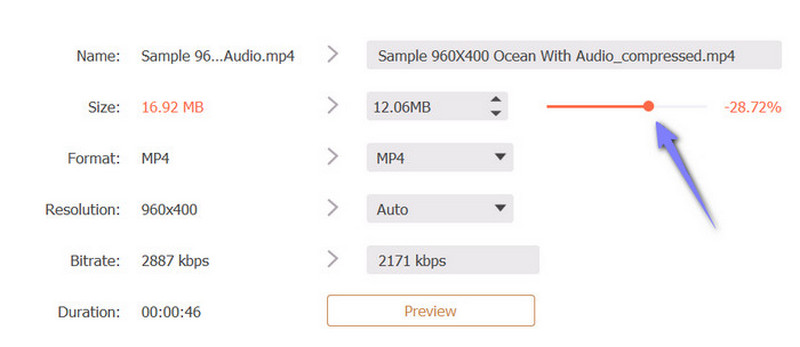
Step 3Once the video is successfully imported, the tool will show you the video properties you can adjust. In here, you will see the slider for compressing the video file size. Click the movable handle, which is the circle slider and drag to the left to decrease the value and watch how the size responds as the slider moves.
Step 4Finally, click the Compress button at the bottom right-hand side of the interface to activate the process. There will be a progress indicator to indicate whether the process is complete or stopped.

2. HandBrake
Another tool you can consider using is HandBrake. This tool is a renown video transcoder that also offers many features, like editing and converting. Besides that, it also acts as a file size reducer for your videos. On top of that, it is compatible with Windows and Mac computer devices. If you want to learn how to compress a video using this program, here is a simple guide to walk you through:
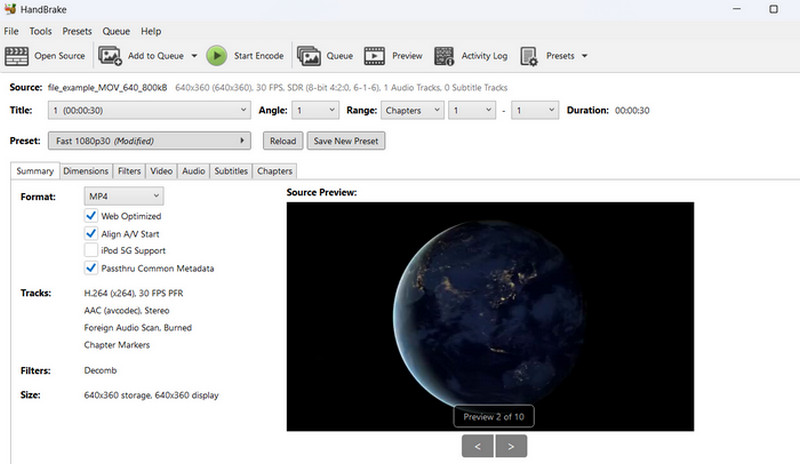
Step 1Download and install the app on your computer. Launch the app and import your video file. Click Source > Open File to load a video file.
Step 2Go to the Destination section and click the Browse button. Then, set a file location where you want to save the final video.
Step 3After that, go to the Output Settings section. From here, choose MP4 as the Container format and tick the Web Optimised checkbox.
Step 4Next, go to the Video tab, reveal the dropdown box and select H.264 as the video codec. Finally, click the Start button at the top menu when you are satisfied with all the settings. You can find more tools like HandBrake with a list of curated best video compressors online.
So, can iMovie compress a video? The answer is a solid yes. You just need to learn the step-by-step procedure to get it done. Anyway, the process is simple, and it does not take you so much time to accomplish. Meanwhile, for users looking for more viable options, you may opt for the alternatives provided.
Your complete video toolbox that supports 350+ formats for conversion in lossless quality.