Subtitles help people understand videos better, especially when the speech is in another language. They make it easier to follow the story and know what each character is saying.
The MKV format is well-known for keeping high-quality videos with many audio and subtitle tracks. But can it handle both soft and hard subtitles?
To learn the answer, please read the whole post and discover the ultimate approaches to add subtitles to MKV, both soft and hard.
Part 1: Does MKV Support Soft and Hard Subtitles
The MKV file format is one of the most flexible video containers used today. It can store video, audio, and subtitle tracks in one file without losing clarity. What makes MKV special is how it handles subtitles. It supports both soft and hard subtitles, giving viewers and editors full control over how text appears on screen.
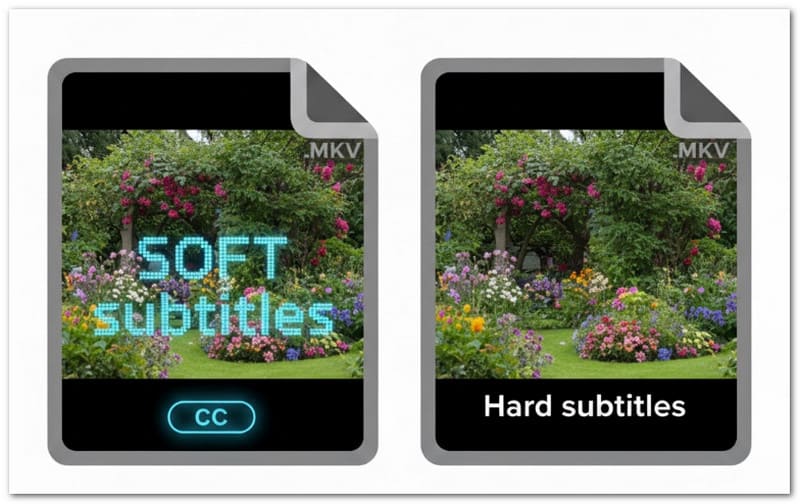
• Soft Subtitles
Fortunately, MKV supports soft subtitles. These are subtitle tracks that can be turned on or off while watching a video. They are stored inside the MKV file but are not burned into the video. It means you can switch between different languages or disable the subtitles completely. Most video players, like VLC or MPC-HC, can read and display soft subtitles in MKV files.
• Hard Subtitles
MKV also supports hard subtitles. These are subtitles that are permanently added or "burned" into the video image itself. They cannot be turned off because they become part of the video. Hard subtitles are usually made during video conversion or editing before saving the final MKV file.
In short, MKV supports both soft and hard subtitles. Soft subtitles can be toggled, while hard subtitles stay visible all the time. This option makes MKV a good pick for people who want to change how subtitles look in their videos.
Part 2: How to Add Soft Subtitles to MKV
In this section, we will focus on adding soft subtitles, and we will teach you how to add them using AVAide Video Converter, the best tool for this task. It supports many subtitle file formats, such as SRT, ASS, and SSA, making it easy to use with any MKV video.
You can also personalize your subtitles by changing the font, size, color, opacity, and outline to make them fit your style. With these features, your video becomes easier to follow and more enjoyable to watch.
Step 1First and foremost, acquire and set up AVAide Video Converter on your Windows or Mac computer.

FREE DOWNLOAD For Windows 7 or later
 Secure Download
FREE DOWNLOAD For Mac OS X 10.13 or later
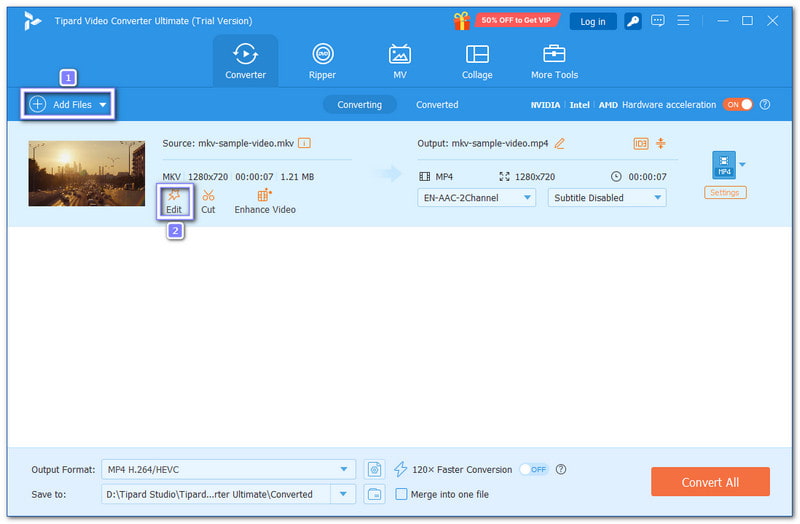
Secure DownloadStep 2Run AVAide Video Converter, and on the main screen, click Add File and choose the MKV video you want to edit. Once the video is loaded, click the Edit button beside the video to open the editing window. It is where you can start working on the subtitles.
Step 3In the editing window, go to the Subtitle tab. If you already have a subtitle file prepared, click the Plus button next to the Subtitle option to upload it from your computer. If not, click the Search button beside the Plus to find and download subtitles online. You can look for the one that matches your MKV video.
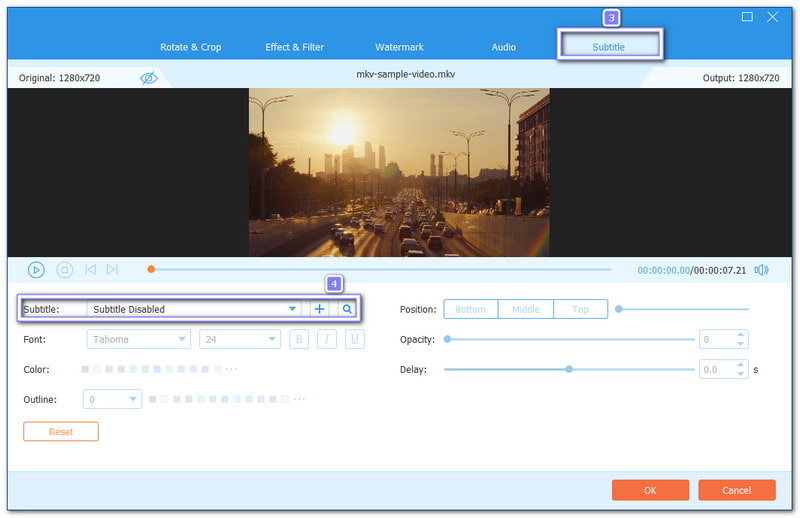
Step 4After adding your subtitle, you can change its appearance to match your preference. You can move the subtitle position, change the text size and font style, adjust the color and transparency, or set the delay time if it does not sync with the video. You can also add an outline to make the text easier to read. These options allow you to make the subtitles look clear and fit your video perfectly.
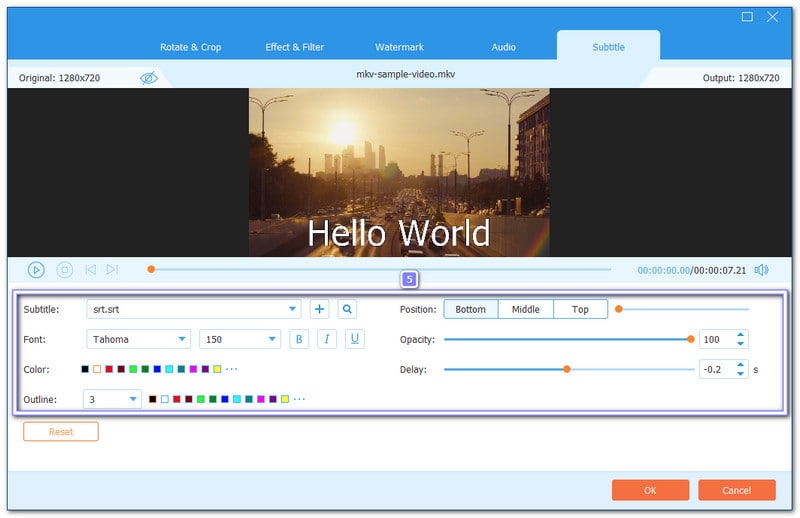
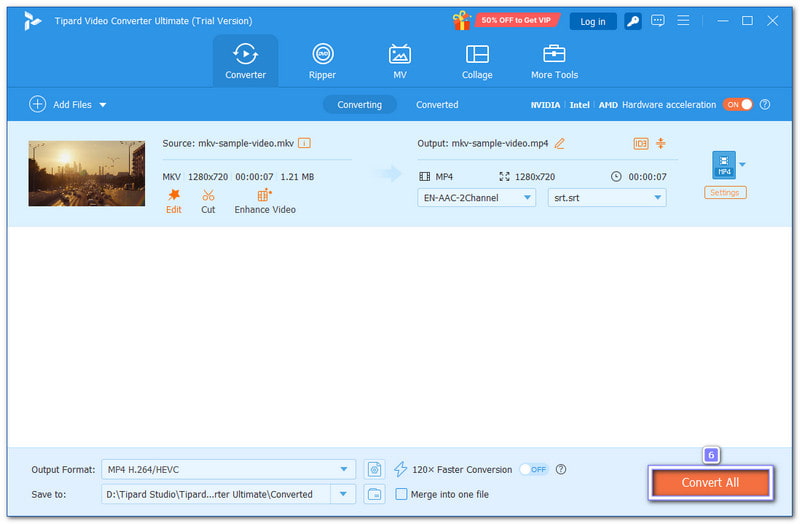
Step 5Once you are happy with the subtitles, click OK to save the changes. Go back to the main interface and press Convert All to export your new MKV file. AVAide Video Converter will save the video with the added soft subtitles inside the MKV container. You can now watch your video with switchable subtitles on any compatible media player.
This method keeps your subtitles soft so that you can turn them on or off anytime. Indeed, AVAide Video Converter offers the best way to add subtitles to your videos, not just to MKV, but also to other formats.
Part 3: How to Add Hard Subtitles to MKV
You are done learning how to add soft subtitles; now it is time to move on to hard subtitles. This time, we will use HandBrake to add a subtitle track to MKV. In older versions, it only allowed SRT files, but the latest update now supports SRT, ASS, and SSA. However, it still lacks features to change or customize subtitle color, size, and position.
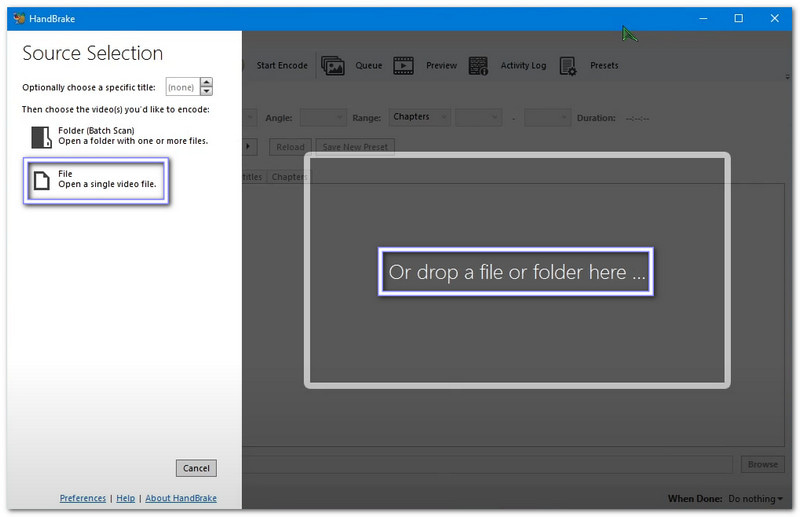
Step 1Start by opening the latest version of HandBrake on your computer. Click About HandBrake, then select Update > Check for Update to see if a newer version is available. If there is, get and set up the update before continuing. Once you have the latest version, open HandBrake to begin the process.
Step 2Click File to import the MKV video you want to edit. You can also select and drop your video into the HandBrake window for quick loading. Please wait for the program to process your video before moving to the next step.
Step 3After the video loads, click Preset and choose your preferred profile. For better clarity, you can select 1080P or even create a custom preset for higher resolution. Then, go to the Summary section, open the Format tab, and select MKV as your output format.
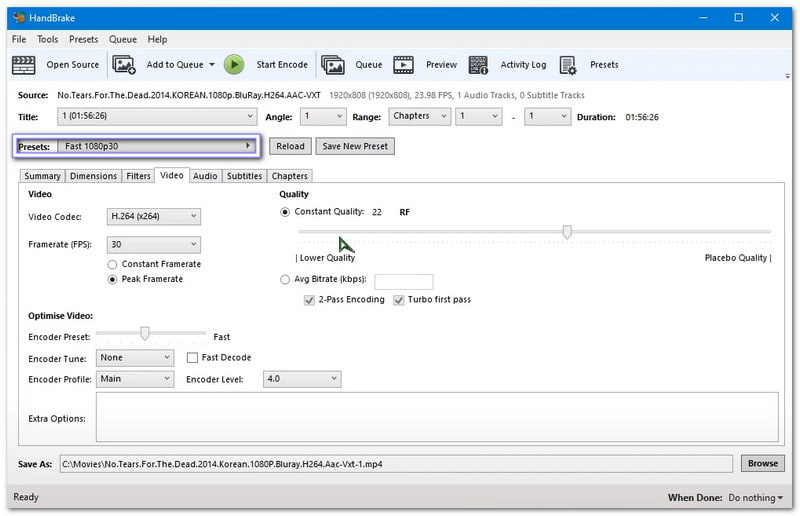
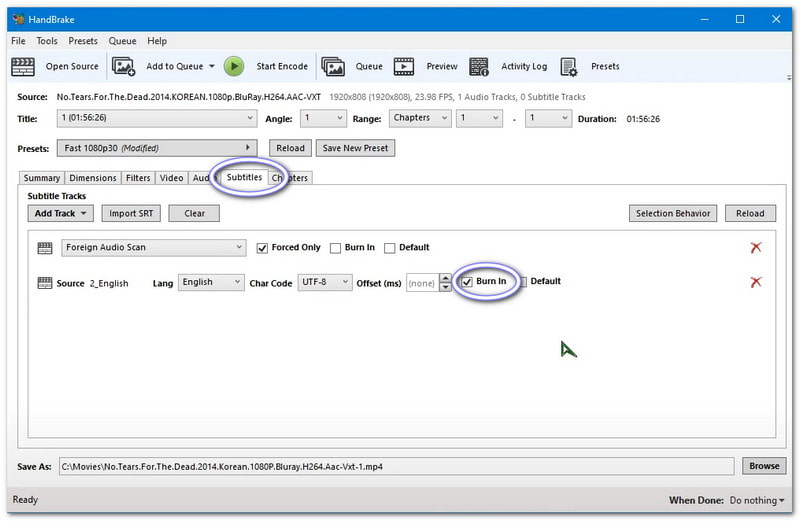
Step 4Click the Subtitles tab and choose Add Track to upload your SRT, ASS, or SSA file. After importing, check the Burn In box. This step ensures the subtitles are permanently added to your video and cannot be turned off later.
Step 5Hit Browse to pick where you want to save your video, then set a new file name. Once everything looks good, click the Start Encode button at the top of the screen. HandBrake will start burning the subtitles into your video. The time it takes depends on your video's length and resolution.
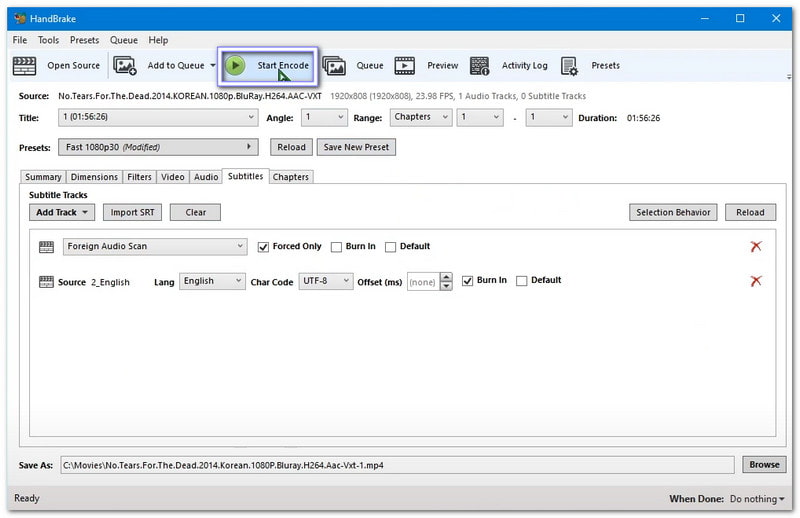
After that, you will have an MKV file with hard subtitles that stay on the screen at all times. It does not end there: you can also use HandBrake if you experience subtitle delay in VLC. It can help fix the timing and keep the subtitles in sync with the video, giving you smooth playback every time.
Through this post, you have learned how to add subtitles to an MKV movie, both soft and hard subtitles. For soft subtitles, you can rely on AVAide Video Converter, which lets you add and edit subtitle tracks easily.
For hard subtitles, you can use HandBrake, a free program that can burn text permanently into your video. With these tools, you can make your MKV movies more enjoyable and easier to follow for everyone.
Your complete video toolbox that supports 350+ formats for conversion in lossless quality.