VLC, first released in 2001, is a free and open-source media player that works on almost all devices. It can play nearly any video format and even lets you do basic edits like trimming. But many users find the trimming process a bit confusing, which sometimes leads to messy cuts.
Do not worry, though. We are here to guide you on how to trim video with VLC on Windows and Mac, plus its best alternative you can also try.
Part 1: How to Trim Video in VLC on Windows
VLC on Windows lets you quickly trim videos. Just pick start and end points, record the clip, and find it in your videos folder. Learn the whole process on how to trim video in VLC on Windows below!
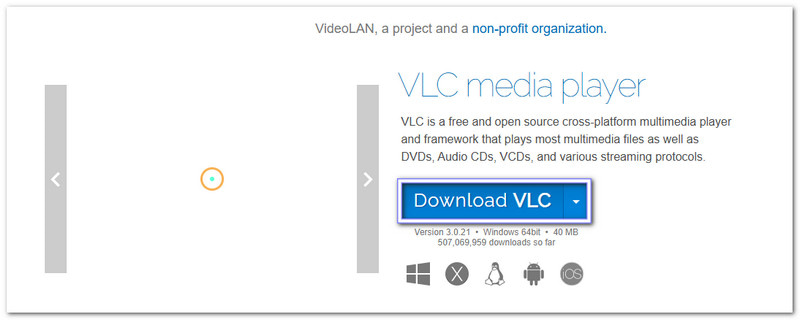
Step 1First, you need VLC media player. So, go to the VideoLAN website and download the latest version. Please install it and open the program on your Windows computer.
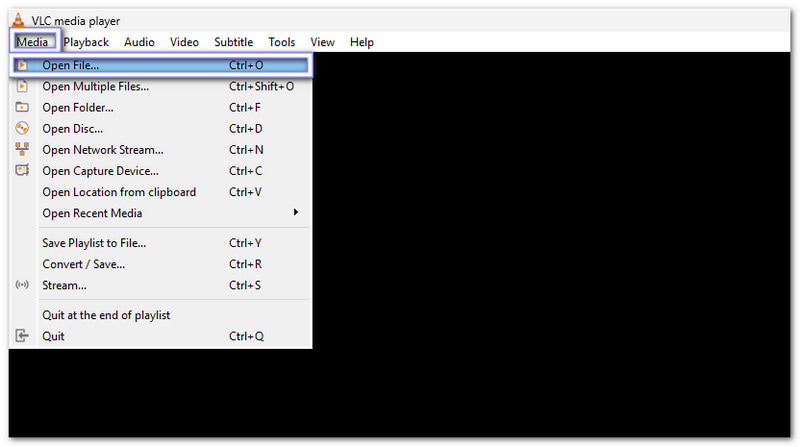
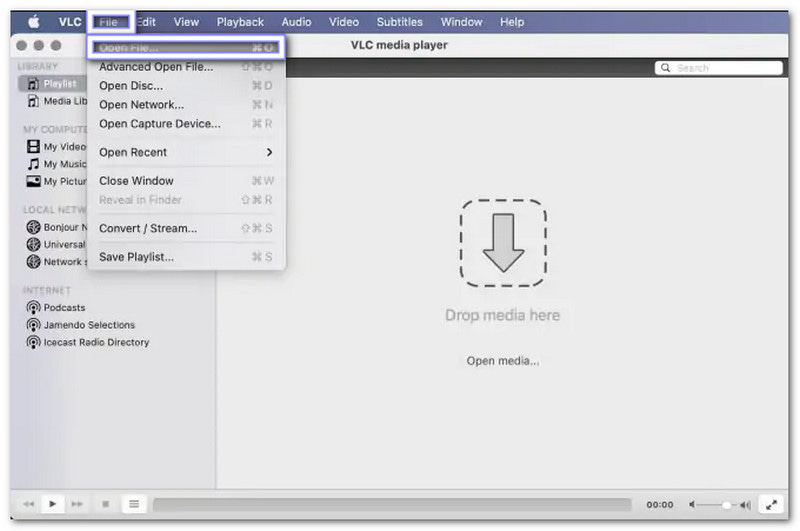
Step 2Next, open the video you want to trim. You can open your file in three ways:
• Drag and drop the video into VLC.
• Click Media on the top left, then Open file, and choose your video.
• Press Ctrl + O, find your video, and click Open.
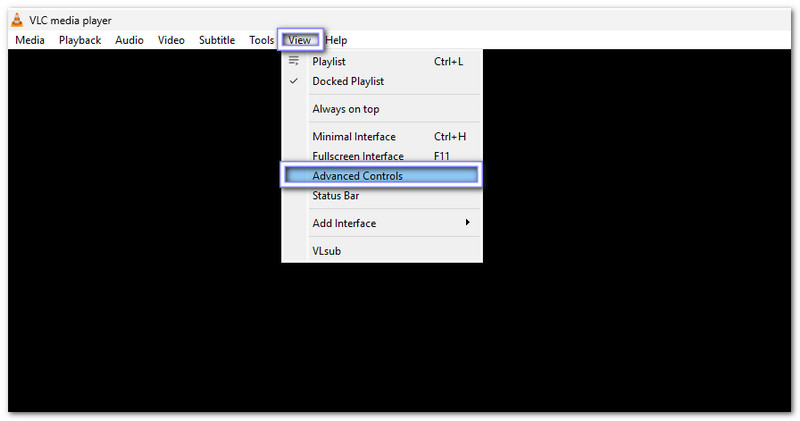
Step 3To trim your video, you need the editing tools. Click View at the top and then Advanced Controls. You will see extra buttons appear under the video screen. These are the tools you need to record your trimmed clip.
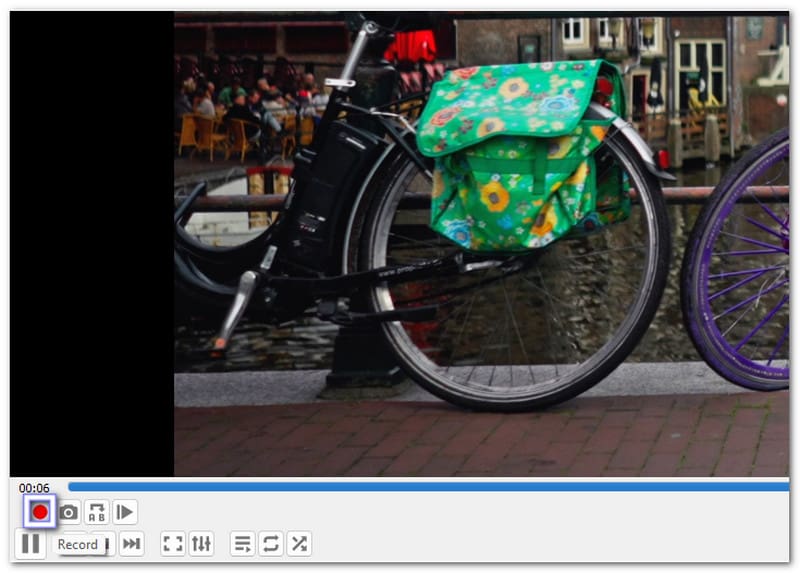
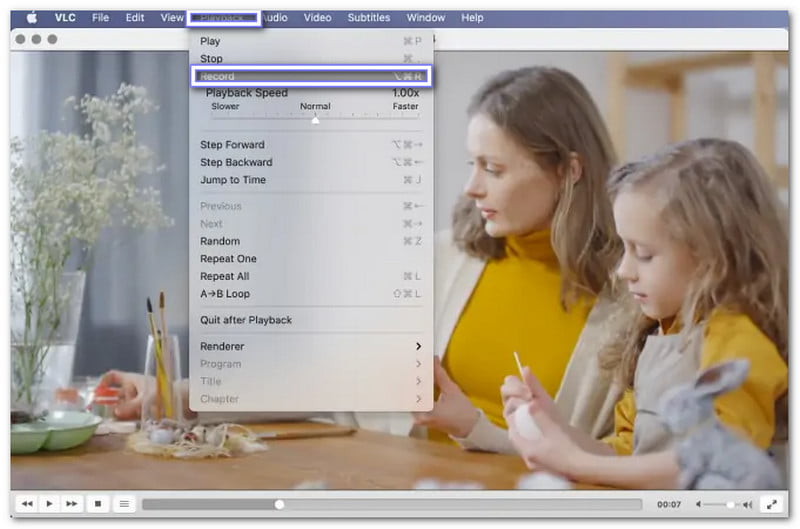
Step 4To cut a video on VLC, play your video and find where you want to start trimming. Then, click the Record button (red circle) to start. You can also press Shift + R or go to Playback > Record. Play the video until the point where you want to stop. Click Record again, press Shift + R, or use Pause and the Frame-by-frame button if you want exact timing.
Step 5Your trimmed video does not appear in VLC automatically. By default, it is stored in the Videos folder on your computer. Look in C:UsersYourUsernameVideos. The file name starts with vlc-record and the date. You can rename it to anything you like. Now your video is trimmed and ready to watch.
- You can play your trimmed video in VLC or try VLC alternatives that also support numerous video formats.
Part 2: How to Trim Video in VLC on Mac
VLC on Mac makes trimming easy. All you need to do is record the part you need, use shortcuts, and find the clip in your movies folder. Please see how to trim video in VLC on Mac below!
Step 1Head to the VideoLAN website and click the Down arrow next to the download link and choose Mac. Then, proceed to download, install, and run the program.

Step 2Next, open the video you want to trim. You can drag and drop it into the VLC playlist, and it should start playing automatically.
Suppose it does not. Double-click the video to play it. You can also click File > Open File or press Command + O to browse and select your video.
Step 3Play the video and find the point where you want to start trimming. You can use the scroll bar below the video or the Play button (or space bar) to reach the right spot.
Step 4Once you find the start point, go to Playback > Record or press Option + Command + R. Then, play the video until the point where you want to stop. Pause the video, then repeat the Playback > Record step or press the shortcut again to stop. After that, your video is now trimmed.
Step 5The trimmed video is saved automatically. By default, it is in your Movies folder. The file name starts with vlc-record followed by the date. You can change the file name to whatever you like.
- You can also combine videos in VLC. Just click Media > Open Multiple Files, add your clips, and save them together to play as one complete file.
Part 3: The Best VLC Alternative to Trim Video on Windows and Mac
Like VLC, AVAide Video Converter works great on both Windows and Mac. But what makes it the best VLC alternative is how simple it is to use. You can use simple mouse or keyboard controls to cut clips easily. It trims videos without re-encoding, keeping the original clarity. In addition, you can enhance resolution, frame rate, and bitrate for a clearer and smoother result.
If you have learned how to trim video using VLC above, now in this part, you will learn how to trim video in any format using AVAide Video Converter.
Step 1First, click the Download button for Windows or Mac. Then, please follow the installation steps on your screen. Once the program is installed, proceed to launch it, so we can start trimming your video.

FREE DOWNLOAD For Windows 7 or later
 Secure Download
FREE DOWNLOAD For Mac OS X 10.13 or later
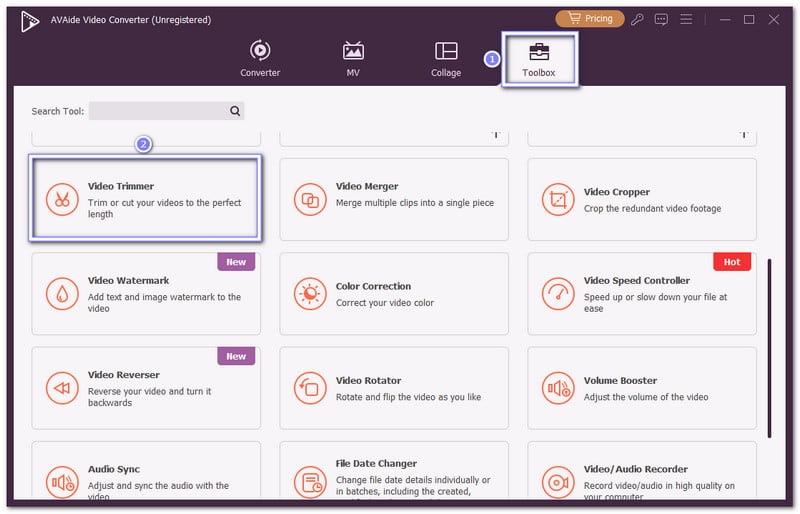
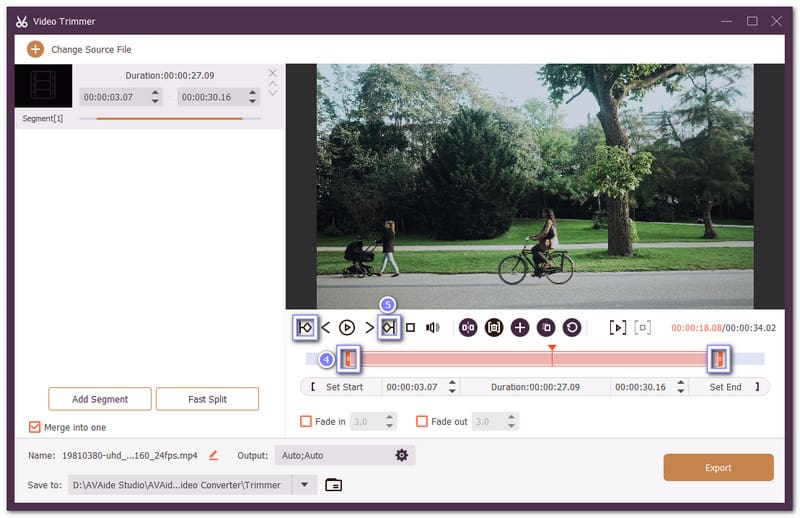
Secure DownloadStep 2Go to the Toolbox tab and select Video Trimmer. This feature allows you to cut videos accurately. It is easy to use and shows your video timeline clearly, so you can pick the part you want.
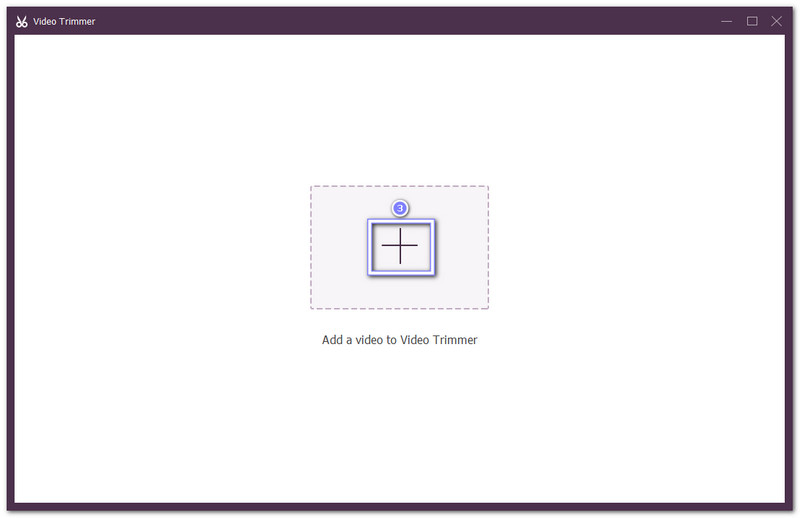
Step 3Drag and drop the video you want to trim into the Add box. You can also click the Add button to browse your files and select the video. Once imported, your video file will appear in the trimming interface, ready for editing.
Step 4On the timeline, move the handlebars to choose where your trimmed clip should start and end. Play the video to make sure you select the exact section you want. You can adjust frame by frame for better precision.
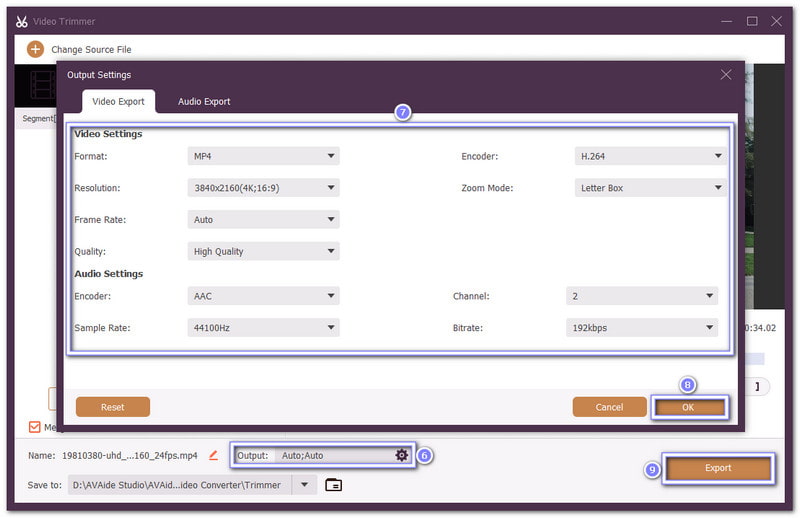
Step 5Before saving your video, click the Output option. Here, you can pick the resolution, like 4K, 2K, HD, or 720P. You can also change the frame rate from 12fps to 60fps, and fine-tune audio settings like encoder, sample rate, and bitrate. Once settled, click OK to save your changes.
After all that, click the Export button, and AVAide Video Converter will save your trimmed video to your Windows or Mac computer. You can now watch or share your trimmed video clip immediately.
Key Features:
• Preview screen: Watch your edits in real time to check every detail.
• Fade in and fade out: Smoothly start or end your video for a clean finish.
• Supports 300+ formats: Works with almost any video or audio file you have.
• Video and audio export settings: Adjust quality, format, and sound before saving.
• Add segment and fast split: Cut and split videos quickly into parts with just one click.
You have learned how to trim video in VLC both on Windows and Mac. But as you can see, the process is a bit tricky since it is not the usual trimming method.
That is why AVAide Video Converter is here to make trimming easy for you. It works fast, there are no confusing steps, and it even lets you enhance your video's clarity after trimming. So, please download it now and give it a try!
Your complete video toolbox that supports 350+ formats for conversion in lossless quality.