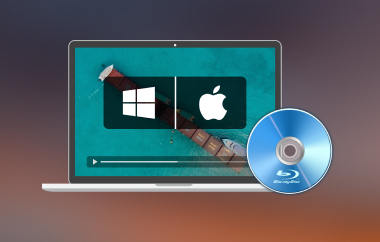
Since CD/DVD discs are gradually disappearing in daily life, you can directly mount an ISO file to install operating systems or play old media easily. It will also avoid the disc scratches or damages for better saving. Thus, this article will help you learn the detailed steps to mount ISO files on all devices, including Windows 11/10, Mac, and Linux. If you find problems in mounting ISO, here is also a professional way to burn ISO to DVD/Blu-ray discs.
Part 1: 2 Ways to Mount An ISO File on Windows 11/10
Windows 11/10/8.1/8 versions have a built-in tool to mount ISO files. This allows you to access the ISO contents directly without third-party software. There are 2 efficient methods with steps for you.
Method 1: Mount ISO Image on Windows with File Explorer
Windows File Explorer is a handy tool to open disc images like a virtual CD/DVD drive on Windows 11/10/8.1. No downloads or commands needed, you can easily mount ISO files now. This process is also reversable.
Step 1Open File Explorer through Windows logo to find the ISO file first. Right-click the ISO file and click Mount to mount the ISO file easily.

Step 2You can also double-click on it to open the ISO file. Your Windows computer will create a virtual drive and automatically open the ISO contents, making it accessible as if it were a physical CD or DVD.
Method 2: Mount an ISO File Using Windows PowerShell
PowerShell made by Microsoft provides a wide range of commands and utilities, allowing you to perform various tasks, including mounting an ISO file on Windows. Although you can access the ISO content and play Blu-ray or DVD movies on your laptop quickly, it’s best for power users and IT admins.
Step 1Click Start menu and search for PowerShell tool. Right-click it and select Run As Administrator.
Step 2Enter Mount-DiskImage -ImagePath “path ilename.iso” (replace with the actual path and filename of your ISO file) Press Enter to mount the ISO file on Windows 11/10/8.

Part 2: How to Mount An ISO File on Mac with 2 Tools
Mounting an ISO file on macOS can also be quick and easy without third-party software. Apple provides two native tools to handle disc images: DiskImageMounter for simple operation while Disk Utility providing more control. Both tools are pre-installed on every Mac, ensuring compatibility with macOS Ventura, Sonoma, and older versions.
Method 1: Mount ISO files on Mac with DiskImageMounter
Apple's built-in DiskImageMounter lets you open ISO or DMG files instantly and mount ISO file as virtual disks. No setup required, no extra downloads, and it works seamlessly across all macOS versions. It’s perfect when you need quick ISO mounting without advanced options.
Step 1Locate the ISO file on Mac and right-click it. Select Open with and then DiskImageMounter from the menu.

Step 2Your ISO file is mounted as a virtual drive. Double-click the file with .pkg extension in the popping-up window.

Method 2: Use Disk Utility to Mount ISO on Mac
You can also use the Disk Utility. It is a pre-installed software in macOS and provides an easy way to open and manage ISO files. It can format, divide, fix, and clear disks and even create or change disk images. Unlike DiskImageMounter, Disk Utility has a user-friendly visual interface for handling your disks effectively.
Step 1Find Disk Utility in Utility folder within Applications folder. If you cannot find it, use Spotlight Search (Command + Spacebar, then type Disk Utility and click Enter) to quickly locate and open it.
Step 2In the Disk Utility window, click on the File menu. Select Open Disk Image... from the dropdown menu and choose your ISO file.

Step 3Disk Utility will now mount the ISO file on Mac, and it will appear in the left-hand sidebar of the Disk Utility window. After that, you can access its contents. When you're done using the ISO file, you can simply right-click to eject and unmount it.
Part 3: Detailed Steps to Mount ISO Files on Linux
There are also flexible ways to mount ISO files on Linux without third-party software, whether you prefer the command line or GUI tools. Unlike Windows and macOS, Linux treats ISOs as standard disk images, giving you full control over mounting ISO file.
Method 1: Use File Manager to Easily Mount ISO Files on Linux
For Linux users who prefer simple operations, using File Manager is the best tool to mount ISO files. This method is perfect for most desktop environments like GNOME, KDE Plasma, XFCE, and others.
Step 1Open File Manage and locate the ISO files. Right-click it and click Open With Disk Image Mounter to mount an ISO on Linux.
Step 2Then, you will see the mounted ISO file showed in File app sidebar. Just click it to view.

Method 2: Mount ISO Files on Linux with Terminal (Command Line)
Linux's terminal provides the most reliable and universal method to mount an ISO file across all distributions. This approach works on servers, old machines, and minimal installations where GUI tools aren't available.
Step 1Launch Terminal tool on Linux and create a directory first to prepare the ISO mounting process. Use the command line: sudo mkdir /mnt/iso.
Step 2Then, you can mount an ISO file on Linux with the command: sudo mount -o loop /path/iso file name.iso /mnt/iso.

Part 4: Professional Way to Burn ISO to DVD for Backup
There are 6 default ways to open ISO files on Windows 11/10 and Mac. But sometimes, you may find the ISO mounting process not working. Thus, you can try Tipard DVD Creator. It's the best DVD burner software that helps you make your ISO files to DVDs or Blu-rays easily. Unlike mounting an ISO file, you can turn your digital content into physical discs, which will help you save the content forever. By combining ISO mounting and DVD creation, you'll have an easier and more creative digital experience.
Step 1Free download Tipard DVD Creator and install it on Windows/Mac. Choose DVD or Blu-ray disc to burn your ISO files.

Step 2Click the Add Media File(s) button to import your ISO file. You also have the option to add or edit audio and subtitles as needed.
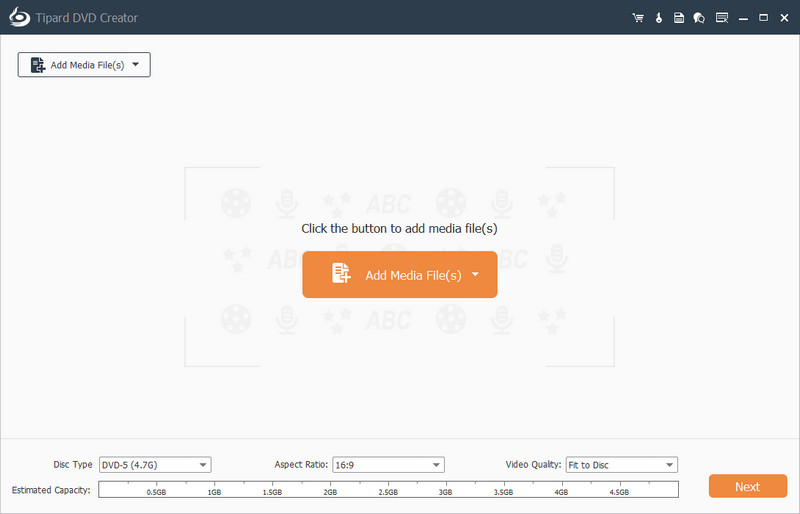
Step 3Click Next, and you can choose a template, add background music, and preview it. Then click Burn, select Burn to disc, and click Start. You will have your DVD in a moment.

Part 5: FAQs about How to Mount ISO Files
How do I mount and unmount an ISO in Windows 10?
To mount an ISO in Windows 10, double-click on the ISO file or right-click and choose Mount.
To unmount, open File Explorer, find the virtual drive representing the mounted ISO, right-click it, and choose Eject.
Why can't I mount my ISO file?
You might fail to mount the IOS file if it is corrupted or incomplete.
Make sure the ISO file is associated with the correct program. Right-click the ISO, choose Open with, and select Choose another app to ensure it's set correctly.
Ensure your Windows operating system is up to date.
If you've tried these solutions and still can't mount your ISO file, you can seek assistance from a technical expert.
Can I burn ISO to a hard drive?
No, you can't burn an ISO file to a hard drive because burning typically refers to the process of writing data onto an optical disc like a CD, DVD, or Blu-ray. However, you can copy or extract the contents of an ISO file to a hard drive or storage device.
To access your ISO digital stuff, you have learned 6 easy ways to mount ISO files on all devices, including Windows 10/11, Mac, and Linux. Whether it's software, games, or other content, knowing how to do this is handy. Moreover, if you fail to mount ISO files with unknown issues, you can try to burn ISO to DVD/Blu-ray discs with DVD Creators. It lets you make your own DVDs with special memories or creative projects. If you found this article helpful, do not hesitate to share it with your friends, families, and colleagues.
ABOUT THE AUTHOR

Full-featured multimedia player to play Blu-rays, DVDs, 4K UHDs, and other video/audio files.

 Secure Download