You are using a Windows computer and now need to crop a video. You noticed that the video you captured earlier has black bars, extra background, or unwanted objects. It is distracting and might not fit on social media.
Do not worry, we are here to help you crop a video on Windows in this post. Let us not waste time; let us get started right away!
Part 1: Best Solution to Crop Videos on Windows
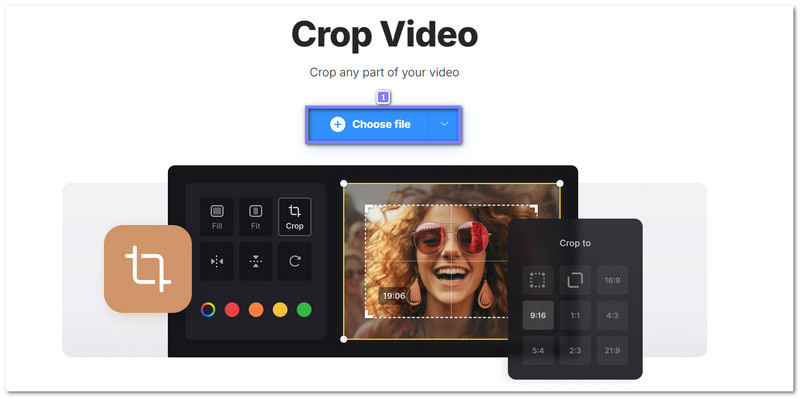
If you are looking for the best solution to crop videos on Windows, AVAide Video Converter is the tool you need. It lets you crop freely on the preview screen or set an exact width and height with no trouble at all.
It also provides many aspect ratio presets like 16:9, 1:1, 4:3, 21:9, and 9:16, so your video fits perfectly for social media or screens. Plus, your videos stay watermark-free, resulting in neat and professional-looking clips every time.
Step 1Get AVAide Video Converter on Windows
First and foremost, get AVAide Video Converter downloaded and installed on your Windows computer.

FREE DOWNLOAD For Windows 7 or later
 Secure Download
FREE DOWNLOAD For Mac OS X 10.13 or later
Secure DownloadStep 2Select Video Cropper
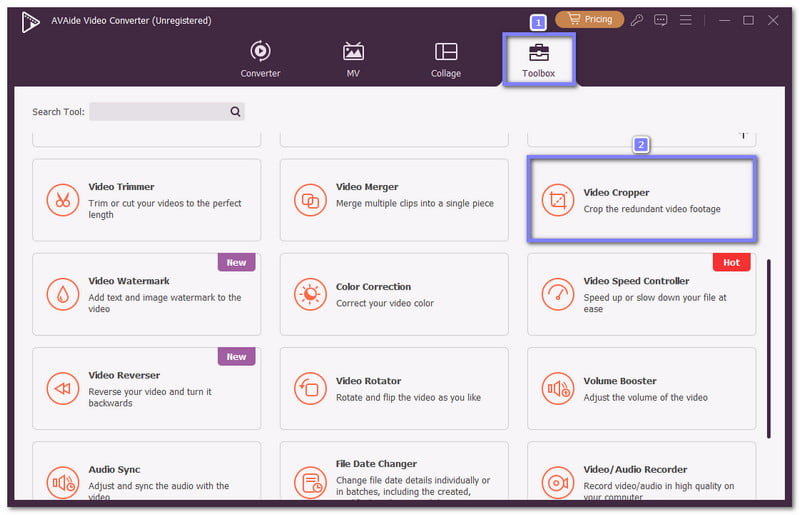
Once the program loads, navigate to the Toolbox tab. This tab holds many handy tools, and one of them is Video Cropper. So, please find it from the list and select it to begin working on your video.
Step 3Import Video to Crop
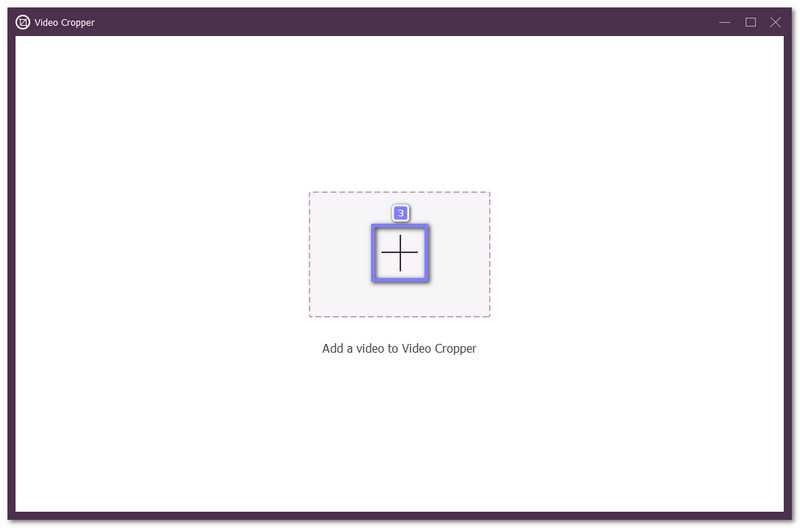
A new display will open on your screen. To import your video, click the Add button in the center. It will let you pick the video from your local folder. Once selected, the file will load inside the crop workspace.
Step 4Crop Your Video
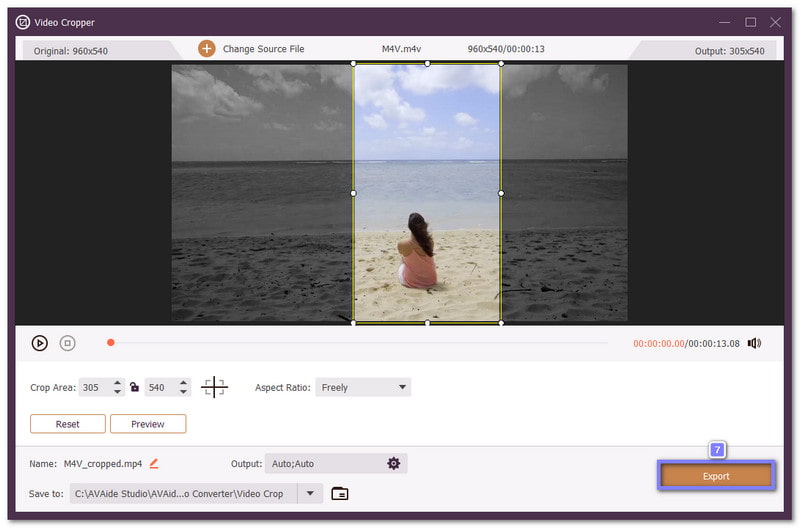
You will see an adjustable frame around your video. You can drag any pointer to shape the frame the way you want manually. You can also use the Crop Area panel to set the height and width with exact numbers. In addition, you can pick from the aspect ratio presets like 16:9, 4:3, 1:1, 21:9, or 9:16 if you want a clean and ready-made size.

Step 5Export Your Cropped Video
When you finish cropping, click the Export button. AVAide Video Converter will process the video and save the new trimmed version to your local folder. You can now play, share, or edit it again whenever you need.
What it does well: You can also crop videos on a Mac, not only on Windows. You can also change output settings like format, resolution, and frame rate before exporting. In addition, it has many useful tools, like the video trimmer, rotator, merger, compressors, enhancer, etc.
What it does not: The trial version has limits. To get full features and unlimited use, you need to register the full version.
Part 2: How to Crop a Video on Windows in VLC
VLC may look like a normal media player, but it hides a helpful cropping feature inside its settings. It lets you crop the sides of your video and then export a fresh file that fits the size you want.
It is not questionable that many Windows users like VLC because it works offline, supports many formats, and does not require extra downloads. So, it becomes a simple way to crop and watch videos in one place.
Below is a guide on how to crop videos on Windows using VLC:
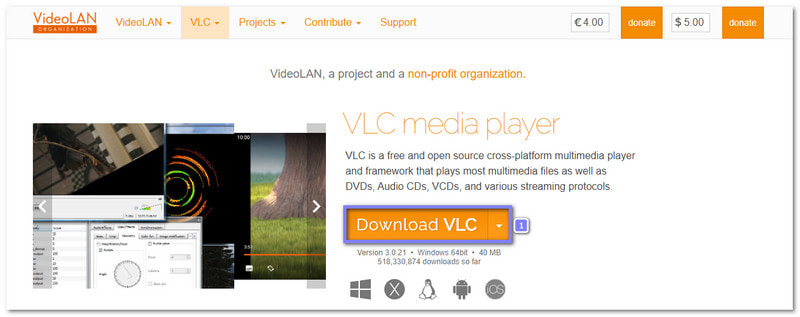
Step 1Download & Install VLC
Head to the VLC official website, click Download VLC, and proceed to install it on your Windows. Once installed, open the media player to start setting it up.
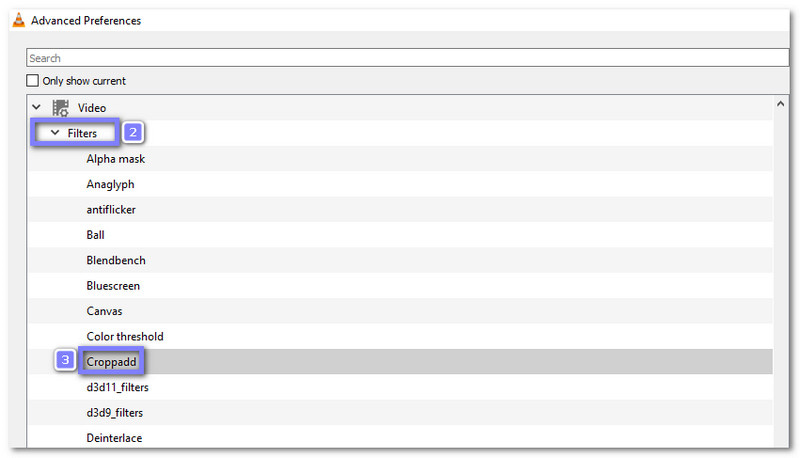
Step 2Modify the VLC settings
You need to change the settings before VLC can crop your video. Go to Menu > Tools > Preferences. Look at the lower left and click Show All to display all the hidden settings. On the left panel, find Video, then go to Filters, and click Croppad. It area is where you prepare VLC for cropping.
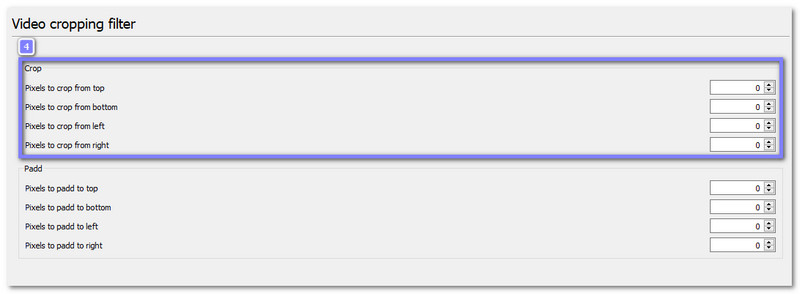
Step 3Set the Crop Size
The Croppadd display lets you type the number of pixels you want to cut from the top, bottom, left, and right. You only need to put numbers that match the space you want to remove. Once you are done, press Save so VLC will remember your crop setup.
Step 4Add Your Video to VLC
It is time to bring your video into VLC. You may click Media > Open File, or you can drag the video into the VLC display. After adding the video, open Preferences again. Go to Video > Filters, and make sure the Video Cropping Filter is checked. It will activate your crop settings.
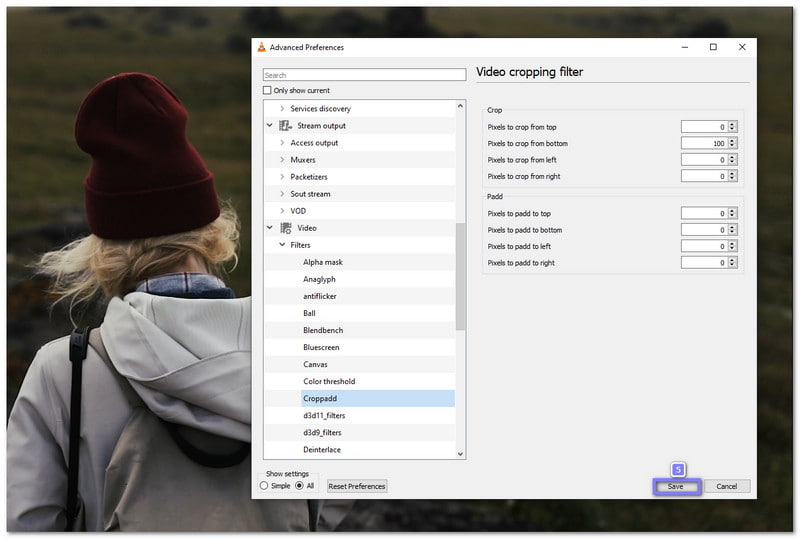
Step 5Save Your Cropped Video
To finish the process, choose the folder where you want to save your new cropped video. Press Browse to pick the location. After that, click Start. VLC will now crop the video and save the new version to the folder you selected.
What it does well: It allows you to crop MP4 video with exact pixel control for each side, and runs smoothly even on older Windows computers.
What it does not: It does not provide an easy visual crop box, and it can feel not very unclear because the crop feature is hidden in advanced settings.
Part 3: How to Crop Videos on Windows Online
Cropping with Clideo feels simple because you only use your browser. You upload a video, move the crop box on the preview screen, or pick a preset shape like 1:1 or 16:9. It works with many file types, so you do not worry about formats. You can even type an exact size if you need a clean fit for websites, school projects, or social media posts.
Rely on the tutorial provided to find out how to crop a video on Windows with Clideo:
Step 1Go to the Clideo Crop Video page
Open your browser and go to the official Clideo - Crop Video Online & Free website.
Step 2Upload Your Video
Click the Choose File button. Pick the video you want to crop. Clideo will upload it, and then you will see the video on the screen.
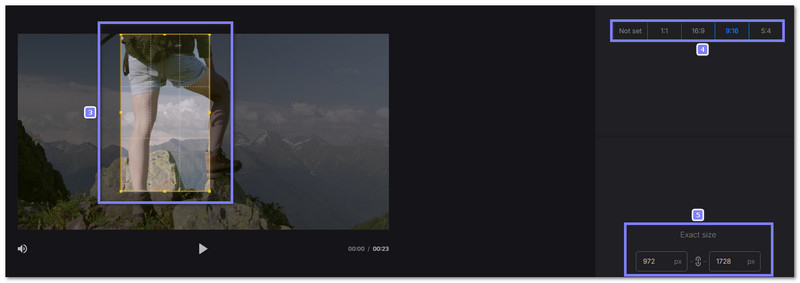
Step 3Adjust the Crop Area
Let us do the cropping! You can crop by dragging the box around the preview. You can also pick a frame ratio like 16:9, 1:1, 9:16, or 5:4. If you want an exact crop, you may type a pixel × pixel size under Exact size. It helps you control the shape of your crop.
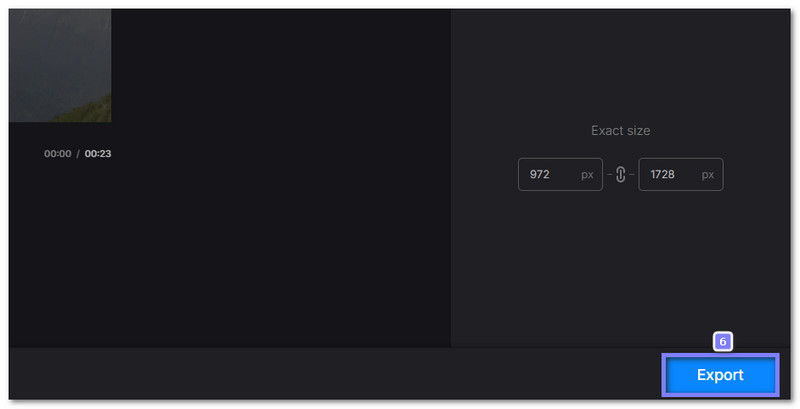
Step 4Export and Download Your Cropped Video
Once everything looks good, hit the Export button. Clideo will process your video. When it is done, you can download your new cropped file to your Windows computer.
What it does well: It provides format conversion, preset crop sizes for popular social apps, and strong security that protects every uploaded file.
What it does not: It does not provide fast results if your internet is slow and needs extra upload time before editing.
Cropping is really essential when editing videos. You do not want to upload a video with black bars or extra parts that distract from your main subject.
That is why, through this How to crop a video on Windows guide, you have learned the right way to do it. It is super fast, especially if you use AVAide Video Converter. You can crop your video easily and quickly, without any hassle, and make it look neat and professional.
Your complete video toolbox that supports 350+ formats for conversion in lossless quality.