A video might have extra edges, unwanted objects in the background, or a frame that does not fit social media. You might also want to focus on a subject or remove distractions to make the clip look cleaner. These are just the common reasons why we want to crop a video.
On your Mac computer, you can do that using different tools, which this article focuses on. So, let us head over to the tutorials for you to learn how to crop video on a Mac effectively.
Part 1: Crop a Video on Mac Using the Photos App
One of the easiest approaches for how to crop videos on Mac is to use something already on your Mac. That is why the Photos app is helpful, especially after macOS Ventura added video editing. You can crop clips without learning anything hard, which makes it friendly for simple tasks.
Step 1Open the Photos app and look for your video in the Library. If it is not there, click File > Import or drag the video into Photos.
Step 2Double-click the video to open it and click the Edit button at the top right.
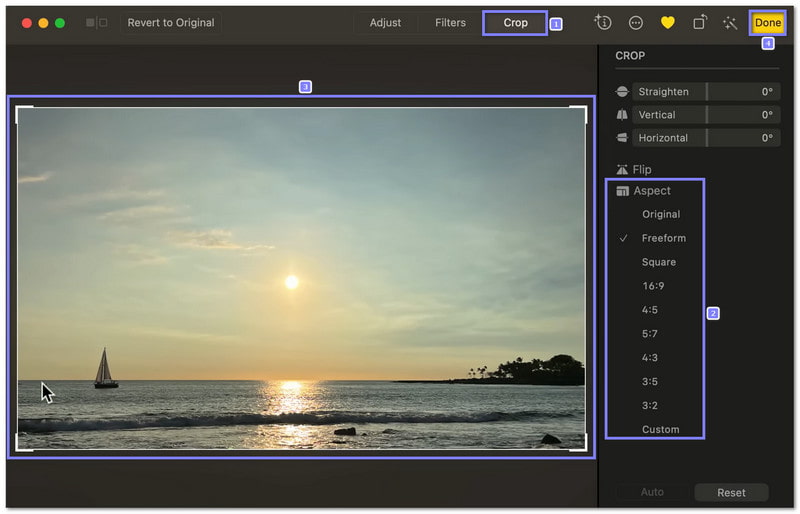
Step 3Select Crop, and then pick a shape on the right side, like portrait, landscape, or any fixed aspect ratio.
Step 4Drag the crop box to cover the part you want to keep. The box will stay in the same shape if you choose an aspect ratio. You can click Reset if you want to start again. Satisfied already? Hit Done to save it.
Part 2: How to Crop Videos on Mac Like a Pro
Do you want to crop videos on Mac like a pro? AVAide Video Converter makes it simple and powerful. You can drag and adjust the edges of the crop box directly on the preview screen or set the crop area exactly with numbers for precise control.
Beyond cropping, it also trims, merges, adds effects and filters, and lets you enhance or compress videos easily. Even with all these features, it is simple to use, letting anyone create professional-looking videos in no time.
Step 1Launch AVAide Video Converter on your Mac after you download and install it.

FREE DOWNLOAD For Windows 7 or later
 Secure Download
FREE DOWNLOAD For Mac OS X 10.13 or later
Secure DownloadStep 2Import the videos you want to crop by clicking the Add Files button or dropping them into the interface.

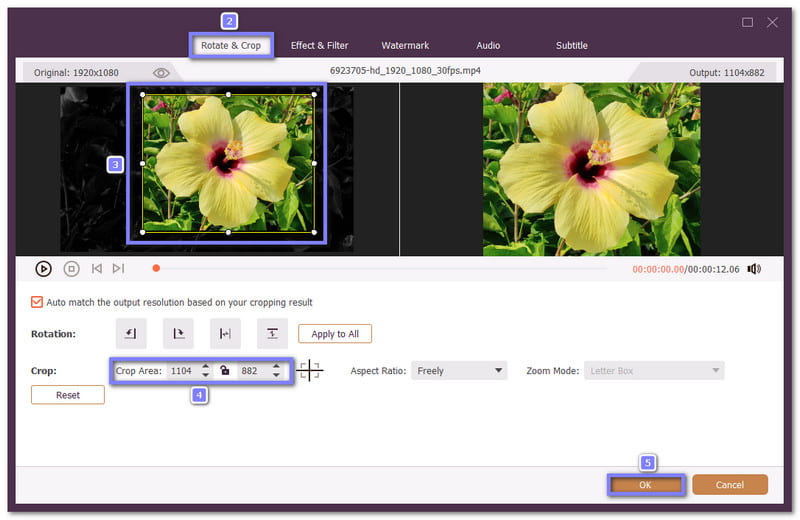
Step 3Once your videos appear in the library, click the Wand button to open the editing display. You will be directed to the Rotate & Crop tab. Now, let us start the cropping!
You can drag the Cropping box with your mouse to cut out the parts you do not want. You can also type values in the Crop Area boxes to get a more exact cut if needed. Hit the OK button once happy with the crop.
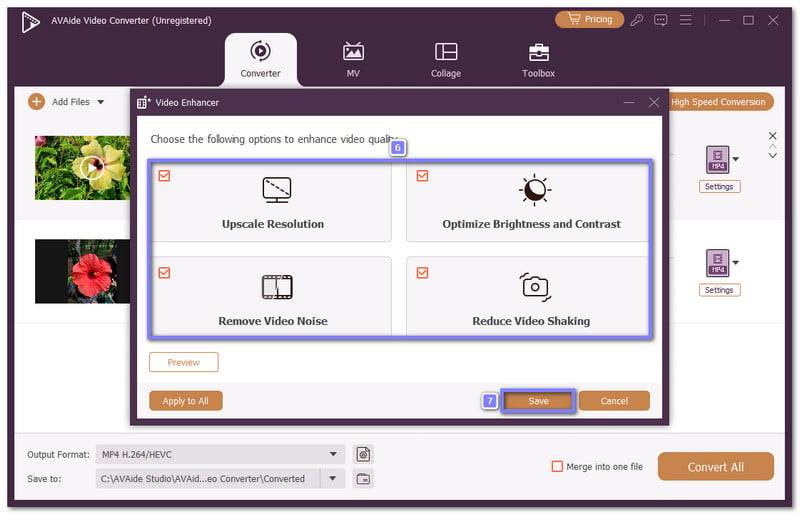
Step 4Optionally, you can use the Trim option if you want to remove unwanted start or end parts. You can also open the Video Enhance option to upscale resolution, reduce video shaking, optimize brightness and contrast, and remove video noise. These options are also essential to have a clean video.
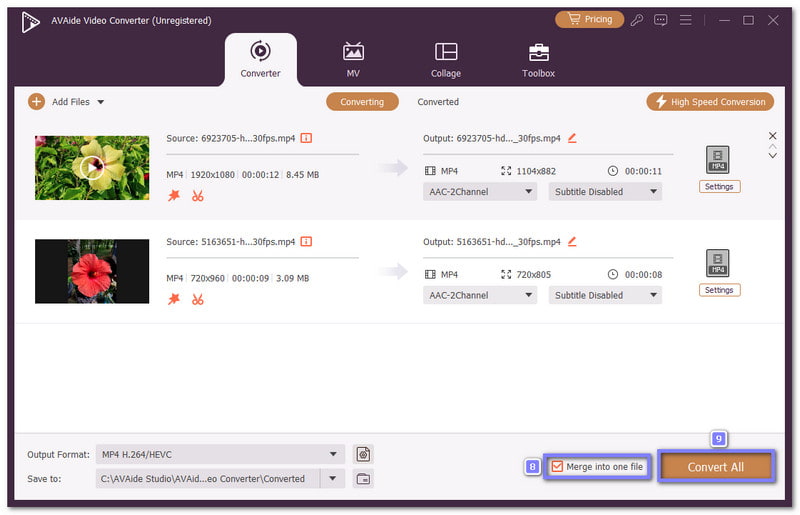
Step 5If you want all your cropped videos to become one long video, just tick the Merge into One File box at the bottom. Once everything is ready, press Convert All, and AVAide Video Converter will crop and save your videos in one go. When it finishes, open your desktop folder and check your clean and neat clips.
Part 3: How to Crop Videos on Mac in QuickTime
Some users expect their media player to crop videos, and that is where QuickTime confuses many people. The normal version can only trim and rotate, so cropping is not included at all. If you want to crop a QuickTime video on a Mac, you need QuickTime Pro and a Photoshop mask, which makes the process slow and complicated.
If you still want to know or try it, please refer to the steps below:
Step 1Open your video in QuickTime and export an image sequence so you can use one frame as a guide. Pick JPEG when saving the image sequence.
Step 2Open the JPEG frame in Photoshop and use the Rectangular Marquee Tool to pick the part you want to keep. Fill that space with black. Invert the rest of the area and fill it with white. Then, save the mask as a GIF or TIFF file.
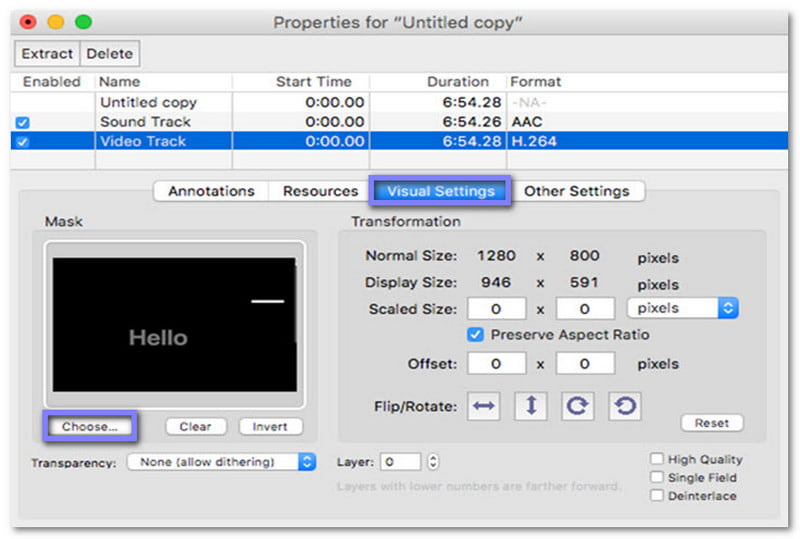
Step 3Now, open both the video and the mask in QuickTime Pro. Then, go to Window > Show Movie Properties, choose Visual Settings, and then add your mask file.
Step 4The video will now hide the extra area. Finally, go to File > Export to save the cropped video.
Part 4: How to Crop Videos in iMovie on Mac
A smoother way to crop videos comes from Apple's own editor, which is iMovie. It lets you crop video and shape clips for social media. If you need to rotate a video, iMovie can help you, too. You can turn clips 90°, 180°, or 270°.
Unlike the QuickTime method, everything works in one place. The only limit is that it keeps the 16:9 frame, so you cannot crop to any shape you want.
Step 1Run iMovie and create a new project or open one you already have.
Step 2Click the Crop button above the preview. Then, choose Crop to Fill and drag the crop box to set your frame.
Step 3If you want movement, choose Ken Burns and set the start frame and end frame. The scene will zoom in or out between the two.
Step 4For the last step, click the Output button at the top right, and proceed to save the cropped video to your Mac.

Part 5: How to Crop Video Frame on Mac in Final Cut Pro
It is a paid program, and it costs about $299.99, but Final Cut Pro is worth it for real work. It gives deep tools to crop video frames on Mac and can fix distortion when you crop a lot. You can also use it to flip videos for a better orientation. However, learning takes time, and it is not for quick fixes.
Step 1Launch Final Cut Pro and create a new project by going to File > Import > Media, then add your clip, and drag it to the timeline.
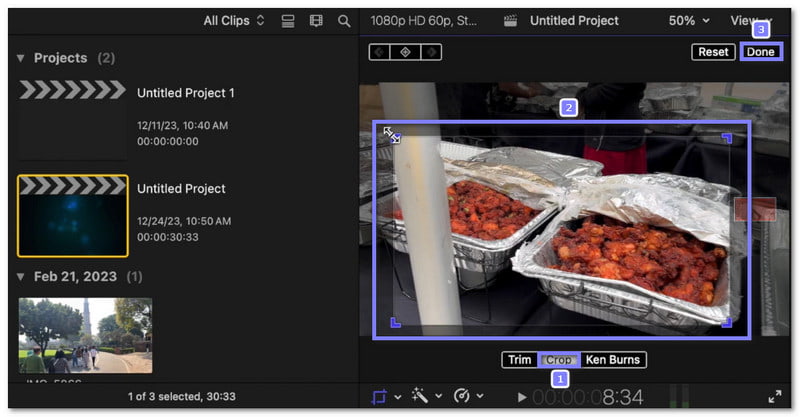
Step 2Select the Crop option under the viewer. Then, choose Crop again; it is in the middle of Trim and Ken Burns.
Step 3Now, please drag the edges of the crop box to pick the area you want. Hit Done to apply it.
Step 4Now, go to File > Share > Master File, and pick where you want to save the cropped video. Hit Next and export your cropped video.
With the help of the video cropping software on Mac, you can now remove unwanted edges, highlight important parts, and make your videos look clean and professional.
For a pro-level crop, AVAide Video Converter lets you control everything simply and quickly. In the end, your clips will look clean, polished, and ready to share or upload anywhere.
Your complete video toolbox that supports 350+ formats for conversion in lossless quality.