Need a cutout image for a Google Slides presentation? You can now remove image backgrounds in Google Slides for eligible accounts. This guide explains how it works and what to use when the built-in background remover is not available.
- Quick Answer: Can Google Slides Make Image Background Transparent?
- Part 1. Why Remove Picture Background in Google Slides
- Part 2. How to Remove an Image Background in Google Slides
- Part 3. How to Lower the Opacity of a Background Image in Google Slides
- Part 4. Alternative Solutions to Remove Image Background for Google Slides
- Part 5. FAQs About Making an Image Background Transparent in Google Slides
Quick Answer: Can Google Slides Make Image Background Transparent?
Can Google Slides remove background from a photo?
Yes, Google Slides can remove an image's background with its built-in Remove Background tool, but this is a paid Gemini feature available only with an eligible Google Workspace or Google One AI Premium plan.
Can Google Slides make the background image of the slide transparent?
Yes, in Google Slides, you can reduce the opacity of an entire image in the Format Options. This is available in the free version.
Part 1. Why Remove Picture Background in Google Slides
Occasionally you might need to make an image background transparent and here are a few scenarios:
1. A strong background can be distracting sometimes. You might want to make it transparent so the audience can read the text easily.
2. A clean background can highlight the main subject and allow you to organize your elements with creativity.
Google Slides does have a built-in Remove background tool, but it's not available on every account. Google says you need an eligible Google Workspace or Google One AI Premium subscription to use it. If you follow our guide and don't see the Remove background option, you probably don't have access. In that case just skip ahead to the alternative methods.
Part 2. How to Remove an Image Background in Google Slides
Step 1Open your Google Slides presentation and insert the image you want to edit.
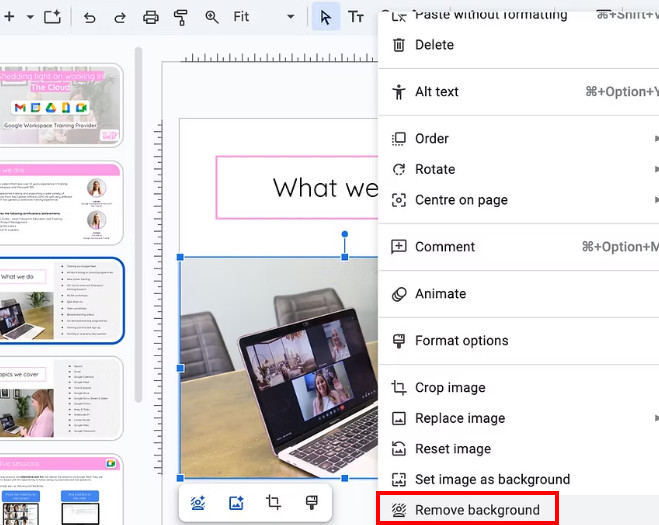
Step 2Right-click the image to select it.
Step 3In the pop-up menu, choose Remove background.
Step 4Wait for Google Slides to process the image. The background is removed while the main subject remains.
Part 3. How to Lower the Opacity of a Background Image in Google Slides
If your goal is to make a photo sit softly behind slide text, you can lower the opacity of the entire image instead. This method fades the whole picture, including the subject, so it is not the same as background removal.
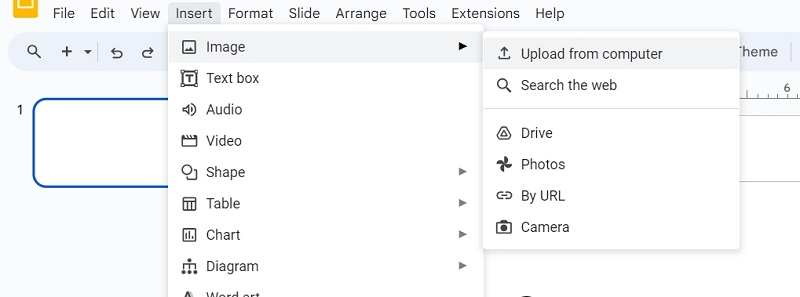
Step 1Open Google Slides and insert your image. Choose Insert > Image > Upload from Computer > Choose the desired file. Or you could also choose a drive or URL.
Step 2Once it's uploaded, it will automatically appear and its border will turn blue. Then you could resize and set the dimensions of the picture as you need.
Step 3Then you could right-click on the image you are trying to adjust and then from the side-bar options, please click on the Format Options.
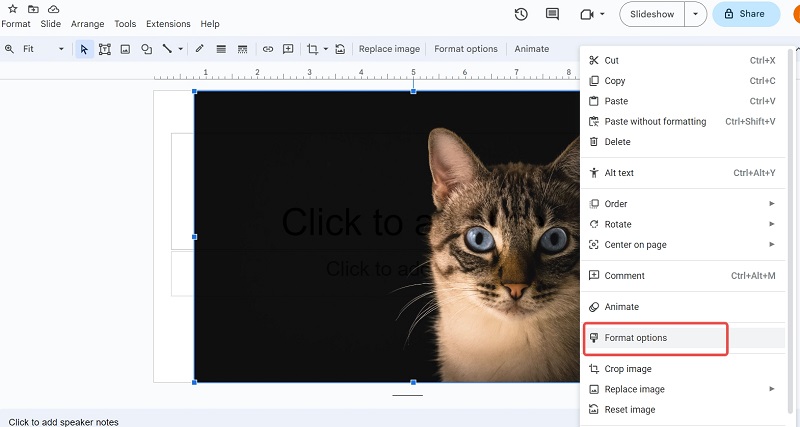
Step 4A drop-down menu will appear on the right where you have to choose Adjustments.
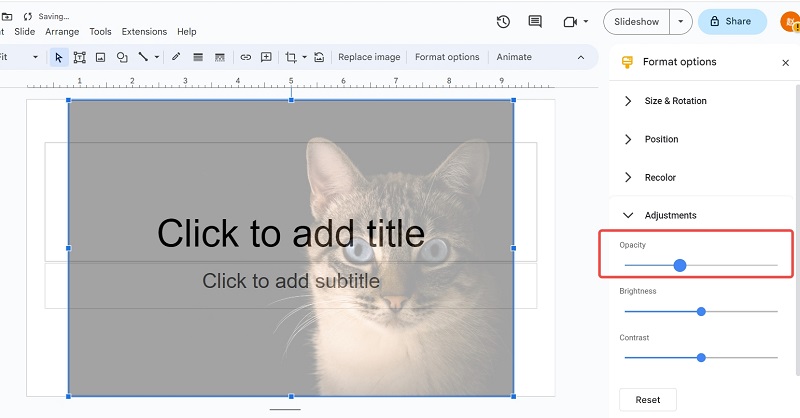
Step 5Move the slider of Opacity just by the right amount you think is appropriate for your slides. And you can keep following the same steps for other pictures you want to control the transparency of.
Step 6Then you can click File > Download and pick the format you want.
Part 4. Alternative Solutions to Remove Image Background for Google Slides
However, using Google Slides like this can only help you make the whole picture transparent. If you want to just erase the background area and leave certain areas like the main object unadjusted, you might need some other tools to achieve that easily. Here are 2 different and convenient ways to make the change.
Solution 1. Erase the Background Online, Then Insert the Image into Google Slides
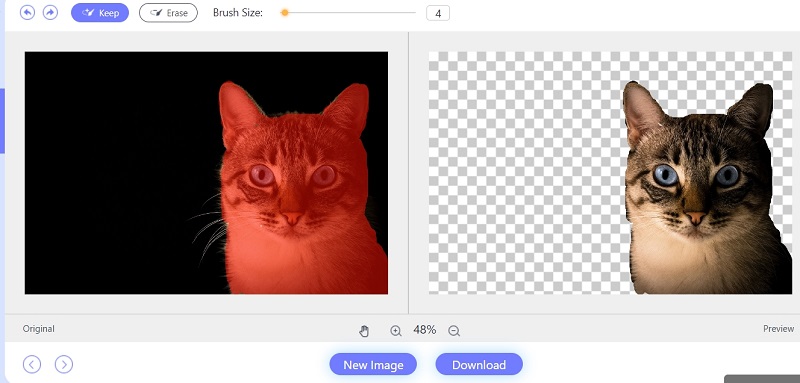
You can access AVAide Background Eraser just on the website without downloading anything. It can help remove image backgrounds of multiple formats of pictures, including PNG, JPG, JPEG, etc. And most importantly it's a free online multi-functional picture editing tool. It can also help change image background with just a few clicks.
Step 1Enter the Background Eraser page.
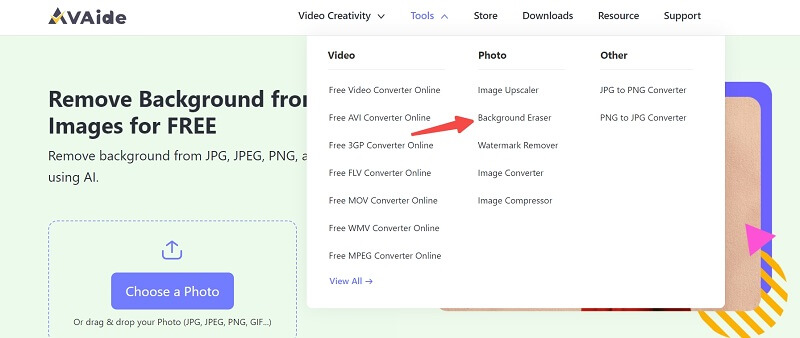
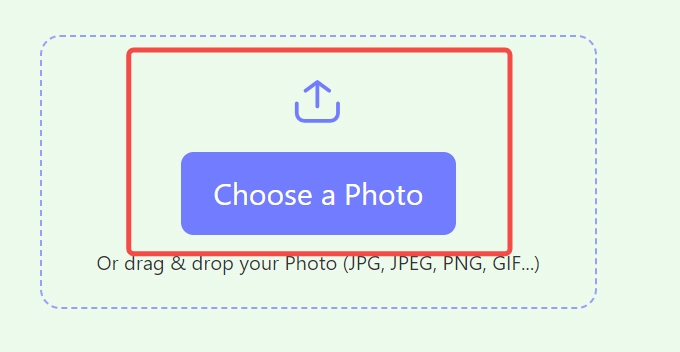
Step 2Choose the photo you need to adjust from the folder or just drag it here.
Step 3Then you can click Edge Refine to mark out the area you want to keep or erase to refine the photo.
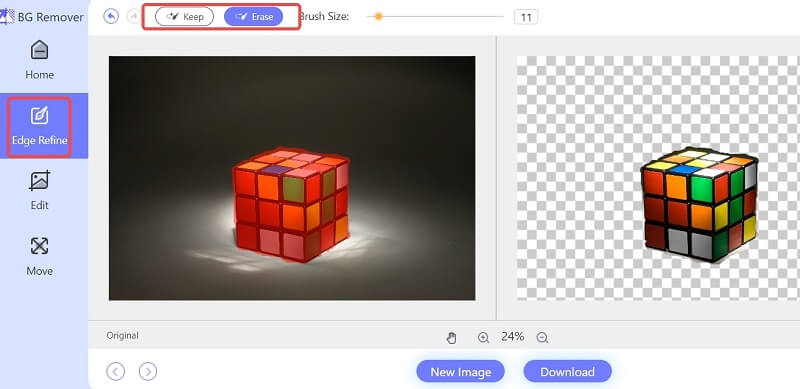
Step 4After you're done, click Download to save your new photo.
Solution 2. Use PowerPoint, Which Removes Image Background for Free
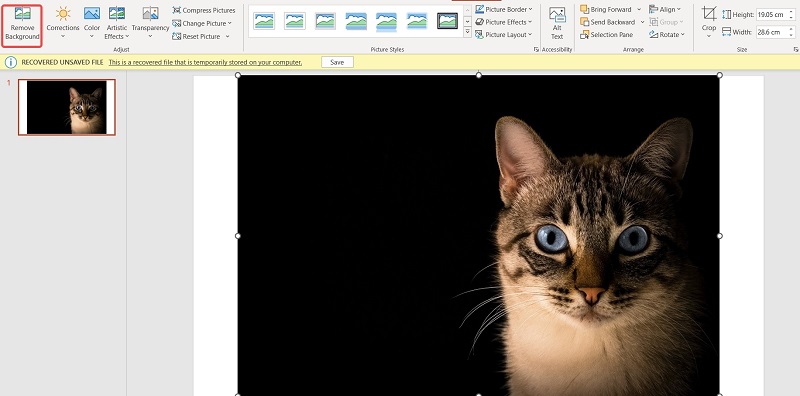
Microsoft PowerPoint could also be used to make the background transparent for any pictures. And it can achieve similar results as Google Slides.
Step 1Create a slide in PowerPoint and then insert the photo.
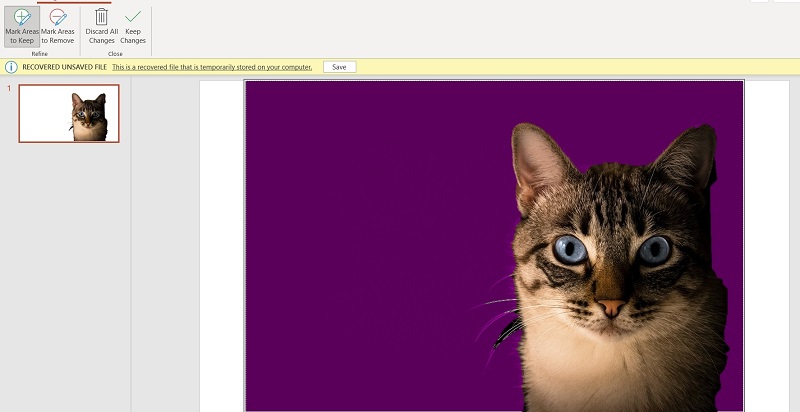
Step 2Go to Picture Tools Format and select Remove Background. Or go to Picture Format and choose Remove Background.
Step 3Then you could get the picture you want to be downloaded through File > Save as.
Part 3. FAQs about Making a Background Transparent
Will making the background transparent affect the formatting of the slides?
No, making a picture background transparent will not affect the formatting of your slide. The text and other elements will remain in their original places.
How do I change the background color of a picture?
Using AVAide you can click Edit in the Background Eraser page to add a color or in PowerPoint, you can click Solid Fill and then choose a new color as you like.
How do I make a shape transparent in Google Slides?
Select the shape you want to make transparent, then click on the Fill Color icon in the toolbar. From there, select Custom and adjust the transparency slider. You can also adjust the transparency of the outline by clicking on the Border Color icon and adjusting the transparency slider.
What format should I export for a transparent image background?
PNG is the best format for a transparent background. AVAide Background Eraser automatically exports your image as PNG. Don't use JPG. It doesn't support transparency at all and will fill the image background with white.
You now know how to make the picture background transparent in Google Slides easily. Google Slides can remove image backgrounds or fade the entire image. If you don't have the paid plan for background removal, AVAide Background Eraser is a go-to for starters. Thanks for staying till the end. Good luck!
ABOUT THE AUTHOR

Photo Editing Solutions

Uses AI and automated background removal technology to capture complex backgrounds from JPG, JPEG, PNG, and GIF.
PROCESS NOW