Thanks to its exceptional sensors and processors, the iPhone camera has become the go-to camera in our pockets. It goes beyond just capturing photos; the iPhone camera produces high-quality videos. This makes the iPhone an essential companion for family events and parties. Given the importance of these memories, many users now seek to preserve them by burning iPhone videos to DVD.
DVDs are durable, easy to store, and compatible with various playback devices. It makes them ideal for preserving memories or sharing them with friends and family who may not have access to digital files. Are you ready to embark on this journey? Let us dive in and discover how to turn your iPhone videos into everlasting DVDs!
Part 1. Guide to Transfer iPhone Videos to DVD with Walgreens
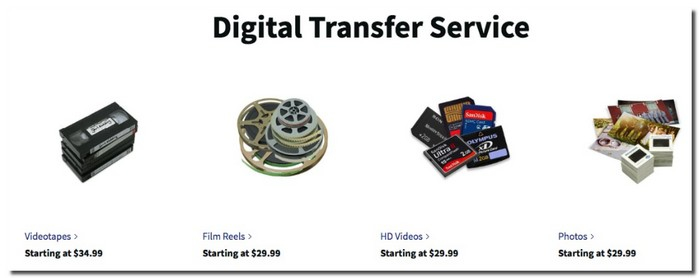
Walgreens is a reputable service for transferring your device's videos into a tangible format. It uses high-quality discs; you can select standard with a menu or regular without a menu. This versatile service extends beyond videotapes; it accommodates movie files, high-definition videos, and photos.
The video formats it supports are MP4, AVI, MPEG, MOV, M4V, MTS, 3GP, DV, and WMV. It uses the DVD-R format, ensuring compatibility with most standalone players. You can also use the customization options available during the online ordering. You can tweak your output by choosing cover designs, adding titles, or incorporating captions. The process is essential and convenient, enabling you to transfer your videos in no time. Besides that, the prices are reasonable.
To transfer iPhone video to DVD with Walgreens, rely on the steps provided:
Step 1Transfer the desired videos from your device to your computer using iTunes or a preferred method.
Step 2Visit the Walgreens photo website and create an account if you do not have one.
Step 3Navigate to the DVD transfer section. Follow the on-screen prompts to upload your videos. After that, specify your preferred preferences, such as format, cover design, and other additional features.
Step 4Explore the customization features, such as adding titles or captions to your output. After that, you can preview your selections before proceeding to ensure satisfaction.
Step 5Add the DVD transfer service to your online cart and complete the order process. Choose whether to have the DVD delivered to your home or ready for pick-up at a nearby Walgreens store.
Part 2. Burn iPhone Videos to DVD by Yourself
If you have captured precious moments on your device and want them to be saved in a tangible format, Tipard DVD Creator is the perfect solution. It can help you burn iPhone videos to DVD and elevate them by providing editing and customization options.
Tipard DVD Creator is not just a burning platform; it also offers basic video editing features. You can trim, crop, or add special effects to your videos before burning them. You can also incorporate audio and subtitles and configure their settings. It provides numerous menu templates to add a professional touch to your creation. You can set the parameters according to your preferences, such as disc type, aspect ratio, and video quality. Before finalizing your output, you can use the built-in player to preview your creation.
Step 1First and foremost, use a data transfer or USB cable to export iPhone videos to your computer.
Step 2Download Tipard DVD Creator and follow the installation instructions for complete access.

FREE DOWNLOAD For Windows 7 or later
 Secure Download
FREE DOWNLOAD For Mac OS X 10.13 or later
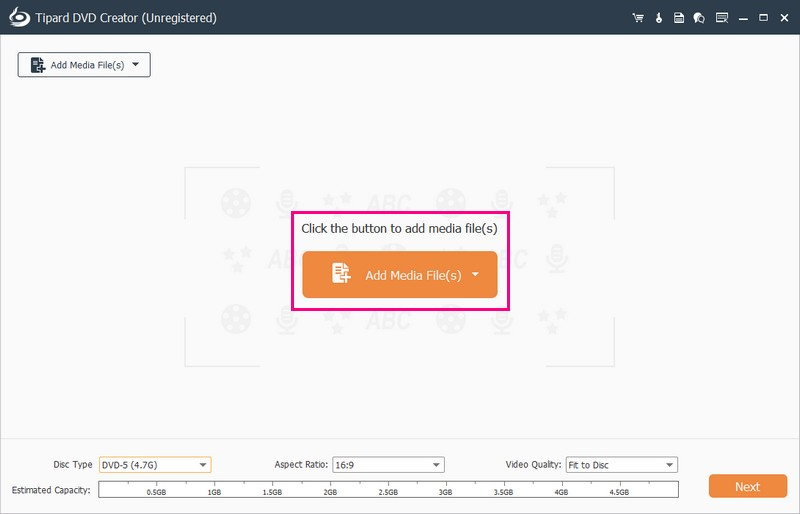
Secure DownloadStep 3Run the program to get started. Choose the DVD Disc as your disc type from the options.
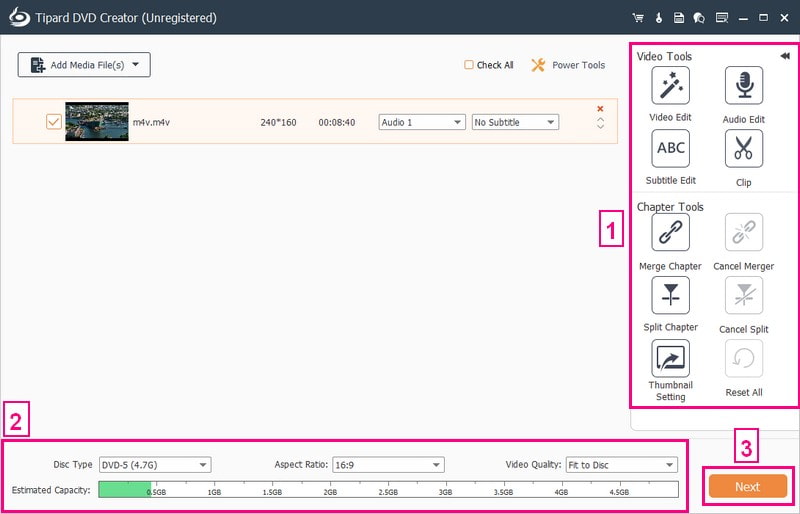
Next, press the Add Media Files button to locate and select the videos you exported earlier. Click Open to upload them into the program. Then, put a checkmark and double-click the uploaded video file to enable the Power Tools feature.
Step 4The Video Tools allows you to edit the video by rotating, cropping, adding effects, modifying the effects, and embedding a watermark. You can also add audio and subtitles and configure their respective settings. The Chapter Tools allows you to merge and split a chapter, cancel a merger and split, configure the thumbnail settings, etc. Remember to click the Apply button to confirm the changes you made.
Head to the Disc Type and take your pick from DVD-5, DVD-9, DVD-25, or DVD-50. Then, choose between 16:9 or 4:3 for the Aspect Ratio. When that is settled, move to Video Quality and opt for Fit to Disc, Low, Medium, or High. Click Next to move to the next screen.
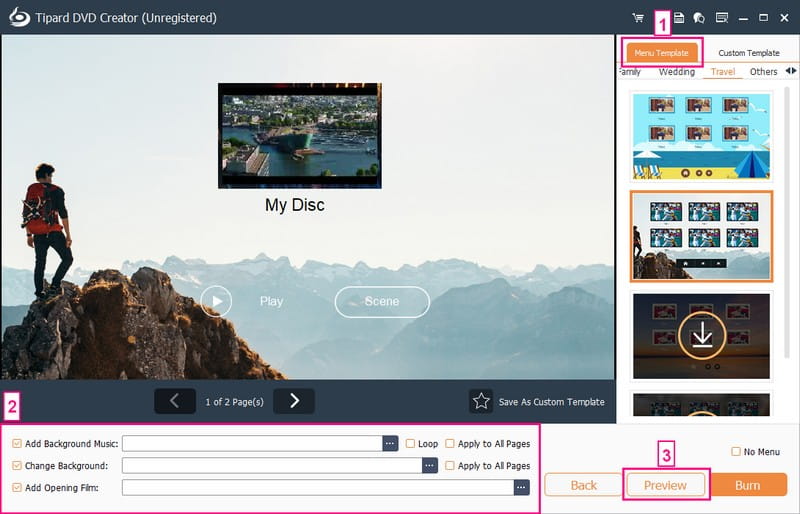
Step 5Navigate to the Menu Template and pick a style that suits your video vibe. The templates available are holiday, family, wedding, travel, etc. You can also enable options like Add Background Music, Change Background and Add Opening Film. Hit the Preview button to see how your DVD looks and play according to the settings you applied.
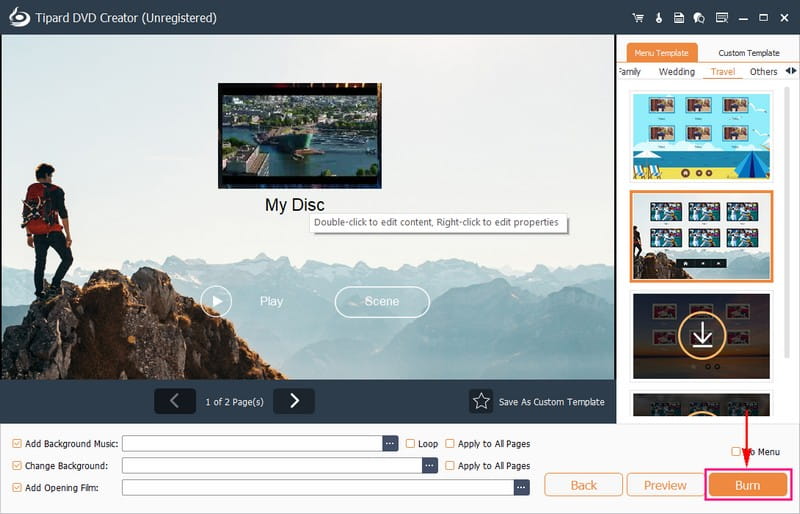
Step 6Now, insert a blank DVD into your computer's disc burner. Then, hit the Burn button to begin the DVD-burning process. Tipard DVD Creator will burn your iPhone videos onto the inserted DVD. You can now enjoy the DVD you created on various media players!
Part 3. FAQs about Transferring iPhone Video to DVD
What types of DVDs can I create - DVD-5 or DVD-9?
Most DVD creation platforms, including Tipard DVD Creator, allow you to choose between DVD-5 and DVD-9 formats. The choice depends on your preferences for storage capacity and video quality.
Can I add multiple iPhone videos to a single DVD?
Definitely! Most DVD-burning platforms enable you to add multiple videos to create a compilation on a single DVD. The good thing is that you can arrange and organize them as you like.
How much space does a typical iPhone video take on a DVD?
The space a video takes on a DVD depends on size and quality. DVD-5 holds around 4.7 gigabytes, and DVD-9 holds around 8.5 gigabytes. The program commonly shows the estimated size before burning.
Are there any copyright concerns when burning iPhone videos to DVD?
Generally, personal videos recorded on your iPhone do not pose copyright issues. However, be cautious when using copyrighted music or content in your videos. Always ensure you have the right to use such materials.
Can I add background music to my iPhone videos on the DVD?
Tipard DVD Creator makes it easy to enhance your DVD experience by adding background music to your videos. Its broad audio format support and real-time preview feature ensure a seamless process.
As you can see, burning iPhone videos to DVDs is a straightforward process when you have the right services or tools. Taking on the task yourself is highly advised, especially using a reliable DVD Burner like Tipard DVD Creator. This professional platform simplifies the process and allows you to customize and personalize your DVDs according to your preferences. So, why not give Tipard DVD Creator a try? It is your ticket to hassle-free DVD creation, letting you easily add your personal touch!
ABOUT THE AUTHOR

Best tool for ripping and converting DVD Disc/Folder/ISO image file into over various formats.