Burn DVD Windows 10 when you need to share large files, back up important data, or create playable discs for home use. Whether for work, school, or personal media, Windows 10 offers multiple methods to burn DVDs easily and reliably.
- Part 1: Why Burn a DVD on Windows 10
- Part 2: Burn DVD on Windows 10 with Free Menu Templates
- Part 3: Burn a DVD on Windows 10 with ImgBurn
- Part 4: Burn a DVD on Windows 10 with DVDFab
- Part 5: Burn Data DVD on Windows 10 with File Explorer
- Part 6: Compare the 4 Ways to Burn a DVD on Windows 10
- Part 7: FAQs of Burning a DVD on Windows 10
Part 1: Why Burn a DVD on Windows 10
Although DVDs may be impractical for most situations due to the advent of USB drives and cloud storage, burning DVDs on Windows 10 can still be beneficial. File access and storage are possible without the internet, and sharing files is possible without the need for cloud services, which are often inaccessible.
Burning DVDs provides these potential benefits:
1. File Backup: You can save and back up important documents, videos, and photographs to a DVD, should they be needed in the future.
2. Easy Sharing: DVDs can be used for sharing documents with particular individuals, especially in situations wherein the recipient may not have access to cloud services.
3. Offline Access: The files on the DVD can be accessed at any time without the need for internet connectivity, Wi-Fi, or data.
4. Device Compatibility: The use of DVDs can be advantageous for older computers or DVD players, which may not have the capability to play modern storage devices.
5. Large Storage (Compared to CDs): Unlike a CD, a DVD provides a significantly greater storage capability, which is advantageous for larger digital files.
6. Simple to Use: Windows 10 provides DVD burning capabilities without the need for additional software.
Part 2: Burn DVD on Windows 10 with Free Menu Templates
Tipard DVD Creator is more than a standard DVD burner, providing a comprehensive DVD authoring solution for users seeking control, customization, and quality. While users can access the burning tool of Windows 10, it provides no features to control structure and editing, or to create menus.
The software allows you to create an entire DVD experience like commercial DVDs by adding menus, chapters, and special features, rather than just burning files to a disc. This is especially helpful for users who are making DVDs for presentations, gifts, or for playing media in home DVD players.
Key Features:
- Create DVD menus using templates and customize backgrounds, music, and buttons.
- Supports popular formats like MP4, MKV, AVI, and MOV without extra conversion.
- Build DVDs with chapters, subtitles, and audio tracks for better playback.
- Speeds up burning using GPU support, especially for large videos.
- Trim, crop, and enhance videos before burning them to DVD.

FREE DOWNLOAD For Windows 7 or later
 Secure Download
FREE DOWNLOAD For Mac OS X 10.13 or later
Secure DownloadStep 1Download and Install
Download from the Tipard DVD Creator official website, and follow the steps to install it on Windows 10. Once the software has been installed, open the program.
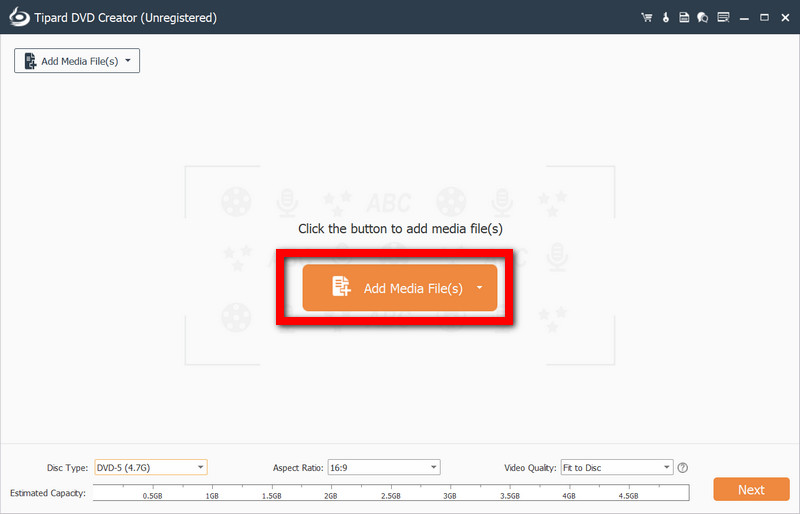
Step 2Choose the Videos You Want
Once the program is opened, click on the Add Media Files option. This will open a window to select the files to be imported. The software allows importing multiple files, even if they are in different formats.
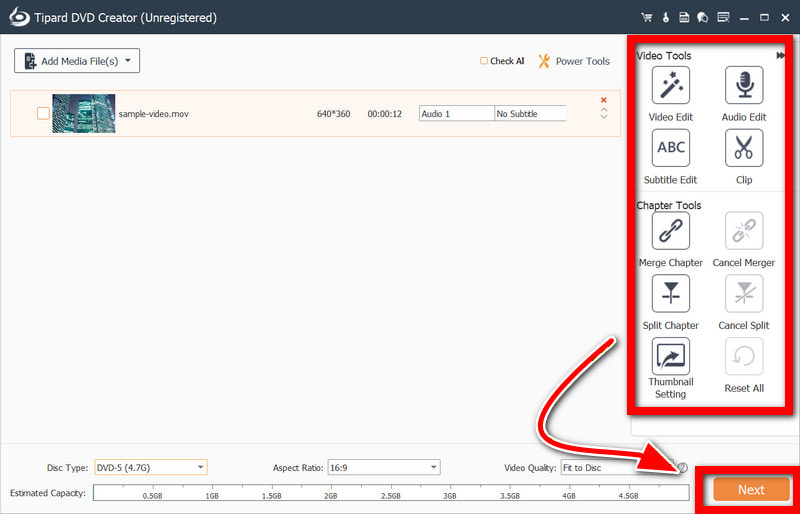
Step 3Arrange and Edit
Organize the videos into titles or chapters. The program has a built-in editor that allows trimming and cropping videos, adding and removing subtitles, and adjusting video effects, then click the Next button to proceed.
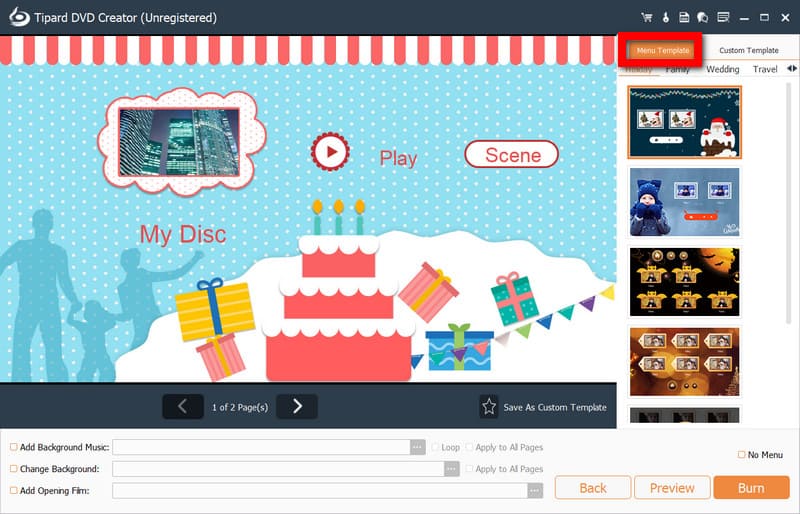
Step 4DVD Menu
Go to the menu section and select a template, then make a selection of styles in the layout, background, and music.
Step 5Put a Blank DVD
Compatible DVDs like DVD-R, DVD+R, or a rewritable DVD should be put in the optical drive.
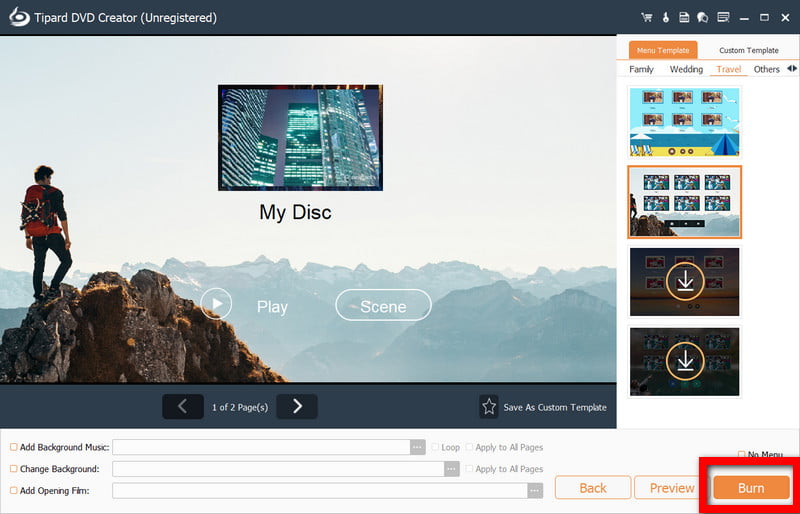
Step 6Choose Output Settings
Choose to burn the files into the DVD, or to create an ISO file, or a DVD folder. This includes adjustment of the disc type and quality.
Step 7Start Burning
Select Burn to start the process. The software will encode and write the files onto the disc.
Part 3: Burn a DVD on Windows 10 with ImgBurn
ImgBurn is a trustworthy DVD burning program that emphasizes precision and technical control. This program is designed for users who are working with ISO files or with folders that are ready and need stable and verified burning results. Even though there are no editing or menu options, it is great with regard to precise writing to discs.
Step 1Download the program from a trusted website. Follow the directions to install it on your Windows 10 computer. Be careful and avoid installing any optional bundled software during the installation.
Step 2Open the desired mode, like Write image file to disc for ISOs, or Write files/folders to disc for regular data.

Step 3Click the File/Folder button, navigate to the desired ISO/file set, and select it.
Step 4Place a blank DVD into the drive. Wait a moment for the system to detect the disc.
Step 5Modify the write speed to your desired setting, and verify if you want the drive to check the disc after writing.
Step 6To start the writing process, select the Write option and wait for the software to complete the disc writing.
Part 4: Burn a DVD on Windows 10 with DVDFab
Created for effortless DVD authoring, DVDFab is a contemporary DVD authoring software solution that caters to users who demand high quality and simple functionality. It is capable of video conversion, menu creation, and hardware acceleration, making it ideal for the conversion of disparate video files into organized DVDs, and users can also explore DVDFab alternatives.
Step 1 Install DVDFab and begin the software.
Step 2Select the Creator module and locate DVD Creator to create a new project.
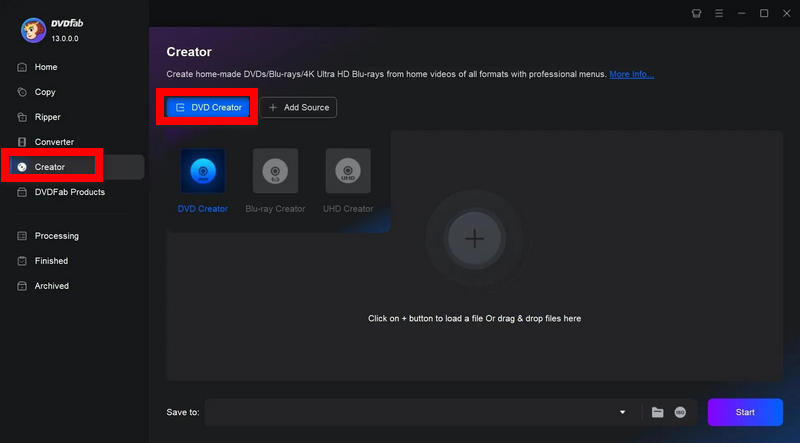
Step 3Select the Add option to upload the video files to be written to the disc.
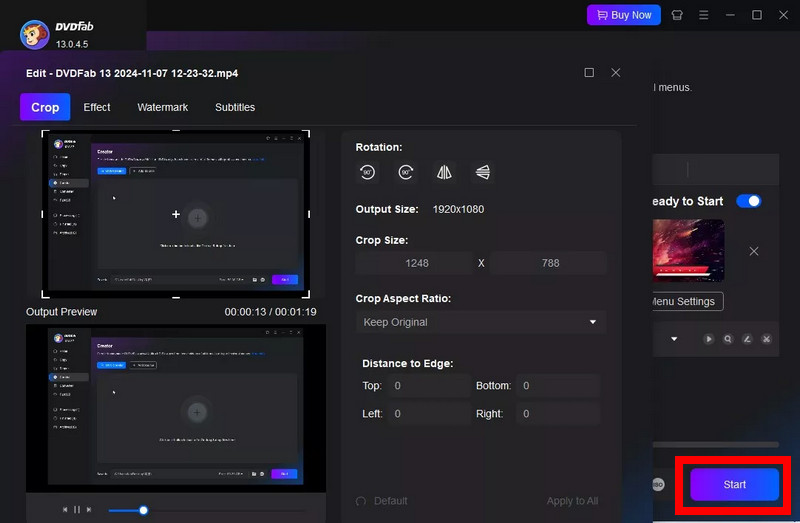
Step 4Before you start burning the DVD, modify the output settings like the type of DVD, menu templates, and quality. After that, put a blank DVD into the drive.
Step 5Press the Start button to start burning, and once it is done, test the DVD.
Part 5: Burn Data DVD on Windows 10 with File Explorer
Using File Explorer, you can burn files to discs without any additional software. This is very basic, and there is the potential for issues, especially if you are trying to burn large files. It is best to create a simple storage disc rather than an advanced DVD.
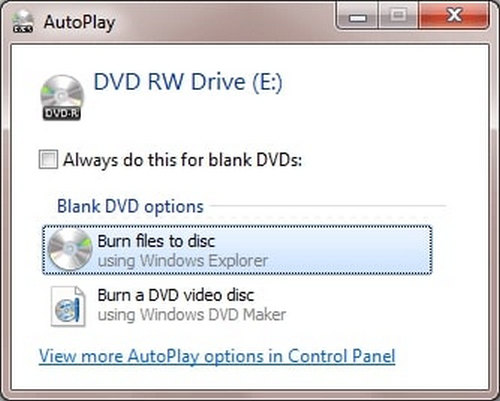
Step 1First, you will need to insert a blank DVD into your computer. Windows will detect the DVD and display some options for you to use to burn the disc.
Step 2You can select the option Like a USB flash drive if you want to add files to the disc later. If you would prefer for the disc to be finalized, select With a CD/DVD player for greater compatibility.
Step 3Now, open File and click on This PC, and open your DVD drive.
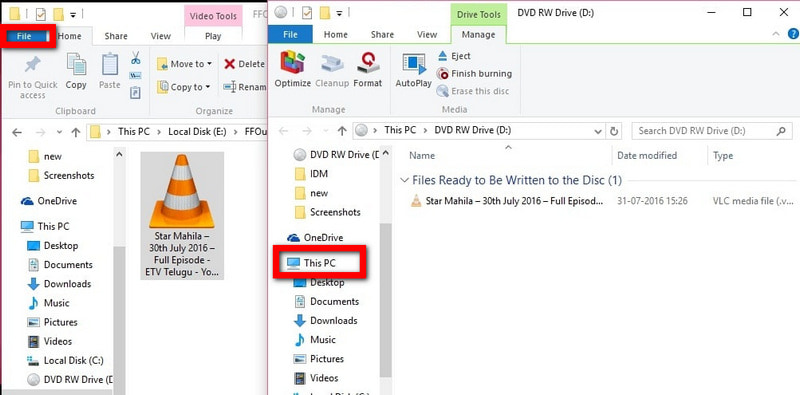
Step 4From your computer, drag and drop (or use copy and paste) into the blank disc.
Step 5If you used the CD/DVD player option above, click Burn Files to Disc burning to set the title and burn speed, then wait for the process to finish before you remove the disc.
Part 6: Compare the 4 Ways to Burn a DVD on Windows 10
| Feature | Tipard DVD Creator | ImgBurn | DVDFab | File Explorer |
| DVD Menu Creation | ✔ | ✖ | ✔ | ✖ |
| Video Editing Tools | ✔PP | ✖ | ✔ | ✖ |
| Supports Multiple Formats | ✔ | ✔ | ✔ | ✖ |
| DVD Authoring (Titles/Chapters) | ✔ | ✖ | ✔ | ✖ |
| Hardware Acceleration | ✔ | ✖ | ✔ | ✖ |
| Ease of Use | ✔ | ✖ | ✔ | ✔ |
| Burn Data DVD | ✔ | ✔ | ✔ | ✔ |
| Burn Video DVD with Menu | ✔ | ✖ | ✔ | ✖ |
| Reliability | ✔ | ✔ | ✔ | ✖ |
| Free to Use | ✔(Free Trial) | ✖ | ✖ | ✔ |
Part 7: FAQs of Burning a DVD on Windows 10
How to burn DVDs in Windows 10 without any software?
You can do this by going to File Explorer and selecting the DVD drive. If you see the option Like a USB flash drive or With a CD/DVD player then drag the files to the disc and complete this process to finish, including burning MKV to DVD.
Is ImgBurn completely free?
Yes, ImgBurn is free to use. As some user-installable bundled offers may be included in the installation process, users should be sure to carefully follow the setup procedure to avoid the offers.
Is PowerDVD free?
PowerDVD is not free. There is a trial version, but to access the complete functionality, users will need to buy a license in order to gain additional playback and media features.
DVD authoring in Windows 10 helps users create structured DVDs with menus, chapters, and playable content using different tools. Whether using built-in options or third-party software, choosing the right method ensures better compatibility, stable burning, and high-quality results for various needs.
ABOUT THE AUTHOR

Best tool for ripping and converting DVD Disc/Folder/ISO image file into over various formats.