If you want to burn DVDs on a Mac, this is the right place for you. Burning a DVD on your Mac can have a lot of benefits. It can help you create a backup file of your videos, images, audio, and other important files. It can also help you play the content to older devices that support DVDs. What's more, you can share large files without uploading. With that, there is a reason for you to burn DVDs effectively. In this tutorial, you will get to know the different methods you can use to burn DVDs on your Mac. You will also get more insights about the things to prepare before proceeding to the main DVD-burning procedure. Thus, if you want to explore the topic more, get the chance to read everything in this post.
Part 1. What to Prepare Before Burning DVDs on Mac
When burning a DVD on a Mac, there are various things you must prepare. To get a better idea, read all the details below.
Blank DVD Disc
It is better to select and choose a reliable DVD brand. Some of them are Verbatim, Sony, Philips, and more. Having an excellent and high-quality disc can help you preserve and keep your content for an extended period. Plus, ensure that the disc is clean and has no scratches. It is to ensure that you can have a smooth DVD-burning process.
External DVD Burner Drive
Since Apple has stopped supporting floppy drives on modern Macs, you must use an external DVD burner drive. It is an important device that can help you connect your DVD to your Mac.
A DVD Burning Software
One of the most essential things to prepare is the DVD-burning software. When choosing the software, it is best to offer a simple UI for a more straightforward burning process.
Part 2. The Most Excellent Method to Burn DVDs on Mac
If you want the most exceptional burning software to help you burn DVDs on a Mac, use Tipard DVD Creator. This DVD burner is perfect on your Mac since it can offer a simple layout that lets you turn your media files into DVDs in just a few seconds. You can also burn the DVD with the best quality up to 4K, leading to a satisfying viewing experience. Aside from that, the software can offer engaging menu templates to make your output better and unique. You can also attach more data during the process. You can add audio and subtitle tracks. Moreover, you can use some features to tweak your files. You can use a video trimmer, cropper, filter, add watermarks, etc. Therefore, if you want the best burner and editor, Tipard DVD Creator is the best software you can operate on your Mac. See the methods below to learn how to burn DVDs to a computer Mac.
Step 1Install Tipard DVD Creator on your Mac. Then, launch it to start the DVD-burning procedure. Ensure that your DVD is already connected to your Mac.

FREE DOWNLOAD For Windows 7 or later
 Secure Download
FREE DOWNLOAD For Mac OS X 10.13 or later
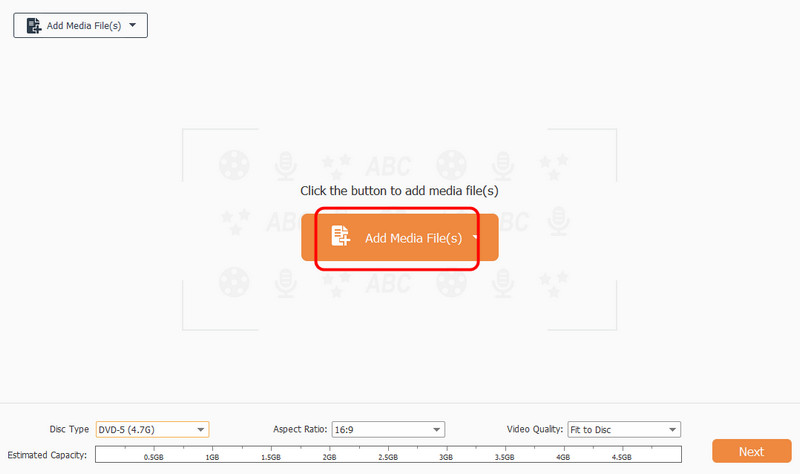
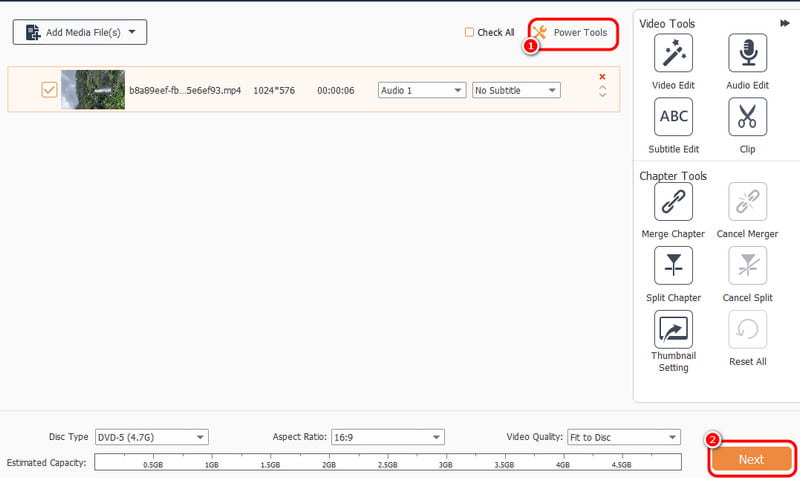
Secure DownloadStep 2Tick the Add Media Files button to browse and add the media files you want to turn into DVD.
Step 3Then, you can go to the Powerful Tools section to edit your content. After that, click the Next button below to proceed to the following process.
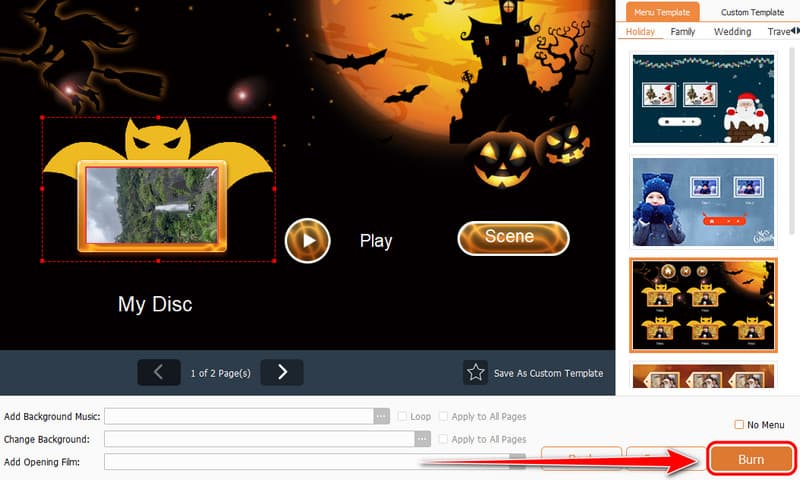
Step 4You can now select your preferred menu templates. You can also customize the menu template based on your preference. Once satisfied with the result, hit Burn to begin the DVD-burning process.
Part 3. How to Burn DVD on Mac Using Burn
Do you want to burn DVDs to Mac for free? In that case, use the Burn software. This burner can give you a smooth process since it has a simple design, allowing you to enjoy its essential features without hassle. It also has a fast-burning procedure, making it ideal for Mac users. You can use the steps below to get your preferred result using the free DVD-burning software.
Step 1Launch the Burn software on your Mac. After that, hit the + button below to add your media files.
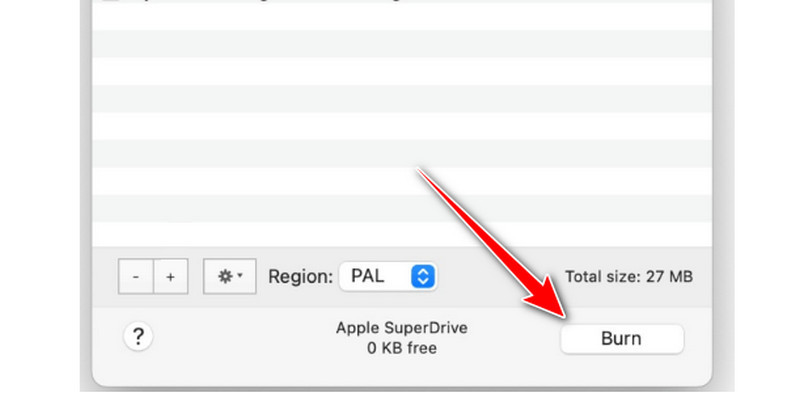
Step 2Afterward, go to the Output section and click the DVD option. Once done, you can proceed to the next step.
Step 3To start the main process, tick the Burn button below. After the process, you can now have your DVD.
Part 4. Burn DVD on Mac for Free Using Disk Utility
You can also rely on Disk Utility to burn DVDs on Mac. With this software, you can achieve your main objective. You can even have a better viewing experience since the program can give you high-quality videos. The only problem here is that the burning process is confusing, especially for non-professional users. Follow the methods below to burn DVD to Mac.
Step 1After you insert the blank disc, open the Disk Utility on your Mac.
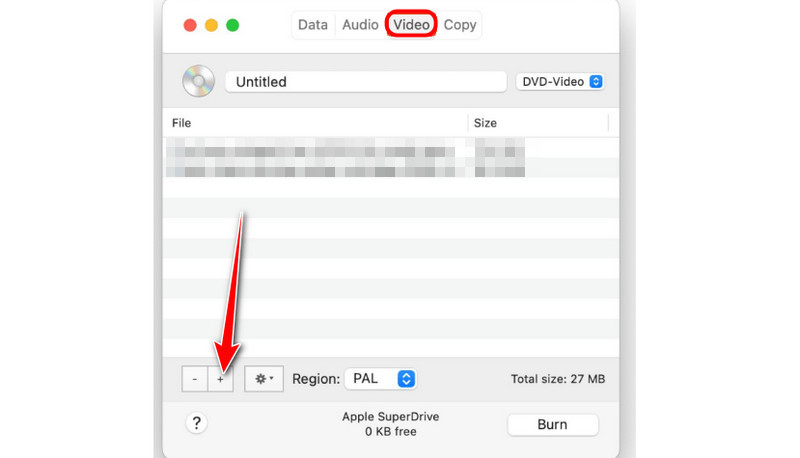
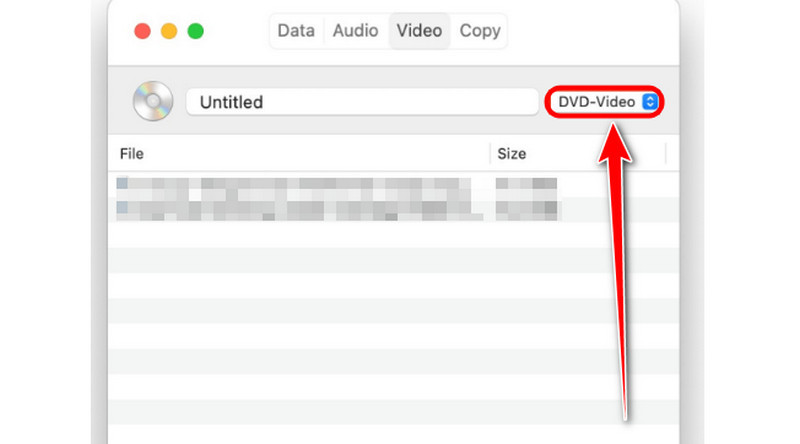
Step 2Then, go to the File > New Image > Blank Image option. After that, a pop-up window will show up on your Mac screen.
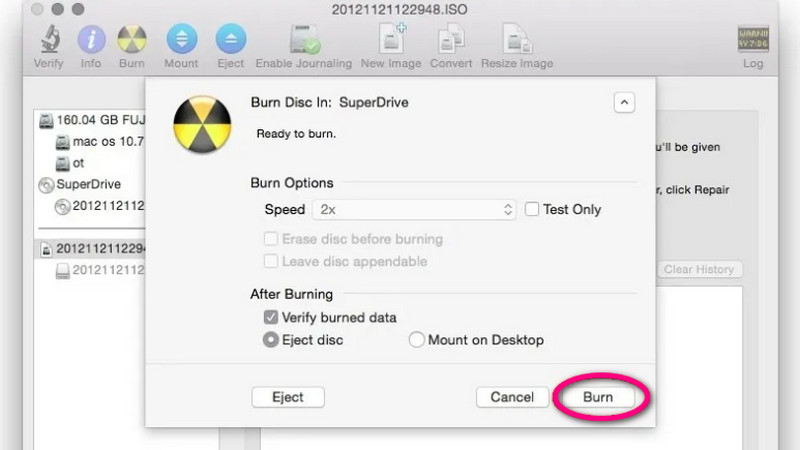
Step 3Go to the Save As option to insert your file name. You can also adjust various parameters, such as format, size, encryption, etc.
Step 4For the final process, click the Burn button to start the DVD-burning process.
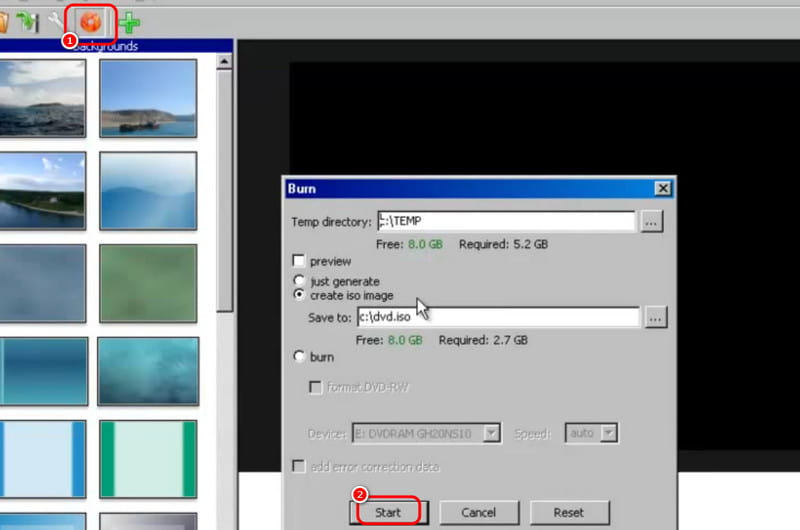
Part 5. How to Burn DVD on Mac Using DVDStyler
If you want software that can give you various menu templates, then DVDStyler is the best burner to access. It can even let you customize your menus, making it ideal for Mac users. In addition, the process of burning DVDs is fast. With that, you can save more time while obtaining your DVD. The only drawback here is that there are times when the software crashes for some reason. Still, if you want to test its capabilities, check the process below and learn how to burn DVDs on a Mac.
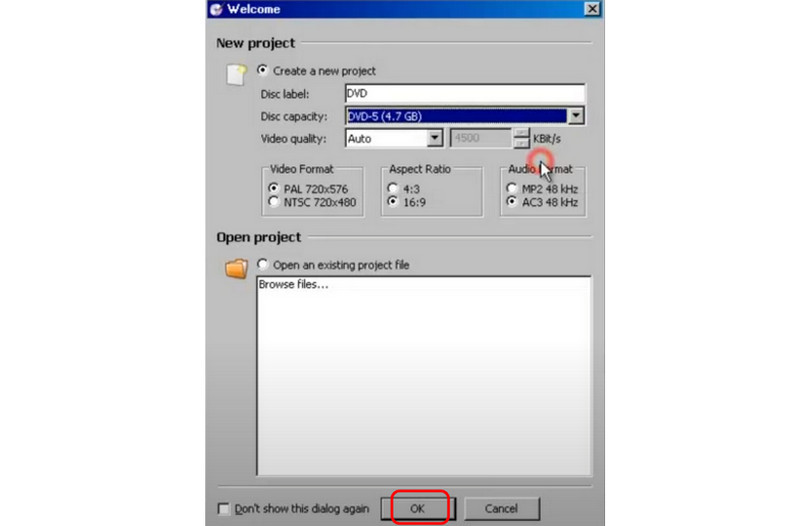
Step 1Once you launch the software, a pop-up window will show up on your screen. Fill in the required information and hit OK to go to the following process.
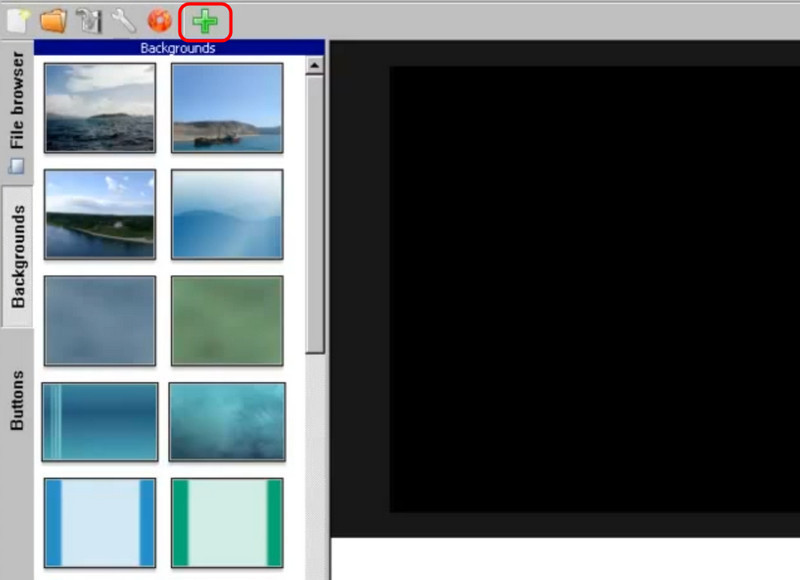
Step 2From the main interface, add your media files by clicking the + button above.
Step 3For the final process, click the Burn symbol. Then, when a window shows up, hit the Start button.
How to Burn DVDs on Mac? This article can be your ideal reference for finding all the best methods you need. It has all the procedures you can follow to achieve your main objective. Plus, if you want to have a better and more satisfying experience, from burning DVDs to smooth playback, we recommend operating Tipard DVD Creator. With its exceptional capabilities, you can burn DVDs while getting the best quality, making it a powerful DVD-burning software.
ABOUT THE AUTHOR

Best tool for ripping and converting DVD Disc/Folder/ISO image file into over various formats.