How to record Skype calls is something many people want to know. You might want to save a meeting, a lecture, or an important chat without taking notes. Maybe you are a content creator recording interviews with guests.
No matter your reason, we are here to help. We will show you reliable Skype call recorders and step-by-step how to record a video call on Skype. By the end, you will be ready to save any call easily.
Top 1: AVAide Screen Recorder
OS: Windows & Mac
The top 1 Skype call recorder today is AVAide Screen Recorder, and it earns that spot for a good reason. It gives you clear video and audio, which helps you hear every word and see every face without blur. You can start a recording with one click, so you never miss the start of a call.

FREE DOWNLOAD For Windows 7 or later
 Secure Download
FREE DOWNLOAD For Mac OS X 10.13 or later
Secure DownloadAVAide Screen Recorder also lets you save your file in many formats, like MP4, MOV, MKV, WMV, and WEBM. Once you finish, you can share your recording right away. It makes the whole process fast, neat, and easy for anyone to use.
Here is how to record Skype calls using AVAide Screen Recorder:
Step 1Suppose you have already downloaded and installed AVAide Screen Recorder on your Windows or Mac; so open it.
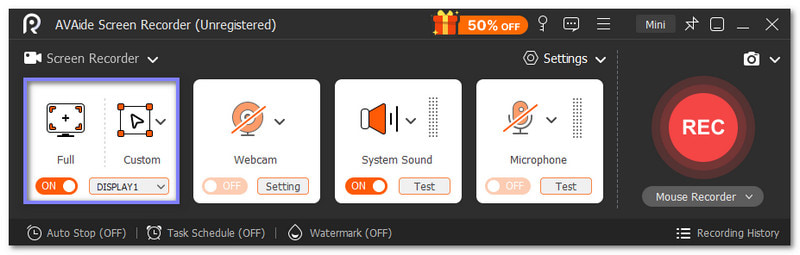
Step 2Pick the recording area you want. You may choose Full if you want the whole screen, or choose Custom and select only the Skype window.
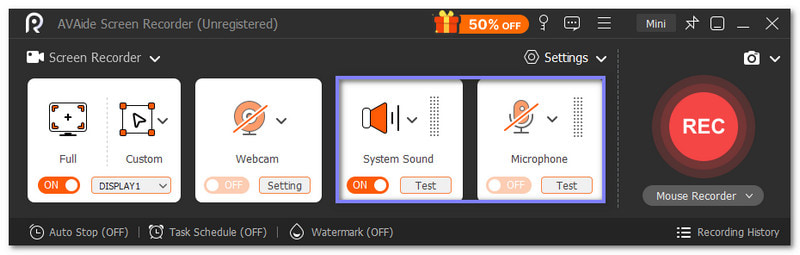
Step 3Turn on System Sound so the computer audio is recorded. If you want your voice included, too, turn on the Microphone switch.
Step 4When your Skype call begins, click the REC button. You will see a short 3-2-1 countdown, and then the recording will start.

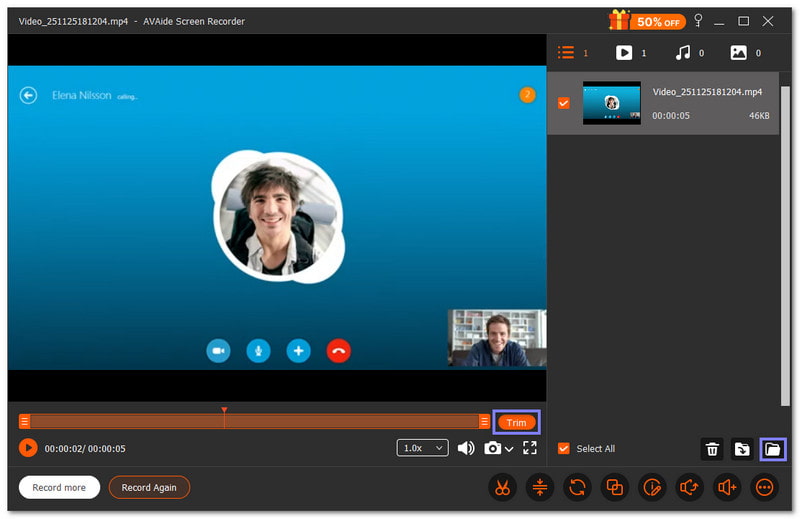
Step 5Once the call is over, click the Stop button. AVAide Screen Recorder will show you a preview so you can check the recording.
If the start or end has parts you do not need, use the Trim option to cut them out. Once you are happy with it, proceed to save the recorded Skype call to your computer.
AVAide Screen Recorder is a screen recorder without a watermark, so expect that your recorded Skype calls will not have any text or logo covering them.
- Pros
- Editing tools to trim or enhance videos.
- Task schedule for automatic recording.
- Annotation tools for marking or highlighting.
- Record webcams, phones, or take screenshots.
- Cons
- The free version has limits, so you need to subscribe to the paid version, but it comes with a 30-day guarantee.
Top 2: OBS Studio
OS: Windows, Mac & Linux
OBS Studio is a powerful program used by many users who want full control of their videos. It works with lots of video and audio sources at the same time, which makes it feel big and advanced. It is mainly known for streaming, but you can also use it as a call recording for Skype if you need strong editing features.
Step 1Launch OBS Studio, and the Auto-Configuration Wizard will pop up. Please pick the option for recording, choose your resolution and FPS, and then click Apply Settings.
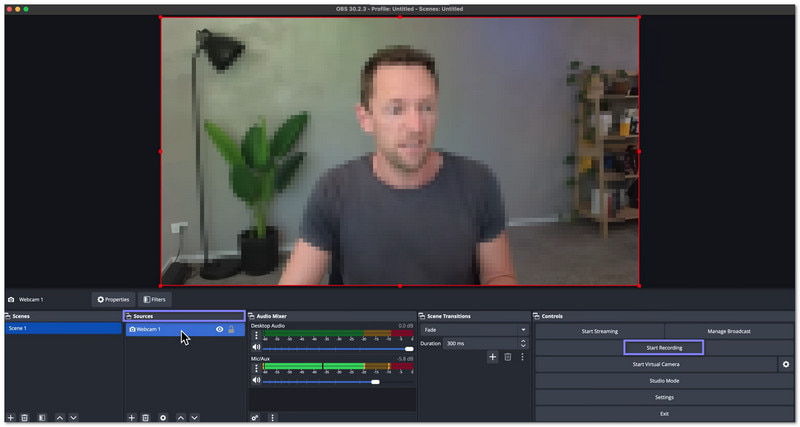
Step 2Look at the main display. You will see Scene, Sources, Audio Mixer, Scene Transitions, and Controls. Press Settings and set the video, audio, and output the way you like.
Step 3Press the Add button under Sources and pick Display Capture to record your whole screen.
Step 4Now, open Skype and get your call ready. OBS Studio will give you a short countdown before it starts.
Step 5Once the call is done, click Stop Recording in the Controls area. After that, OBS Studio will save your Skype call on your computer.
- Pros
- It can also record streaming video in high clarity.
- It supports long recording sessions without limits.
- It works well with webcams and capture cards.
- Cons
- It takes time to learn how everything works.
- It has more features than simple call recorders need.
Top 3: TalkHelper
OS: Windows
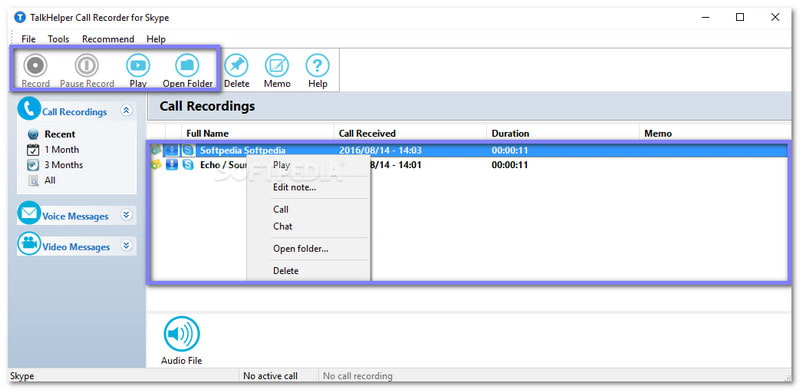
Some tools focus on saving essential conversations, and TalkHelper is one of them. It records Skype calls, messages, and even voicemails with clear audio. It keeps helpful details, like the caller identification card, date, and time. It is made for people who want to store and review calls, not for people who need fancy video editing.
So, how can you record Skype calls using it? Find out that below!
Step 1Download and install TalkHelper from its main website. Once installed, proceed to open it to get started.
Step 2The thing about TalkHelper is that it records calls by default as soon as you make a Skype call. You can change this to manual in the settings if you want more control.
Step 3During the call, you may press the Pause and Record button if you want to skip parts of the conversation.
Step 4After the call, use the Play button to watch your recording or click Open Folder to see your AVI or WAV files.
Step 5You may move your files anywhere you want, like Dropbox. Remember that TalkHelper is free to download, but it needs payment to unlock full use.
- Pros
- It can record voicemails and chat logs.
- It stores caller details for easy tracking.
- It can add notes that help you remember parts of the call.
- Cons
- It may show small bugs on some systems.
- It works only on Windows computers.
Top 4: Pamela for Skype
OS: Windows
Pamela for Skype gives users simple tools to handle calls and chats. It can record calls, save chat history, and even reply for you when you are busy. It feels like a small helper for Skype users who want basic control. It works well for voice calls, but its video options are simple and not advanced.
Find out below on how to record Skype voice calls or video calls using Pamela for Skype:
Step 1Get and set up Pamela for Skype and run it when you are done.
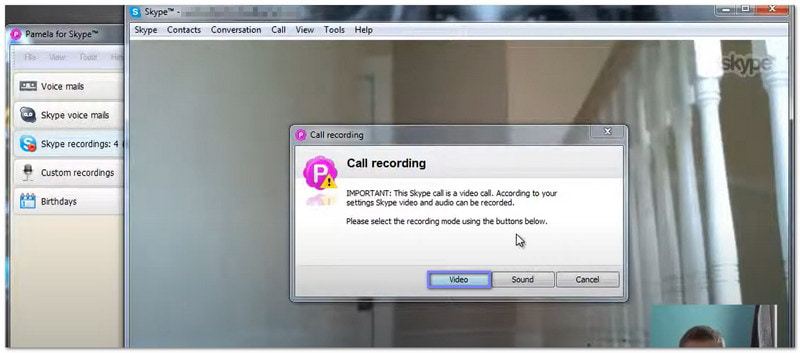
Step 2Start a Skype video call, and Pamela will begin recording on its own.
Step 3If it does not start, click the small Record button on the Pamela toolbar. You can pick audio, video, or both.
Step 4Once the call ends, click the Stop button in Pamela or end the call on Skype.
Step 5Look for the saved Skype call in Pamela's recording list. You can play it or move it to any folder you want.
- Pros
- It has tools that help organize your Skype schedule.
- It can auto-record calls without pressing anything.
- It supports older Windows systems that many still use.
- Cons
- It has fewer features in the free version.
- It has limited control for video recording.
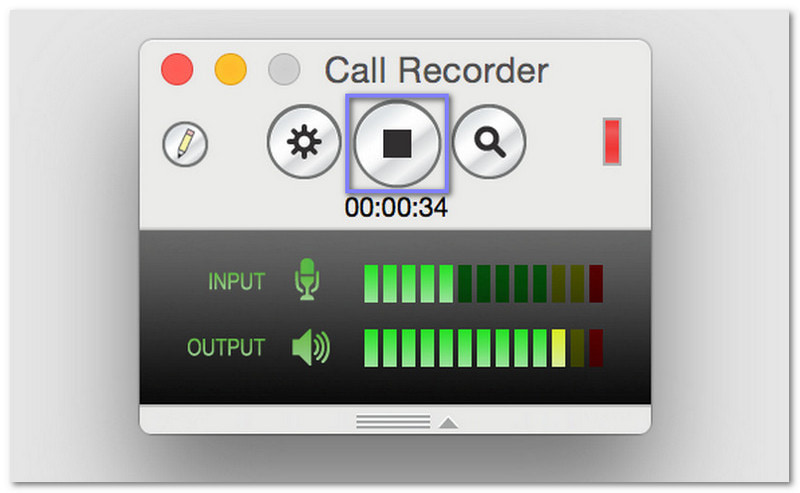
Top 5: Ecamm Call Recorder for Skype
OS: Mac
If you are a Mac user and wondering, How do I record a Skype call on a Mac, Ecamm is another trusted option you can use.
It is built to start recording quickly without confusing menus. It allows you to pick the video size and even connect a camera for better picture clarity. It really fits users who want neat call recordings without extra editing work.
Step 1Just like the tools above, please download and install Ecamm Call Recorder on your computer.
Step 2After installation, you will see a new Recording preference added to your Skype settings.
Step 3Start your Skype call like normal. Then, a small record display will appear when the call begins. You need to press the Red button to start recording.
Step 4Once the call is over, click the Stop button in the recorder display. You can find all the saved calls inside the Saved Calls or Movies folder.
- Pros
- It supports HD recordings for clearer video.
- It has simple drag-and-drop tools for small edits.
- It allows split-screen mode for two-person calls.
- Cons
- It works only on Mac devices.
- The free version has limited tools.
As you can see, there are a lot of ways to record Skype calls. The last thing you need to do is pick one that works best for you.
If you are undecided, we strongly recommend AVAide Screen Recorder. You can use it to capture Skype calls and much more. It is not limited to just one use so you can rely on it for many recording tasks.
Record screen, audio, webcam, gameplay, online meetings, as well as iPhone/Android screen on your computer.