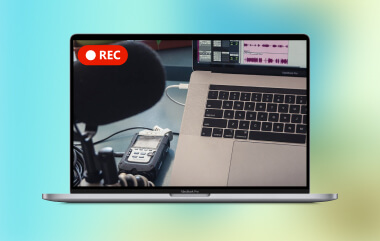
Google Meet lets you join meetings from your computer or phone easily. If you want to save a meeting, share it with someone who missed it, or keep it for training, you need to know how to record Google Meet. Do not worry if you are not sure how; this guide will show you exactly how. Let us get started!
- Part 1. How to Record Google Meet: Step-by-Step Guide
- Part 2. Adjust Settings to Record Google Meet with Ease
- Part 3. How to Record Google Meet with High Quality
- Part 4. How to Record Google Meet with Web Extensions
- Part 5. Comparison of the 3 Ways to Record Google Meet
- Part 6. Troubleshooting Errors When Recording Google Meet
Part 1. How to Record Google Meet: Step-by-Step Guide
You need to be aware that only Google Meet hosts or users with permission can start a recording. Each meeting can be recorded for up to eight hours, with captions or transcripts added for clarity. Without further ado, please learn how to record in Google Meet step-by-step below:
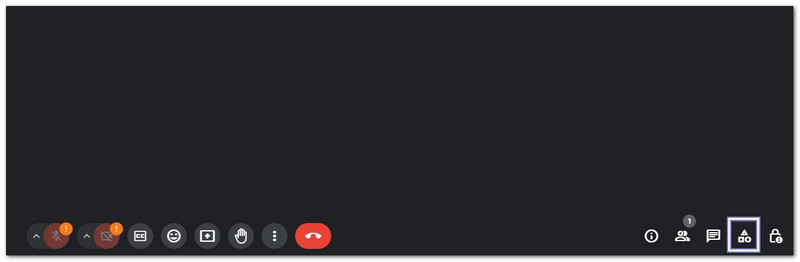
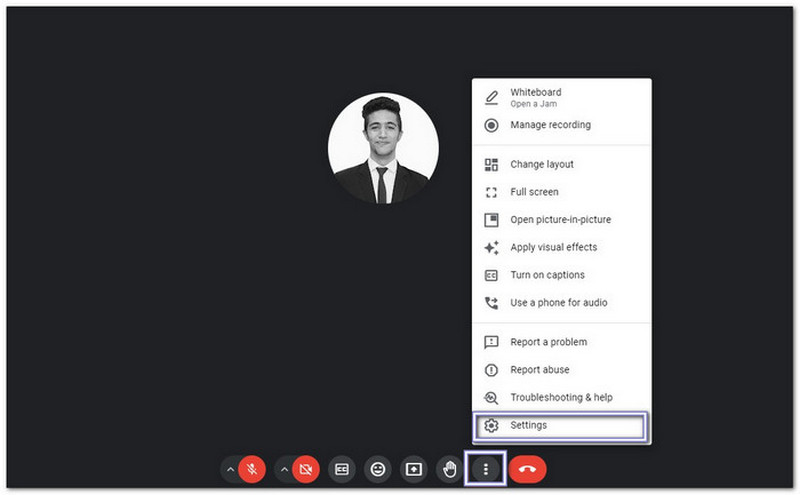
Step 1Join your Google Meet call first. Go to the bottom right corner of the screen and click Activities.
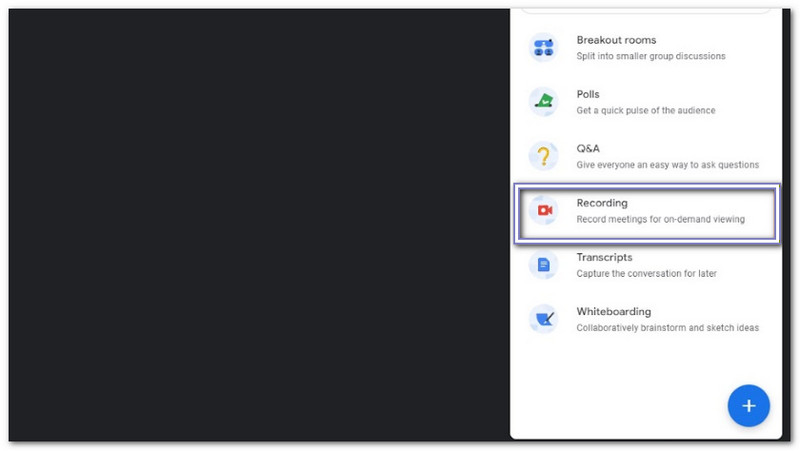
Step 2After the Activities panel opens, choose Recording. A new small window will appear on the side of the screen.
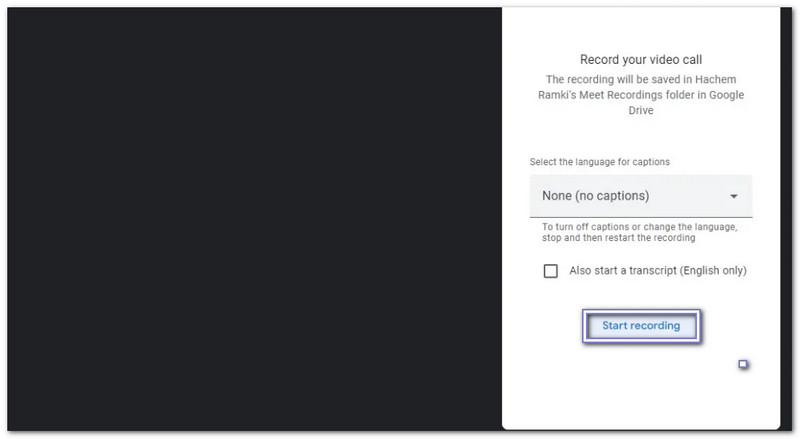
Step 3Turn on captions or transcripts if you need them. These help if you want text along with the meeting video. After that, click Start recording. Everyone in the meeting will also see a notice that the recording has started.
Step 4Look at the top left corner of your screen. A red recording symbol should appear there. It confirms that the meeting is being recorded.
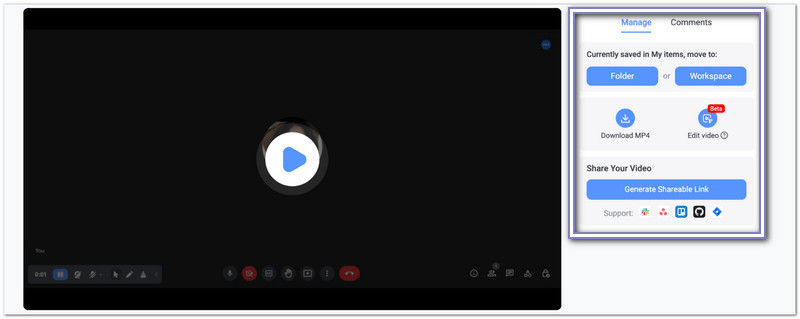
Step 5Once you finish, return to the same menu and stop the recording. The video will save automatically to your Google Drive inside the Meet Recordings folder.
If you are wondering where Google Meet recordings go, they appear in this folder. The file name usually follows the meeting date and time. If the meeting is long, the video and transcript may take a little time before they appear in Drive and in your email.
Part 2. Adjust Settings to Record Google Meet with Ease
Before you start recording, a few quick settings can make your Google Meet video look and sound much better. A clear microphone and the right camera help a lot, especially if you plan to save the meeting for later review.
Step 1Click the three dots at the bottom right of the meeting display. Select Settings to open the audio and video options.
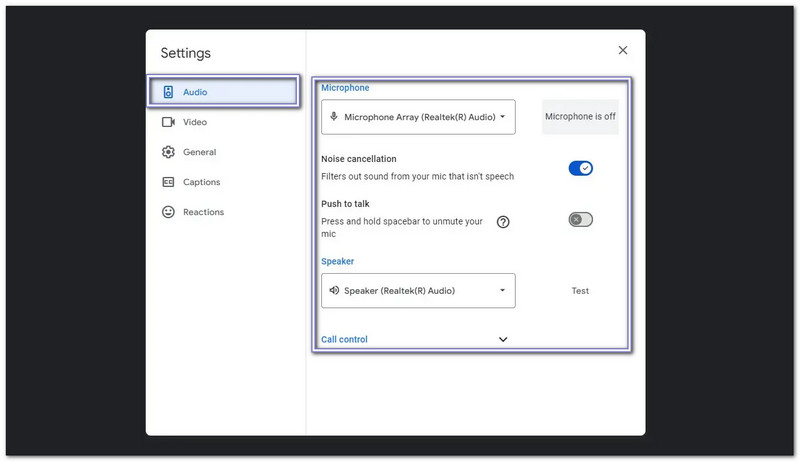
Step 2Go to the Audio section and check which microphone is active. Some applications can appear as extra input devices, so it helps to choose the one you really want to use. You can also select your speaker here.
Step 3Enable Noise cancellation if there is background sound around you. You can also use Push to talk if you want your microphone active only when speaking.
Step 4Open Video and choose the correct camera. It is useful if your device has more than one webcam connected.
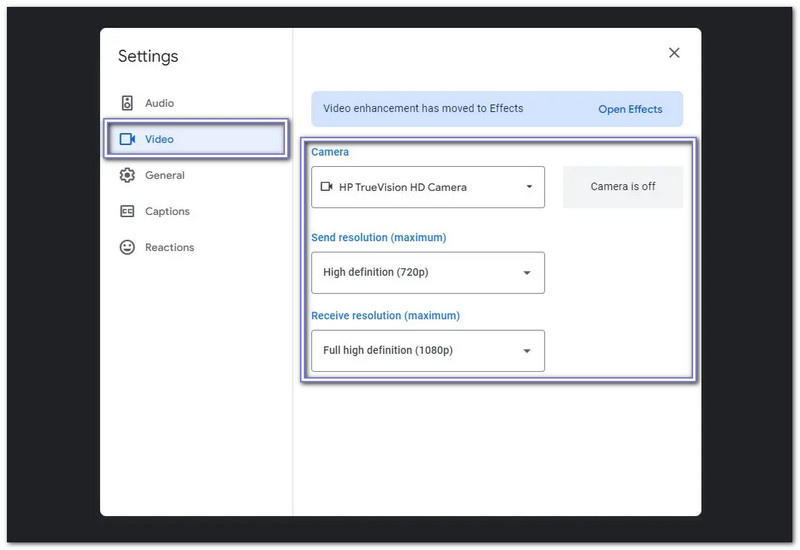
Step 5Choose Send resolution to control how clear your camera looks to other people. Choose Receive resolution to control how clearly you see others during the meeting.
Part 3. How to Record Google Meet with High Quality
For high-quality Google Meet recordings, AVAide Screen Recorder is an excellent choice. It keeps your original resolution and can even upscale recordings to 4K for extra clarity. With support for HEVC and AV1 codecs, you can save long meetings with high compression without losing quality.
It also handles long-duration recordings smoothly, so your meetings stay lag-free and stutter-free. It is really perfect for saving or sharing important sessions with clear audio and sharp video.
- Record any window or application with precise control.
- Schedule recordings to start automatically at a set time.
- Record system sound, microphone, and webcam for lively videos.
- Add text, images, shapes, or whiteboard notes to highlight key points.
- Export videos in multiple formats like MP4, AVI, MOV, WMV, or MKV.

 Secure Download
Follow the steps to master how to record Google Meet with high quality below:
Step 1Click the Free Download provided above to download and install AVAide Screen Recorder on your Windows or Mac.
Step 2Screen Recorder opens by default. Choose Full Screen to capture the whole Google Meet window, or select Custom if you prefer a smaller area. Turn on both System Sound and Microphone to record your voice and the meeting audio at the same time.
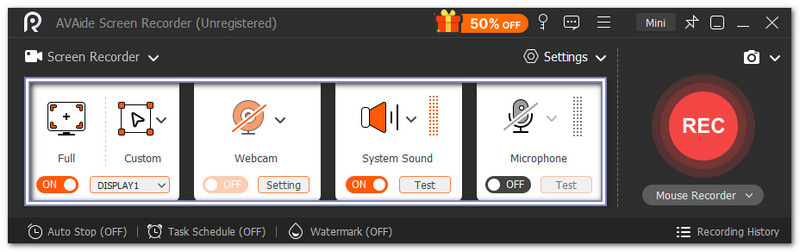
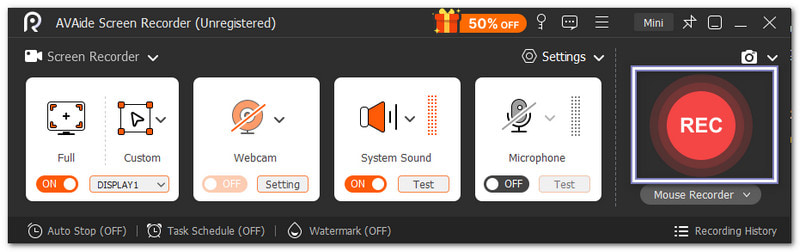
Step 3Join your Google Meet call and switch to the AVAide Screen Recorder. Hit REC to begin. While recording, you can use annotation tools like text, arrows, shapes, or highlights to mark important parts of the meeting in real time.
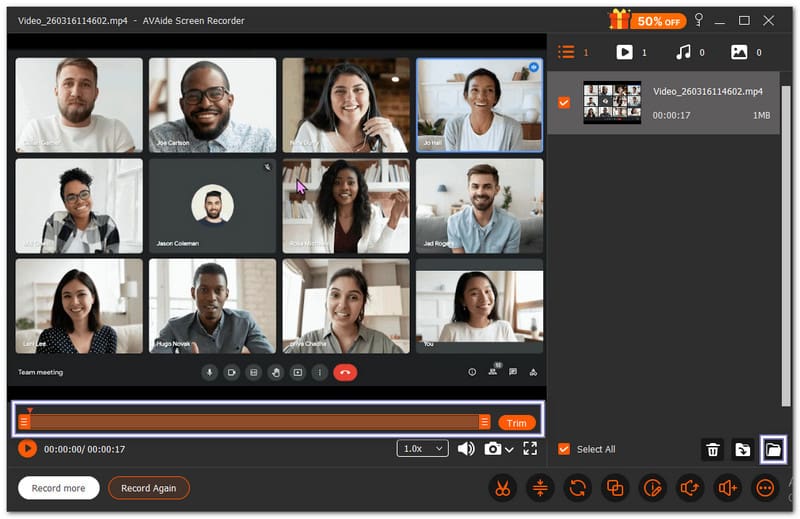
Step 4Once the meeting ends, click the red Stop button. A preview display will appear where you can watch and or trim your recorded Google meeting call. After that, click the Folder button to save the file to your computer.
- You can also use AVAide Screen Recorder to record Zoom meetings, online classes, or gameplay.
Part 4. How to Record Google Meet with Web Extensions
If you need another way to save a meeting, a browser extension can help. To master how to record a Google Meet call or how to record a Teams meeting, Awesome Screenshot & Screen Recorder works on major browsers. It can record your meeting tab with audio, even when you do not use Google Meet's built-in recorder.
Step 1Download and add Awesome Screenshot & Recorder to your browser. Open it after installation, then sign in or create an account so all recording tools become available.
Step 2Open your meeting in the same browser and enter the call. Stay on that tab because the extension records the active browser tab you choose.
Step 3Click the extension symbol and open the Record tab. Choose This Tab so it records only your Google Meet screen. Set the video resolution and choose whether to save the file locally or in cloud storage.
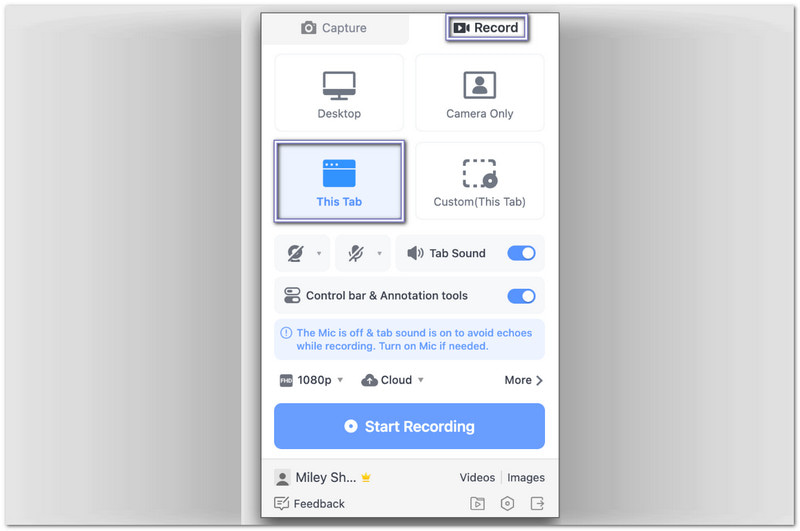
Step 4Click the blue Start Recording button. A short countdown will appear, then the recording begins automatically.
Step 5Click Pause on the control bar when you want to finish, then press Stop. After recording, you can preview the file, trim it if needed, download it, upload it to the cloud, or share it by link.
Part 5. Comparison of the 3 Ways to Record Google Meet
There are three main ways to record Google Meet, and each works a little differently. The table below compares them so you can see which option is best for your needs.
| Feature | Google Meets Built-in Recorder | AVAide Screen Recorder | Awesome Screenshot & Recorder |
|---|---|---|---|
| Ease of Use | Easy | Easy | Easy |
| Permission Needed | Only the host or co-host can start recordings. | No host permission is needed, and it works for any meeting. | You can record without host permission using this extension. |
| Video Quality | The video quality is standard and limited by Google Meet’s streaming. | It keeps high quality, preserves the original resolution, and can even upscale to 4K. | The quality depends on your browser tab, but it is usually decent. |
Part 6. Troubleshooting Errors When Recording Google Meet
Recording Google Meet can sometimes be tricky. Errors may happen even if everything seems fine. Learning how to fix them fast can save time and keep your meetings recorded properly. Here is how to troubleshoot common problems when recording Google Meet:
1. Check your permission - Only the meeting host or someone in the same Google Workspace organization can record. If you are not the host, ask them to permit you or record for you. It usually answers the question of why I cannot record Google Meet.
2. Use the Right Account - Make sure you are signed in with the correct Google account. Personal accounts might not allow recording.
3. Stable Internet - A weak connection can stop recording. Make sure your Wi-Fi or network is strong.
4. Update Browser - Google Meet works best on Chrome. Make sure it is updated. Older versions can cause glitches.
5. Clear Cache - The cache in your browser can occasionally cause lag. Errors can be fixed by clearing them.
6. Check Storage - If you are curious where to find Google Meet recordings, check your Drive's Meet Recordings folder. Make sure you have enough space, as low storage can prevent recording.
7. Restart and Retry - Close the meeting, reopen it, and try recording again. Sometimes, this simple step solves the issue.
You can record Google Meet video not only using Google Meet's built-in recorder but also with tools like AVAide Screen Recorder or a web extension such as Awesome Screenshot & Recorder.
For long meetings, AVAide Screen Recorder is the best choice because it handles long recordings smoothly without any lag. Use it for all your future recordings to keep everything clear and reliable!
ABOUT THE AUTHOR

Record screen, audio, webcam, gameplay, online meetings, as well as iPhone/Android screen on your computer.