"How can I copy my DVD to a USB so I can watch it on my TV, computer, or phone without losing quality or worrying about scratches or protection?"
If you have a collection of favorite movies or precious home videos on DVDs, you probably know how fragile they are. One accidental scratch can ruin your favorite memories forever. On top of that, most modern devices - like smart TVs, thin laptops, and smartphones, don't even have DVD drives anymore. Saving your DVDs to a USB flash drive is the best way to protect your videos and watch them anytime, anywhere.
While the idea is simple, the actual process can be slightly different depending on your DVD type. For example, commercial DVDs often have copy protections, while homemade DVDs do not. To help you get the job done easily, this guide will show you how to copy a DVD to a USB using three types of methods.
Part 1: Benefits of Copying a DVD to a USB Memory Stick
Why should you back up your DVD collection to a USB flash drive? Here are the key benefits:
• Ultimate Portability: USB drives are incredibly small and lightweight. You can easily carry dozens of DVD movies in your pocket or bag without dragging around bulky plastic cases.
• Better Physical Protection: DVDs are fragile and easily ruined by scratches, dust, or cracks. Transferring DVD to a USB stick keeps your precious videos safe from physical damage forever.
• Play on Any Device: Most modern smart TVs, laptops, and game consoles have USB ports but lack DVD drives. By transferring your DVDs to a USB flash drive, you can watch your favorite content on almost any screen, and easily transfer the files to your phone or tablet.
• Faster Loading & Better Control: USB drives load files much faster than optical discs. Just insert it into a device, and then you can directly open the movie with the built-in player.
• Declutter Your Home: Physical discs and shelves take up valuable living space. Copying your DVDs to a single, high-capacity USB drive lets you clear out the clutter while keeping your entire media library organized.
Part 2: Transfer DVD to USB by Direct Copy
The simplest way to copy a DVD to a USB stick is to transfer the DVD files directly. However, this method does not work with protected DVDs. Also, the original video files on a DVD are in .vob format, which is not widely compatible with many modern devices and TVs.
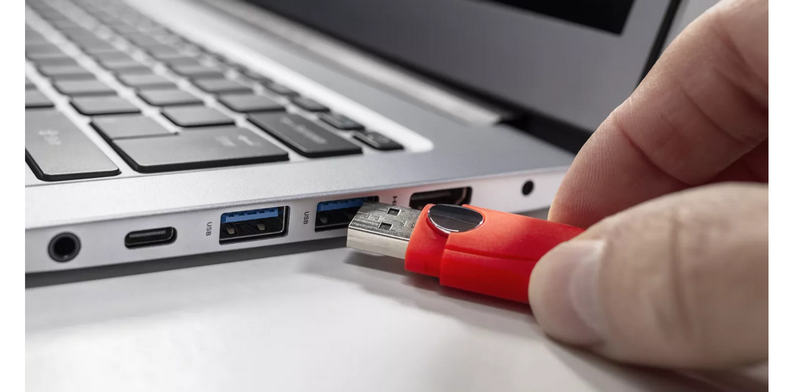
Step 1Put the DVD into the disc drive and place the USB stick into the USB port. Please wait until the computer reads both devices.
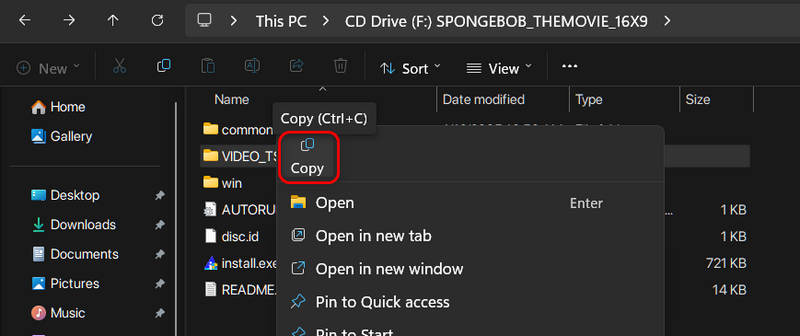
Step 2Open File Explorer on Windows or Finder on Mac. Then, click the DVD drive to view the DVD files.
Step 3Now, select the DVD files you want. Right-click and choose Copy. It works best for home or data DVDs that are not protected.
Step 4Open the USB stick folder, right-click inside the folder and choose Paste. Please wait until the copy process ends. Safely remove the USB stick once done.
Part 3: Transfer DVD to USB Flash Drive with DVD Ripper
As mentioned above, directly copying a DVD to a USB flash drive is doable, but the DVD videos' format is not widely compatible today, let alone copy-protected DVDs. Therefore, to overcome the two key disadvantages, you can resort to professional DVD ripper programs.
1. AVAide DVD Ripper
If you want to copy copy-protected commercial DVDs or play your videos on any device without compatibility issues, a professional tool like AVAide DVD Ripper is your best choice. It can convert your DVD movies to MP4, MKV, MOV, WebM, and many other video formats with wide compatibility on modern devices, like TVs, PCs, Macs, laptops, and more.
Unlike simple copy-pasting, AVAide DVD Ripper is designed to bypass any DVD copy protections (such as CSS, Region Code, UOPs, and Sony ARccOS). It can easily read protected discs and convert them into digital formats. You can copy any DVD to a USB flash drive quickly with its full GPU acceleration.
- Rip your DVDs into mainstream formats like MP4, MKV, AVI, and MOV.
- Bypass any DVD copy protections like region codes, CSS, and 99-Titles.
- Upscale and enhance DVD movies to make them compatible with smart TV, computer, PlayStation, Xbox, and even your iPhone or Android phone.
- Powered by advanced hardware acceleration, it rips DVDs up to 30x faster.

 Secure Download
Step 1Get and set up the AVAide DVD Ripper on your Windows or Mac computer. Next, insert the DVD you want to copy into your computer's DVD drive. After that, connect your USB drive to a USB port. Once settled, proceed to open the program.
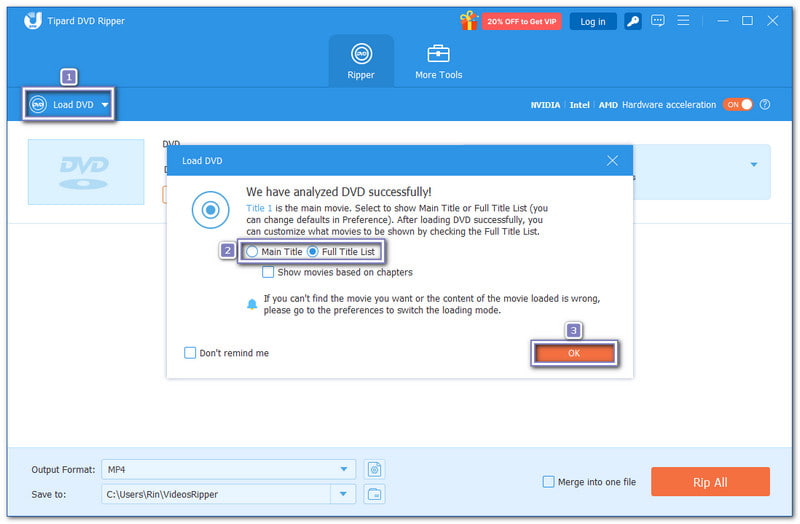
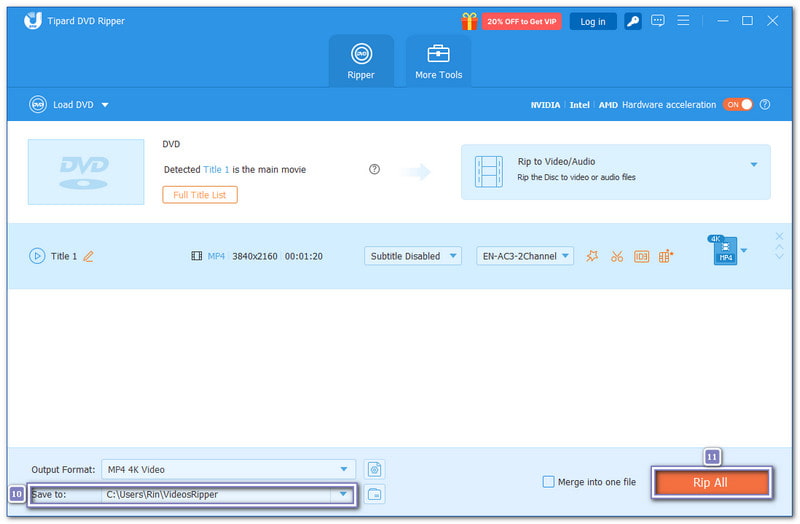
Step 2Click the Load DVD drop-down menu and choose Load DVD Disc to import your DVD. Then, choose whether to load only the Main Title or the Full Title List of your DVD. Once decided, click the OK button to continue.
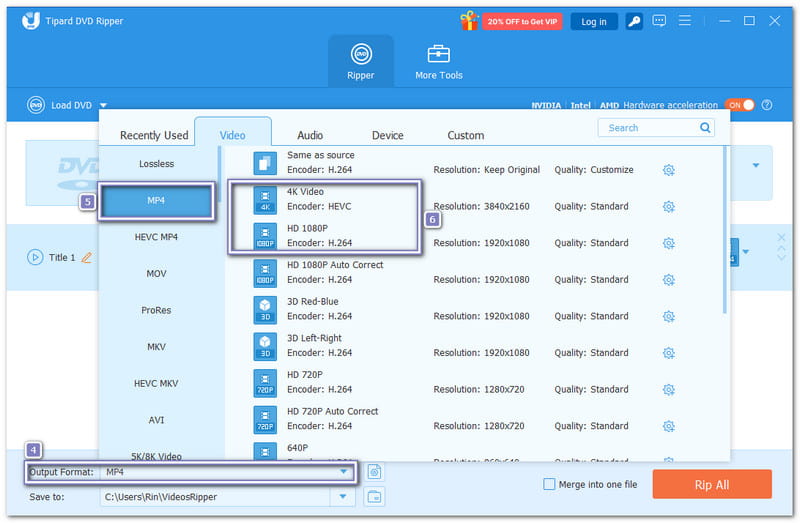
Step 3Go to the Output Format menu. For TVs, computers, and mobile devices, choose MP4, which works on almost all devices. Then, pick your resolution, like 4K Video for ultra-clear images, HD 1080P for sharp quality, or HD 720P for smaller files.
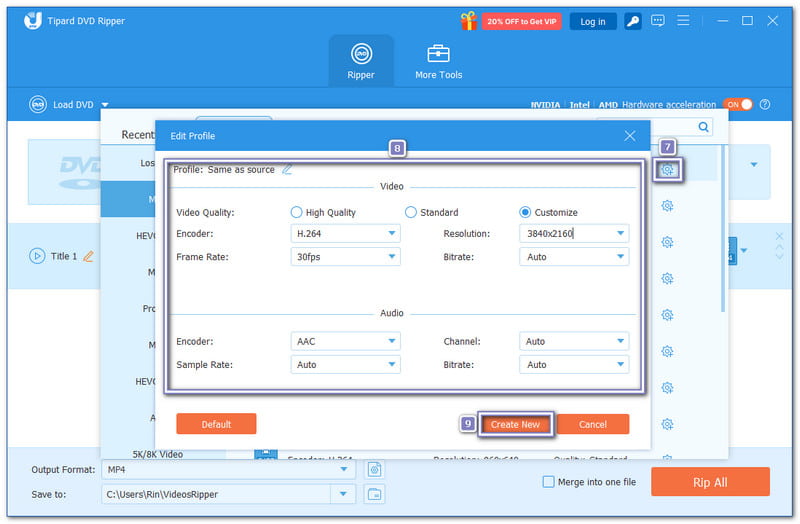
Step 4To customize settings, click the Cogwheel button. You can change the video's encoder, resolution, bitrate, and frame rate. You can also change the audio's channel, bitrate, and sample Rate. Hit the Create New button to save your changes.
Step 5Click Save To option to select your USB drive as the destination. Once ready, click the Rip All button to convert the protected DVD and save it directly to your USB drive. After it finishes, safely eject the USB and insert it into your TV, media player, or computer to make sure the file plays properly.
- You can also use AVAide DVD Ripper to transfer a DVD directly to an SD card on both Mac and Windows.
2. VLC Media Player
If your DVD is not encrypted, you can copy the DVD to a USB flash drive for free using VLC. It has a hidden feature that rips DVDs and saves them as digital and widely compatible video files, like MP4 with H.264 video streams and MP3 audio streams. After that, you can move the converted video files to your USB easily. The best thing about it is that it works with numerous popular video and audio formats, and most people already have it installed.
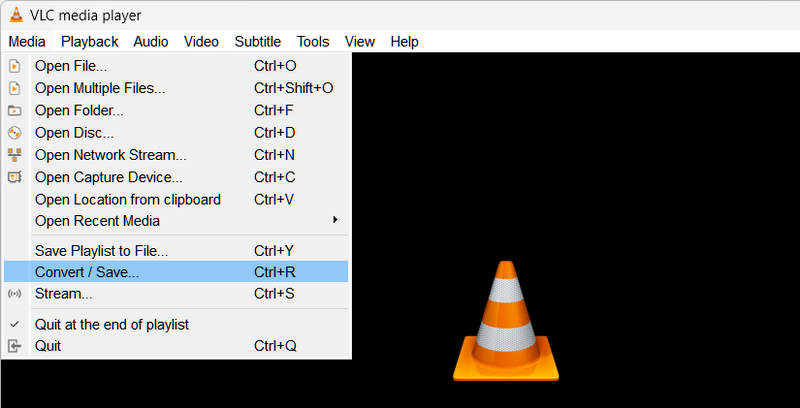
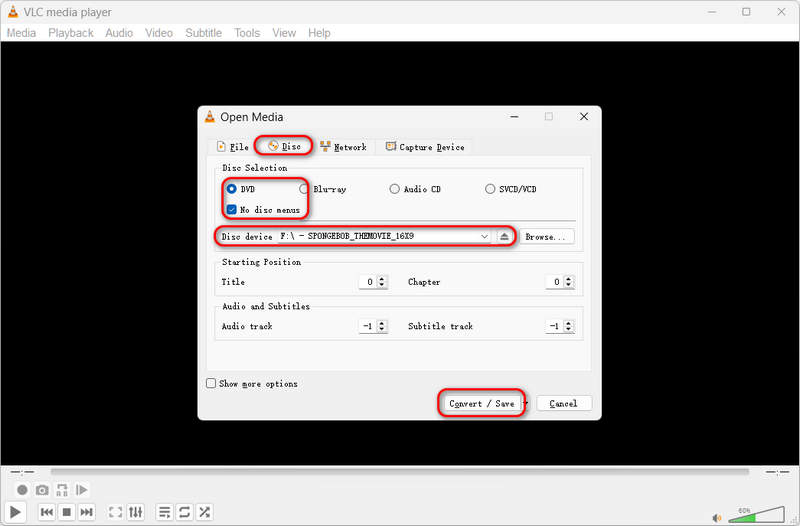
Step 1Put the DVD you want to copy into your computer's DVD drive. In VLC, go to Media and choose Convert / Save.
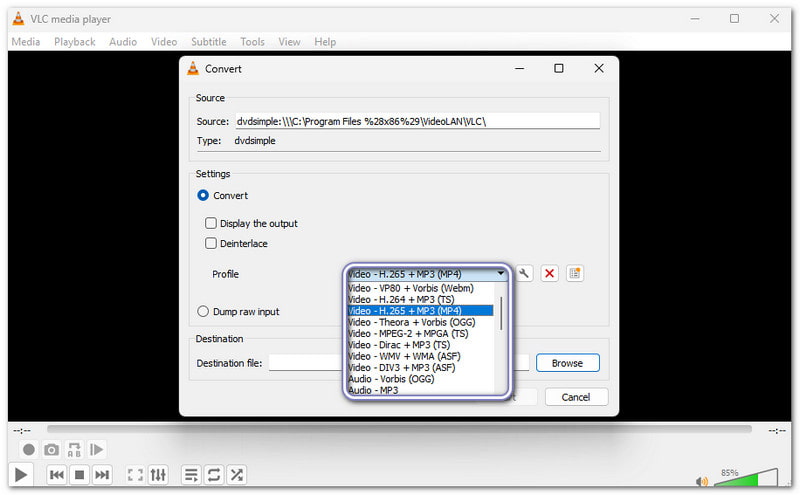
Step 2Pick the format you want, like MP4, MKV, or MP3. These formats work on most devices. Then, set the destination folder on your computer where the DVD file will be saved.
Step 3Click the Profile dropdown list to pick the format you want, like Video – H.264 + MP3 (MP4). This format works on most devices. Then, set the destination folder on your computer where the DVD file will be saved.
Step 4Click the Start button to digitize the DVD. Once VLC finishes, look for the saved file in your local folder. After that, insert your USB flash drive into your PC and transfer the DVD files to the USB flash drive. Now your DVD movies are safely on your USB.
Part 4: Transfer DVD to USB Flash Drive with DVD to USB Service
If you want to transfer a DVD to a USB drive without a PC, you can use a home movie transfer service. These services let you send your DVD to them. They convert it to a digital format and save it on a USB drive. Two popular services are Walmart Photo and CVS Photo.
1. Walmart Photo
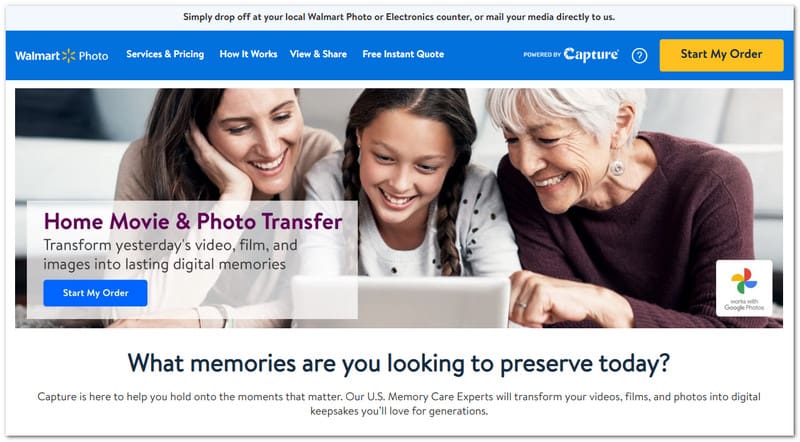
Walmart Photo allows you to copy DVDs from YesDVD, Walmart DVD, DVD, CD, VCD, and MiniDVD. Your digital copy is stored in your MemoryCloud account for 60 days. During this time, you can view it or download it to your devices. You can also order extra DVDs or USBs. A digital copy costs $12.96 for the first 30 minutes and $5.46 for each extra 30 minutes. Additional DVD and USB copies cost $3.96 and $12.96.
To use Walmart Photo, create an order online, send or drop off your media at a Walmart store, wait for it to be digitized, and then receive your digital copy, original media, and any extra copies.
2. CVS Photo
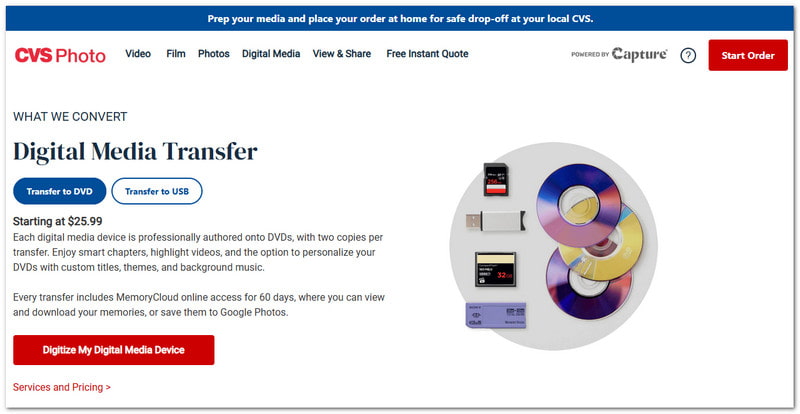
CVS Photo supports DVDs, CDs, VCDs, MiniDVDs, and YesDVDs. You can get a DVD, Blu-ray, or USB copy, plus a digital copy stored in your MemoryCloud account for 60 days. A DVD copy costs $25.99 for 90 minutes from one device, a Blu-ray copy costs $33.99, and a USB copy costs $34.99.
To use CVS Photo, place an order online, bring your media to a CVS Photo Center, wait for digitization, and then receive your USB, DVD, or Blu-ray copy along with your digital copy and original media.
Part 5: FAQs of Transferring DVDs to USB
Why won't the copied DVD files play on my smart TV or phone?
If you copied the DVD by directly dragging and dropping its folders, you will get VOB files (inside the VIDEO_TS folder). Most modern smart TVs, mobile phones, and tablets do not support the old VOB format. To make the files playable, you can use AVAide DVD Ripper to convert the DVD into a widely compatible format, such as MP4.
Why do I get an error when trying to copy a movie DVD to my USB?
If the copy process freezes, fails, or gives you an error, your DVD is likely copy-protected, and then you cannot directly copy and paste the DVD files to your USB. You must use a professional tool like AVAide DVD Ripper that can safely decrypt the protection and convert the movie into standard video files.
What is the best format to choose when saving DVDs to a USB?
The best format should balance the video quality and compatibility. MP4 format with H.264 video codec, MP3 audio codec, and 720p/1080p resolution is the best choice.
We have provided various ways on how to copy a DVD to a USB flash drive. You can do it directly or even without using a computer. But if you want to copy a protected DVD to a USB drive, AVAide DVD Ripper is the best choice. It can handle copy-protected DVDs, convert them to digital formats, and even let you customize the output settings. It makes it easy to save and play your DVDs on any device!
ABOUT THE AUTHOR

Best tool for ripping and converting DVD Disc/Folder/ISO image file into over various formats.