Are you fond of music, and you even think of editing your favorites, but it seems a complicated task for you? Well, with all the tools available on the internet, you can now seamlessly learn how to edit music. Ditch out those technicalities, as we will be showing you how to modify music the easier way. And the best catch? We will show you how to do it on different platforms - from Windows to Mac. In this article, we will give you the best software to edit and polish the audio you want. Read further to learn more.
Part 1. How to Edit Music & Songs with the Best Music Editor
Have you ever downloaded music and just deleted it because the output is significantly low in quality? It is okay if you only have one; however, when you have already downloaded multiple, that's too frustrating. Thankfully, we have an AVAide Video Converter, an all-in-one editing software packed with useful editing tools for video and audio. This video converter offers an intuitive interface best fit for beginners and novice users. The app also lets you have noise-free sounds by detecting and reducing unnecessary sounds instantly.
Meanwhile, if your music has a too-low or too-high volume, the tool also allows you to adjust that just by using its sliders — yes, there is no need to control multiple buttons; swipe the sliders, and your music is good to go. Another editing that you can do with it is to edit your audio format — you can convert it from MP3 to other audio formats like AAC, AC3, WMA, WAV, AIFF, FLAC, MKA, OGG, or AU. You can also modify its other properties, such as the name, bitrate, and channel. It also has a new feature, an Audio compressor, meant to modify your audio size depending on usage. Interestingly, you can enjoy this on Windows or Mac devices.
Here is the step-by-step guide on how to use this tool:
Step 1Download, Install, and Launch the Software
Download AVAide Video Converter with the right operating system that you have. On a dialog box, install the app and wait for it to launch automatically.

FREE DOWNLOAD For Windows 7 or later
 Secure Download
FREE DOWNLOAD For Mac OS X 10.13 or later
Secure DownloadStep 2Select and Import the Audio File
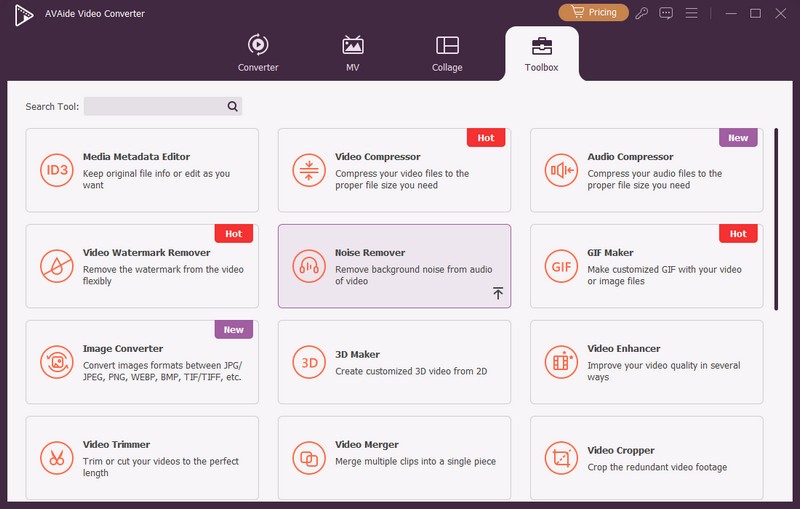
Please familiarize yourself with its interface and free trial conditions. After that, navigate to the Toolbox tab and click Noise Remover. Then, click the Plus sign to import the audio you wish to edit. Please wait until it is successfully imported.
Step 3Edit the Music File
Tick the box beside Enable audio noise reduction so the software automatically starts polishing your music. Then, swipe on the Volume and Delay slider to adjust the loudness, create an interval to your audio track, and simulate echo.
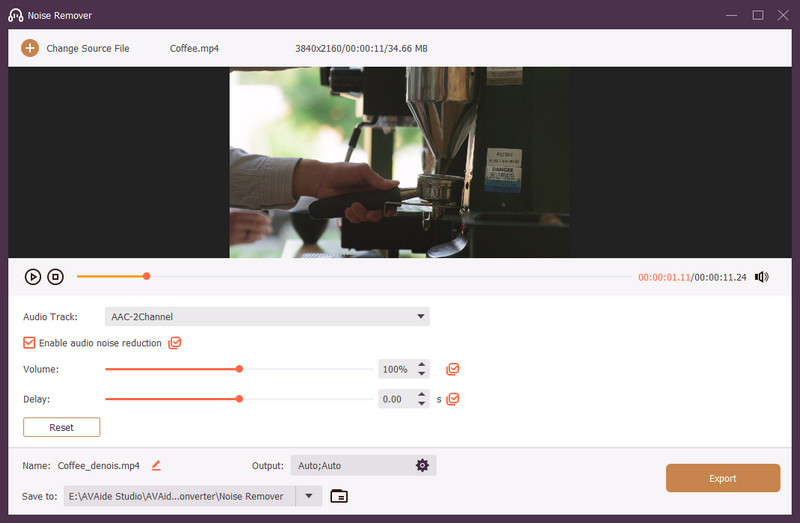
Step 4Modify the Audio Properties
At the bottom part, rename your music by clicking the Edit button beside the name. Then, on its counterpart, you will see the Output option; click Setting to edit the properties of your sounds - format, channel, encoder, sample rate, and bitrate. Hit OK to save all the alterations made.
Step 5Save the Final Output
Double-check your output by playing the audio track on the editing window. Once satisfied, choose the folder output in the Save to section. Then, hit Export to start processing your edited file and saving it on your device.
Part 2. How to Edit Music on iMovie iPhone, iPad, and Mac
If you don't feel like the need to install a new app on your device, here are some other options together with a step-by-step process you can try to edit your audio track on your iPhone, iPad, and MAC devices using iMovie.
For iPhone and iPad users:
Step 1Install iMovie from the App Store to your iPhone or iPad.
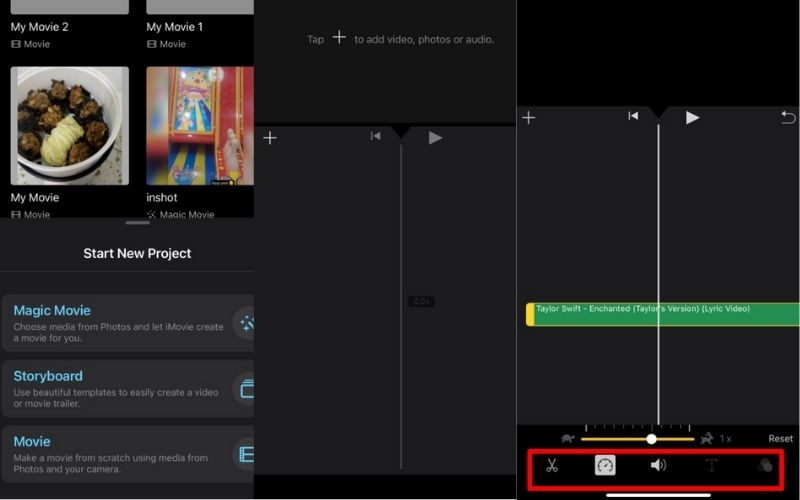
Step 2Open the app and click Start New Project > Movie > Create Movie.
Step 3Tap + to import audio from your music file.
Step 4Hit the track to activate the audio editing tools. From here, you can trim, adjust the volume, and slow down the sound.
Step 5Click Done to export and save your output.
For Mac users:
Step 1Go to your iMovie app and open it.
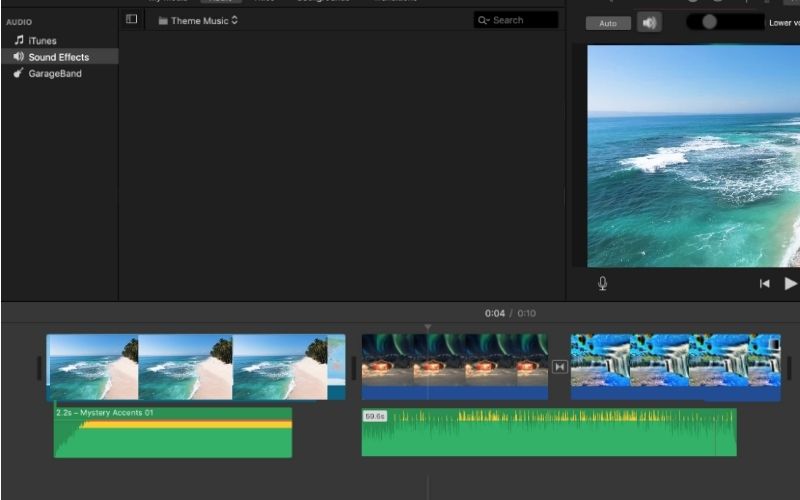
Step 2On the timeline, open a separate window where your audio is stored. Drag it down to the storyboard or timeline to import.
Step 3Click on the audio and move the beginning or the ending of the audio to trim. From here, you can also split and adjust the volume of your audio.
Step 4Save your edited video once done.
Part 3. How to Cut and Edit Music on Windows Media Player
For basic renaming of the audio, you can open Windows Media Player or WMP and the audio, right-click and select Edit. Meanwhile, for permanent cutting and editing of your file, you have to install a plugin. Here's how:
Step 1Download and install the WMP Trimmer Plugin to integrate it into the Windows player.
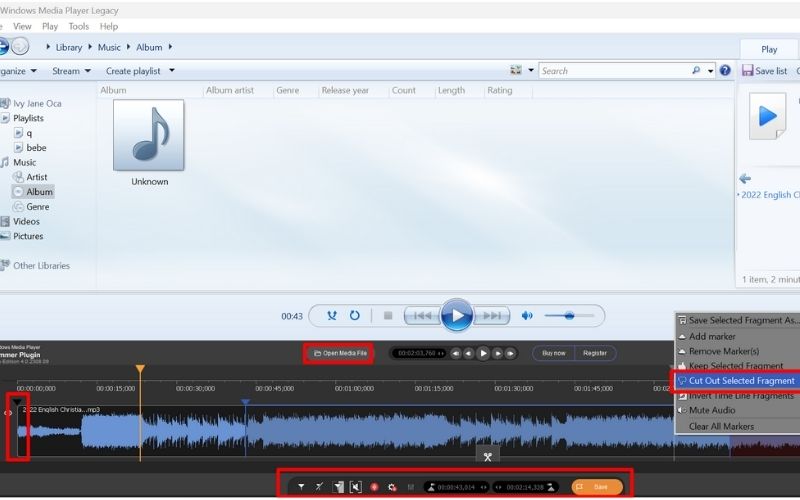
Step 2Launch WMP, and on the bottom part, click Open Media File.
Step 3Next, click Edit file to start trimming and cutting your audio.
Step 4Adjust the slider, double-click, and select Cut Out Selected Fragment to trim and cut the part of the music.
Step 5Hit Save to make all the changes permanent.
Part 4. How to Edit Music Files in iTunes
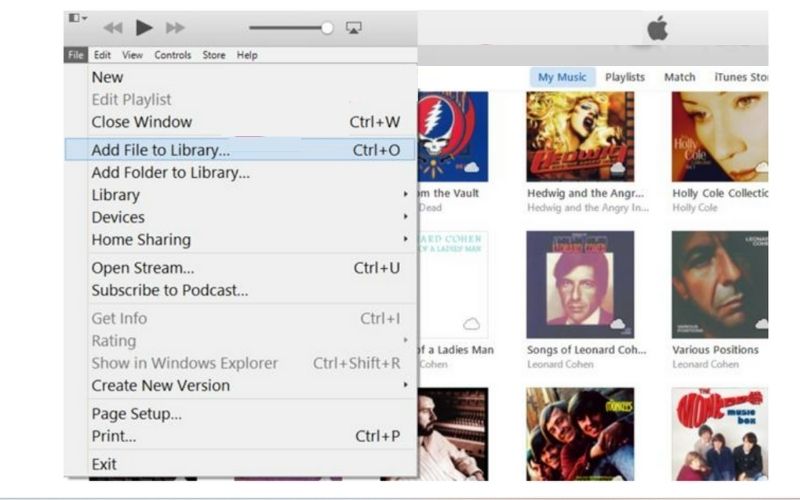
Step 1Open your iTunes and add your library by clicking File and Add File Library.
Step 2To trim, mark the start and stop time of the audio you are editing.
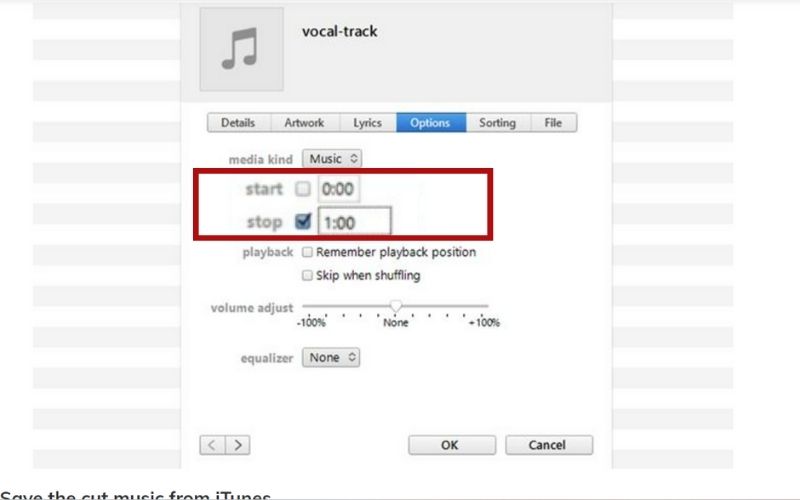
Step 3Then, right-click and select Get Info > Options, fill in the Start and Stop the duration time of the part you want your audio to be cut, and click OK.
Step 4To save the edited and trimmed video, navigate to the file and choose Create New Version so you will not overwrite the original audio.
Part 5. FAQs about Editing Music
Can I edit the audio on my video on iMovie?
Yes, you can absolutely can. Upload the video and detach the audio from your video. Just follow the steps to edit the audio on the iPhone at the top part.
Can I edit audio directly on Windows Media Player?
You can only do the renaming on the WMP itself. If you want to cut it, you must install plugins before doing so.
Why editing music is important?
No one loves to hear ugly music. Hence, editing and polishing it should be done to enjoy it fully.
Are editing and mixing the same?
Well, not editing requires mixing; sometimes, it is only about trimming, noise reduction, and format changing. Meanwhile, mixing requires an intense knowledge of music technicalities, from the equalizer, pitch, bass, etc.
Now that you already know how to edit songs on different platforms, there is no reason for you to delete those low-quality soundtracks on your playlist. And by learning how to cut and trim your audio, you can level it up by doing a video or film now. Hopefully, this article helps you.
ABOUT THE AUTHOR

The most comprehensive media converter to convert video & audio without quality loss.