YouTube is the top platform for watching movies, TV shows, and other content. If you want to watch YouTube videos on a big-screen TV or DVD player or keep them safe long-term, you can burn YouTube videos to DVD. Read on to learn how to do this and find the best tools to burn them to a DVD!
Part 1: Necessary Precondition to Burn YouTube Video to DVD
To burn a YouTube video to a DVD, you need a few things:
1. Download the YouTube video: Save the video to your computer using a good tool that will enable you to download the video file in a format compatible with your computer's media player, such as MP4.
2. DVD Drive: Your computer must have a DVD drive to insert a blank disc.
3. Burner Software: Install DVD burning software like Tipard DVD Creator to help burn the video onto the disc.
Once you have these, you can easily burn your YouTube video to a DVD.
Part 2: Burn YouTube Video to DVD with Best Video Quality
A versatile and user-friendly tool, Tipard DVD Creator allows you to burn YouTube videos to DVD with top-notch quality easily. You can also use videos from your digital camera, smartphone, or camcorder. It makes it a great choice for burning not just YouTube videos but personal footage, too.
This DVD creator also lets you customize the DVD menu with different templates or even create your own. You can merge or split video clips, rotate or flip videos, add text or image watermarks, and more. The built-in preview function lets you see your DVD's appearance before burning. The best part is that it retains excellent video quality while burning your videos, so your DVDs will look as good as the original.
Learn how to burn a YouTube video to DVD using Tipard DVD Creator with just the easy steps below:
Step 1First, download Tipard DVD Creator from its official website. After downloading, follow the on-screen procedures to install it on your computer.

FREE DOWNLOAD For Windows 7 or later
 Secure Download
FREE DOWNLOAD For Mac OS X 10.13 or later
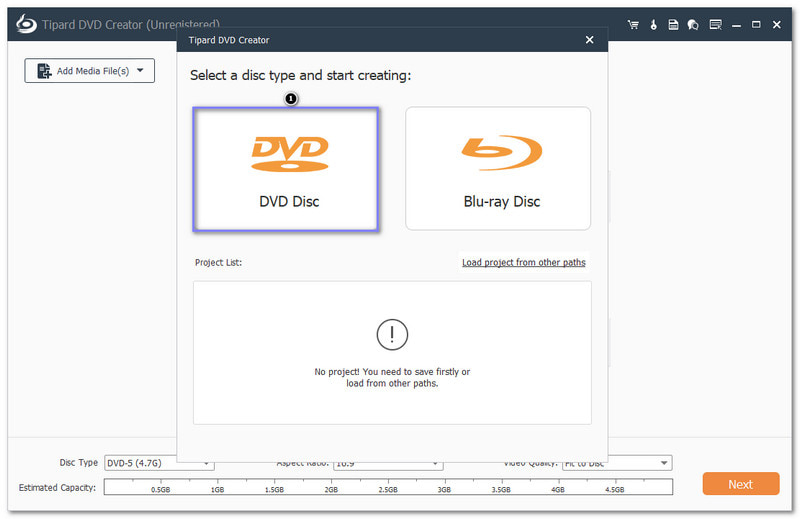
Secure DownloadStep 2Once you have downloaded YouTube videos to MP4 or other digital formats, you can place a blank DVD into your computer's disc drive. You have the option to use an external DVD drive if you do not have one built-in. After that, open Tipard DVD Creator and choose the DVD Disc option from the main menu.
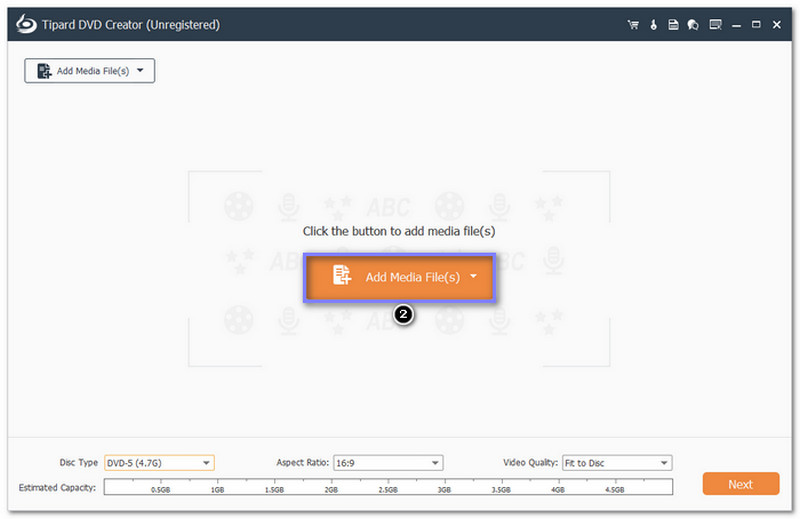
Step 3Now, import the YouTube video you want to burn. Click the Add Media Files button to select the video from your computer. After adding it, you can add and edit audio and subtitles if you want.
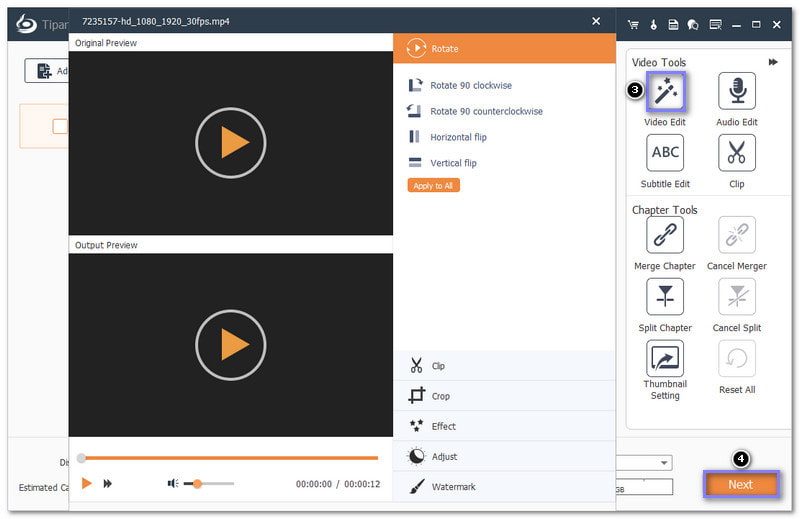
Step 4You can make changes using the Video Edit under the Power Tools option. You can trim the video if you need to cut out parts. Crop it to remove any edges. Add special effects or watermarks for a personal touch. After editing, click the Next button to move to the menu design section.
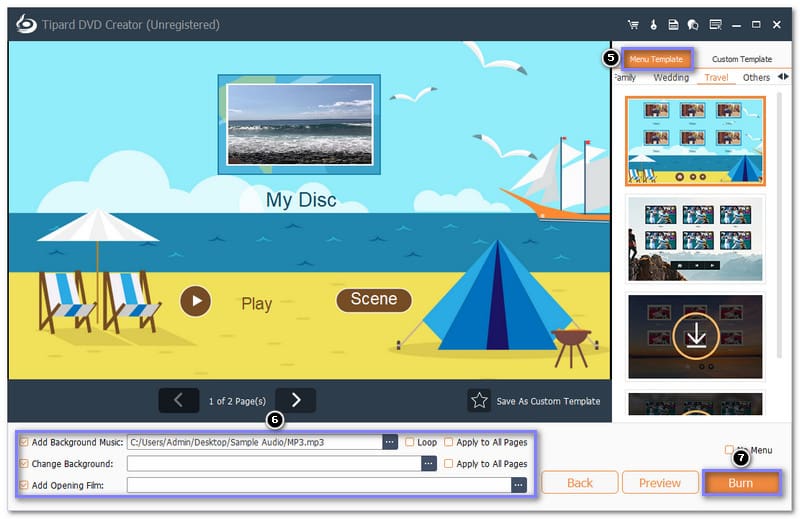
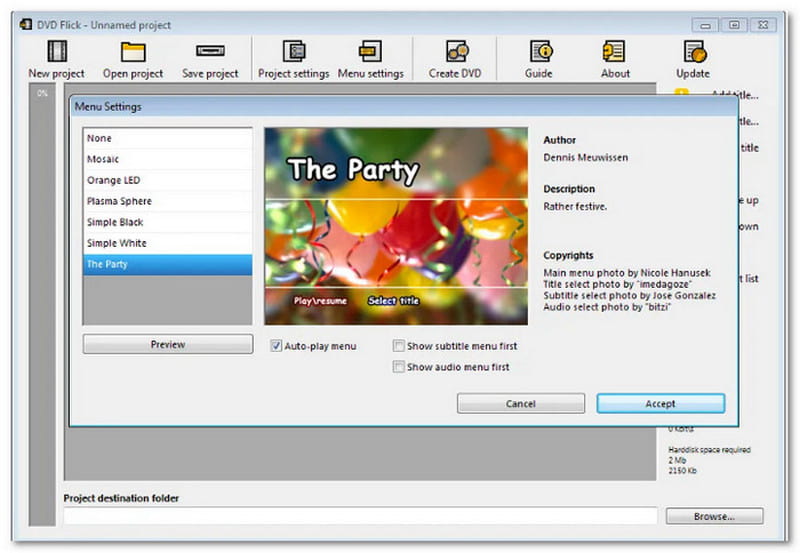
Step 5You can make a personalized menu for your DVD in the Menu Editor. Choose from ready-made templates like holiday, family, or travel themes. You can also create your own menu by adding custom background music, pictures, or an opening film. If you prefer, you can skip the menu entirely. After all that, click the Burn button.
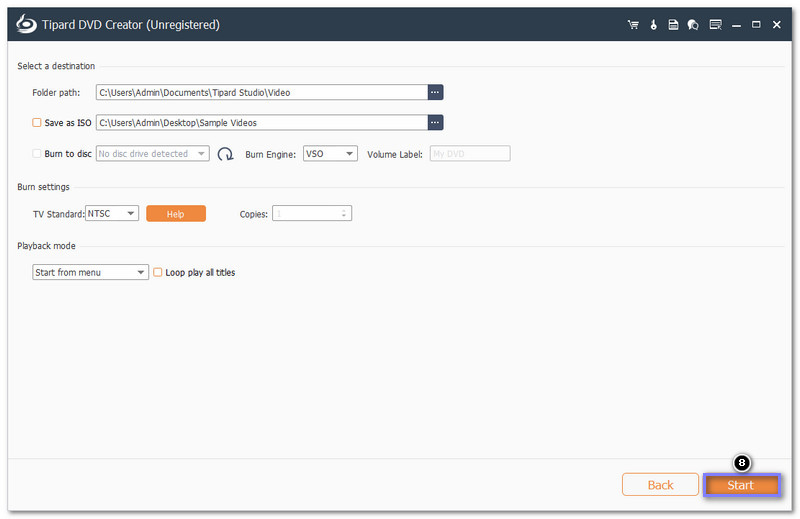
Step 6Now, it is time to finalize everything. Set the DVD output path, which tells the program where to save your work. Then, hit the Start button to burn the YouTube video onto the disc.
Part 3: Burn YouTube Video to DVD with DVD Flick
DVD Flick is a free DVD-burner software that burns YouTube videos onto DVDs. It is open-source, so anyone can install and use it without paying. One cool feature is its built-in menu templates. These templates let you create stylish DVD menus. You can also customize them to suit your style. If you want to, you can add subtitles and extra audio tracks to your videos before burning them.
Discover how to burn a video from YouTube to DVD using DVD Flick below:
Step 1Open DVD Flick to get started.
Step 2Click the Add title button. Then, find the YouTube video files saved on your computer. Select them, and they will show up in the program.
Step 3Make your DVD look nice by creating a menu. DVD Flick enables you to add simple menus to organize your videos. You can pick a design or layout that works best for you.
Step 4Once everything is ready, click the Create DVD button. DVD Flick will take care of the rest. It will burn your files and prepare the DVD for you.
Part 4: Burn YouTube Video to DVD with Nero Burning ROM
Works well with YouTube videos and other media files; Nero Burning ROM lets you turn your downloaded videos into DVDs. One of its best features is the ability to create DVD-Video discs. You can organize your files into the VIDEO_TS folder required for DVD players. In addition, it lets you fine-tune settings like burning speed to get the best results.
Step 1Insert a blank DVD into your computer. Open Nero Burning ROM, and in the New Compilation window, select DVD, then choose DVD-Video.
Step 2Fine-tune the settings in the tabs as needed. Once ready, click New to proceed.
Step 3On the right side, find and select the YouTube videos you want to burn. Then, choose the Output Disc.
Step 4Drag your video files into the VIDEO_TS folder on the left. Make sure all files are in this folder.
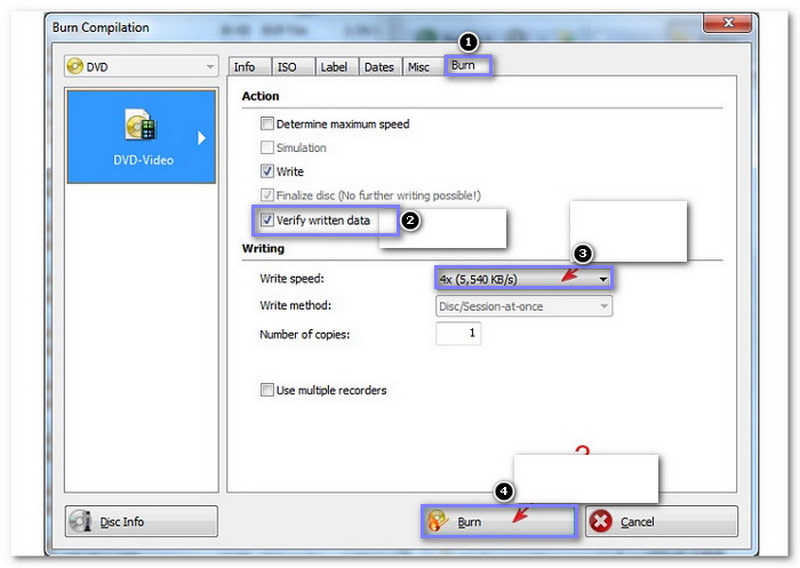
Step 5Now, click the Burn button at the top. Verify the data if needed, set the burning speed, like 8x for stable burning, and click Burn. After that, please wait for the burning process to finish.
Part 5: Burn YouTube Video to DVD with BurnAware
BurnAware is a lightweight and beginner-friendly program for burning videos, including YouTube downloads to DVDs. It supports various formats, making turning your favorite videos into playable discs easy. Besides that, it works with all types of DVDs, such as DVD-R, DVD+R, and rewritable discs. BurnAware ensures compatibility, so the DVDs you create will work on most standard DVD players.
Now, how do I burn a YouTube video to DVD using BurnAware? Check it out below!
Step 1Open BurnAware.
Step 2Select Data from the main menu, then choose Data Disc. This option allows you to add your video files to the program.
Step 3Insert a blank DVD into your burner. Find the YouTube video on your computer and add it to the program.
Step 4After that, click the red Burn button in the top-left corner to start the process. After a few minutes, your DVD will be ready.

That is all about how to burn a video from YouTube to DVD. As you can see, burning a YouTube video to DVD may consume a certain amount of time, especially if you burn a custom DVD. To do this, you will need a good DVD burner. Select one that will suit your requirements and preferences as to the features of the tools described above. Just be sure to be very selective and to find what is best for you!
Best tool for ripping and converting DVD Disc/Folder/ISO image file into over various formats.