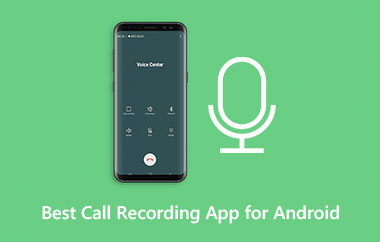
Android users who want to learn how to record audio on Android are in the right place, as this write-up will cover every simple method you need.
We will tackle how to record external audio, like voice and environment sounds, as well as how to capture internal audio from your phone system. We will also include a basic troubleshooting guide to help you solve common recording problems.
Part 1. Recording External Audio (Voice & Environment Sounds)
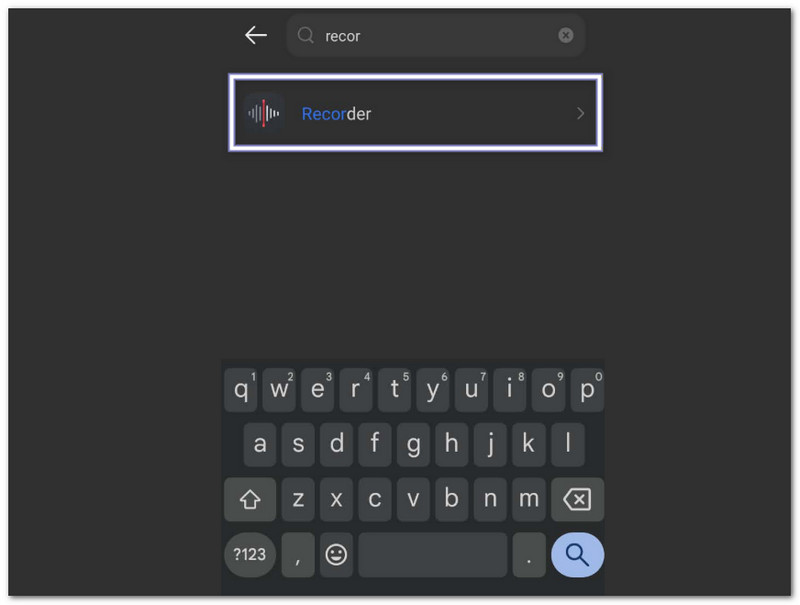
1. Using the Built-In Voice Recorder App
This method gives an easy way to master how to record audio on an Android phone, using a basic feature already on most Android phones to capture voice and sound.
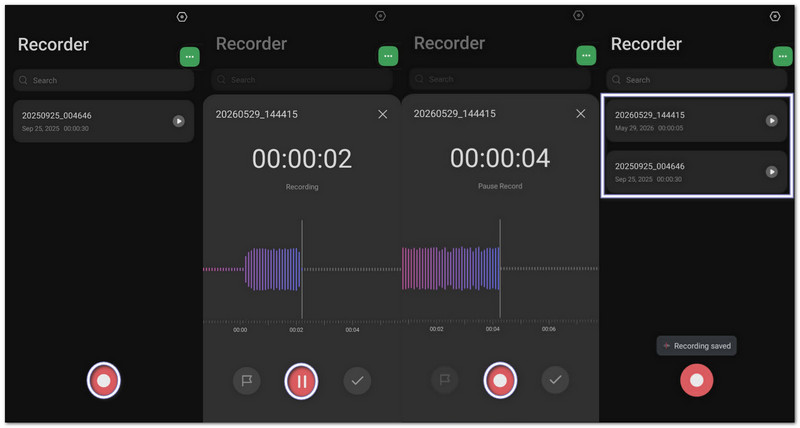
Step 1Open your app drawer and look for Voice Recorder.
Step 2Tap the red Record button to start recording your voice or nearby sounds.
Step 3Tap Pause if you need a short break. Tap Resume to continue.
Step 4Tap Save once you finish. Your audio file is stored in your Files or My Files app. Most recordings save as MP3 or M4A files.
2. Recording External Audio Without Any App
This approach allows voice recording on Android for immediate audio capture using built-in phone features without opening any installed recording app.
A. Google Recorder Widget
Step 1Press and hold an empty area on your home screen.
Step 2Tap Widgets and find the Google Recorder widget.
Step 3Drag it to your home screen.
Step 4Tap the widget anytime to start recording with one tap.
B. Google Assistant
Step 1Say "Hey Google" or hold the Power button.
Step 2Say "Record my voice" or "Start an audio recording."
Step 3Google Assistant will open the recorder and begin capturing sound.

C. Quick Settings Tile
Step 1Swipe down from the top of your screen.
Step 2Look for Audio Recorder or Screen Recorder in Quick Settings.
Step 3Tap it to start recording instantly.
Step 4Stop the recording once finished and save the file.
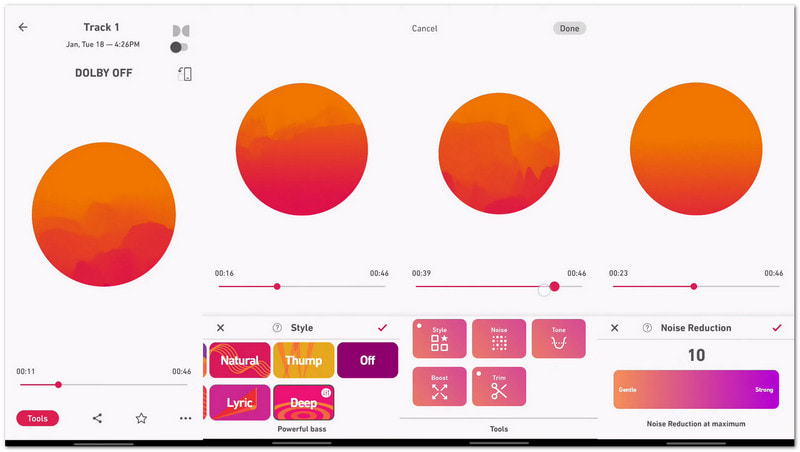
3. Recording with Third-Party App (For Better Quality & Features)
Recording with a third-party app, like Dolby On, gives better sound clarity and more control for all types of audio needs. It turns your phone into a simple recording studio for voice, music, and videos.
It enhances sound with noise reduction, EQ, and studio effects for cleaner and more professional audio. It is really useful if you need to learn how to record audio on Samsung and other Android brands
Step 1Install Dolby On from the Google Play Store.
Step 2Open the app and press the Record button.
Step 3Record your voice, music, or background sounds. The app automatically lowers noise and improves sound clarity.
Step 4Save or share the recording after editing with built-in audio tools.
Part 2. Recording Internal Audio (From Your Phone's System)
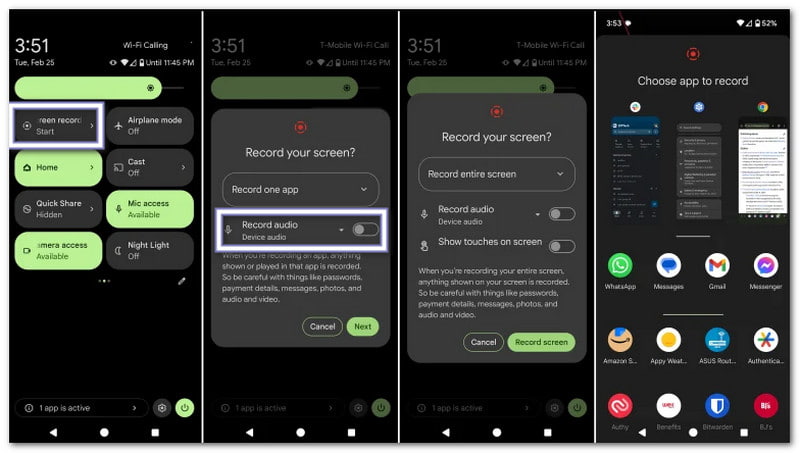
1. Using the Built-In Screen Recorder
It is the official Android feature to learn how to record internal audio on Android, and it records system sound together with screen activity in a stable way.
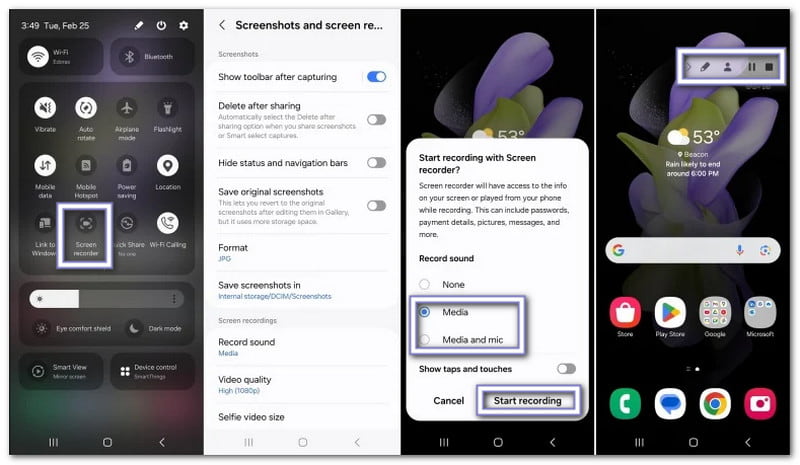
Step 1Swipe down from the top of your screen twice to open Quick Settings.
Step 2Find Screen Recorder. If it is missing, press the Pencil or Edit button and add it first.
Step 3Tap Screen Recorder and choose Device Audio or Media and Microphone as the sound source.
Step 4Start recording and open the app, game, or video you want to capture. Stop the recording once finished.
2. Recording Pure Internal Audio (No Video) Using Third-Party App
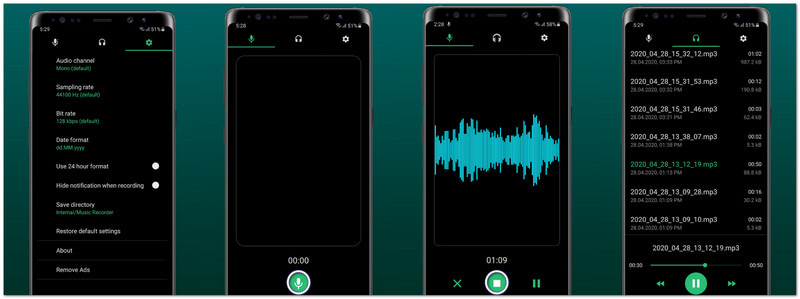
If you are looking for how to record just audio on Android, Music Recorder - Song Recorder, developed by Jaya Zone Tech, is a simple solution.
This voice recorder app captures high-quality sound from apps, games, and music players. You can also configure bitrate, sample rate, and choose mono or stereo for better output. It supports pause, resume, editing, sharing, and even a hidden recording mode for flexible use.
Step 1Install Music Recorder - Song Recorder from the Google Play Store and open the app.
Step 2Allow the needed permissions for Microphone and Storage access.
Step 3Open Settings and change the Recording Source from Mic to Internal Audio. You can also choose MP3 or WAV format.
Step 4Tap Record and play the audio, game, or video you want to capture. The app records only the internal sound.
Part 3. In Case You Need to Use External Microphones with Android
Your phone microphone works fine for simple recordings. But if you want clearer sound, less noise, or louder voice capture, an external microphone can help a lot.
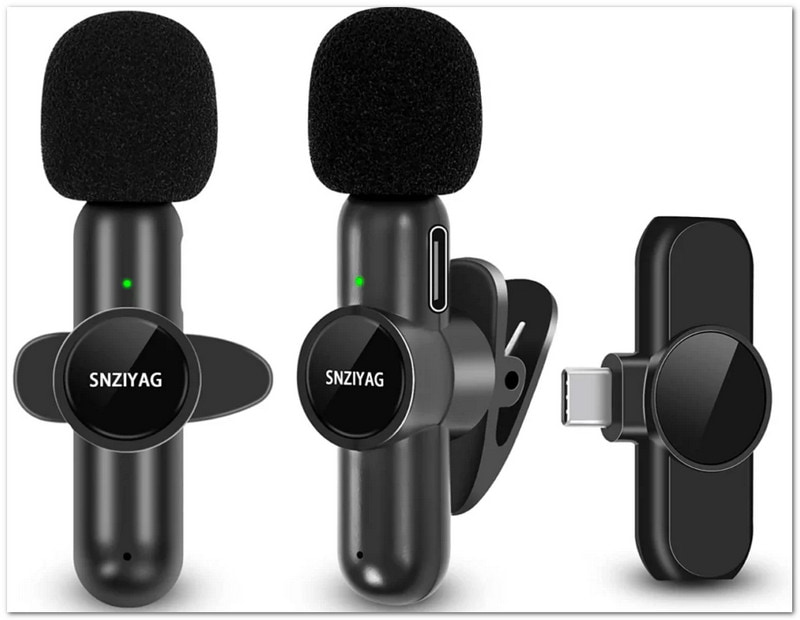
Option A: USB-C Microphones
USB-C microphones are simple and fast to use. You only need to plug them into your phone's USB-C port and start recording. Most Android phones detect them automatically. They often give a cleaner sound and better voice clarity than the built-in phone microphone. They are great for content creators, students, and mobile video recording.
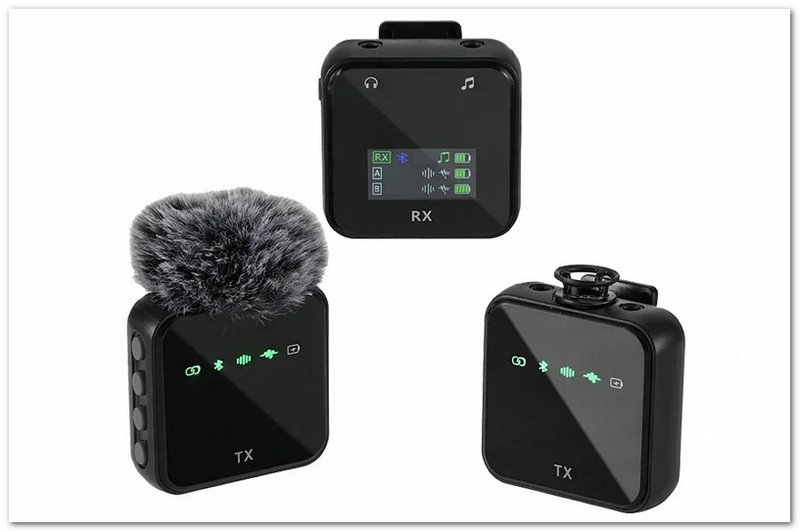
Option B: Wireless Bluetooth Microphones
Bluetooth microphones let you record without wires. You connect them through your phone's Bluetooth settings and start recording normally. They are useful if you move around while filming or speaking. Many people use them for vlogs, presentations, outdoor videos, and interviews because they are portable and easy to carry.
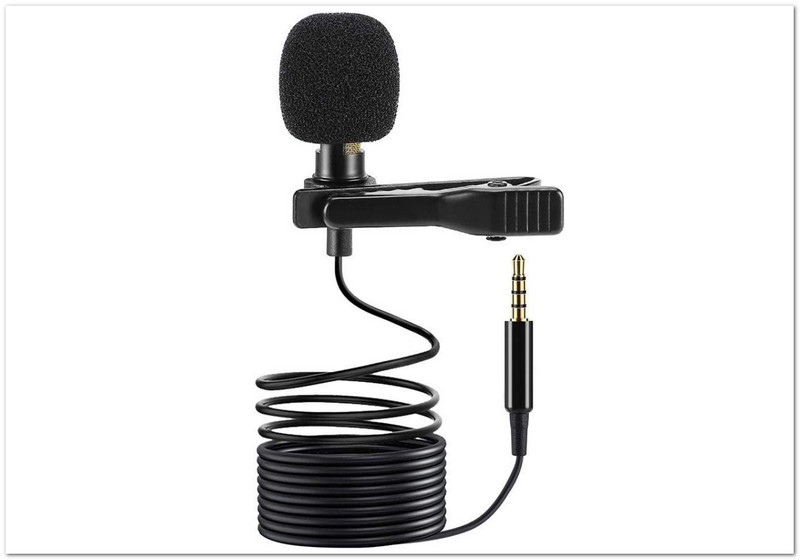
Option C: 3.5mm Microphones
3.5mm microphones connect through the headphone jack of your Android phone. If your device has no headphone jack, you can use a USB-C to 3.5mm adapter. These microphones are affordable and easy to use for voice notes, school projects, calls, and simple recordings. They are also a good choice for beginners who want better audio without spending too much.
Part 4. Troubleshooting Common Issues
You are done learning audio recording on Android. But what if you face unexpected issues? Do you know what to do?
It can feel hard, especially if you are a beginner. But do not worry. We will not leave you stuck. We will also give simple solutions you can rely on if you ever face problems like the ones below.
1. Internal Audio Option Grayed Out
Android blocks internal audio on some apps. It can also be restricted by copyright rules. Use the built-in Screen Recorder from Quick Settings. It works better for system sound. If possible, set audio to Device Audio or Media and Mic.
2. External Microphone Not Recognized
It happens when the phone cannot detect the mic. Turn on OTG in Settings for USB-C mics. Check Cables and Adapters for support and a DAC chip. Plug the mic first before opening the app. Try Open Camera if needed.
3. Voice Recorder Not Showing Up
The app may be hidden or disabled. Open App Drawer and search Recorder. Go to Settings > Apps and enable it if disabled.
4. Background Recording Stops
Android may close apps to save battery. Set Battery Optimization to Unrestricted. Lock the app in Recent Apps so it stays open.
5. Recordings Not Saving
It is often a storage or permission issue. Allow Storage or Files permission. Check if storage is full. Clear the cache and try again.
Bonus: Best Screen Recorder for Android with Better Quality Output
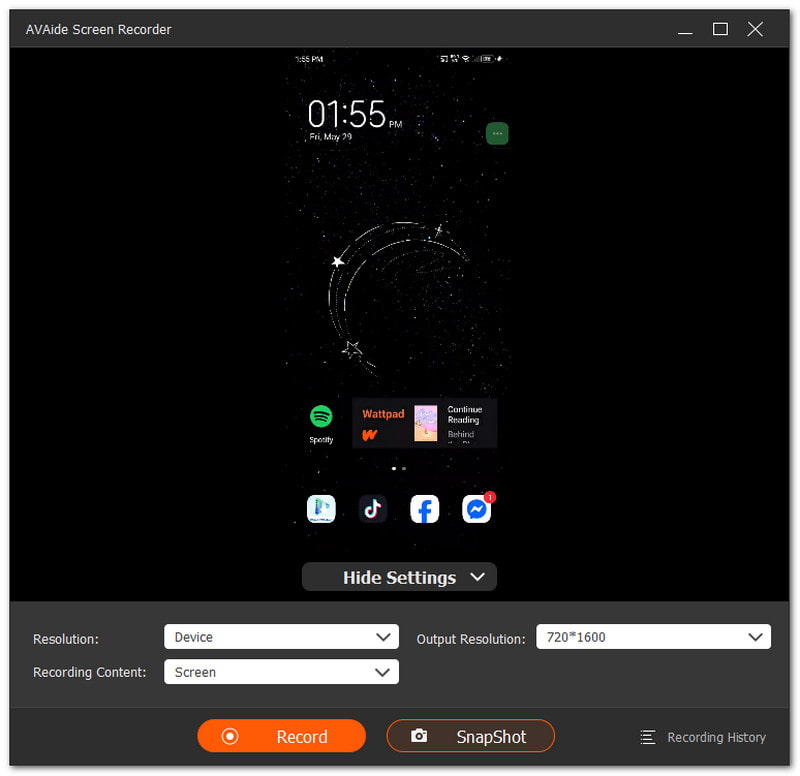
AVAide Screen Recorder offers a phone recorder feature that works for Android devices. It supports up to 4K resolution for clear and sharp video output. It also lets you capture your phone microphone, your computer speaker sound, or both at the same time. In addition, you can take a snapshot while recording for an immediate capture. It is really suitable for mobile app games, app tutorials, and video calls.
- Records audio on iPhone, Android, Windows, and Mac.
- Captures phone screen in high-quality resolution.
- Allows editing like trim, merge, convert, and audio boost.
- Supports formats like MP4, WMV, AVI, GIF, and MP3.

 Secure Download
Now you know how to record sound on Android and what to do when you experience issues. If problems happen, just check your settings, permissions, and recording tools.
For better results, you can also use a powerful tool like AVAide Screen Recorder. It gives smooth recording and high-clarity output for Android users and even Windows and Mac users.
ABOUT THE AUTHOR

Capture screen activities with audio, online meetings, gameplay videos, music, webcam, etc.