You want your own personalized ringtone. Not something from anywhere. Something you made your own for calls and alerts.
We are here to help you with that. We will show different ways to record a ringtone on different systems. We will also share simple tips for better results. So, get your voice or sound ready for a custom ringtone.
Part 1. How to Record a Ringtone on iPhone
1. Voice Memo to Ringtone (The Easiest Way)
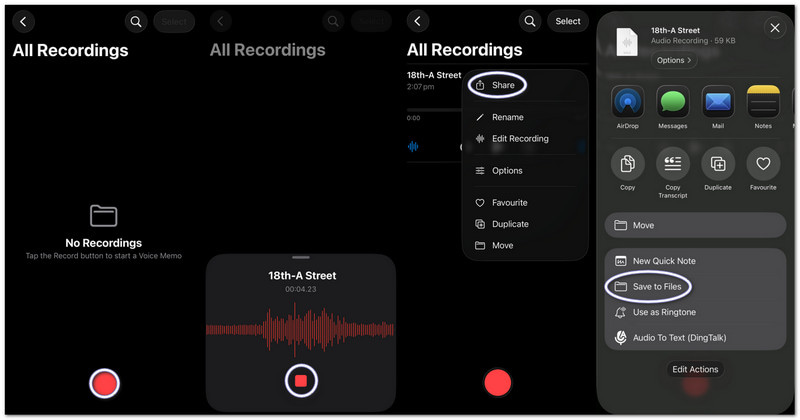
Voice Memos records sound and immediately turns it into a usable custom ringtone with basic trimming tools, and this part will teach you exactly how to make a voice recording into a ringtone on an iPhone.
Step 1Launch Voice Memos on your iPhone.
Step 2Tap the red Record button and speak or play your audio.
Step 3Tap Stop when you are done.
Step 4Tap the three dots (...) on your recording.
Step 5Choose Save to Files to store your audio and use it later as a ringtone.
2. Any Audio File (MP3/M4A) to Ringtone
Stored MP3 or M4A audio files from downloads or music apps can be selected and set as a ringtone on an iPhone.
Step 1Download your MP3 or M4A file and save it in the Files app.
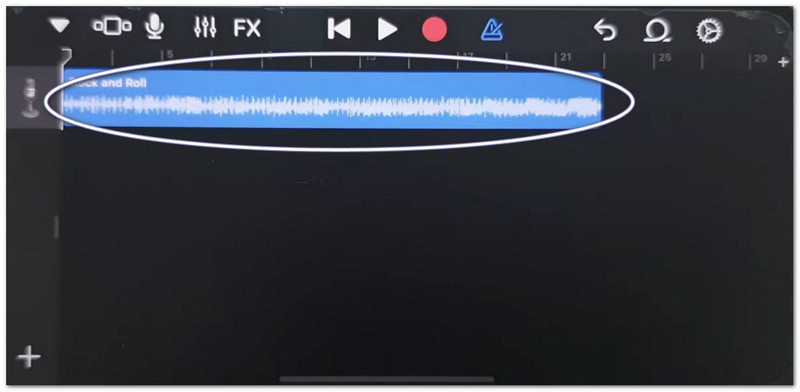
Step 2Run GarageBand and pick Audio Recorder.
Step 3Locate your audio in Files, then drag it to the timeline.
Step 4Go to Files, find your audio, and drag it to the timeline.
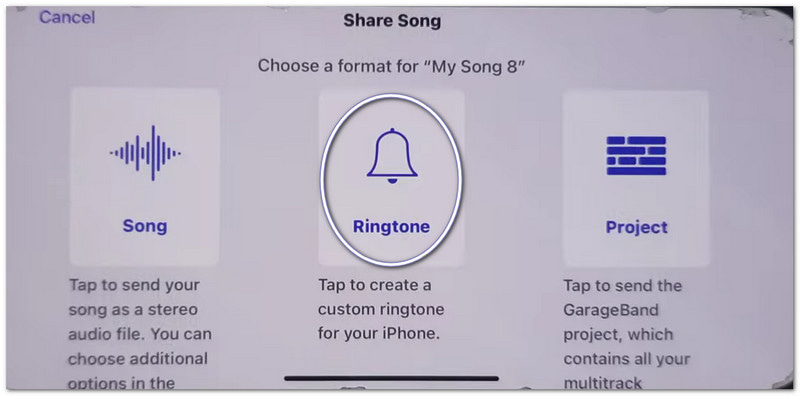
Step 5Trim it to under 30 seconds, then tap Share > Ringtone > Export.
3. Using GarageBand (For Older iOS Versions)
GarageBand edits audio clips with precise controls, allowing users to cut, arrange, and export custom ringtones easily, which makes it simple to understand how to set a voice recording as a ringtone on an iPhone.
Step 1Open GarageBand and select Audio Recorder.
Step 2Tap the Tracks view, then open the Loop Browser.
Step 3Import your saved Voice Memo or audio file.
Step 4Drag it to the timeline and trim it to 30 seconds or less.
Step 5Tap My Songs, then Share > Ringtone > Export.
Troubleshooting "Share Notes on iPhone Not Working"
If the Share Sheet freezes, crashes, or does not show apps when sharing Voice Memos or GarageBand files, try these fixes.
Quick Fixes:
- Force Restart: Press Volume Up and Volume Down. Then, hold the Power button until the Apple symbol appears.
- Update iOS: Go to Settings > General > Software Update. Install any updates. It fixes system errors.
- Toggle AirDrop: Open Control Center to turn off AirDrop. Switch AirDrop off and back on. Sharing is refreshed.
System Fixes
- Free Up Storage: Keep at least 2 gigabytes of free space. Delete unused files or videos. Low storage can stop Share Sheet from working.
Final Fix
- Reset All Settings: Go to Settings > General > Transfer or Reset iPhone > Reset All Settings. It does not delete your data. It only resets system settings and can fix Share Sheet issues.
Part 2. How to Record a Ringtone on Android
1. Using a Ringtone Maker App (Most Recommended)
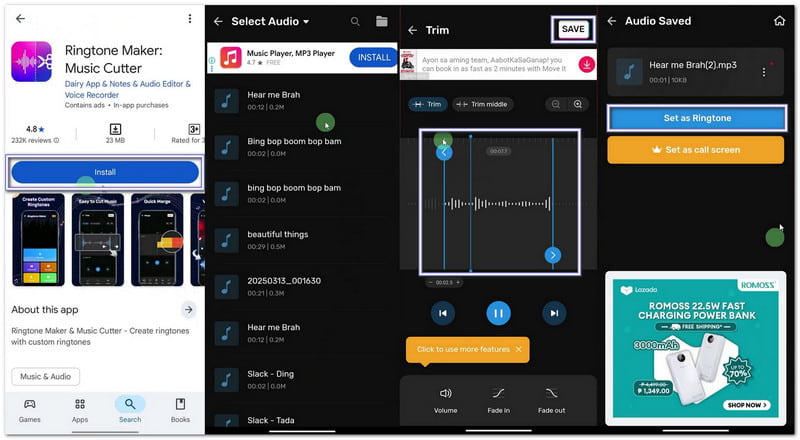
If you want to learn how to record your own ringtone, you can use Maker: Music Cutter on the Google Play Store. Its main goal is to help you trim songs, cut exact audio parts, and instantly set them as custom ringtones on Android phones.
Step 1Open the Google Play Store. Search for Ringtone Maker: Music Cutter. Install it. Then, press Open.
Step 2Tap Get Started. Choose Trim Audio. Allow permissions so the app can access your files.
Step 3Pick a song or audio file from your phone. Move the sliders to choose the start and end parts of your ringtone.
Step 4 Tap Cut or Save. Pick the clarity if needed. Press Confirm. Then, click Set as ringtone. Allow system settings access and choose the default ringtone.
2. Built-in Settings (For Downloaded Audio)
Android settings allow direct selection of saved audio files and assign them as ringtones without needing extra apps or tools.
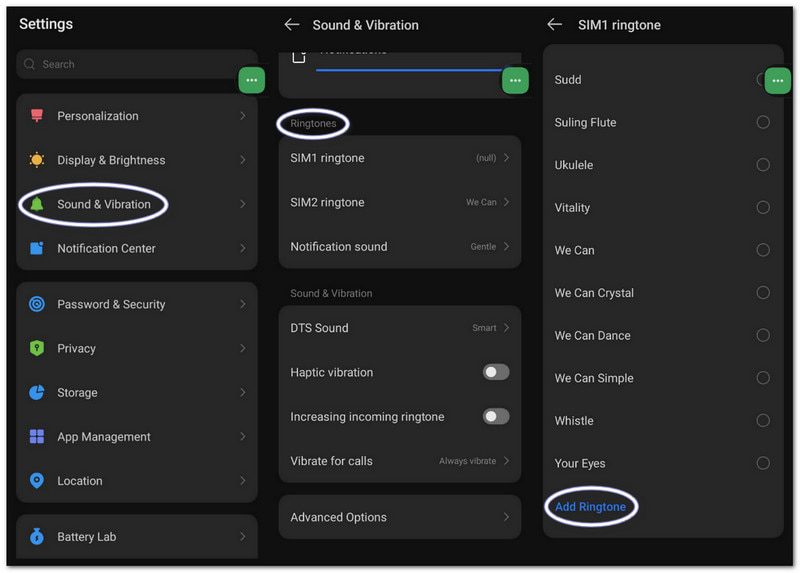
Step 1Go to your phone's settings. Tap Sound and vibration or Sound.
Step 2Tap Phone ringtone to see available options.
Step 3Tap the Plus button or the Add ringtone button at the top.
Step 4Browse your storage. Select your audio file. Tap Done. Then, confirm to set it as your default ringtone.
Part 3. How to Turn a Screen Recording into a Ringtone
You can also turn a screen recording into a ringtone on a Windows or Mac computer using AVAide Screen Recorder. It has an audio recorder mode that captures sound from your system and your voice, which makes it easy to record a ringtone.
It also offers sound settings, where you can lower or boost volume, enable noise cancellation, and show a warning when no audio is detected. Of course, you can export your ringtone in supported formats like MP3 and M4A, which work well for mobile devices.
Step 1Get and set up AVAide Screen Recorder on your Windows or Mac computer.

FREE DOWNLOAD For Windows 7 or later
 Secure Download
FREE DOWNLOAD For Mac OS X 10.13 or later
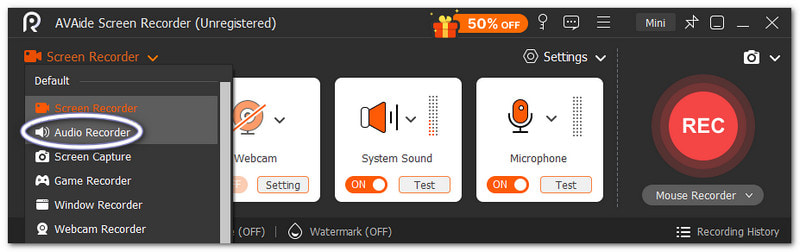
Secure DownloadStep 2It starts in Screen Recorder mode. Click the drop-down. Select Audio Recorder for better sound capture.
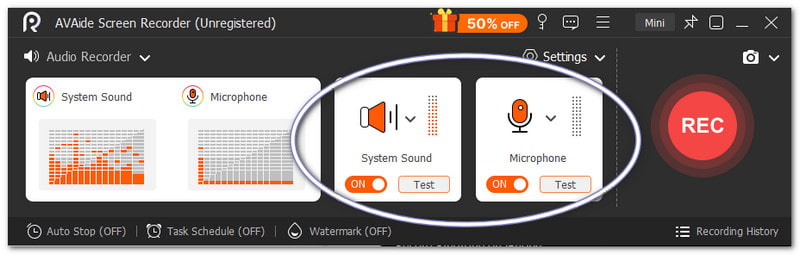
Step 3Turn on System Sound to record internal audio. Turn on the Microphone if you want your voice to be added. You can also fine-tune the volume if needed.
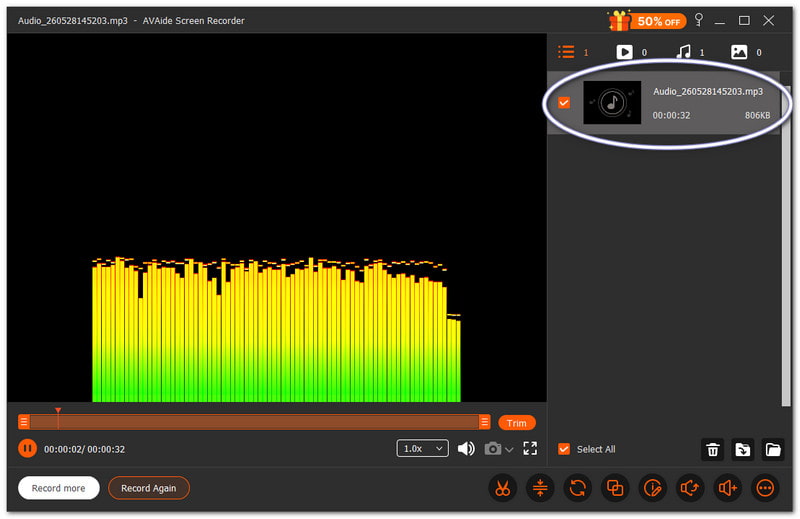
Step 4Hit REC to start, and please wait for the countdown. Once begun, play the sound you want. Press the Stop button once done. After that, the file saves automatically. But you can also trim or edit it before using it as a ringtone.
There is no doubt that this Mac and Windows audio recorder can help you create a ringtone that you personally want and like for your device.
Part 4. Samsung-Specific Steps
1. Using the Built-in Screen Recorder
Samsung Screen Recorder captures audio from videos and helps turn recorded sounds into usable ringtones.
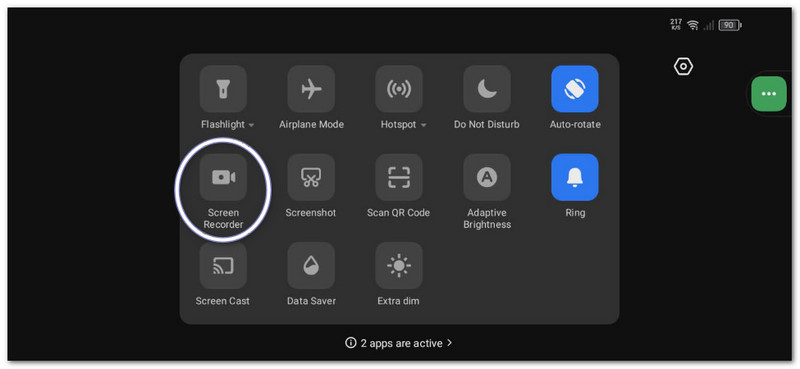
Step 1In the Quick Panel, swipe down. Press the Screen Recorder button. Prior to beginning, select the Media sounds.
Step 2Play the video or music you want to capture. Let the screen recorder record it with sound.
Step 3Stop recording once done. The file will be stored in your gallery. Use a video-to-MP3 app to extract the audio.
Step 4Move the MP3 file to your Internal Storage > Ringtones folder so it can be used later.
This method shows Samsung screen recording. So, please make sure to convert the recorded video into audio only so it can be used as a ringtone.
2. Built-in Ringtone Maker
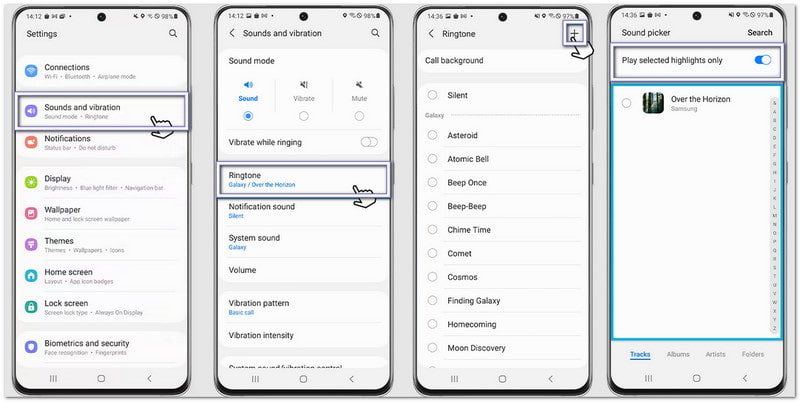
Samsung ringtone settings let users pick songs, trim highlights, and instantly assign them as the default phone ringtone.
Step 1Open your phone and go to Settings. Tap Sounds and vibration. Then, select Ringtone.
Step 2Tap the Add button and select a saved song or recording from your phone.
Step 3Enable Play selected highlights only if available. Samsung will automatically trim the best part of the audio.
Step 4Confirm your selection, and the sound will now be set as your default ringtone.
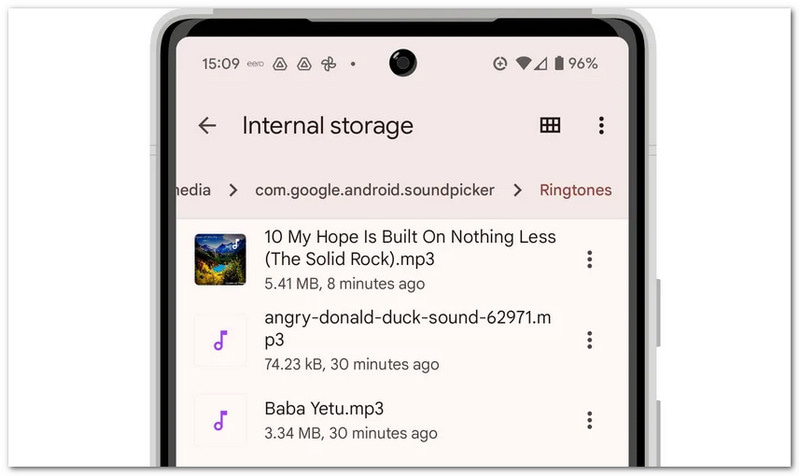
3. File Manager Method
Samsung File Manager organizes audio files and allows direct copying into the Ringtones folder for automatic ringtone detection.
Step 1Launch the My Files app on your Samsung phone.
Step 2Go to Downloads or Audio folder. Locate your recorded or downloaded sound.
Step 3Long-press the file. Tap Copy. Then, go to Internal storage > Ringtones.
Step 4Paste the file inside the Ringtones folder. Then, go back to Sound settings. Your file will now appear in the ringtone list.
Part 5. Pro Tips for Best Results
Before you set your ringtone, it helps to follow a few simple tips. These will make your ringtone sound clear and work better on your phone.
Tip #1: Keep it short.
Make your ringtone 30 to 40 seconds only. It keeps it smooth and fully compatible with Android phones.
Tip #2: Use the right format.
Use MP3 or M4A files when possible. These formats work well on most Android devices without errors.
Tip #3: Check the volume first.
Play your ringtone before setting it. Make sure it is not too loud or too soft. It helps you avoid surprises when someone calls.
You have learned how to record a ringtone on an iPhone, Android, and a desktop. So, no matter what device you use, you can create your own custom ringtone anytime.
For Windows and Mac users, AVAide Screen Recorder makes the process easy. You can record your own voice or capture audio from your system. You can also trim the file after recording. It helps you keep only the best part for your ringtone.
ABOUT THE AUTHOR

Capture screen activities with audio, online meetings, gameplay videos, music, webcam, etc.