Do you need to do a quick screenshot, but pressing the Prt Scr key is not enough? Then, try to use the Snipping Tool, a native screen capture utility on Windows that offers more control than a basic screenshot. It lets you capture a selected area, window, or full screen, then annotate, save, or share it with ease. If you are interested, this guide explains all the information regarding it and extensively explores similar tools on other operating systems, and even compares popular alternatives to help you find the best option.
Part 1. What Is the Snipping Tool?
The Snipping Tool is Microsoft's built-in screen capture utility that permits you to capture all or part of your screen with just a few clicks. After taking a screenshot, you can also annotate, crop, copy, save, or even share it without using additional software. It is a simple way to take a screenshot, yet it is a practical tool that serves different purposes for others.
Part 2. How to Use Windows Snipping Tool
How to Open
There are many ways you can use the Windows Snipping Tool. Here are the most well-known ways:
On your keyboard, press the Windows key, type in the Snipping Tool in the search bar, and select the app when it appears in the results.
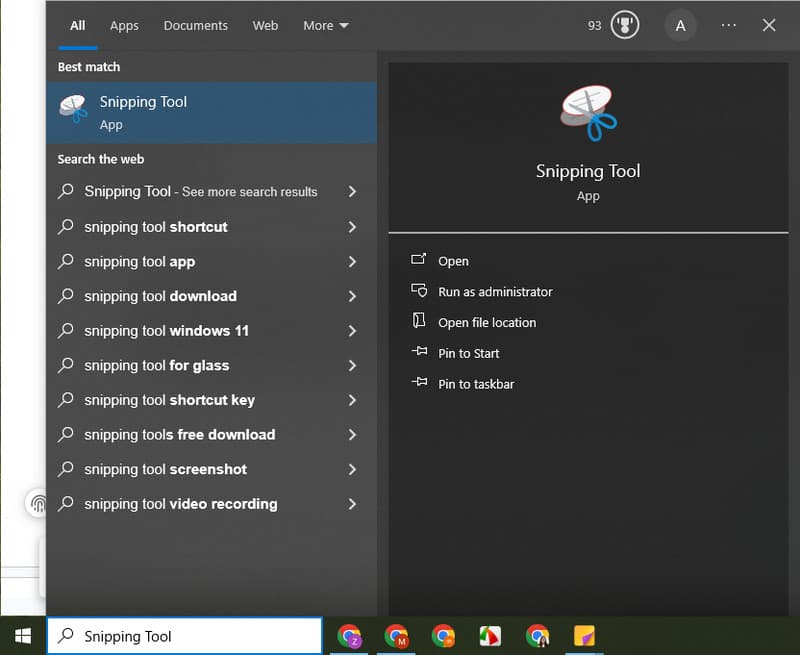
Hit the Windows key again, scroll down until you are on the letter S, find the Snipping Tool, and click it twice to open it.
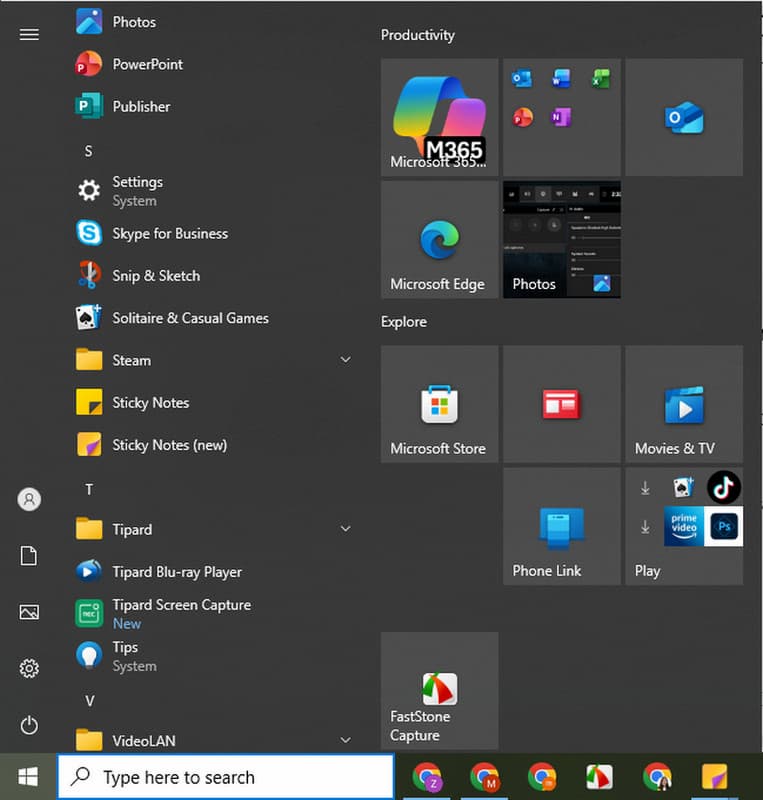
Without opening the full app, you need to simultaneously press Windows + Shift + S.
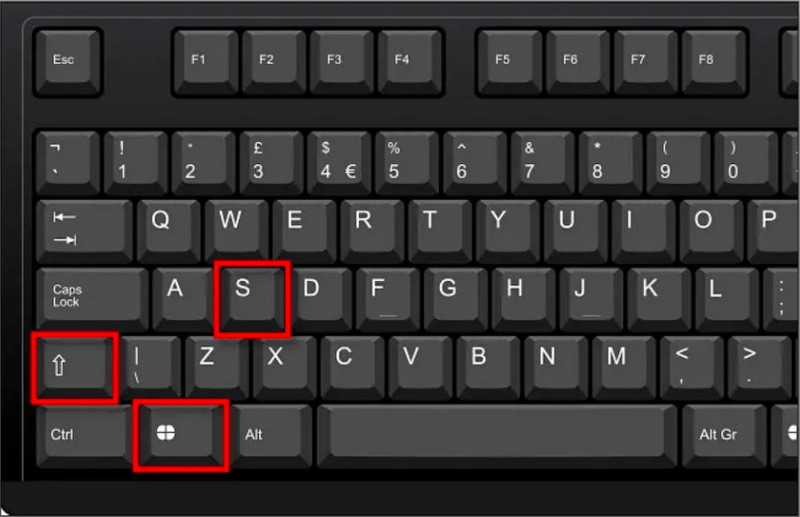
Snipping Tool Shortcut & Hotkey
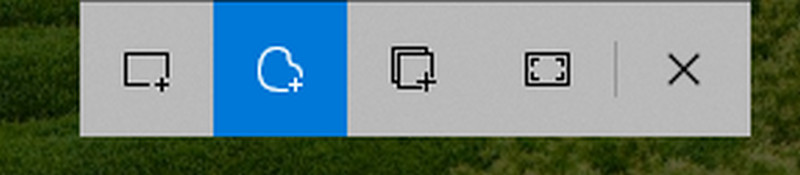
The most useful snipping tool shortcut is Windows + Shift + S because it opens the capture toolbar, wherein you can select the screenshot mode, such as rectangular, free-form, window, and full-screen snip.
Capture Modes
As we mentioned earlier, there are 4 major capture modes available once you press the Snipping Tool Hotkey, and these are:
- Rectangular Snip - Allows you to capture an area in a customizable rectangular shape on your screen.
- Free-form Snip - Allows you to draw any shapes around the area you want to capture.
- Window Snip - Allows you to capture a single application window currently opened on your computer.
- Full-screen Snip - Allows you to capture everything visible on your screen.
Rating: 8.5/10
Overall, how to use Snipping Tool is simple and can be accessed with the help of shortcut keys or hotkeys. Its options to take a screenshot are not limited to Full-screen only, which is a great addition, especially if you want to capture the window of a certain app or you want to capture a certain area freely. However, compared to the others, this program snipping tool lacks advanced features that you most likely need, such as scrolling screenshots.
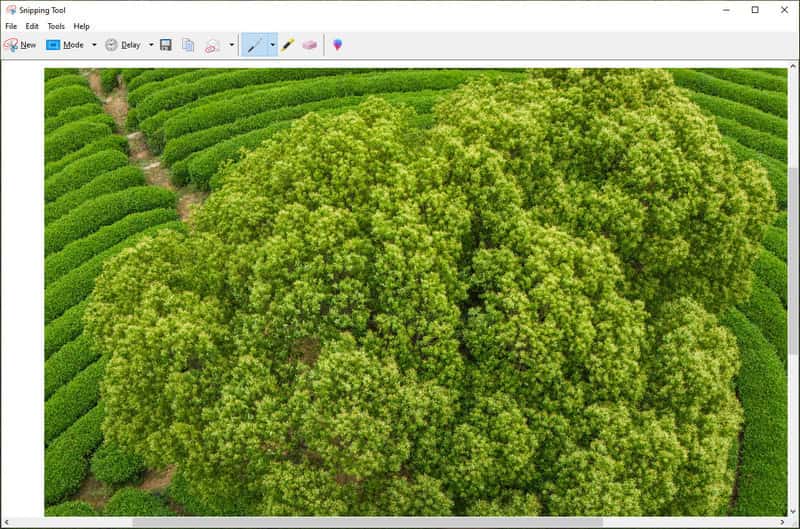
Though annotation is supported, it still lacks an advanced version of it and additional editing that you will most likely encounter after downloading a third-party app to snip. So if you want a quick and efficient screen capture, this is the option, but for more advanced, we suggest you pick from the options below.
Part 3. Is There a Snipping Tool on Mac?
No, macOS does not have an app called Snipping Tool. However, it has powerful built-in screenshot tools that function similarly:
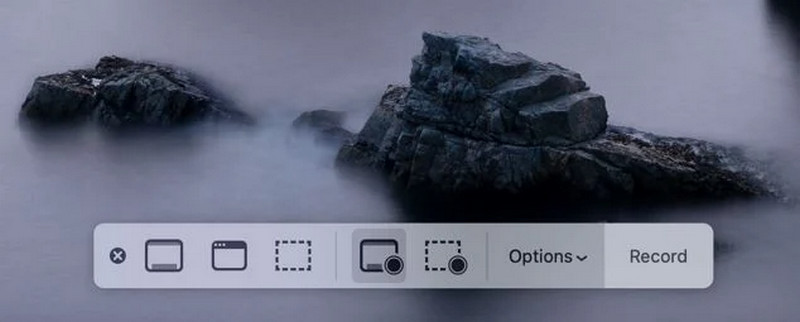
- Command + Shift + 3 - for Full Screen capture
- Command + Shift + 4 - for a specific area
- Command + Shift + 5 - to access more features on the Screenshot toolbar
These built-in Snipping Tools on Mac can make capturing, saving, and managing screenshots easier without the need for a third-party.
Rating: 8/10
MacBook snipping tool provides a more polished and reliable built-in screenshot experience compared to what Windows has. You can access it via keyboard shortcuts faster, and the Screenshot toolbar offers more capture and recording options, and the tools integrated into it are seamless with the operating system.
Thus, the advanced features such as scrolling screenshot and extensive annotations are unsupported here, which is why you are required to download an additional app to do these tasks. But overall, the built-in screen capture is sufficient for your daily snipping needs.
Part 4. What Is the Best Linux Snipping Tool
Linux snipping tool is not limited to one because there are two default screenshot utilities that you can use, depending on the desktop environment your Linux has. These are the Gnome Screenshot and Spectacle(KDE).
What Is Gnome Screenshot?
Gnome Screenshot is the default screenshot utility for the GNOME-based distribution, namely Ubuntu. It works like a Snipping Tool on Windows 11, but it offers an additional feature wherein you can add a capture delay and save the screenshot in a universally known image format.
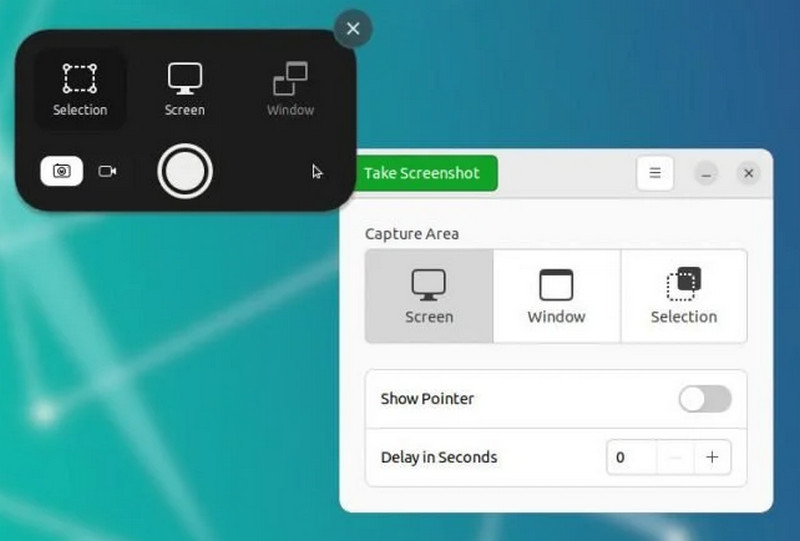
Rating: 8/10
Gnome is an excellent choice for users who are using a GNOME-based distribution because it has a clean interface and has all the essential capture modes, making it ideal for everyday tasks. However, it lacks advanced editing and annotation features that you can find on some third-party apps.
What Is Spectacle(KDE)?
Spectacle is the default screen capture on KDE Plasma, wherein it supports the same level of capture mode available on the snipping tool download. Unlike the first one, Gnome, you can annotate, delay capture, and have options to copy or share the screenshot directly to the receiver.
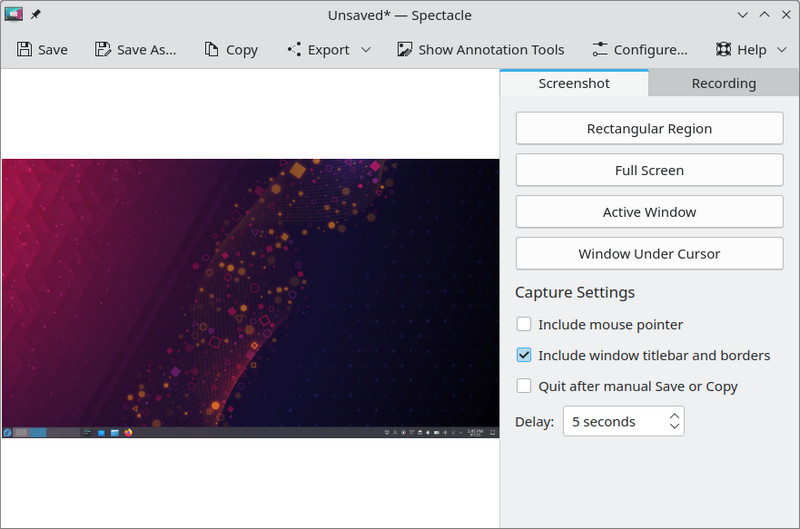
Rating: 8.5/10
Spectacle is one of the richest-featured built-in screenshot tools available on Linux. Since it offers flexible capture modes, useful annotation tools, and seamless integration with the KDE Plasma, it is a strong option for users who need more than basic screen capture.
Part 5. Snipping Tool for Chromebook
Chromebooks do not include an app with this exact name, but the built-in snipping tool that Chromebook users rely on provides everything needed for everyday screen captures. You can open the Screen Capture tool by pressing Shift + Ctrl + Show Windows, then choose to capture the full screen, a specific window, or a selected area. The same tool also supports screen recording, making it a convenient option for work, school, and personal use.
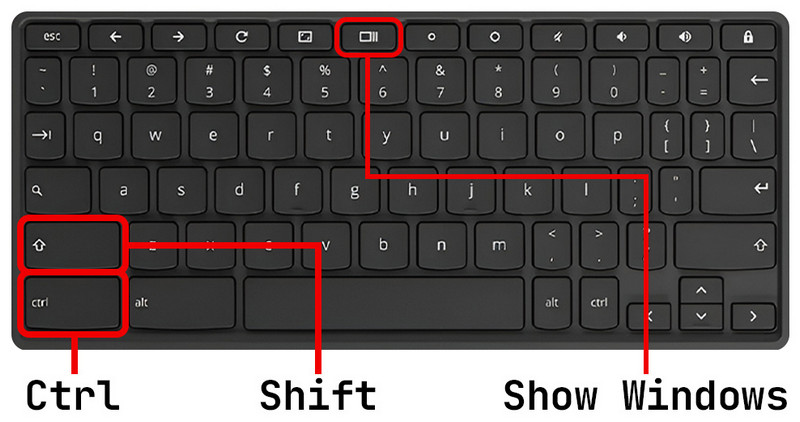
Review Score: 8.5/10
Built-in screen capture is quick, intuitive, and seamlessly integrates with ChromeOS. It may not have as many editing tools as other third-party tools like the ScreenPal, but it has all the basic features a user of Chromebooks would need to capture a screenshot or screen record without needing to install other software.
Part 6. Free Snipping Tools
The built-in screenshot tool is sufficient for simple tasks, but sometimes it's not. These free alternatives are worth a try if you want more editing features, more ability to capture, or safeguard against issues with the snipping tool not working.
1. AVAide Screen Recorder
AVAide Screen Recorder is known for screen recording, but its screenshot feature is just as useful. You can capture the full screen, a window, or a selected area, then instantly add text, arrows, shapes, or highlights before saving the image. The layout is easy to navigate, so even first-time users can find the tools they need without spending time learning the interface. If you are looking for a snipping tool download that combines screenshots and screen recording in one application, AVAide is a practical choice.

FREE DOWNLOAD For Windows 7 or later
 Secure Download
FREE DOWNLOAD For Mac OS X 10.13 or later
Secure Download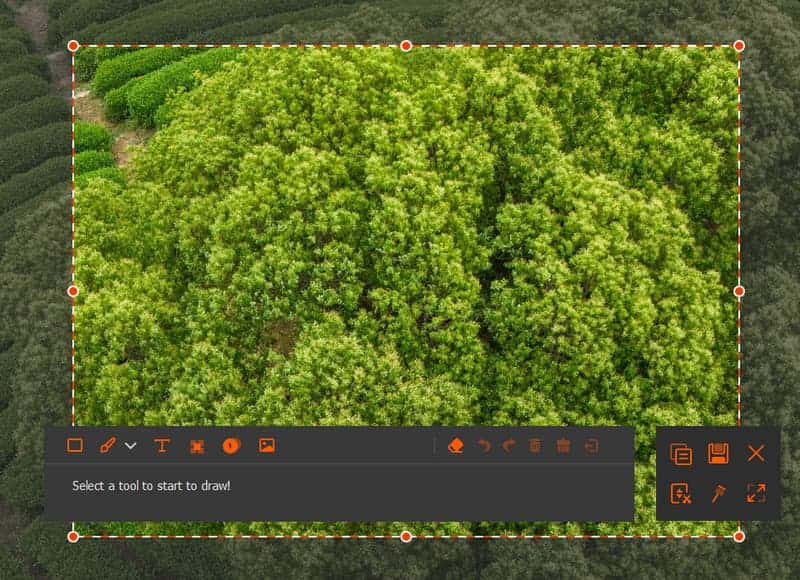
Review Score: 9.5/10
Overall, the app works effectively with many options on screencapture, but if you want to use it as a desktop recording software, it will surely never let you down because of its performance and more.
2. ShareX
ShareX offers far more than basic screen captures. It can take scrolling screenshots, extract text with OCR, upload files automatically, and automate repetitive tasks through custom workflows. Despite its long list of features, the program remains lightweight and responsive. The interface may seem complex at first, but it becomes much easier to use once you customize it to fit your workflow. If you already know how to open a Snipping Tool but need something more powerful, ShareX is one of the best free upgrades available.
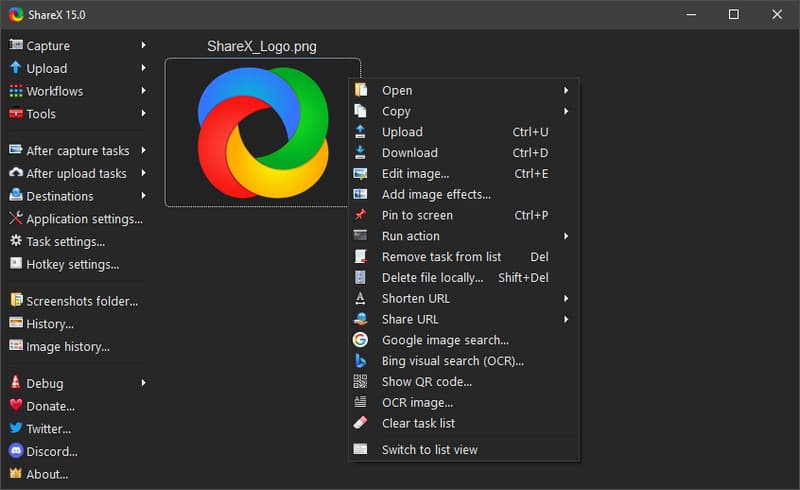
Review Score: 9/10
3. Flameshot
Flameshot maintains the screen capture process quickly and simply. Once you capture some of the screen, you are able to draw arrows, add text, blur private information, or highlight important details before saving, all with the tools appearing as soon as you capture. All of this happens inside a single window, and creating guides, tutorials, or bug reports is thus much faster. Linux users particularly favor it due to its neat appearance and reliable functionality.
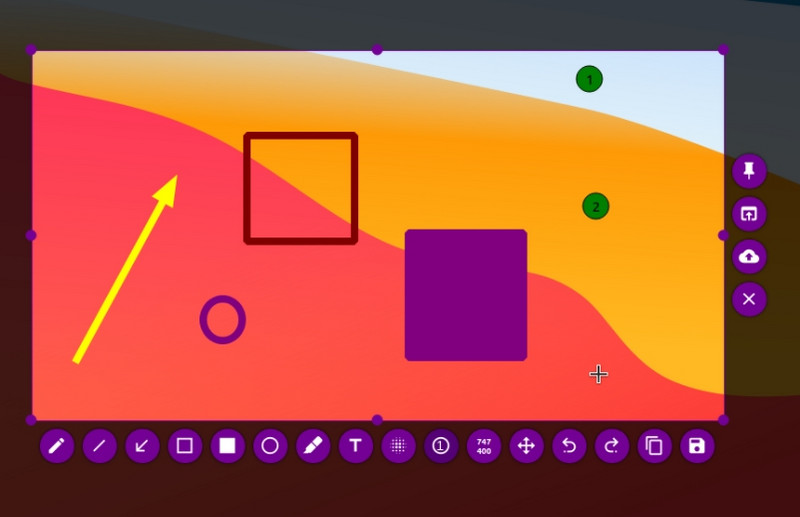
Review Score: 8.5/10
4. Screenshot.guru
Screenshot.guru is a simple online tool for capturing web pages without installing software. Just paste a webpage link, and it generates a clean screenshot that you can download in seconds. It is particularly useful when using a shared computer or a device where installing applications is not possible. It can also be a handy alternative if you are dealing with a snipping tool blown-out display issue and only need to capture online content.
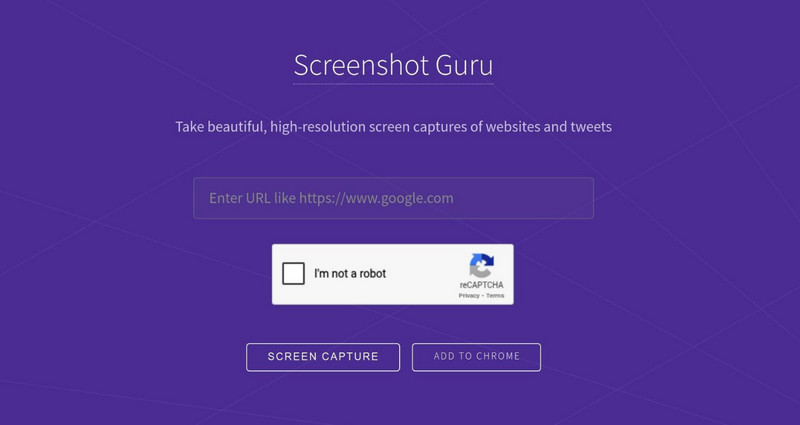
Review Score: 8.5/10
Part 7. Snipping Tool vs. Alternatives - Comparison Table
| Features | Snipping Tool | AVAide Screen Recorder | ShareX | Flameshot | Screenshot.guru |
| Platforms | Windows | Windows and Mac | Windows | Windows and Linux | Web |
| Annotation | Yes | Yes | Yes | Yes | No |
| Screen Recording | Yes, but for Windows 11 only | Yes | Yes | Limited | No |
| Best Used Case | Everday screenshots | For tutorials, presentations, and professional use | Power users and workflow automation | Fast screenshots with built-in markup | Capturing websites |
| Ease of Use | Easy | Easiest | Easy | Easy | Easy |
What is a Snipping Tool? Well, we already discussed what the Snipping Tools are and their capabilities in taking a screenshot of any area of your screen. You can use it to screenshot a specific window or the entire screen freely and without downloading it since it is already pre-installed. However, the built-in app lacks advanced features that will surely make your screenshot better, which is why we introduce the other alternatives that you can use. Aside from that, we highlighted information regarding similar tools on other desktop platforms and how to access them.
ABOUT THE AUTHOR

Record screen, audio, webcam, gameplay, online meetings, as well as iPhone/Android screen on your computer.