FaceTime is one of the most popular applications for video calls on Apple devices. Many people use it to talk with family, join work meetings, or catch up with friends. Many users ask: Can you record a FaceTime call? Is it possible to record FaceTime with audio?
In this guide, we will explain how to record FaceTime with audio on both iPhone and using a desktop. You will learn how to use a built-in option, a third-party tool, and essential tips to keep your recordings safe and legal.
Part 1: How to Screen Record FaceTime with Sound on iPhone
Recording FaceTime calls with sound on your iPhone lets you save essential conversations and special moments. You can capture both your voice and the other person's voice, making the recording complete and clear.
The iPhone's built-in Screen Recording feature manages this easily. Recordings are stored directly in the Photos application, so you can watch, share, or keep them for later. This method works on most iPhones with iOS 11 or later and does not need any extra applications.
Check the guide below to master how to screen record FaceTime with sound using your iPhone:
Step 1Set Up Screen Recording in Control Center
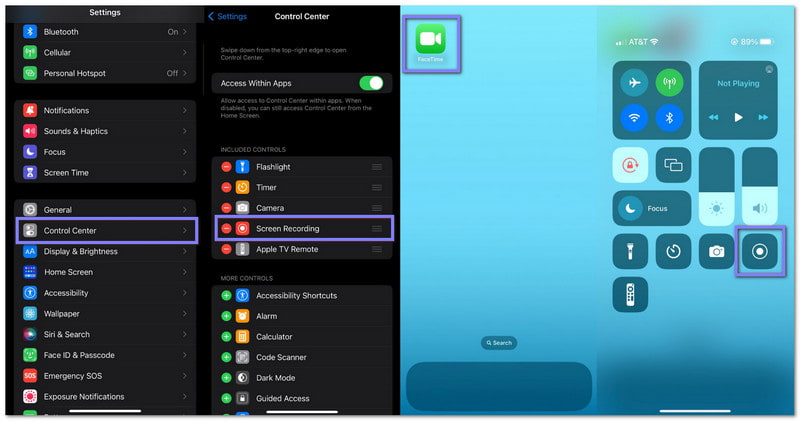
Make sure your iPhone has Screen Recording ready. Go to Settings > Control Center > Customize Controls. Find Screen Recording and press the green + to add it. It makes it easy to access whenever you want to record.
Step 2Open Control Center & Prepare Recording
Swipe up from the bottom of your screen (or down from the upper-right corner on iPhone X or later) to open the Control Center. Then, long-press and hold the Screen Recording button. It will show extra options.
Step 3Turn On the Microphone & Start Recording
Tap the Microphone button so it is on. It lets your iPhone record your voice along with the call audio. Then, tap Start Recording, and a three-second countdown will appear.
Step 4Make Your FaceTime Call
After the countdown, close the Control Center and start your FaceTime call. To capture the other person's voice, put your call on speaker mode. Continue your conversation while the iPhone records the screen and audio.
Step 5Stop Recording & Find Your Video
Once your call ends or you want to stop recording, press the red Time indicator at the top of your screen and tap Stop. Then, your recording is automatically saved in the Photos application. You can find it at the bottom of the Recent album or in the Screen Recordings album.
Additional Details: With the same screen recording method on your iPhone, you can also record Instagram Live or other live streams on your social media applications.
Part 2: How to Record FaceTime with Audio on Mac/Windows
AVAide Screen Recorder lets you record FaceTime calls with audio perfectly synced to the video. It captures every detail clearly, keeping the picture sharp and the sound clean. It means your recordings look professional and sound just like the real conversation.
Another thing about it is that it can capture a FaceTime call without the other person knowing. It makes it great for saving important conversations or fun moments. On top of that, it is easy to set up, so you can start recording your FaceTime calls in no time.
- Take screenshots anytime during recording.
- Save recordings in formats like MP4, WMV, or AVI.
- Capture your screen in 4K or 1080p for clear videos.
- Record system sound and microphone at the same time.
- Choose to record full screen, a window, or a custom area.

 Secure Download
Learn how to record a FaceTime with audio on Mac and Windows using AVAide Screen Recorder below:
Step 1Launch FaceTime
What you need to do first is to open FaceTime on your computer. Then, proceed to call a friend, family member, or anyone you want to chat with.
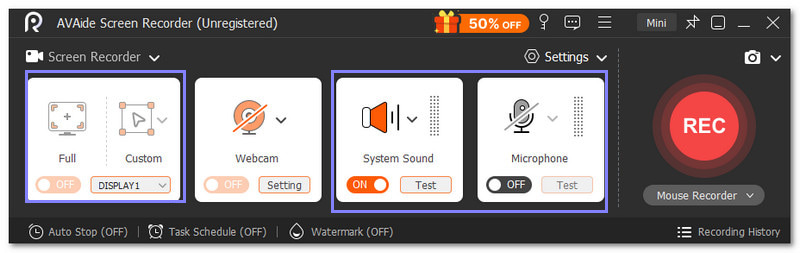
Step 2Set The Recording Area & Audio
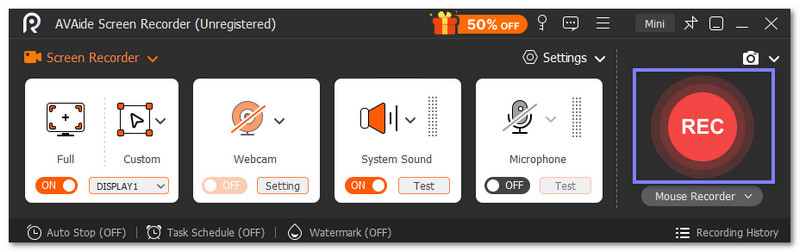
Once your call is live, run AVAide Screen Recorder. Please adjust the frame so the entire FaceTime screen is visible, and nothing gets cut off. Also, ensure to turn on the System Sound and Microphone so your recording captures all audio.
Step 3Start Recording FaceTime
Are you ready to capture your conversation? If yes, click the REC button to start recording. Just speak naturally and let the conversation flow.
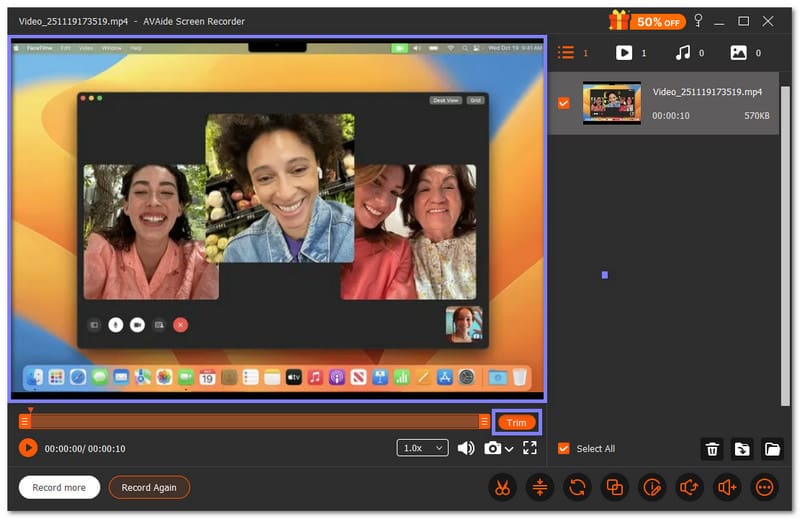
Step 4Stop & Trim Your Recording
Once your call is done, click the Stop button. A display will be opened, where you can preview your recording. If there are unnecessary start or end parts, you can remove them by opening the Trim option.
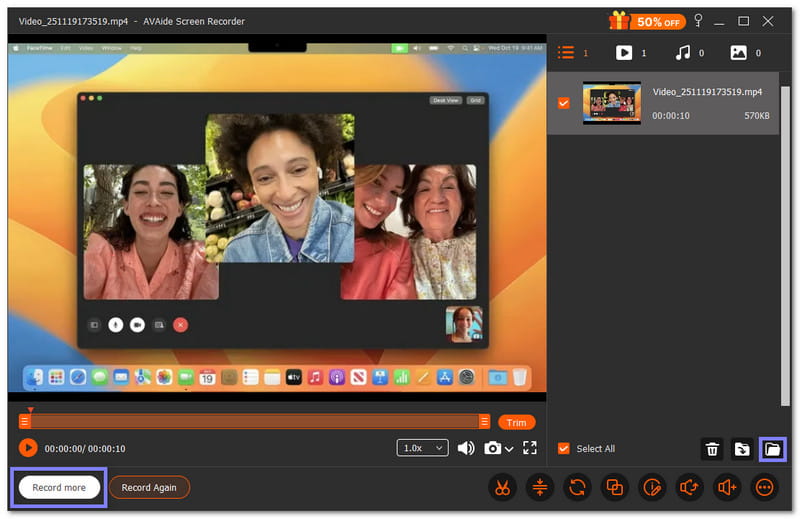
Step 5Save Your FaceTime Recording
Finally, click the Save button to keep your FaceTime recording. If you need to record another FaceTime call, just click the Record More button. This way, you will not miss any essential part of your call.
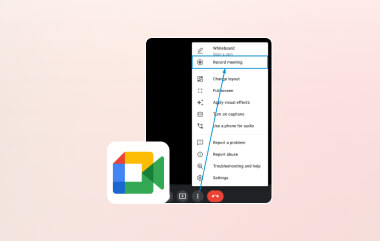
- You can also use AVAide Screen Recorder to record Zoom meetings, Teams calls, or Google Meet. It records both video and audio, so you do not miss anything. It makes it easy to save work meetings, online classes, or group chats for later.
Part 3: Tips and Legal Considerations
You have discovered how to record a FaceTime conversation above. But aside from that, we also want you to understand that recording FaceTime calls also comes with responsibilities. You must follow legal and ethical considerations to keep everyone safe and build trust. Below are the things you need to know.
1. Notify Everyone
Always let the other people on the call know that you are recording. In many places, this is not just polite; it is required by law. Being transparent shows respect, builds trust, and protects you from legal issues. A simple "I'm recording this call" at the start is enough to keep everyone informed.
2. Check Local Laws
Laws about recording calls vary depending on where you live. Some areas require one-party consent, which means only one person on the call needs to agree. Other areas require two-party consent, meaning everyone must agree.
Check local legal resources or websites like Justia or your country's data protection authority to make sure you follow the rules. Knowing the law helps you record safely and avoid trouble.
3. Manage Recordings Carefully
If you record FaceTime calls for work or professional reasons, keep your recordings secure. Use cloud storage with access controls, encrypt sensitive files, and share only with people who are allowed to see them. It keeps personal or professional information safe and protects everyone involved.
You did well! You now know how to screen record FaceTime with sound on iPhone and Mac/Windows. It is not hard at all, right? Just a few taps and you can begin recording, especially when using AVAide Screen Recorder. Whether it is a work meeting, a class, or a chat with friends, AVAide Screen Recorder makes sure nothing is missed, and everything is saved in high quality.
ABOUT THE AUTHOR

Record screen, audio, webcam, gameplay, online meetings, as well as iPhone/Android screen on your computer.