Just imagine putting in a DVD and nothing taking place. No image, no mistake, and pure silence. It is in this way that most people who use Macs come to know that DVD handling has changed. Its problem is not often discussed. This guide demonstrates how to copy a DVD on a Mac by matching the right method to the disc type and system limits. The sections that follow explain why copying helps, how protection changes the process, and what precautions matter.
Part 1: Benefits of Copying DVD to Mac
Copying DVDs to a Mac gives you more control over your media and helps extend its life. Discs wear out, drives fail, and modern Macs no longer support DVDs the way they once did. Learning how to copy a DVD to a DVD on Mac also helps you understand how digital copies work, which applies when saving DVDs to your system. Here are the main benefits:
1. Protect Aging Discs
DVDs degrade over time. They can be scratched, burnt, or used repeatedly to make them illegible. Adding a DVD to your Mac copies the information before the disk crashes.
2. Watch Without a Disc
Once copied, you can play videos directly from your Mac. This removes the need for an external DVD drive and avoids playback issues caused by damaged discs.
3. Easier Access and Organization
Digital copies also enable them to sort videos by title, date or type. Family videos, movies or training discs are found and manipulated more easily.
4. Better Compatibility With Modern Devices
Macs, iPhones and iPads are not dependent on DVDs. Duplication will enable you to change the materials into forms that are compatible with Apple devices.
5. Faster Backups and Transfers
When you copy the DVDs to your Mac, it becomes easy to save files or transfer them to the external storage. It is handy for travelling, long-term storage or sharing in your home.
6. Reduced Hardware Dependence
DVD drives have become non-standard in the majority of Macs. Duplicating your DVDs eliminates the future use of hardware and adapters that are going to die.
With these benefits in mind, the next sections explain how copying DVDs to DVDs on Mac protection affects the process and which methods work for different types of DVDs.
Part 2: Copy-Protected DVDs to Mac
Copy-protected DVDs add an extra layer of difficulty because they use encryption that macOS cannot handle on its own. If your goal is to learn how to copy a DVD on a Mac computer, AVAide DVD Ripper is a practical solution. It is able to cut around normal DVD encryption without compromising the original video and audio quality. Also, this tool is compatible with complete disc copying, where such things as original menu structures, chapters and subtitles are retained. The batch processing enables you to work with several discs simultaneously, which helps to save time when dealing with large sets.
Step 1Begin by downloading AVAide DVD Ripper from the official website. Install it following the on-screen instructions. Make sure the software is up to date so it can handle both protected and unprotected DVDs smoothly.

FREE DOWNLOAD For Windows 7 or later
 Secure Download
FREE DOWNLOAD For Mac OS X 10.13 or later
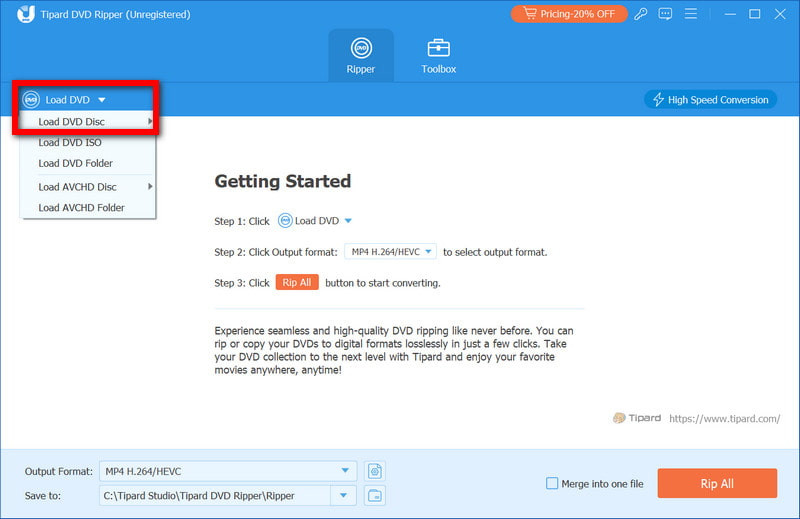
Secure DownloadStep 2Insert the DVD into your drive or an external DVD drive on your Mac. Open AVAide DVD Ripper and click the Load DVD button. The software will read the disc and show all titles, chapters, and menus, giving you the option to copy the full disc or select specific sections.
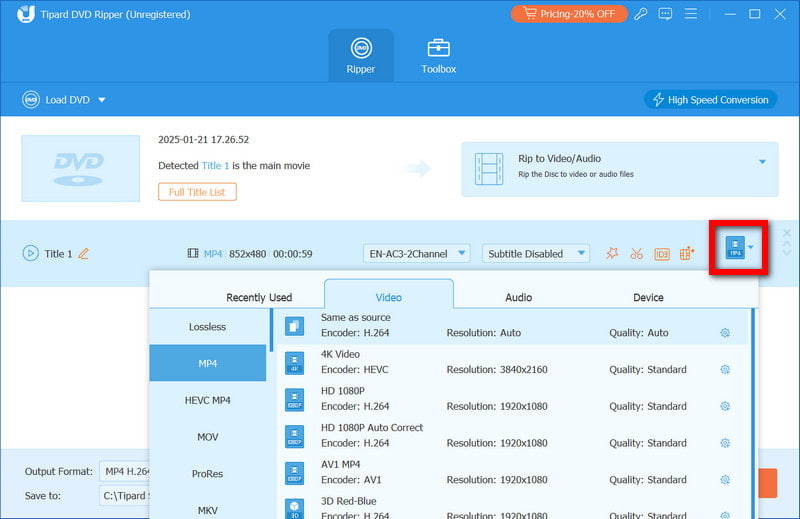
Step 3Click the Format button and pick a Mac-compatible format such as MP4, MOV, or MKV. You can also customize settings like resolution, audio tracks, and subtitles. Choosing the right format ensures your copied DVD plays smoothly on your Mac, iPhone, or iPad.
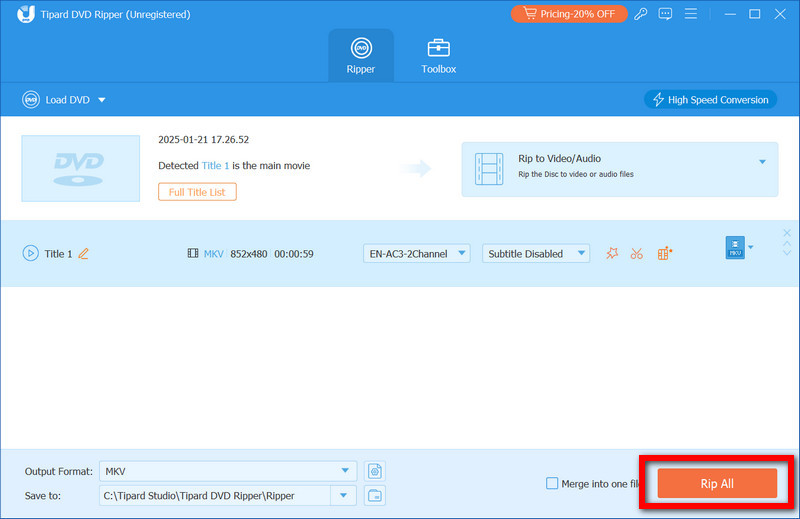
Step 4Choose the folder where you want the copied files saved. Once ready, click Rip All. The tool will copy the DVD while keeping the original video quality, menus, and chapters intact. Batch processing is available if you want to rip a copy-protected DVD at once, saving you time.
Part 3: Copy Unprotected DVDs to Mac
Unprotected DVDs are much easier to copy because they do not have encryption or digital rights restrictions. If you want to back up home movies, personal videos, or any legally owned discs, you can do so using built-in macOS tools without installing extra software. This method answers the common question of how to copy a DVD to a Mac computer. It preserves all DVD content, including menus, chapters, and extras, while creating a safe digital copy on your Mac.
Step 1Place the unprotected DVD into your internal drive or an external DVD drive. Wait for the disc to appear in Finder before proceeding.
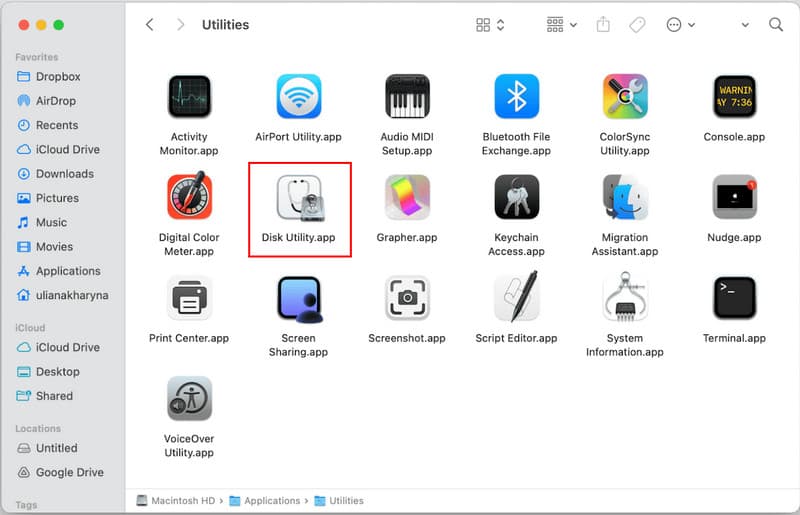
Step 2Go to Applications > Utilities > Disk Utility and launch the app. It is free and included with macOS, making it ideal for copying unprotected DVDs.
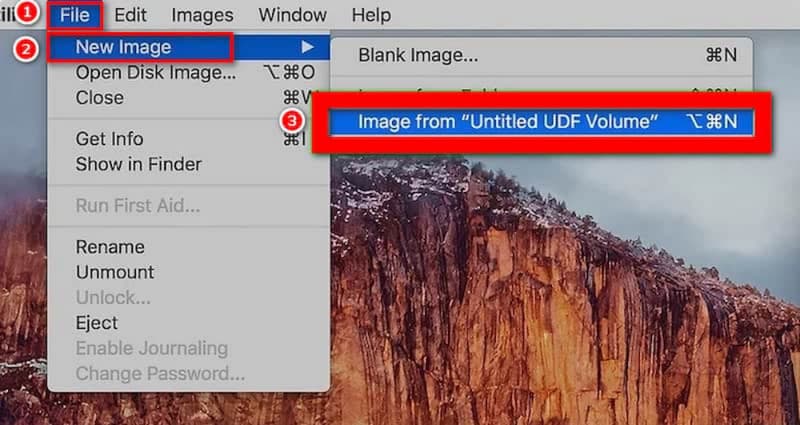
Step 3In Disk Utility, select your DVD from the sidebar. Then go to File > New Image > Image from [DVD name].
Step 4Select DVD/CD Master as the image format. This preserves the full structure and content of the DVD. Pick a destination folder on your Mac where the image will be saved, then click Save.
Step 5Once it is created, it will appear in Finder. You can double-click it to mount and view the DVD contents directly, or burn it to another DVD if needed.
This process is free, simple, and reliable. It enables you to do complete backups without altering the original quality and format of your DVD. For anyone looking for a straightforward way to store or transfer their discs, this step-by-step method clearly demonstrates how to copy a DVD to a Mac computer.
Part 4: Risk and Precautions When Copying a DVD to a Mac
Risk 1: Damaging the Original DVD
Physical DVDs can be scratched or broken during handling. Always handle discs by the edges and avoid fingerprints on the surface. Proper care is crucial when learning how to copy a DVD on a Mac to prevent permanent data loss.
Risk 2: Using Outdated or Incompatible Software
Older applications might not be able to read newer DVDs or might corrupt the data. To go through the copying of a DVD into a Mac, always ensure that you utilize the tools that you trust and make sure the software is compatible with the version of macOS.
Risk 3: Losing Video Quality
Other modes of copying compress files or bypass menus. In order to retain the original feeling, find software that will retain quality. This ensures the best way to copy a DVD on a Mac keeps both video and audio intact.
Risk 4: Choosing the Wrong Output Location
Saving files in a system directory or a limited space may end up giving errors due the incomplete copying of files. Always verify your destination before you copy a DVD to my Mac.
Risk 5: Hard Drive Corruption or Failure
Copying large DVDs can stress old or nearly full hard drives. Back up your Mac regularly to avoid losing files when you copy a DVD movie to your Mac Hard Drive.
Risk 6: Issues With External Drives
If you are copying a DVD to an external hard drive, make sure it is formatted correctly for Mac and has stable connections. Too early unplugging or ejection may corrupt files when you copy a DVD to an external hard drive Mac.
Risk 7: Confusing File Formats
Storing DVD materials in an incorrect format may render the material unplayable. Verify the format matches your needs before you copy a DVD to a Hard Disk Mac, make sure the format is as you need, since you will not put it on a multi-playing device.
DVD recording on a Mac is not as complicated as it may appear, and it safeguards your movies, your personal video and valuable files in the long run. The step-by-step processes in this guide allow you to save your disks in a secure condition, retaining the quality of the original type, and organizing your media easily. With these tools and tips, anyone can confidently copy a DVD to a Mac computer and enjoy their content anytime, without worrying about scratches, lost discs, or playback issues.
Copy, back up, and convert DVDs on Mac while preserving menus, chapters, and full quality.