You are prepared to share your photo and are just about to upload it. But before you do, you notice that your face has unsightly spots, distracting shadows, or faded colors. Why don't you retouch it? We can help you with that!
With our step-by-step guide, you can easily fix these little flaws and make your photo look smooth, bright, and flawless. Just simple steps to retouch the photo before you upload it. Let us start retouching!
Part 1: What Does Photo Retouching Mean
Photo retouching means improving a picture by fixing minor flaws. Removing spots, wrinkles, or dust helps make a photo look better. It can also smooth skin, brighten colors, and fix lighting issues.
Photo retouching is used by designers, photographers, and companies to improve their work. It aids in producing top-notch photos for print, advertising, and social media. Retouching can be done with a variety of tools and programs, ranging from basic web editors to sophisticated software.
Part 2: How to Retouch Photo Online Free
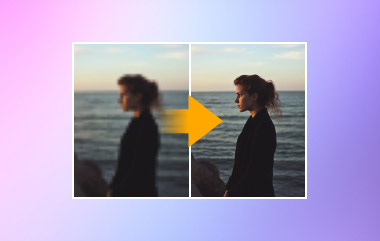
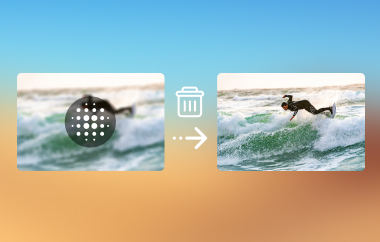
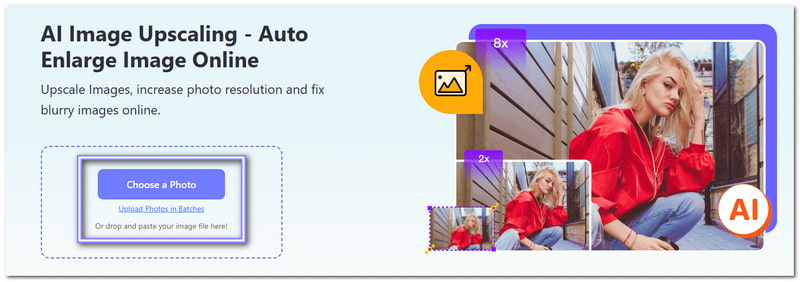
You want to improve your photo but do not want to do it manually. Fixing every detail takes too much time. You want an instant retouch, no extra work. Luckily, AVAide Image Upscaler does it all for you. It allows you to retouch a photo online for free by using AI to sharpen details, remove noise, etc.
This online tool is perfect for fixing blurry pictures, increasing resolution, and making images look more professional. It works on portraits, product photos, animals, and cars. You can make small, pixelated images clear and sharp with just one click. You can even upscale photos up to 8× without losing quality.
Upsides and downsides: One of the best things about AVAide Image Upscaler is its free use. AI powers the tool, so you do not need any editing skills. There are no watermarks, so your pictures stay clean. But if you want to upload multiple photos simultaneously, upgrade to a paid plan.
Step 1Open your browser and search for AVAide Image Upscaler and open it.
Step 2You can import your image in JPG, JPEG, or BMP format by clicking the Choose a Photo button. If you have many photos to retouch and want to work on simultaneously, click the Upload Photos in Batches.
Step 3Please wait a few seconds, as AVAide Image Upscaler will process the image and show a preview. The best thing about it is that you will immediately see the difference. You can see that the output photo became sharper, clearer, and fully retouched without extra work.
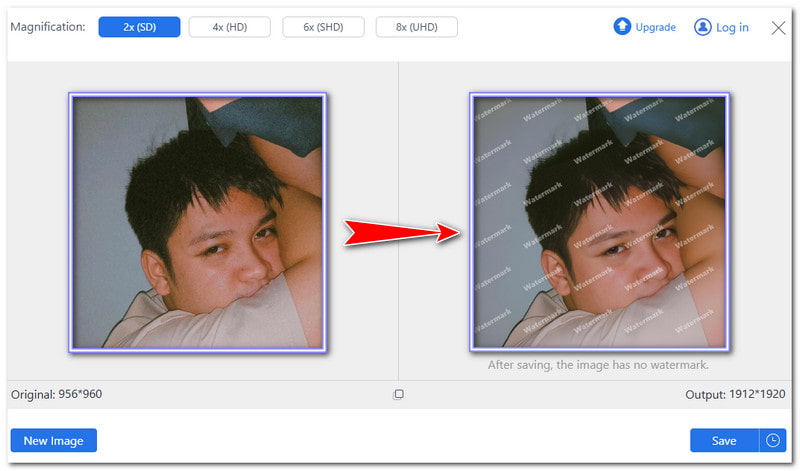
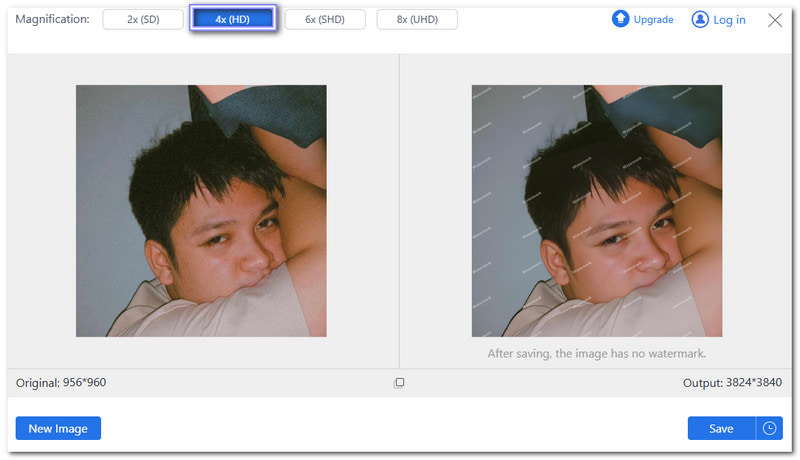
Step 4The image is upscaled to 2× by default. If needed, you can try a different upscale level for better results. You can choose 4×, 6×, or 8×. However, note that higher levels make details clearer and can also increase file size.
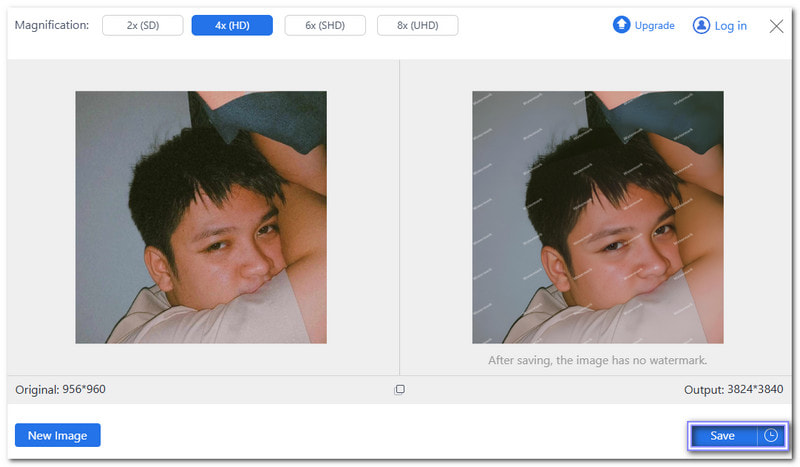
Step 5Once satisfied, press the Save button to download the retouched image. Now, you have a retouched photo ready to share or keep. Whether for social media, printing, or personal use, your picture will look clearer and more professional with no extra effort.
Part 3: How to Retouch Photo in Photoshop
Photoshop is a top tool for editing photos and one of the best photo retouching programs on Windows and Mac. Professionals use it for retouching, fixing picture quality, and creating designs. It can remove blemishes, smooth skin, and adjust lighting. Many photographers and designers trust it to make their work look perfect.
Upsides and downsides: It supports layers, so edits do not affect the original image. The software also has AI features to make editing faster. However, it can be hard to learn, especially for beginners. The price is also high since it requires a subscription.
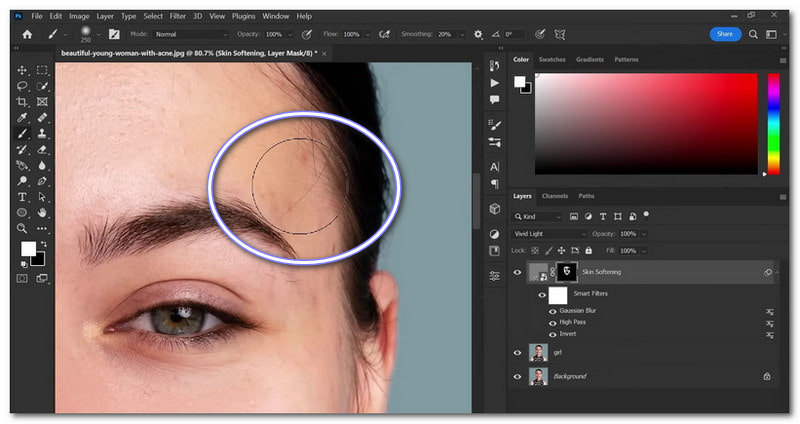
Step 1First, make a copy of the image layer. It keeps the original safe in case you make a mistake.
Step 2Next, use the Patch Tool to remove wrinkles. Draw around the wrinkle, then drag it over a smooth part of the skin to blend it.
Step 3Use the Clone Stamp Tool to fix eye bags. Pick a spot near the eye bags, lower the brush opacity to 20%, and gently paint over the puffiness until it looks natural.
Step 4Use the Spot Healing Tool to remove blemishes. With a simple click, this tool quickly erases spots, marks, and dirt.
Step 5Finally, save and export your edited photo once you are happy with the outcome.
Part 4: How to Retouch Photos on iPhone
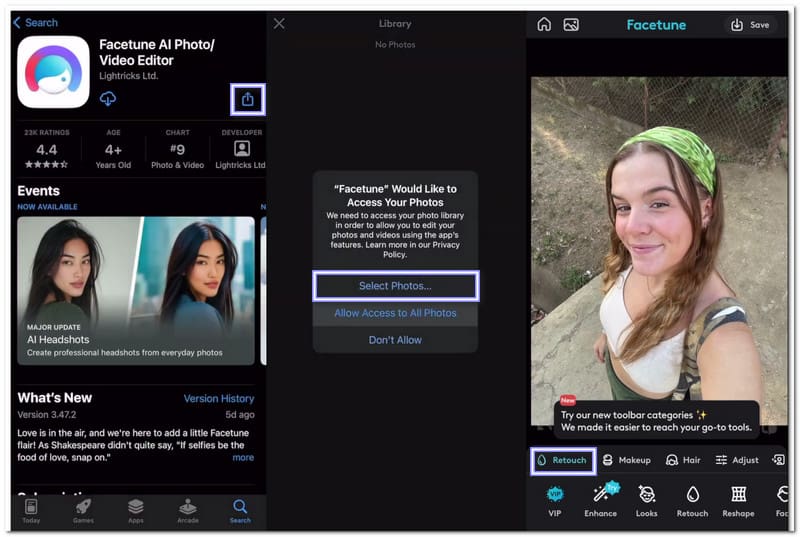
If you want to learn how to retouch photos on your iPhone, Facetune can help you. It is one of the leading photo retouch apps. It is developed by Lightricks Ltd., placing #15 in the Photo & Video category. Whether you want a minor touch-up or a complete transformation, it has everything you need. It helps smooth skin, whiten teeth, and remove unwanted spots. You can also add filters, fix lighting, and even apply virtual makeup.
Upsides and downsides: The retouching feature removes blemishes and smooths skin with one tap. The teeth whitening feature brightens smiles fast. While it has excellent tools, some features are only available with a paid subscription. The free version has limits, so you may need to pay for advanced features.
Step 1Get Facetune from the App Store and open it.
Step 2Pick a photo from your album.
Step 3Tap Retouch at the bottom.
Step 4Choose the Heal tool. Zoom in and tap on blemishes to remove them. For smooth skin, tap Auto. The application will fine-tune your photo automatically.
Step 5When you are happy with the edit, tap Share to save it to your album.
Part 5: How to Choose a Photo Retouching Service
A good photo retouching service should make pictures look better without looking fake. Some services fix minor flaws, while others can make significant changes, like removing backgrounds or restoring old photos.
1. Look at their sample work: Most services show before-and-after photos. It helps you see if their editing style matches what you want.
2. Check the features they offer: Some only smooth skin or brighten colors, while others can remove objects, sharpen details, or change the background. Make sure they have the tools you need.
3. Compare the prices: Some services charge per photo, while others have subscription plans. Free options exist, but they may not give the best results. Paid services often provide better quality.
4. Consider the time it takes: Some services return edited photos in minutes, while others take hours or days. If you need pictures quickly, choose one with a fast turnaround.
5. Read customer reviews: Other users can tell you if a service is good or bad. A service with many happy customers will give you great results.
This article shows you how to retouch your photo online and offline. You can follow our guide to retouch your pictures the way you want. If you want a free and not manual way, try AVAide Image Upscaler. You do not need editing skills to use it. Add upload your photo, and the AI will do the work!

Image Upscaler
Our AI technology will automatically enhance the quality of your images, remove noise and fix blurry images online.
PROCESS NOW