JPEG images feature on the majority of sites and electronic media. Statistics indicate that they are applied to more than three-quarters of active sites, including the most highly ranked sites. This popularity is a result of a powerful compression that minimizes file size. Issues begin as the quality of images is reduced because of the compression.
Being in the right time and place to compress the JPEG properly is useful to safeguard clarity, speed, and usability. The article starts with the explanation of the file format of JPEG, the reasons as to why compression is important, and then concludes by stating the practical ways that you can employ online or on Windows and Mac platforms.
Part 1: What Is a JPEG File
A JPEG file is one of the most popular image formats that is used to take photos efficiently. The Joint Photographic Experts Group came up with it to minimize the size of the file whilst maintaining the quality of the image in the eye. This is the balance that has rendered JPEG as the standard where websites and emails, as well as digital photography, are concerned.
JPEG uses lossy processing, known as JPEG compression. This method removes image data that the human eye rarely notices. As a result, file sizes drop significantly, often by 10 to 20 times. Some quality loss occurs, but it is usually minor and acceptable for photos. Issues appear when images are compressed too aggressively or saved multiple times.
The format supports 24-bit color, which allows over 16 million colors. This makes JPEG suitable for complex images with gradients and realistic lighting. It is less effective for sharp graphics like logos or text, where compression artifacts are more visible.
JPEG files commonly use the .jpg or .jpeg extension. Both refer to the same format and work the same way.
JPEG VS. JPG
There is no difference between JPEG and JPG. The name JPG comes from older Windows systems that only allowed three-letter extensions. Today, the formats are identical. When you compress a JPEG, file size and image quality remain the same regardless of whether the extension is JPG or JPEG.
Part 2: Why Need to Compress JPEG Files
1. Faster Website Loading
One of the primary reasons why page speed is slow is the large images. Heavy JPEG files increase load time and affect user experience. Knowing how to compress JPEG file size helps reduce page weight, improve performance scores, and support better search visibility without changing the image content.
2. Improved Search Engine Performance
Search engines favor speedy and effective pages. Large-sized images may damage the crawling and rankings. Knowing how to compress a JPEG is also important to ensure images are loaded fast, and they satisfy technical SEO and the image is still displayed well on different devices.
3. Easier Sharing and Uploading
There are numerous sites that restrict the size of images uploaded. Email services, forms, and content systems usually reject large files. The ability to compress JPEG to 100kb means that the sharing process is quicker and eliminates failure to upload due to an upload error.
4. Reduced Storage and Bandwidth Use
Images of high resolution use storage space and bandwidth over time. This is an expense and a drag on systems. The most frequent response to this question is how I can compress a JPEG when dealing with image libraries, image backups, and image clouds in a more cost-effective way.
5. Preserve Visual Quality While Reducing Size
Not all compression is equal. Poor settings can blur details and introduce artifacts. Understanding how I can compress JPEG images without losing quality helps maintain sharpness while removing unnecessary data from the file.
6. Better Image Optimization Control
JPEG image compression allows control over quality levels, resolution, and output size. This flexibility makes JPEG suitable for many use cases, from web publishing to personal storage, as long as JPEG image compression is applied with purpose and balance.
Part 3: How to Compress JPEG Photos Online
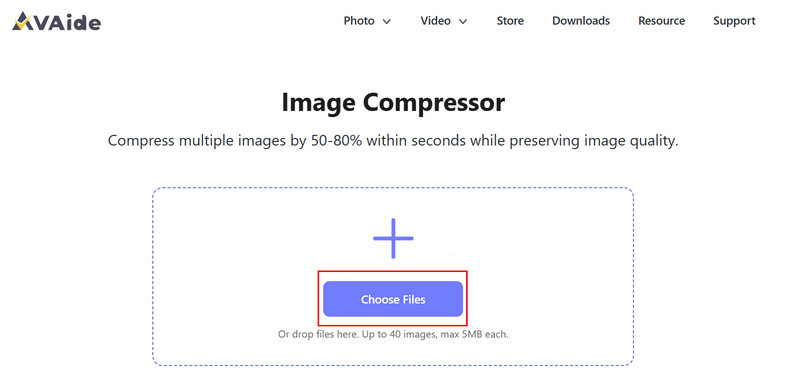
1. AVAide Image Compressor
AVAide Image Compressor is a browser-based program that is used to optimize images quickly and successfully. It enables users to compress online JPEG photos with one click without the use of manual settings or software downloads. The tool uses intelligent compression, which minimizes file size without loss of quality, ensuring that images are clear and accurate to the eye.
It is open-source, does not add any watermarks, and allows compression of the processing of batches of JPEG files, which is why it is resourceful when working with many files simultaneously. This simplicity, quality, and speed allow AVAide to be a viable choice in the daily image compression requirements.
Step 1Open your browser and visit the official AVAide Image Compressor website. Click the Choose Files button to upload the JPEG image you want to compress. The tool supports batch uploads, so you can add multiple JPEG files at the same time.
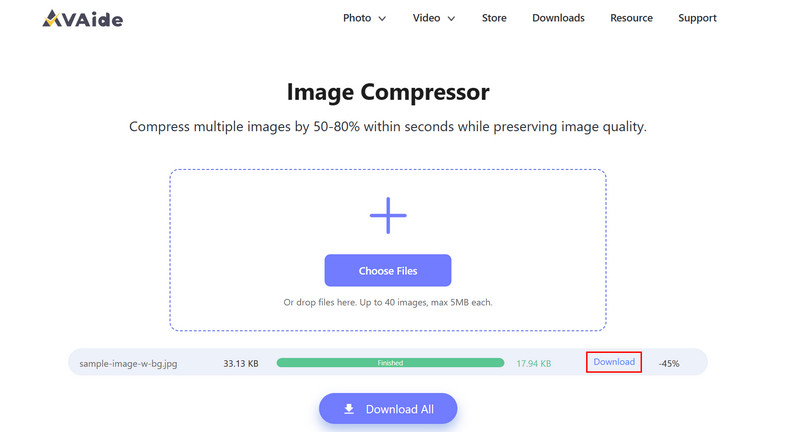
Step 2After uploading, the compression starts automatically. The website processes each image and reduces its size without requiring any manual input. Once finished, click the Download button next to each file to save the compressed JPEG to your device.
2. TinyPNG
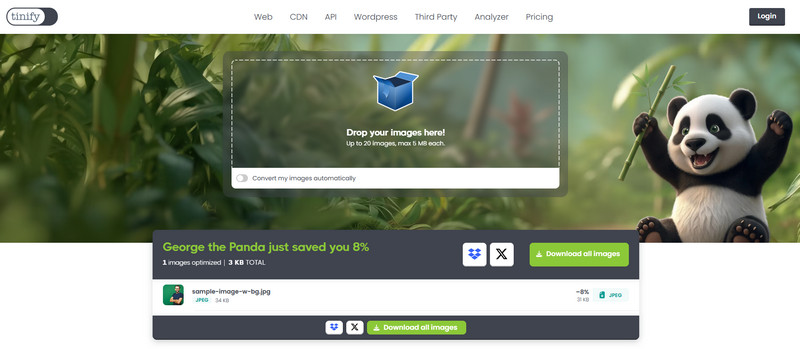
TinyJPG is a simple and fast online tool for optimizing JPEG images. It allows users to compress JPEGs online quickly with minimal steps. The tool automatically reduces file size while maintaining good image quality, making it ideal for web uploads, email attachments, and storage. TinyJPG also supports batch compression, so multiple images can be processed at once, all for free and without adding watermarks.
Step 1Go to the TinyJPG website and drop the JPEG image that you want to be compressed here.
Step 2TinyJPG compresses the images automatically. Once the process is complete, click the Download all images button to save each compressed JPEG to your device.
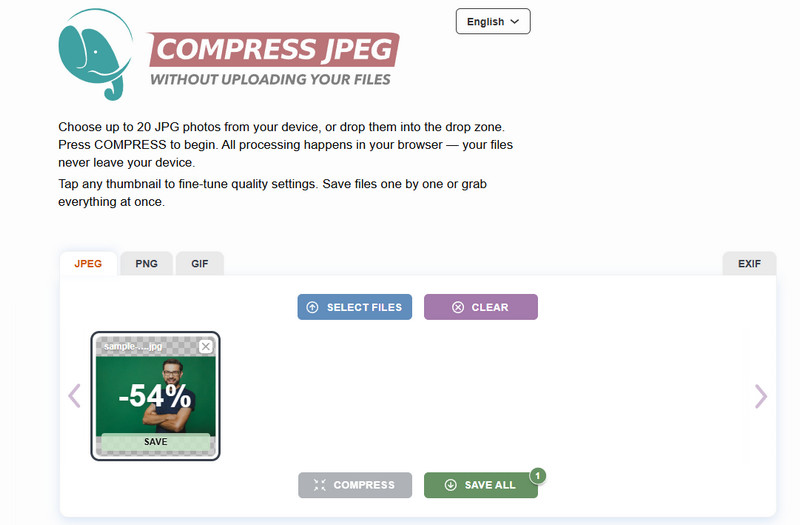
3. CompressJPEG
CompressJPEG is a user-friendly tool designed to compress a JPEG for free. It efficiently compresses files without compromising image quality, hence it is good for posting or sharing files online. It does not need any account or installation, and the interface is direct and simple enough so that beginners can compress their images within seconds.
Step 1Open your browser, search for CompressJPEG, and click Select Files. Try to avoid clicking the ads that suddenly pop out of nowhere.
Step 2After uploading, click the Compress to process it, and click Save to download the compressed version.
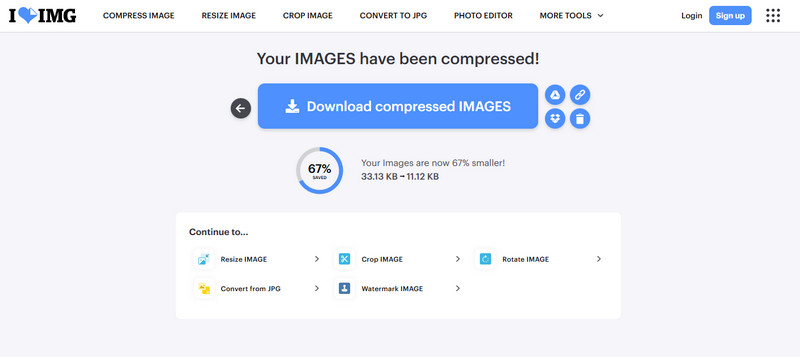
4. ILoveIMG
ILoveIMG is a fast, browser-based image compressor that allows users to compress JPEGs online effortlessly. It supports batch ILoveIMG compression, works in any modern browser, and keeps image quality intact. The platform is free to use and is a reliable choice for users handling multiple images for websites or emails.
Step 1Once you have opened the ILoveIMG, find the Compress Image, click Select Image to import the JPEG.
Step 2Tick the Compress IMAGES button to proceed. Once done, click Download compressed IMAGES to get it.
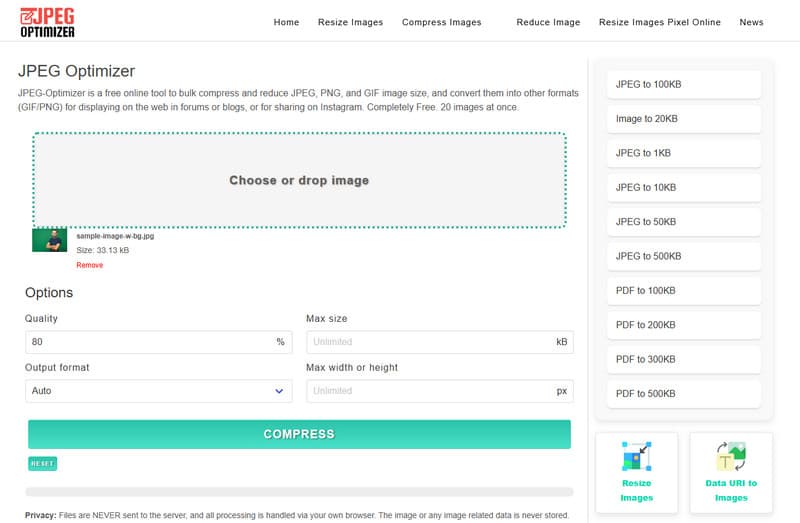
5. JPEG-Optimizer
JPEG Optimizer is an online application that is very light and can be used to compress the size of JPEGs without compromising quality. It has variable levels of compression, which provide the user with greater control of the size of the output and visual fidelity. This is why it is an ideal solution to compress JPEG images online when it is important to optimize uploads, emails, or storage with high accuracy, and not download software.
Step 1On its web interface, you drag and drop the image you want to compress or click Choose to upload it.
Step 2Here, you have the option to adjust the compression before you click Compress.
Part 4: How to Compress JPEG File Size with Built-in Tool on Windows/Mac
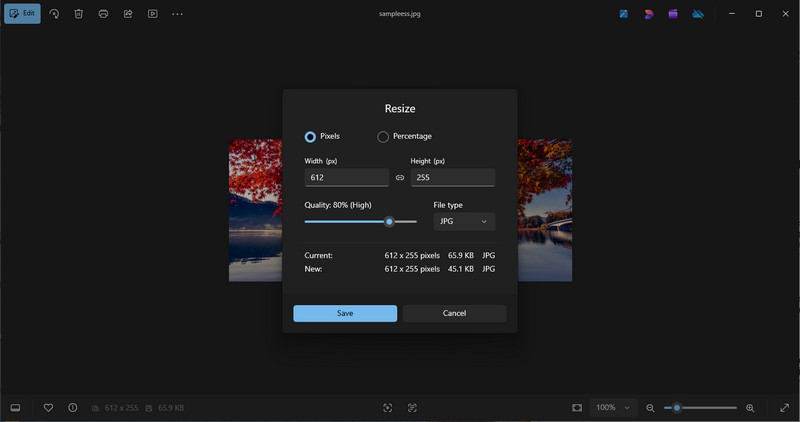
1. Photos App
The Photos app can be used to resize and compress JPEG images without much effort. It makes sizes smaller and auto-compresses the files, leaving the images sharp. This is ideal to share on the Internet, email, or to store pictures without making them poor. Photos is fast, reliable, and works well for single images or multiple files. Using this tool, you can quickly compress JPEG files without installing anything extra.
Step 1Open the JPEG image in Photos.
Step 2Click the menu or three dots and select Resize image.
Step 3Choose a preset size or enter custom dimensions, then save the compressed image.
2. Paint
Paint is another built-in Windows tool that can reduce image size, and you can use Paint to make a transparent background. There is manual control of its width and height, which automatically decreases the size of files. It is easy and is applicable to rapid compression in the absence of Photos.
Step 1Open the JPEG image in Paint.
Step 2Click Resize, select Pixels or Percentage, and enter smaller values.
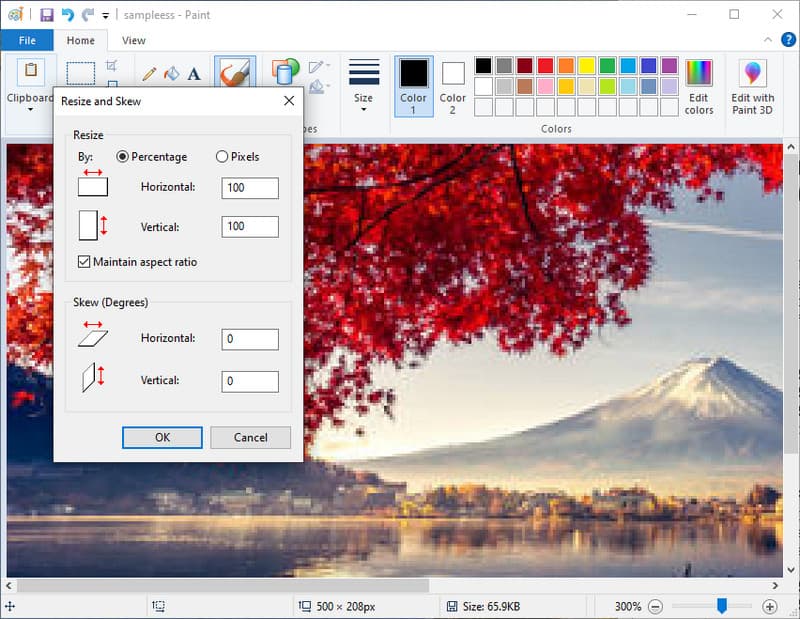
Step 3Save the image to create a compressed JPEG.
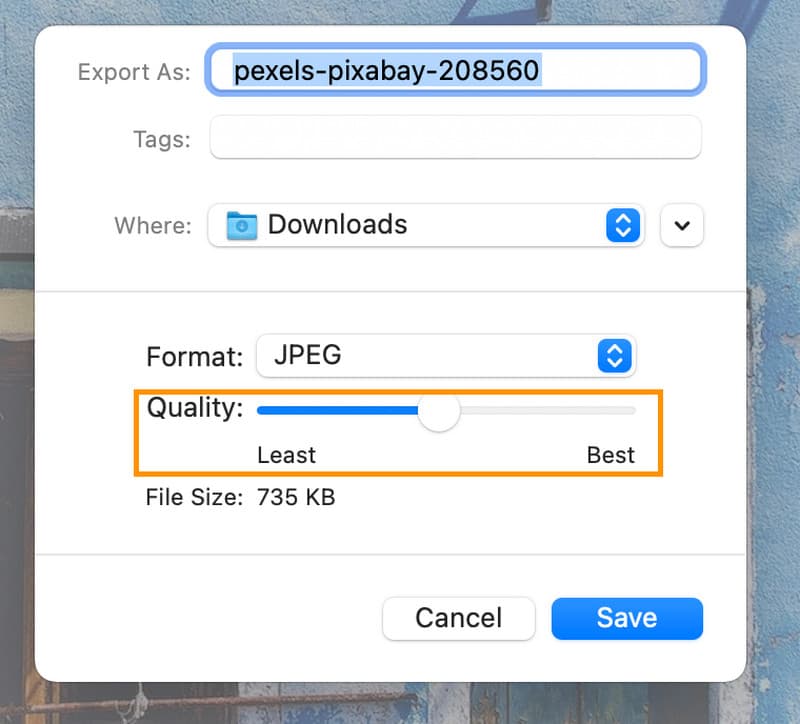
3. Preview on Mac
Preview enables users of Mac to downsize JPEGs effectively. You are able to reduce the number of dimensions, adjust the resolution, and decrease the amount of quality to a certain degree in order to save space and preserve the images in their sharpness. It is especially useful when you need to compress JPEGs to 50 KB for uploads, emails, or storage. Preview also supports batch resizing for multiple images at once.
Step 1Open the JPEG image in Preview.
Step 2Go to Tools > Adjust Size and reduce width, height, or resolution.
Step 3For further compression, select File > Export, move the Quality slider, and save the image.
They need to reduce the size of the JPEG files to achieve faster loading, sharing and effective storage. No matter whether you are utilizing online tools or built-in applications on Windows and Mac, it is possible to compress JPEG files in a short time to preserve a clear picture of high quality. Such techniques ensure that it is easy to handle and distribute your photos in a very efficient and dependable way.
ABOUT THE AUTHOR


Reduce the file size of an image online within seconds while preserving the quality. We support JPG, PNG, WEBP, GIF, and more.
PROCESS NOW