Podcast recording software becomes essential when you finally decide to launch your first podcast, but struggle with unclear audio, background noise, or complicated recording tools. Whether you plan to record solo episodes, remote interviews, or iPhone podcasts, this guide covers the equipment, recording methods, and practical tools needed to create professional-quality podcast episodes.
Part 1. Essential Podcast Recording Equipment
Microphones: The Most Important Investment
Your audio quality is directly proportional to the quality of the microphone you are using for your podcast. Balanced audio and clarity keep listeners engaged and generate professional podcasts.
1. USB Microphones
Being super easy to use, USB Microphones provide a direct connection to your device and support the development of simple podcasts. This is why they are great for beginners, as they are totally adequate for online interviews and dedicated home studios.
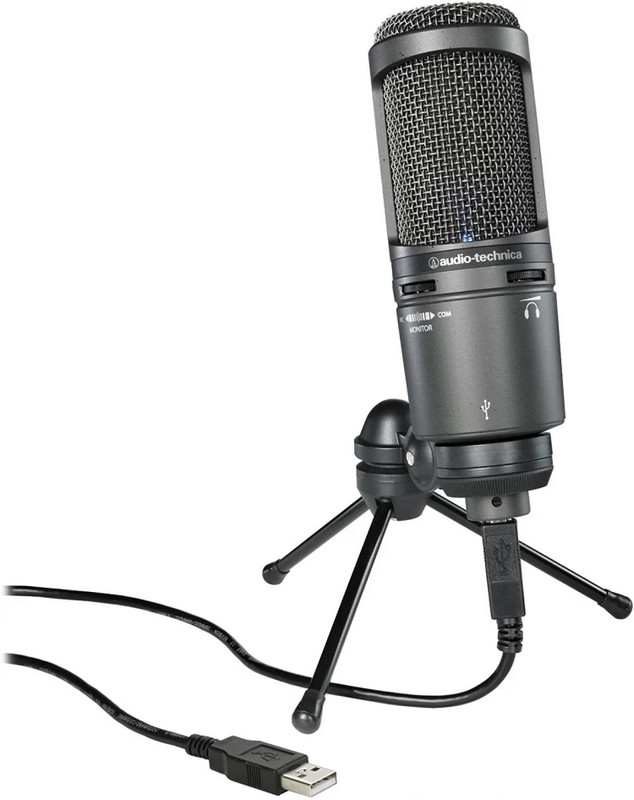
Some common USB Microphones are:
- Blue Yeti
- Audio-Technica AT2020USB+
- Rode NT-USB
2. XLR Microphones
XLR Microphones are quite the opposite. Providing a great quality of audio input and control of what your audio sounds like. These are great investments for advanced podcasting setups. These differ from USB Microphones in the sense that XLR Microphones require an audio interface or a mixer.

Some common XLR Microphones are:
- Shure SM7B
- Rode PodMic
- Electro-Voice RE20
Audio Interface (For XLR Mics)
An audio interface is a perfect partner for your XLR microphone as it enhances the quality of your recordings and converts the audio to a digital format that your computer is able to understand. This process also eliminates a good level of noise from your recordings and even allows you to play music while recording.
Some good audio interfaces are:
- Focusrite Scarlett 2i2
- PreSonus AudioBox USB 96
- Universal Audio Volt 2
Headphones
Being able to monitor your audio while recording and controlling echo sound leakage into your microphone are some advantages of having a good quality closed-back headphone.
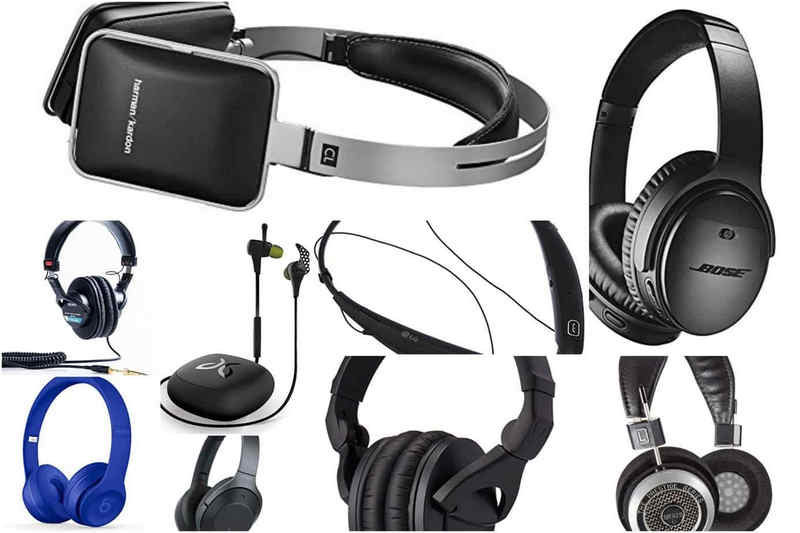
Some great podcast headphones:
- Audio-Technica ATH-M50x
- Sony MDR-7506
- Beyerdynamic DT 770 Pro
Accessories
One of the essential purchases to improve comfort and your audio while recording is additional accessories.

- Pop Filter: These are used to decrease the sound of harsh popping that letters such as P and B create.
- Boom Arm: These keep your microphone stable while also freeing up your desk space.
- Acoustic Foam Panels: These are great for improving the acoustics of your space while also controlling the echo.
- Shock Mount: A shock mount minimizes vibration and desk noise during recording.
Part 2. Best Podcast Recording Methods
Method 1: Record a Podcast with AVAide Screen Recorder
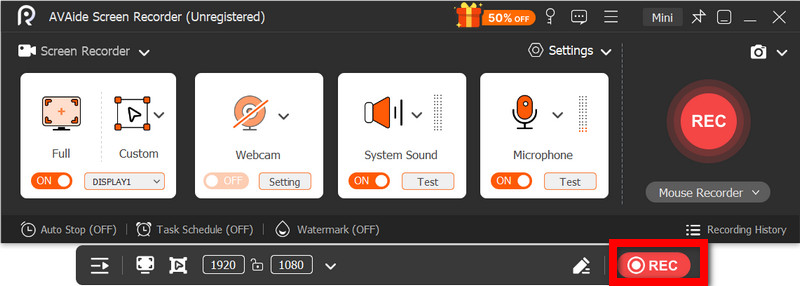
Recording podcasts using AVAideスクリーンレコーダー is simple and reliable. It is one of the best programs that captures screen, webcam, and audio all at once, and it captures your phone screen, too. The software is lag-free and ideal for remote interviews, podcast sessions, reaction videos, educational podcasts, and video podcasts.
- Records microphone and system audio simultaneously.
- Captures webcam and screen together for video podcasts.
- Supports full screen, window, or custom recording area.
- Offers annotation tools during recording.
- Exports recordings in formats like MP4, MP3, AAC, FLAC, and more.

 安全なダウンロード
ステップ1ソフトウェアをダウンロードしてインストールします
Go to the official website of AVAide to download it for your Windows or Mac computer. Install the software by following the instructions and prompts.
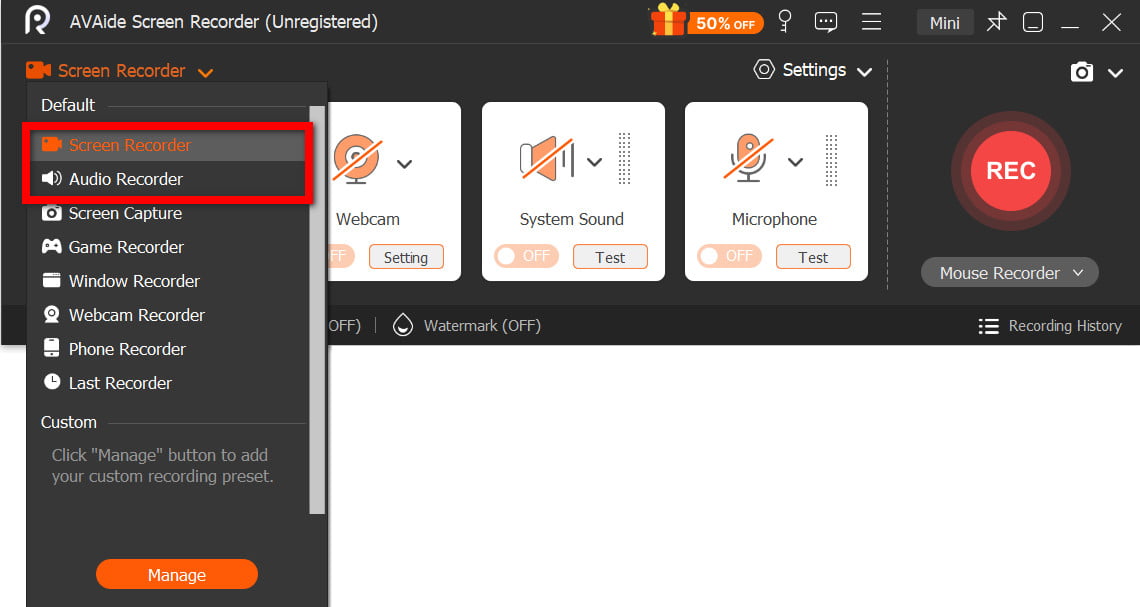
ステップ2Choose Audio or Video Recorder
Open the software and click either 録音機 また スクリーンレコーダー, depending on whether you want to make an audio-only or video podcast.
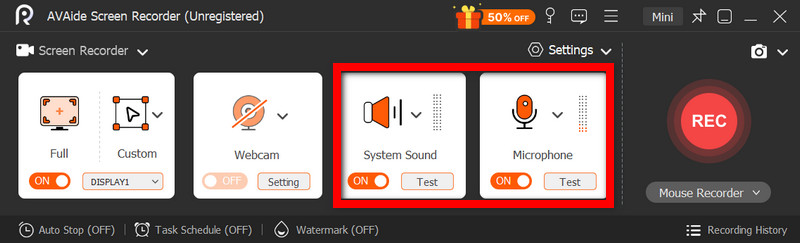
ステップ3Turn on Microphone and System Sound
有効にする マイクロフォン to record your voice. システムサウンド should be enabled to record online interviews, music, and guest audio.
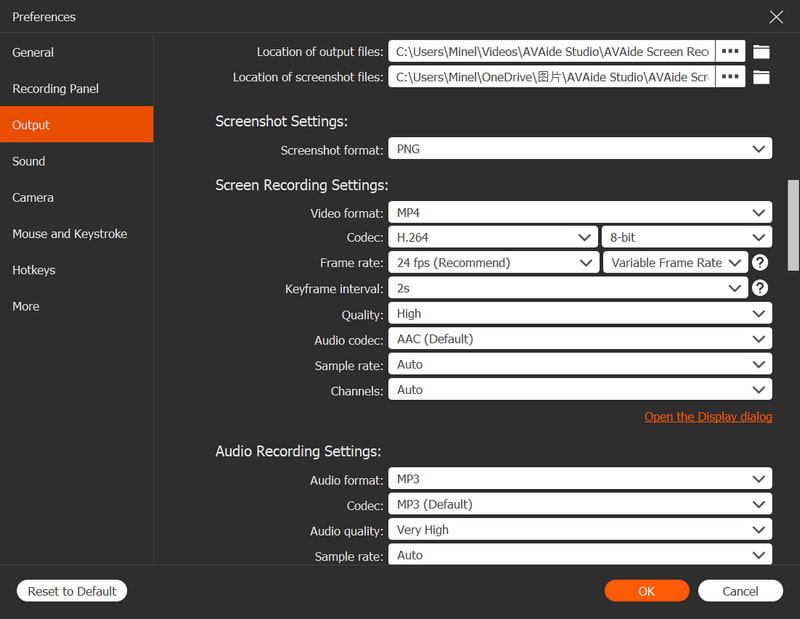
ステップ4Set Recording Preferences
Select your preferred audio format and quality under the 設定 menu. For video podcasts, set your recording area and webcam overlay.
ステップ5記録
After you hit the REC button, you start recording your podcast session. You have the option of adding notes or highlights at any point.
ステップ6Save and Preview
を打った後 やめる button, you can save your podcast after trimming any unwanted sections. You can also preview your work.
Method 2: Record a Podcast with Audacity
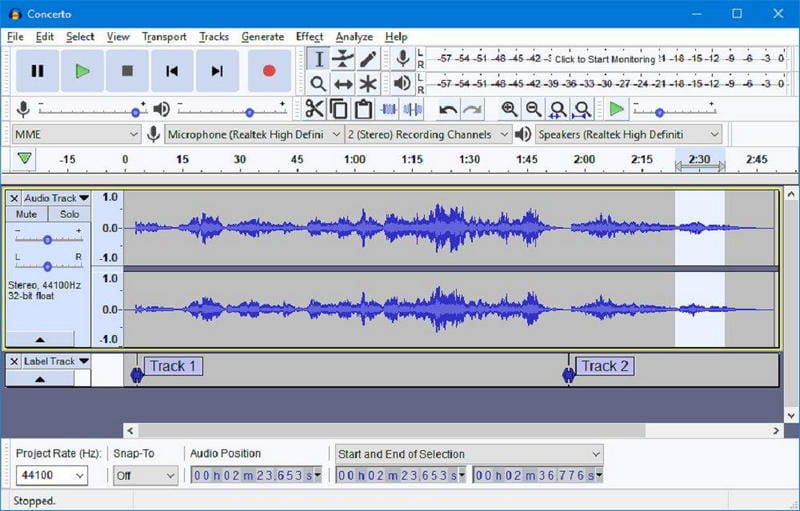
Audacity is one of the most popular programs used for recording and editing audio for podcasting. It is a free program with open-source coding that allows users to record audio and edit it with useful functions such as noise reduction, audio effects, and multitrack support. With these features, it is possible to create professional-quality podcast recordings quickly and easily with Audacity.
ステップ1Download Audacity from the official Audacity website and install it on your personal computer.
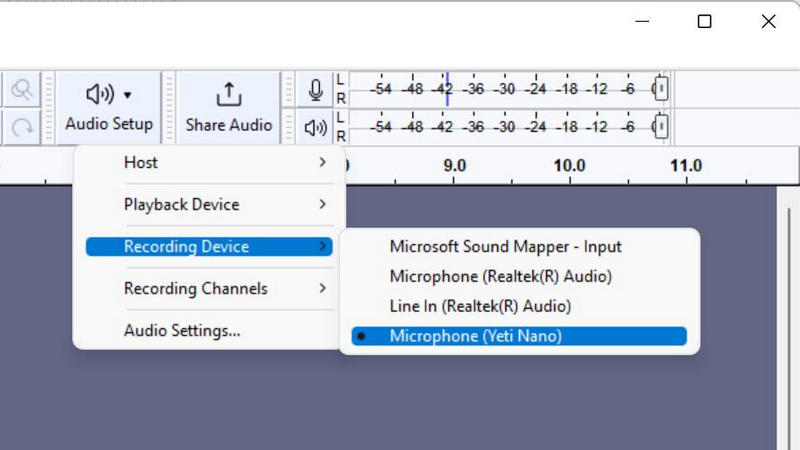
ステップ2Use a USB or XLR microphone and set it as the recording device in Audacity.
ステップ3Set the recording channels and audio quality that suit the needs of your podcast.
ステップ4クリック 記録 button and state your content into the microphone.
ステップ5 Edit your podcast to remove any mistakes, add intro music, or add sound effects using the Audacity editing toolkit.
ステップ6Save your podcast by exporting the audio as an MP3 or WAV file.
Method 3: Record a Podcast with Adobe Audition
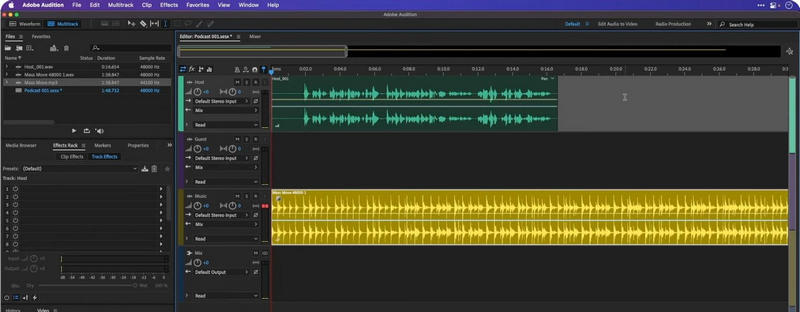
With Adobe Audition, you have more professional-quality audio for your podcasts. Adobe Audition includes great features for editing audio for a quality podcast, such as noise reduction and audio restoration. It is a great multitrack editor as well.
ステップ1 Download Adobe Audition from the official Adobe website and install it on your device.
ステップ2 Open the program and create and set up a new multitrack podcast session.
ステップ3使用 Audio Hardware settings to select your microphone and headphones.
ステップ4Select the audio track you wish to record on.
ステップ5Start your podcast session by clicking the 記録 ボタン。
ステップ6Edit your podcast session using the Adobe Audition editing tools, and you are finished.
Part 3. How to Record a Podcast Remotely
Riverside.fm is one of the best, most trustworthy sites for remote podcast recording. Instead of recording audio and video through the internet, it records high-quality, local audio and video on each hardware. Riverside.fm is a great tool for video podcasts, webinars, online talk shows, and interviews because it provides clear recordings, even when the internet is unstable, and works well alongside tools like the best screen recorder for Mac for backup or recording support.
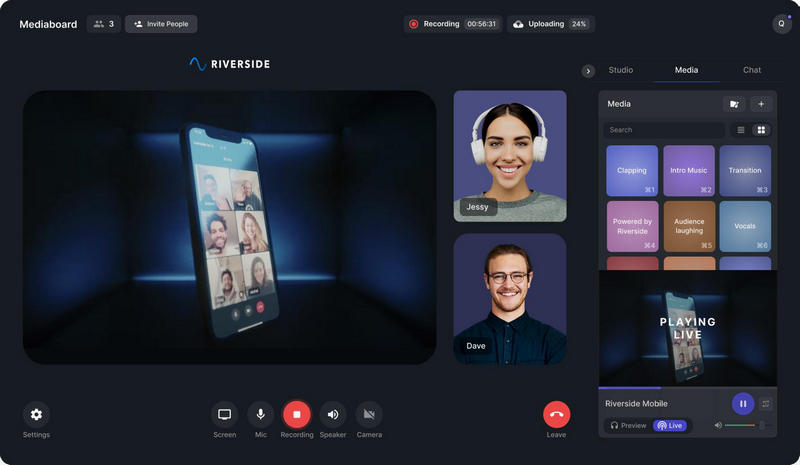
ステップ1Go to the Riverside.fm site, and create an account. After registering, log in to the studio.
ステップ2クリック Create Studio button, and choose your podcast settings. Determine whether to record an audio-only or video podcast.
ステップ3Send your podcast guests the invitation link. They can join via a web browser and are not required to download any software.
ステップ4Choose the microphone, headphones, and webcam of your preference before entering the studio, and make sure to test your audio before you leave the studio to ensure there are no technical issues.
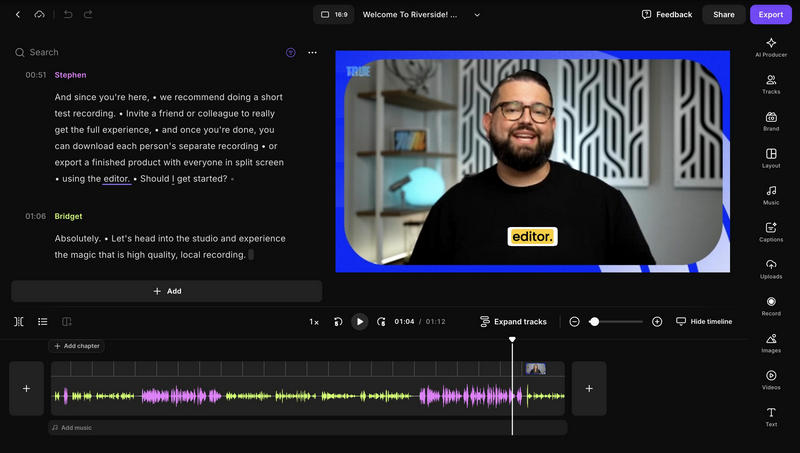
ステップ5準備ができたら、 記録 button. Riverside.fm captures each audio and video locally in high quality.
Part 4. How to Record a Podcast on iPhone
GarageBand is the go-to podcast recording app for many iPhone users looking for something beyond the built-in Voice Memos app. It allows multitrack recording, sound effects, and background music in addition to offering an impressive selection of editing tools.
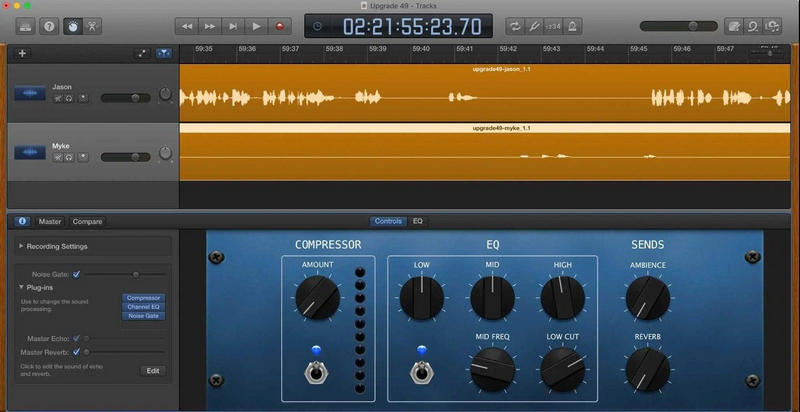
ステップ1To download GarageBand, go to the App Store and check if it is already installed on your iPhone. If it is not, install it.
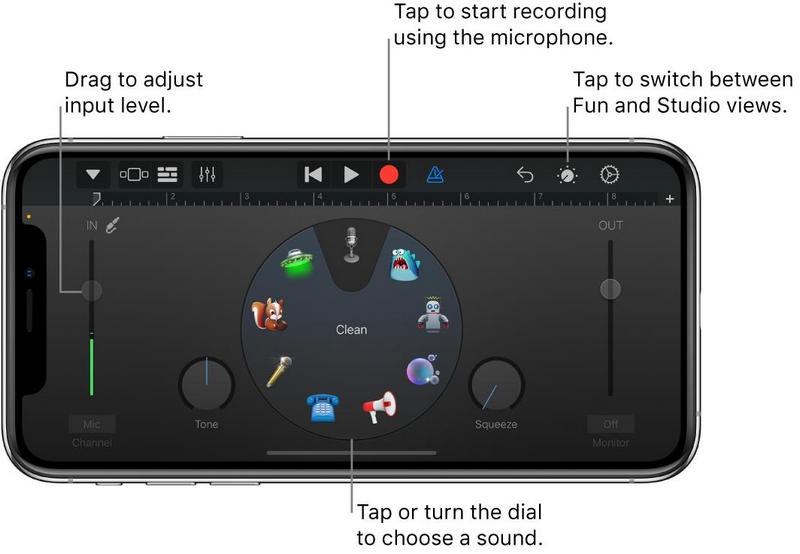
ステップ2Upon opening GarageBand, choose the 録音機 from the available recording tools.
ステップ3Your podcasts will sound much more professional if you are using an external microphone. They will also sound clearer, and you will hear less interference.
ステップ4Monitoring is useful to check the level of sound your microphone is picking up and to ensure it is clear and uncompressed.
ステップ5You can instantly start recording your podcast by tapping the 記録 button. Recording can be interrupted by pausing and resumed after unpausing.
ステップ6Mistakes can be edited out, and sound levels can be adjusted in GarageBand by using the trim feature. You are also able to add music.
ステップ7The podcast you have spent so much time practicing, recording, and editing can be exported and saved to your iPhone. You can also share your podcast.
Setting up to ポッドキャストを録音する is convenient, with the right equipment and software. You can podcast from your computer, from remote locations with guests, or record directly from your iPhone with good equipment. You will produce high-quality podcasts every time.
著者について

オーディオ、オンライン会議、ゲームプレイビデオ、音楽、Webカメラなどで画面アクティビティをキャプチャします。