Immagina di voler salvare un tutorial, un momento di gioco o una riunione online, ma non sai come catturarlo sul tuo dispositivo. Sapere come registrare lo schermo su iPad Questa funzione semplifica il salvataggio e la condivisione di questi momenti. Questa guida ti illustra come abilitare la registrazione, utilizzare l'audio, risolvere i problemi e migliorare la qualità per ottenere registrazioni dello schermo sempre più fluide e di qualità superiore.
Parte 1. Come abilitare la registrazione dello schermo su iPad
Non preoccuparti, il pulsante per la registrazione dello schermo non è ancora installato nel Centro di Controllo, a meno che tu non lo abbia già sul tuo iPad. Apple ha integrato questa funzionalità nativamente in iPadOS e deve essere attivata prima di poterla utilizzare. Una volta aggiunta, potrai registrare lo schermo in qualsiasi momento con un semplice gesto e un tocco.
Passo 1Clicca il Impostazioni app sul tuo iPad.
Passo 2Clicca su Centro di controllo nel menu scorrendo verso il basso.
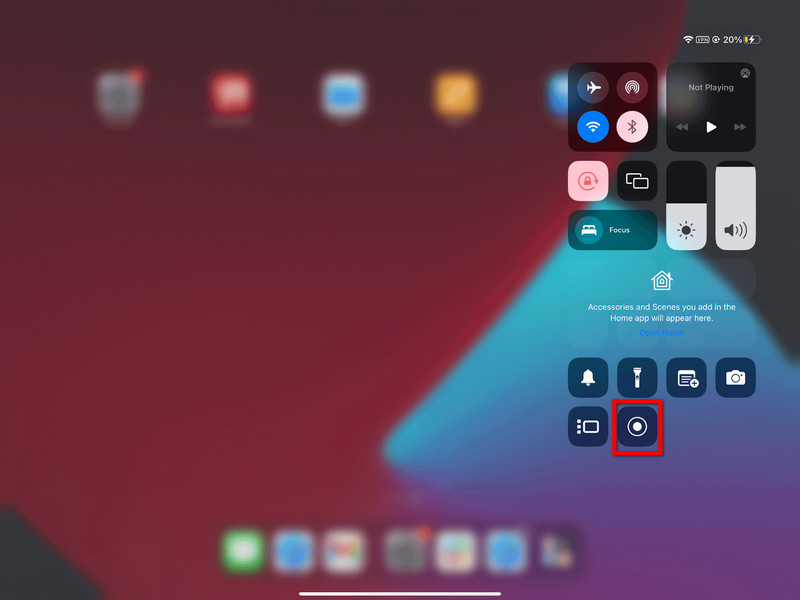
Passaggio 3Clicca il + (Aggiungi) pulsante nel Registrazione dello schermo sezione dell'elenco dei controlli disponibili.
Passaggio 4Per accedere al Centro di controlloScorri verso il basso dall'angolo in alto a destra dello schermo. Ora dovresti vedere il record.
Parte 2. Come registrare lo schermo su iPad
Una volta attivata, registrare lo schermo dell'iPad è facile e veloce. Il registratore integrato di iPadOS è una funzione intuitiva che consente di registrare sessioni di gioco, tutorial o persino videochiamate senza dover installare app di terze parti.
Passo 1Tieni premuto l'angolo in alto a destra dello schermo dell'iPad, quindi trascinalo verso il basso.
Passo 2Toccare il Registrazione dello schermo pulsante. Ci sarà un conto alla rovescia di 3 secondi prima dell'inizio della registrazione.
(Opzionale) Tieni premuto il Registrazione dello schermo pulsante e toccare il Microfono per attivarlo quando desideri registrare la tua voce.
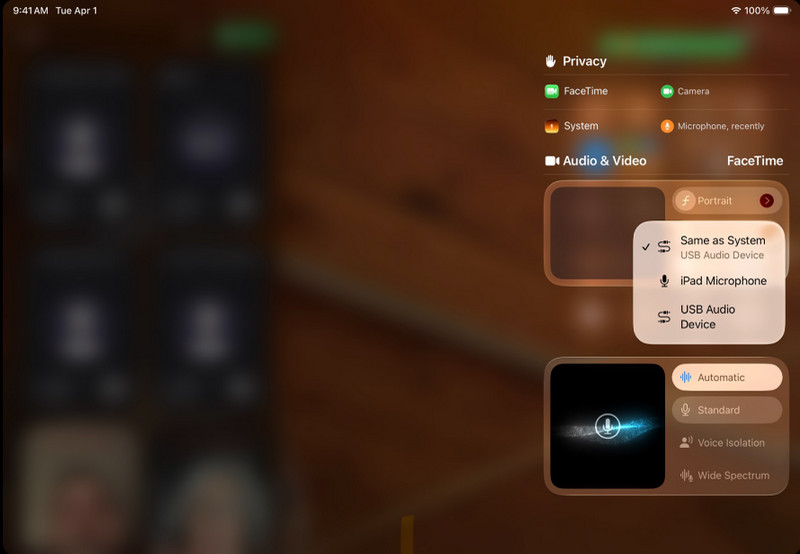
Passaggio 3Seleziona le app o le attività che desideri registrare.
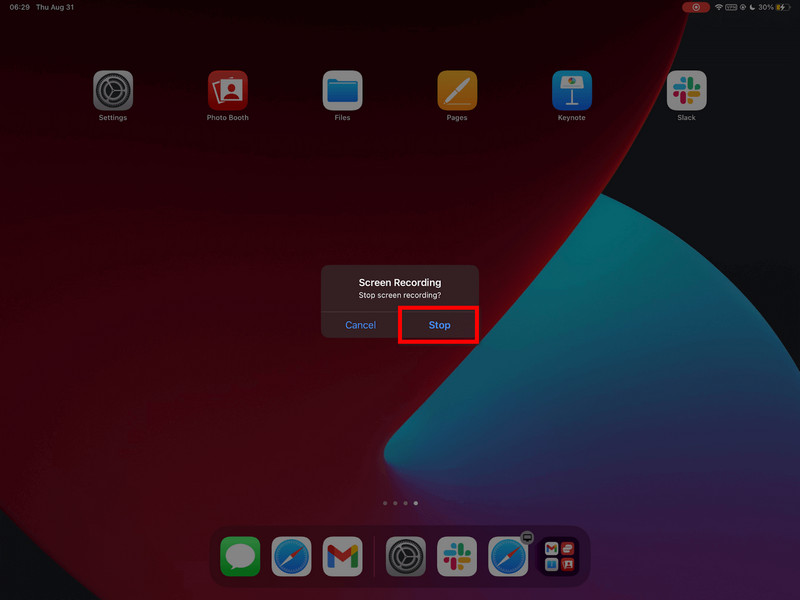
Passaggio 4Tocca la barra di stato rossa e poi tocca Fermare, oppure tornare al Centro di controllo e tocca il Disco pulsante di nuovo.
Passaggio 5Il tuo video verrà salvato automaticamente nella Fotografie app, dove puoi modificarla o condividerla.
Parte 3. Come registrare lo schermo su iPad con audio
Catturare lo schermo e l'audio con l'iPad è utile per tutorial, giochi, lezioni online e dimostrazioni. La registrazione su iPadOS funziona solo in misura limitata ed è importante comprendere la relazione tra il microfono e l'audio di sistema prima di iniziare a registrare.
Distinzione importante: microfono vs. audio di sistema
| Tipo audio | Cosa registra | Disponibilità su iPadOS | Casi d'uso migliori |
| microfono Audio | La tua voce e i suoni esterni vengono catturati dal microfono dell'iPad. | Disponibile | Commenti, tutorial, narrazione. |
| Sistema audio | Suoni interni provenienti da app, giochi, video e riproduzione multimediale. | Non supportato direttamente | Richiede strumenti esterni o una soluzione alternativa. |
Procedura per registrare l'audio con un microfono
Passo 1Scorri verso l'alto dall'angolo in alto a destra dello schermo dell'iPad per aprire l' Centro di controllo.
Passo 2Tieni premuto il Registrazione dello schermo pulsante per visualizzare ulteriori opzioni.
Passaggio 3Premi il pulsante del microfono per attivarlo. Dovrebbe diventare rosso per indicare che la registrazione vocale è attiva.
Passaggio 4Clic Inizia a registraree, al termine del conto alla rovescia di 3 secondi, inizia la registrazione.
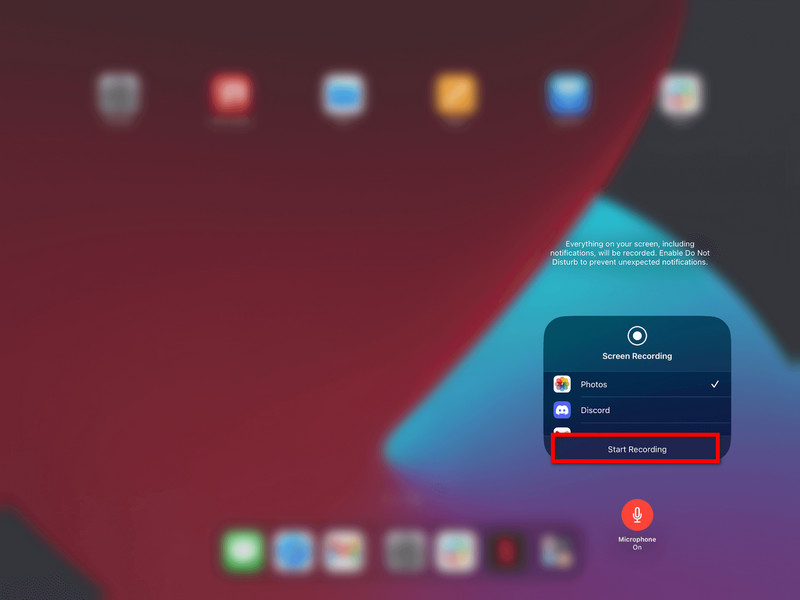
Passaggio 5Ripeti i movimenti che desideri registrare. Se il microfono è acceso, verrà registrata anche la tua voce.
Passaggio 6Tocca la barra di stato rossa nella parte superiore dello schermo oppure torna a Centro di controllo e tocca il Disco pulsante di nuovo.
Passaggio 7Il video verrà salvato automaticamente nel Fotografie app, dove è possibile visualizzarlo o modificarlo.
Alternativa per la registrazione audio di sistema
Sfortunatamente, a causa di limitazioni di sistema, non è possibile registrare l'audio interno direttamente sull'iPad, quindi è necessaria una soluzione basata su computer. Un ottimo strumento è il AVAide Screen Recorderche consente di duplicare lo schermo di un iPad e di registrare simultaneamente lo schermo e l'audio di sistema.
AVAide Screen Recorder è un software di registrazione schermo di alta qualità che cattura l'attività sullo schermo con chiarezza. Può registrare senza ritardi fino a 4K/1080p. Consente inoltre la registrazione simultanea dell'audio di sistema e del microfono, ideale per tutorial, sessioni di gioco e presentazioni.
- La registrazione di alta qualità consente di acquisire video in 4K o 1080p con risultati nitidi e di alta qualità.
- Doppio audio
- Supporta la registrazione simultanea dell'audio di sistema e dell'audio del microfono.
- La funzione Screen Mirroring di iOS visualizza e registra lo schermo del tuo iPad su un PC o Mac.
- Le modalità schermo flessibili consentono la registrazione a schermo intero o in un'area personalizzata.
- Gli strumenti di modifica integrati ti aiutano a tagliare, migliorare e modificare le registrazioni rapidamente.

 Download sicuro
Passo 1Scarica e installa
Visita il sito web ufficiale e scarica AVAide Screen Recorder. Scarica AVAide Screen Recorder dal sito web ufficiale. Una volta installato, potrai eseguirlo sul tuo computer Windows o Mac.
Passo 2Seleziona l'opzione iOS
Nell'interfaccia principale, fai clic Registratore telefonico, quindi selezionare Registratore iOS dall'elenco delle opzioni (iOS e Android).
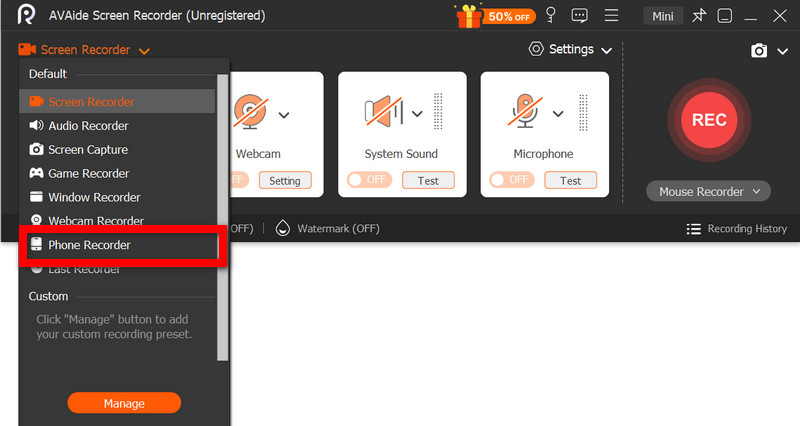
Passaggio 3Collega l'iPad al PC
È possibile duplicare lo schermo dell'iPad sul computer in modalità wireless tramite la stessa rete o tramite un cavo USB, se disponibile. Nell'app Screen Mirroring sull'iPad, seleziona il dispositivo AVAide. Una volta stabilita la connessione, vedrai lo schermo dell'iPad visualizzato sul computer.
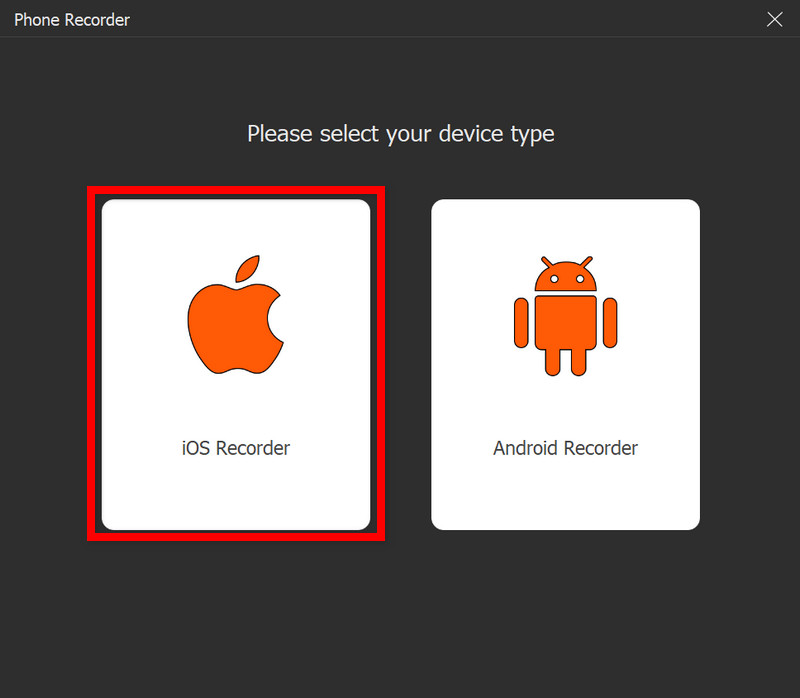
Passaggio 4Inizia a registrare
Con il mirroring riuscito, premere Disco per avviare la registrazione dello schermo dell'iPad, dell'audio di sistema e dell'input del microfono (se presente).
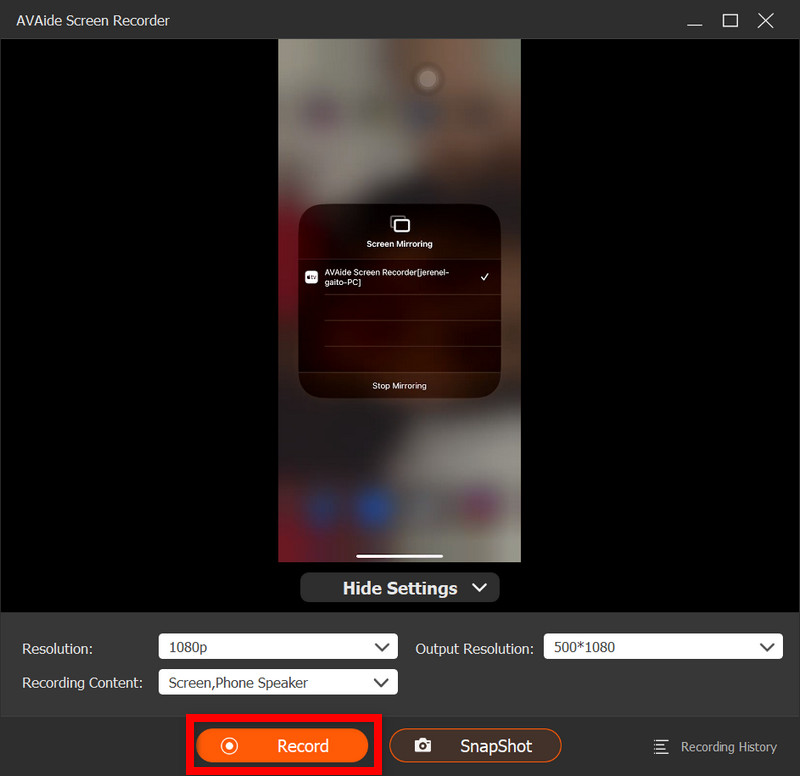
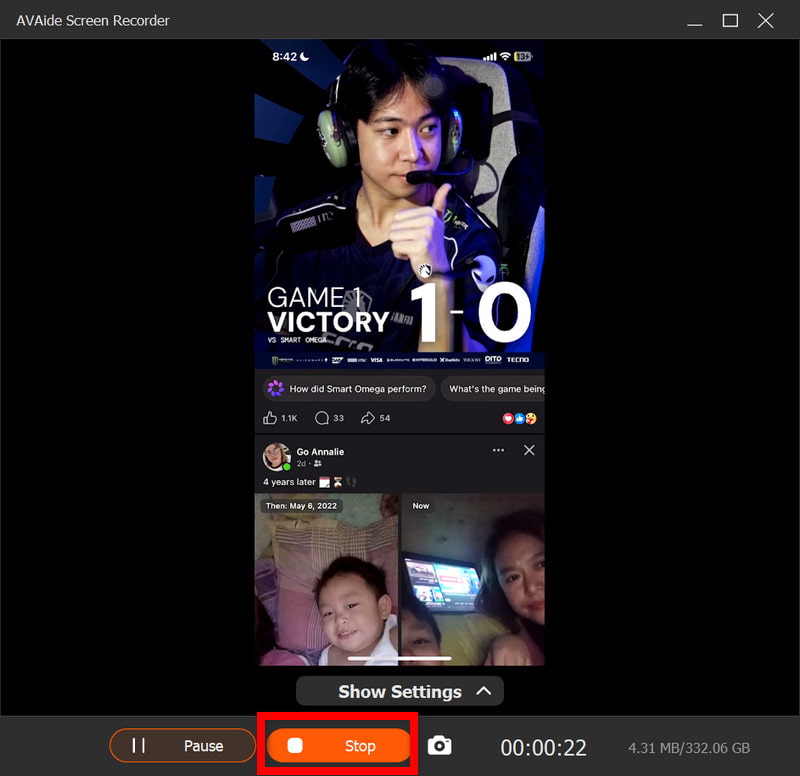
Passaggio 5Interrompi registrazione
premi il Fermare Fai clic sul pulsante al termine. La registrazione verrà salvata automaticamente sul tuo computer.
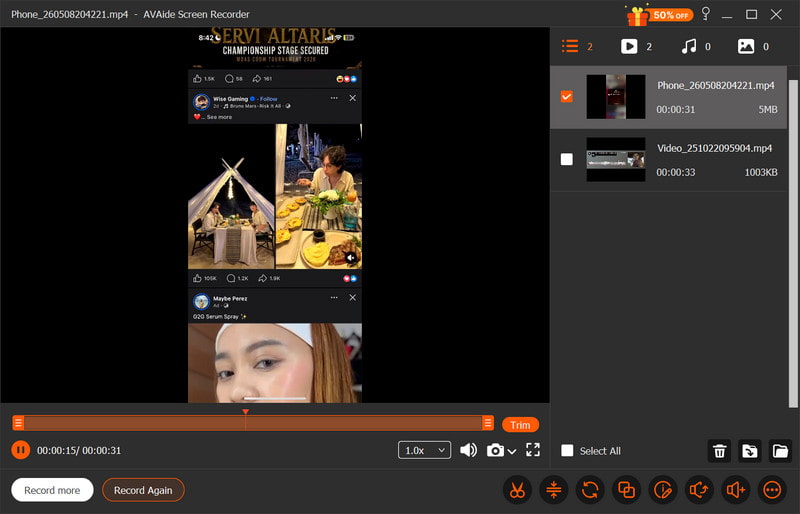
Passaggio 6Modifica il video
Una volta avviata la registrazione, si aprirà una finestra di anteprima. È possibile tagliare le parti indesiderate, regolare l'audio o effettuare semplici modifiche prima di esportare il video finale.
Parte 4. Perché non riesco a registrare lo schermo sul mio iPad?
I problemi di registrazione video su iPad si verificano in genere a causa di impostazioni, restrizioni o problemi di prestazioni. I problemi e le cause più comuni sono elencati di seguito.
1. Il pulsante è completamente assente
Questo problema si verifica se la funzione Registrazione schermo non è installata nel Centro di Controllo. È necessario aggiungere manualmente la funzione Registrazione schermo in Impostazioni > Centro di Controllo affinché venga visualizzata.
2. Il pulsante è disattivato o non risponde
In genere, ciò è dovuto a una restrizione sulla registrazione dello schermo imposta dalle impostazioni di sistema o dai controlli del dispositivo.
- È possibile impostare dei limiti di tempo di utilizzo dello schermo.
- La registrazione potrebbe essere vietata dalle impostazioni del profilo del dispositivo utilizzate a scuola o sul lavoro.
- Alcune app potrebbero non consentire di acquisire schermate durante il loro utilizzo.
3. La registrazione si interrompe immediatamente dopo l'avvio.
Il problema è generalmente legato a problemi di sistema o di archiviazione, come spazio disponibile insufficiente o altre applicazioni che interferiscono con il processo di registrazione.
4. Nessun suono nella registrazione
Ciò si verifica quando l'audio non è collegato correttamente o quando l'utente si aspetta l'audio interno; non è possibile registrare lo schermo internamente su iPadOS, quindi utilizzando il miglior registratore schermo per Mac può aiutare a catturare correttamente il suono del sistema.
5. La registrazione è frammentata o di bassa qualità
Questo problema è in genere causato da uno dei seguenti fattori: spazio di archiviazione limitato sul dispositivo, troppe applicazioni in esecuzione contemporaneamente o un modello di iPad più vecchio incapace di registrare a una risoluzione così elevata.
Parte 5. Consigli professionali per registrazioni dello schermo migliori
Quando registri su iPadOS, assicurati che il tuo iPad sia configurato correttamente per ottenere registrazioni fluide, nitide e di alta qualità. Ecco alcuni suggerimenti utili per ottimizzare la qualità video e audio.
1. Libera spazio di archiviazione
Prima di iniziare a registrare, assicurati che ci sia spazio libero a sufficienza sul tuo iPad, in modo che non si verifichino rallentamenti o blocchi, che potrebbero causare problemi durante la registrazione.
2. Chiudi le app non utilizzate
Chiudi tutte le applicazioni in background non necessarie per migliorare le prestazioni del sistema ed evitare interruzioni o rallentamenti durante la registrazione.
3. Attiva la modalità Non disturbare
Attiva la modalità Non disturbare per impedire che chiamate, messaggi e notifiche in arrivo vengano visualizzati sullo schermo e ti distraggano durante la registrazione.
4. Mantieni una configurazione dello schermo stabile
Non modificare la luminosità, l'orientamento o le impostazioni di sistema durante la registrazione, poiché cambiamenti improvvisi potrebbero compromettere la coerenza del video e la qualità della registrazione.
5. Prima testa l'audio
Prima di iniziare a registrare il video, fai una breve registrazione di prova per verificare che i livelli del microfono siano impostati correttamente e che la tua voce sia chiara e venga registrata correttamente.
6. Utilizza una schermata iniziale pulita
Riordina la schermata iniziale o sposta le app o le applicazioni sensibili in una cartella diversa, in modo che la tua registrazione appaia focalizzata, professionale e ordinata.
7. Registra in un ambiente tranquillo
Se puoi registrare in una stanza silenziosa con poco rumore di fondo, il tuo microfono catturerà un audio vocale migliore e ridurrà al minimo i suoni indesiderati quando registrazione vocale su un Mac o iPad.
Registrazione dello schermo dell'iPad È un modo semplice ma efficace per registrare tutorial, sessioni di gioco e momenti importanti direttamente dal tuo dispositivo. Con le giuste impostazioni e i suggerimenti appropriati, puoi migliorare la qualità video e audio per risultati migliori. Che tu utilizzi strumenti integrati o software esterni, la registrazione diventa più semplice e affidabile.
INFORMAZIONI SULL'AUTORE

Cattura le attività sullo schermo con audio, riunioni online, video di gioco, musica, webcam, ecc.
Registrazione dello schermo
- Registrazione schermo su Windows
- Registra Instagram Live
- Copia video da Tubi
- Converti i video di YouTube in MP3
- Scarica video da Fansly
- Scaricare i video di JW Player
- Scarica i video di Bilibili
- Scarica i video di Patreon
- Scarica i video di SpankBang
- Scarica i video di Discord
- Scarica il video di DoodSream