Trying to figure out how to record audio on a Mac often happens when you need to capture a class lecture, save a video call, record a podcast, or create voice content quickly. Thankfully, macOS includes built-in recording tools, and several third-party options can help you record high-quality microphone and internal audio with ease.
Method 1: Using QuickTime Player
Everyone seems to have QuickTime on their macOS. QuickTime provides an intuitive interface, trustworthy microphone recording, and speedy exports that require no other application. This technique is useful for voice-overs, lectures, online meetings, and even basic podcast recordings.
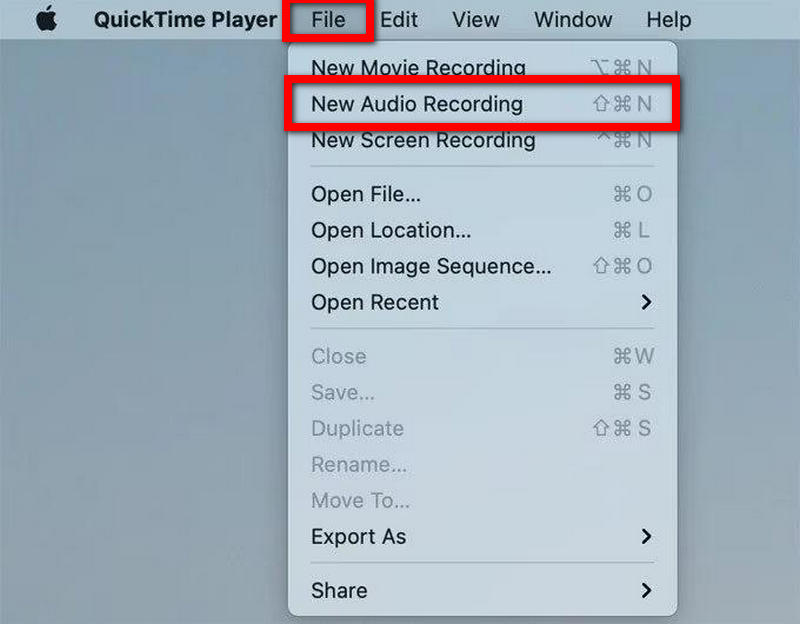
Passo 1Launch QuickTime Player either from the Applications folder or via Spotlight search.
Passo 2Vai al File menu from the top menu bar.
Passaggio 3Clic Nuova registrazione audio.
Passaggio 4Press the small arrow next to the Disco button to specify the microphone you want to use.
Passaggio 5If necessary, adjust the input volume.
Passaggio 6Per iniziare la registrazione, premere il Disco pulsante.
Passaggio 7 Speak into the microphone.
Passaggio 8premi il Fermare button to end the recording.
Passo 9To save the recording to your Mac, go to File e seleziona Salva.
Method 2: Using Voice Memos
Voice Memos is made for quick voice recording. This application is good for making personal reminders, brainstorming ideas, short lectures, and short audio recordings. Recorded voice memos are automatically synced through iCloud, so the recordings are available on all Apple devices.
Passo 1Launch Voice Memos on your Mac.
Passo 2premi il Disco pulsante.
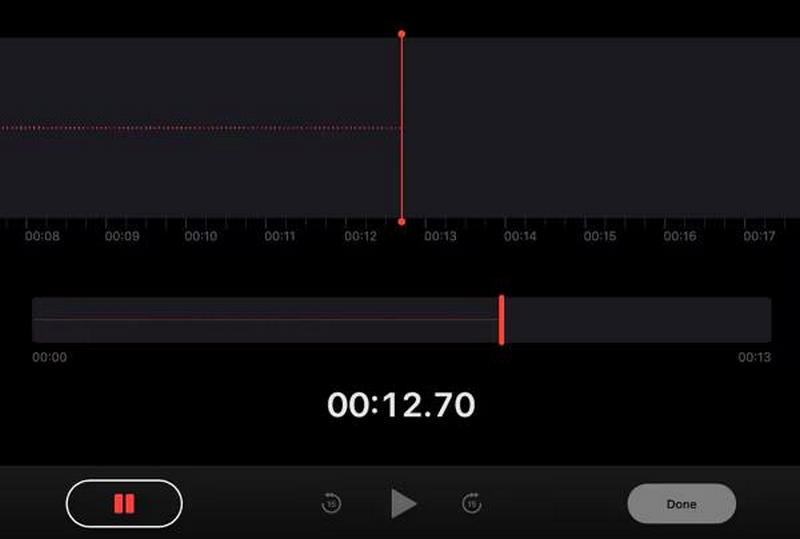
Passaggio 3Speak through the microphone.
Passaggio 4If you need to stop recording for a moment, select Pausa.
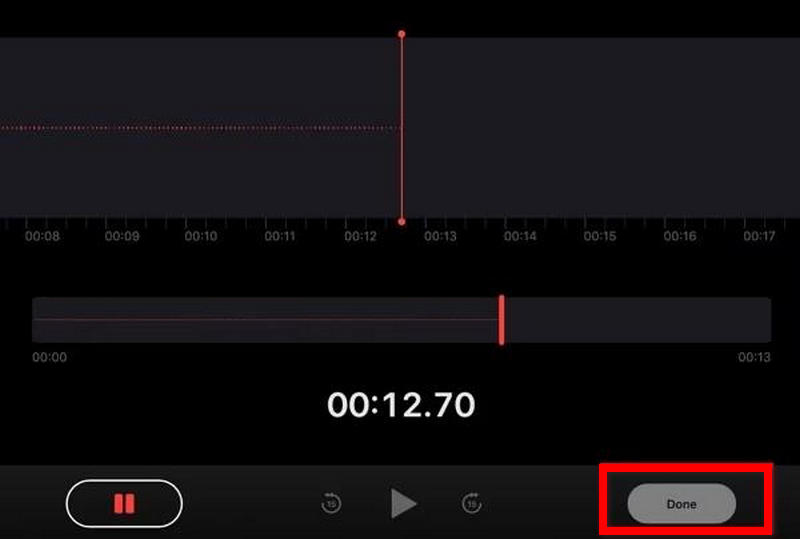
Passaggio 5Premere Fatto to finish the recording.
Passaggio 6To make it easier to find the recording, select the Rinominare opzione.
Passaggio 7To share, duplicate, or export the recording, right-click the file.
Why macOS Does not Natively Support Internal Audio Recording
Out of the box, macOS allows the use of the microphone. However, there is no way to record internal system audio with the built-in functionality. This includes media playing in apps, music, and browser sounds. Privacy, copyright protection, and system security are the reasons macOS has these restrictions.
Unlike microphone audio, internal audio may contain protected media or private communications from apps. Because of this, Apple restricts access to internal audio channels unless users install additional software.
Because of these issues, tools like QuickTime cannot record internal audio, but external audio through a microphone can.
Examples of these issues:
- Record video game play with the audio.
- Record an online class.
- Record online audio and video.
- Record audio from an online video on the web.
- Record instructional videos with internal computer audio.
Method 3: Using BlackHole + QuickTime Player
BlackHole is a free virtual audio driver that allows system audio to be internally routed to recording software. If this driver is used along with QuickTime, then Mac users can record internal audio and external microphone audio. This drive allows users to record online meetings, tutorials, video games, webinars, podcasts, and browser audio, all with high-quality, clear audio.
Passo 1Download and install BlackHole on your Mac from the official website, then open Audio MIDI Setup.
Passo 2Create a Multi-Output Device and enable both your Mac speakers or headphones and BlackHole.
Passaggio 3 Set the Multi-Output Device as your default audio output in the sound settings.
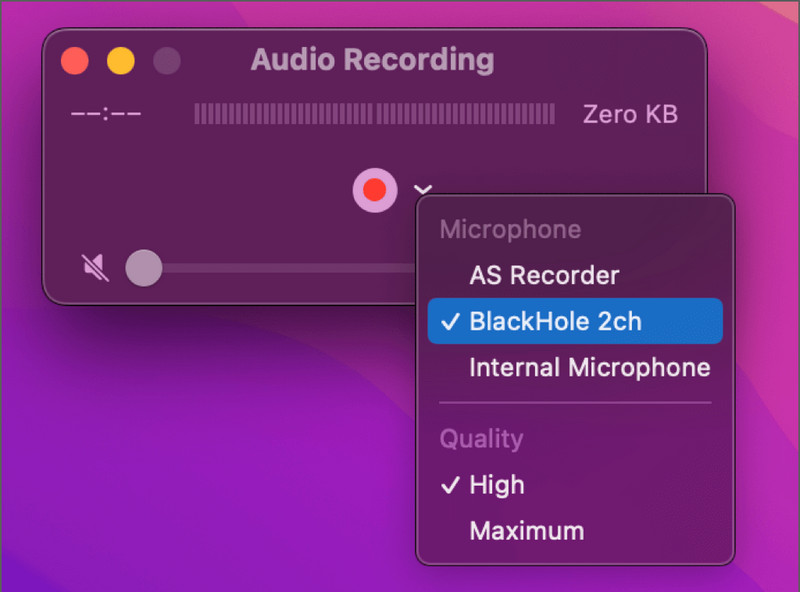
Passaggio 4Open QuickTime Player, select File > Nuova registrazione audio, quindi scegli BlackHole as the microphone or audio source.
Passaggio 5Clicca il Disco button, play the audio you want to capture, then stop and save the recording once finished.
Method 4: Using Dedicated Third-Party Software
1. DISPONIBILE Registratore schermo
AVAide Screen Recorder is perfect for Mac users who want a simple yet powerful tool to record voice and audio. On top of screen recording, AVAide can capture audio from your microphone, system speakers, and webcam, as well as your phone screen. One of the best features of AVAide is that it is designed for beginners and advanced users, making it a great option for anyone who needs to record voice on a Mac.
- Records both the microphone and system audio simultaneously.
- Supports high-quality audio recording with minimal lag.
- Allows full-screen, window, or custom area recording.
- Includes webcam recording for tutorials and podcasts.
- Supports multiple export formats such as MP3, AAC, FLAC, M4A, and more.

 Download sicuro
Passo 1Scarica e installa il software
Navigate to the AVAide website to download the software. Follow the on-screen installation instructions to install the software successfully.
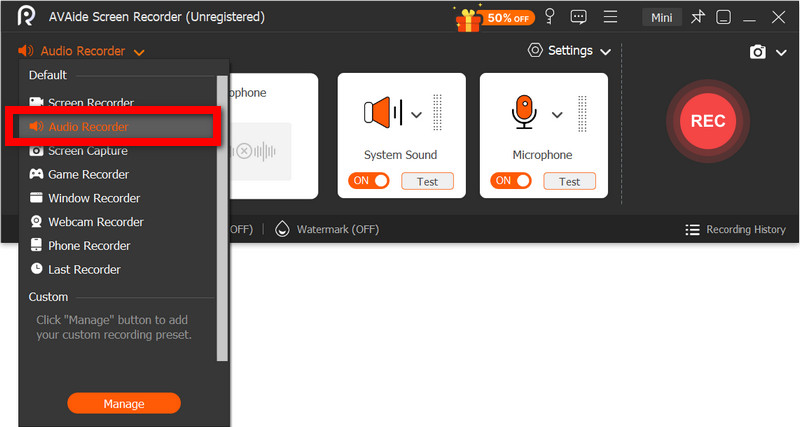
Passo 2Seleziona Registratore audio
Open the software and from the main page, select Registratore audio to record voice only.
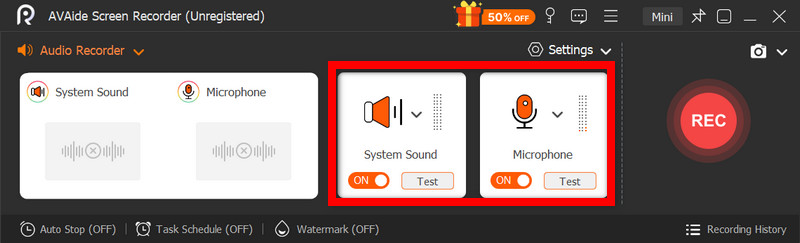
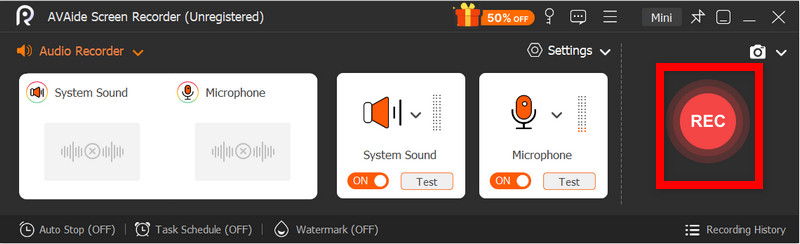
Passaggio 3Activate Microphone and System Sound
Attivare il Microfono option to record voice clearly. Activate the Suono di sistema to capture the internal audio from your Mac.
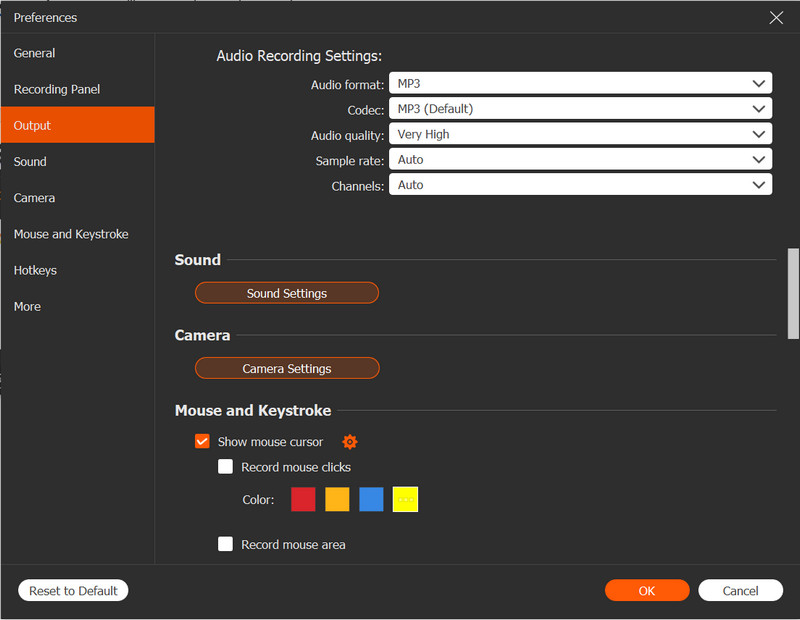
Passaggio 4Regola le impostazioni di registrazione
Dal Impostazioni menu, select your preferred audio format and output quality. Determine the save location and adjust the volume level for the microphone and system audio.
Passaggio 5Inizia a registrare
Seleziona il REC option to start recording your voice. During the recording session, you can pause, resume, or add notes.
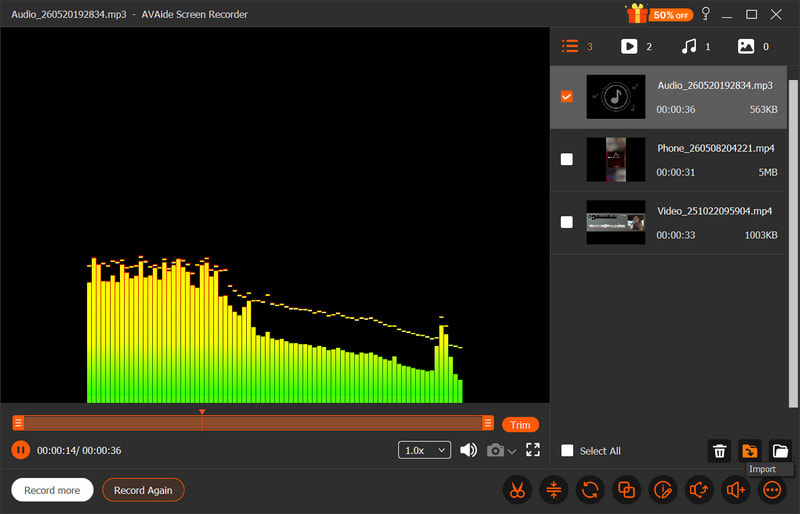
Passaggio 6Save and Preview
Seleziona il Fermare option to end the audio recording. You are then able to trim the audio and save the recorded audio on your Mac.
2. Using Audacity
Audacity is an easy-to-use, powerful, free Mac audio recorder and editor. It is often favored over other options for podcasts and music projects because of its simple workflows and professional features like noise reduction, trimming, and audio enhancement. Even with all of these features, Audacity has a simple user interface, making it a great choice for beginners.
Passo 1Download Audacity and install it on your Mac. Open the app when you finish the installation.
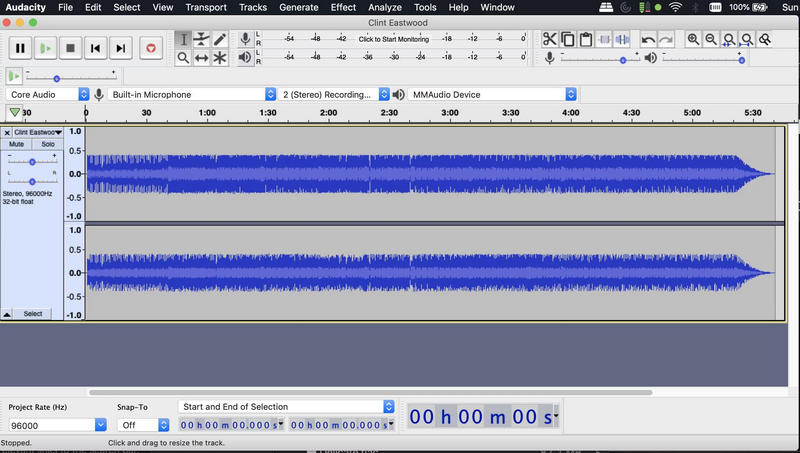
Passo 2Select your audio input. Set the input to your audio device and adjust the capture level.
Passaggio 3When ready to record, press the Disco button and begin to speak into your microphone.
Passaggio 4When finished recording, press the Fermare pulsante.
Passaggio 5When satisfied with the recording, select the project you wish to export by going to File > Esportare. Selezionare MP3, WAV, or another audio export option.
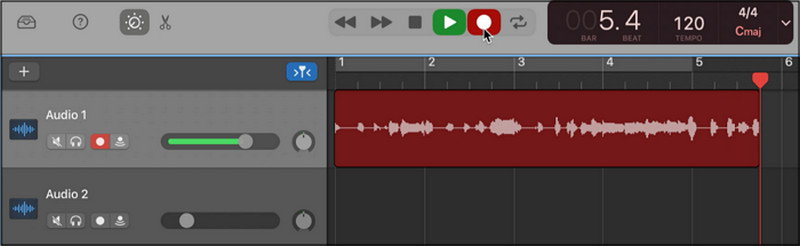
3. Using GarageBand
A great alternative to Audacity is GarageBand, which is an Apple proprietary app pre-installed on all Macs. GarageBand has all of the same features as Audacity and more, like music tools and audio effects. GarageBand is even better for music productions and is widely used to record podcast sessions, voiceovers, and high-quality audio projects with professional sound control.
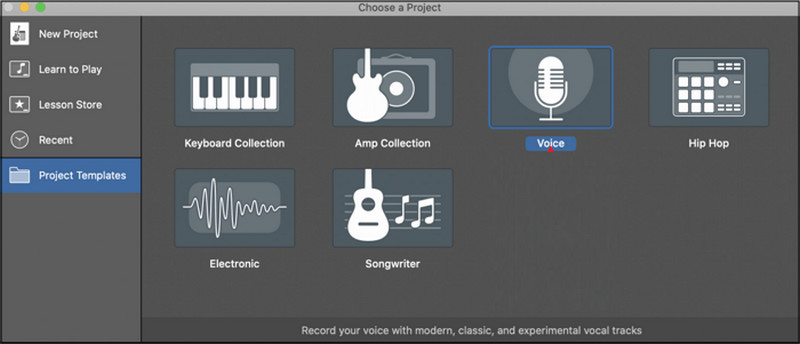
Passo 1Launch GarageBand and select New Project, selecting the option Voce.
Passo 2Select the input you wish to record with. If you would like, enable Audio monitoring to hear your voice when recording.
Passaggio 3Colpo Disco and begin your session.
Passaggio 4When you are done with your recording, press the Fermare button. Use the editing and sound adjustment features in GarageBand to refine your recording.
Passaggio 5Export the finished audio project in your desired quality and format to your Mac.
Bonus Tips
1. How to Record Audio from YouTube on Mac
To capture YouTube audio, online courses, webinars, and the playback of podcasts and music on your Mac, you can use OBS Studio, a free recording software for screen video and livestream capture. Since OBS Studio offers high-quality recordings of system sounds, it is a great option to have.
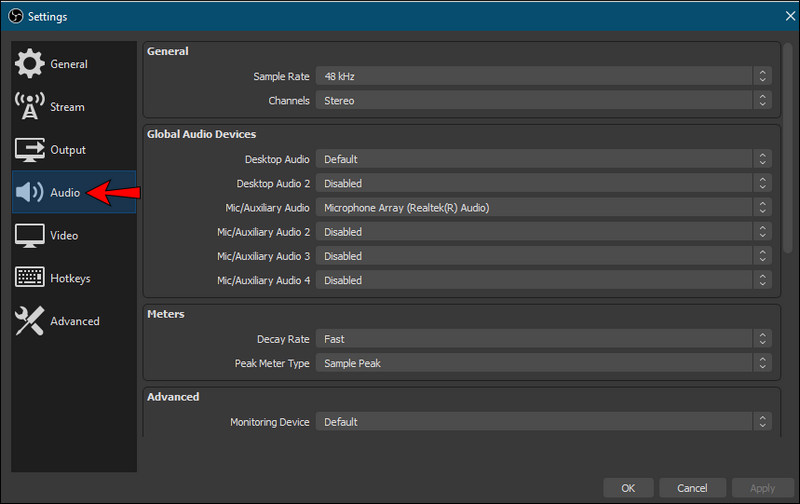
Passo 1Download and install OBS Studio on your Mac and open the software when it is installed.
Passo 2Create a new source in the Audio option and select your system audio device or virtual audio driver.
Passaggio 3Open YouTube in the browser and load the video/audio you want to record.
Passaggio 4Colpire il Inizia a registrare button, then play the YouTube video/audio normally.
Passaggio 5Wait until the audio you want to record is finished, then press the Fermare button and locate the audio file, which is now saved on your Mac.
2. How to Record Audio on Mac with an External Microphone
Audio from external mics, in most cases, has a higher audio quality when compared to the internal mic on a Mac. USB microphones have a direct connection to a Mac. However, XLR microphones may need an audio interface for better sound quality and lower noise. Using the best screen recorder for Mac can also help capture clearer recordings when combining audio and video tasks.
Passo 1Connect your chosen microphone to your Mac, open Impostazioni di sistema, vai a Suono, and set the microphone you just connected as the input device.
Passo 2Adjust the microphone input level and test the sound to ensure your voice is being detected clearly.
Passaggio 3Open your preferred recording software, such as AVAide Screen Recorder.
Passaggio 4Choose the external microphone inside the software settings and begin recording your voice or audio session.
Passaggio 5Stop the recording, review the sound quality, and save or export the final audio file to your Mac.
Record Mac voice easily using built-in tools like QuickTime and Voice Memos or advanced software for professional-quality recordings. Whether you need internal audio, podcast narration, or online lecture recordings, these methods provide reliable ways to capture clear sound efficiently on your Mac.
INFORMAZIONI SULL'AUTORE

Cattura le attività sullo schermo con audio, riunioni online, video di gioco, musica, webcam, ecc.
Registrazione audio