Software per la registrazione di podcast Diventa fondamentale quando finalmente decidi di lanciare il tuo primo podcast, ma hai difficoltà con un audio poco chiaro, rumori di fondo o strumenti di registrazione complicati. Che tu voglia registrare episodi in solitaria, interviste a distanza o podcast con iPhone, questa guida illustra l'attrezzatura, i metodi di registrazione e gli strumenti pratici necessari per creare episodi di podcast di qualità professionale.
Parte 1. Attrezzatura essenziale per la registrazione di podcast
Microfoni: l'investimento più importante
La qualità audio è direttamente proporzionale alla qualità del microfono che utilizzi per il tuo podcast. Un audio bilanciato e nitido mantiene alto l'interesse degli ascoltatori e contribuisce a creare podcast professionali.
1. Microfoni USB
I microfoni USB, estremamente facili da usare, offrono una connessione diretta al dispositivo e consentono di realizzare podcast semplici. Per questo motivo sono ideali per i principianti, risultando perfettamente adatti sia per interviste online che per studi di registrazione casalinghi.
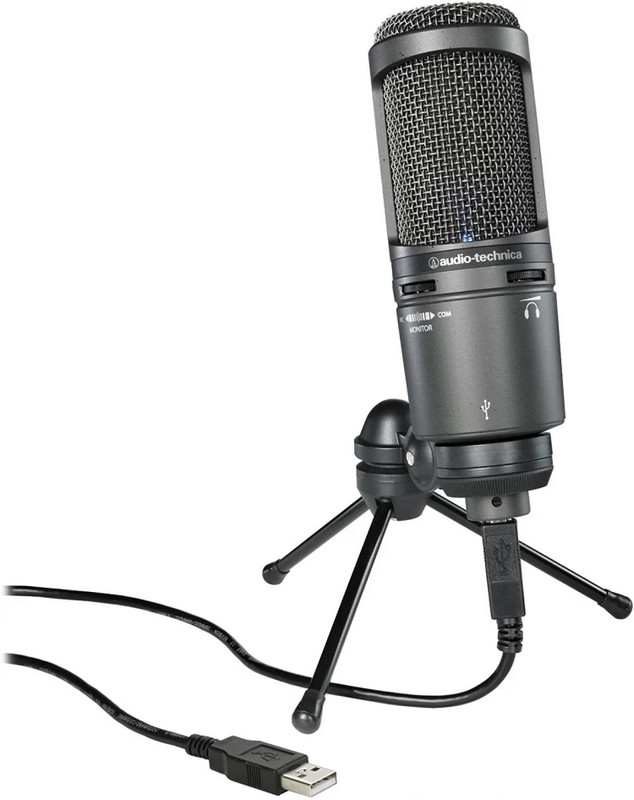
Alcuni microfoni USB comuni sono:
- Yeti blu
- Audio-Technica AT2020USB+
- Rode NT-USB
2. Microfoni XLR
I microfoni XLR sono l'esatto opposto. Offrono un'ottima qualità di ingresso audio e il controllo completo sul suono. Rappresentano un ottimo investimento per configurazioni di podcasting avanzate. Si differenziano dai microfoni USB perché i microfoni XLR richiedono un'interfaccia audio o un mixer.
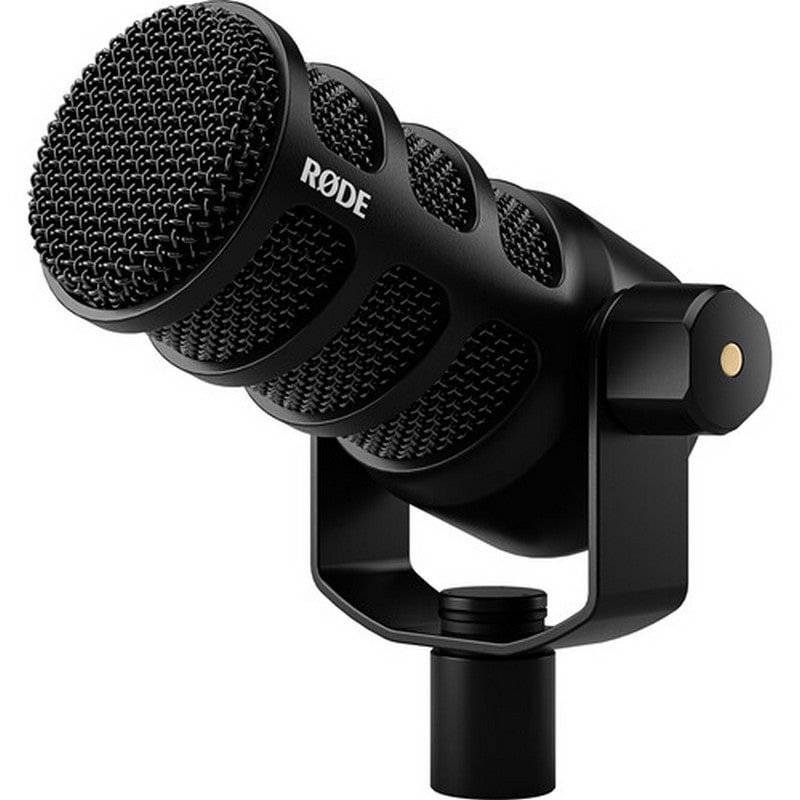
Alcuni microfoni XLR comuni sono:
- Shure SM7B
- Microfono Rode PodMic
- Electro-Voice RE20
Interfaccia audio (per microfoni XLR)
Un'interfaccia audio è il partner perfetto per il tuo microfono XLR in quanto migliora la qualità delle tue registrazioni e converte l'audio in un formato digitale che il tuo computer è in grado di comprendere. Questo processo elimina anche un buon livello di rumore dalle tue registrazioni e ti consente persino di Ascolta la musica durante la registrazione..
Alcune buone interfacce audio sono:
- Focusrite Scarlett 2i2
- PreSonus AudioBox USB 96
- Audio universale Volt 2
Cuffie
La possibilità di monitorare l'audio durante la registrazione e di controllare l'eco che potrebbe propagarsi al microfono sono alcuni dei vantaggi offerti da cuffie chiuse di buona qualità.
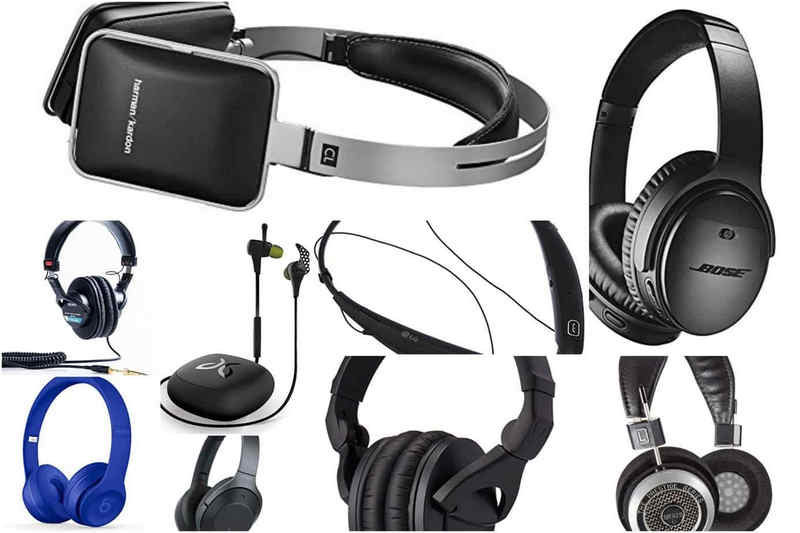
Alcune ottime cuffie per podcast:
- Cuffie Audio-Technica ATH-M50x
- Sony MDR-7506
- Beyerdynamic DT 770 Pro
Accessori
Uno degli acquisti essenziali per migliorare il comfort e la qualità audio durante la registrazione è rappresentato dagli accessori aggiuntivi.
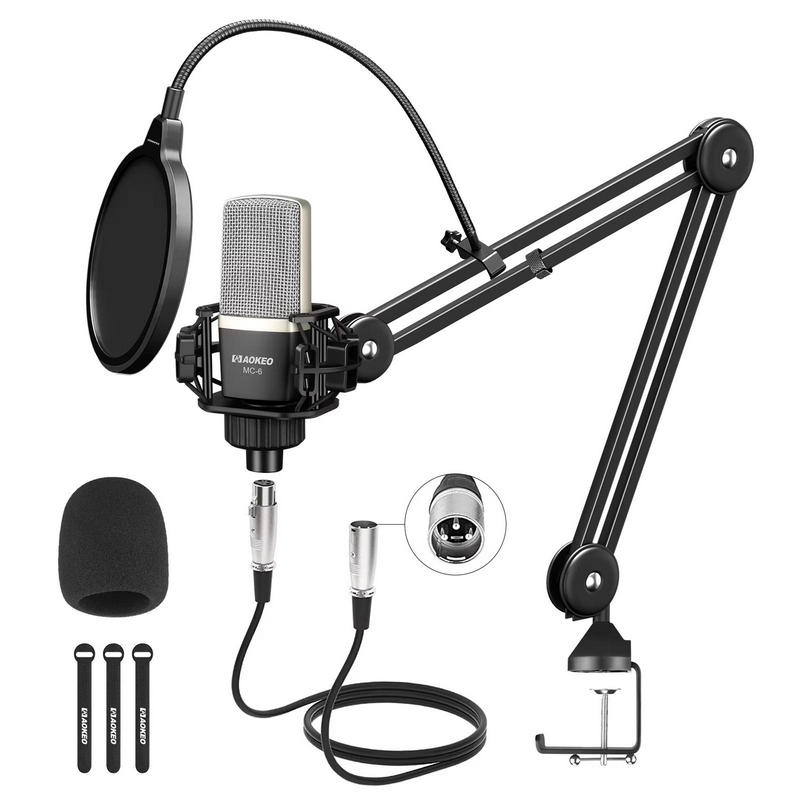
- Filtro anti-pop: Questi accorgimenti servono a ridurre il suono sgradevole e scricchiolante prodotto da lettere come la P e la B.
- Braccio di sollevamento: Questi supporti mantengono stabile il microfono e allo stesso tempo liberano spazio sulla scrivania.
- Pannelli in schiuma acustica: Questi dispositivi sono ottimi per migliorare l'acustica del tuo ambiente e allo stesso tempo controllare l'eco.
- Supporto ammortizzatore: Un supporto antivibrazione riduce al minimo le vibrazioni e il rumore della scrivania durante la registrazione.
Parte 2. I migliori metodi per registrare podcast
Metodo 1: Registrare un podcast con AVAide Screen Recorder
Registrazione di podcast utilizzando AVAide Screen Recorder È semplice e affidabile. È uno dei migliori programmi in grado di acquisire schermo, webcam e audio contemporaneamente, e cattura anche lo schermo del telefono. Il software non presenta ritardi ed è ideale per interviste a distanza, sessioni di podcast, video di reazione, podcast educativi e podcast video.
- Registra simultaneamente l'audio del microfono e quello di sistema.
- Cattura contemporaneamente la webcam e lo schermo per i podcast video.
- Supporta la modalità a schermo intero, a finestra o con area di registrazione personalizzata.
- Offre strumenti di annotazione durante la registrazione.
- Esporta le registrazioni in formati come MP4, MP3, AAC, FLAC e altri ancora.

 Download sicuro
Passo 1Scarica e installa il software
Visita il sito web ufficiale di AVAide per scaricare il software per il tuo computer Windows o Mac. Installa il programma seguendo le istruzioni e le indicazioni visualizzate.
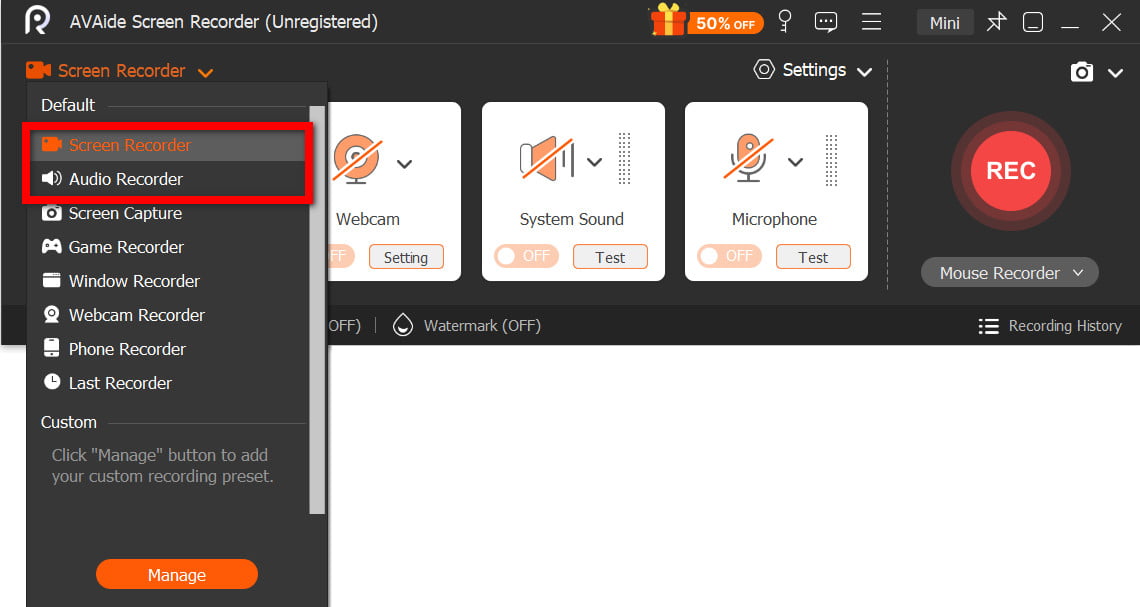
Passo 2Scegli Registratore audio o video
Apri il software e fai clic su uno dei due Registratore audio o Registratore dello schermo, a seconda che si desideri realizzare un podcast solo audio o video.
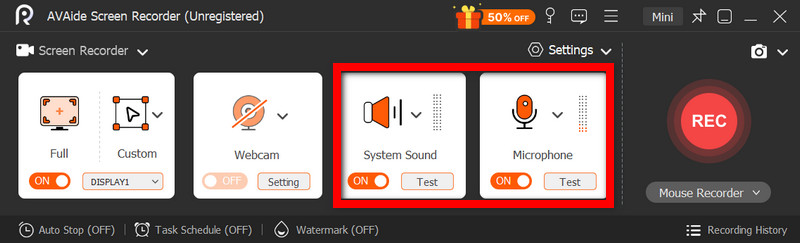
Passaggio 3Attiva il microfono e l'audio di sistema
Abilitare il Microfono per registrare la tua voce. Suono di sistema Dovrebbe essere abilitata la registrazione di interviste online, musica e audio degli ospiti.
Passaggio 4Imposta le preferenze di registrazione
Seleziona il formato e la qualità audio preferiti sotto Impostazioni menu. Per i podcast video, imposta l'area di registrazione e la sovrapposizione della webcam.
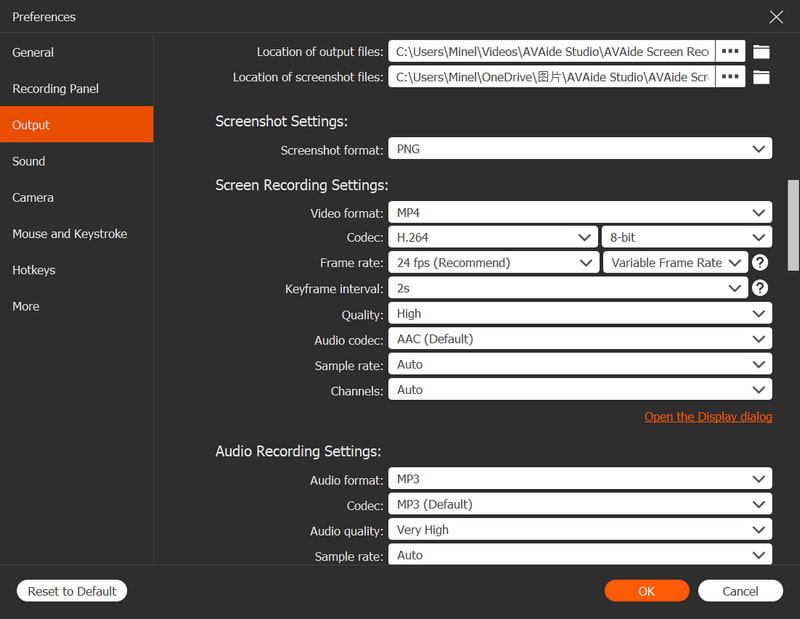
Passaggio 5Disco
Dopo aver colpito il REC Premendo il pulsante, si avvia la registrazione della sessione podcast. È possibile aggiungere note o evidenziazioni in qualsiasi momento.
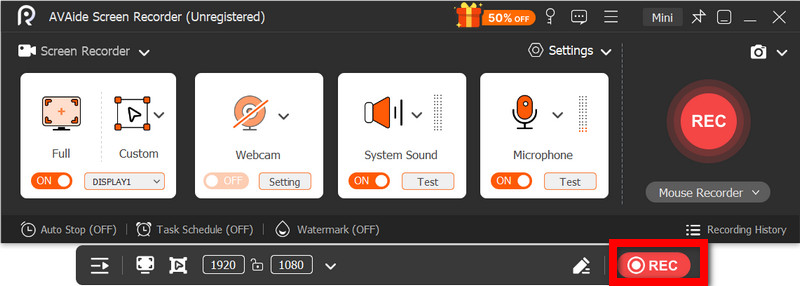
Passaggio 6Salva e visualizza l'anteprima
Dopo aver colpito il Fermare Facendo clic su questo pulsante, puoi salvare il tuo podcast dopo aver eliminato le sezioni indesiderate. Puoi anche visualizzare un'anteprima del tuo lavoro.
Metodo 2: Registrare un podcast con Audacity
Audacity è uno dei programmi più popolari per la registrazione e la modifica dell'audio per i podcast. Si tratta di un programma gratuito con codice sorgente aperto che consente agli utenti di registrare e modificare l'audio con funzioni utili come la riduzione del rumore, gli effetti audio e il supporto multitraccia. Grazie a queste caratteristiche, è possibile creare registrazioni podcast di qualità professionale in modo rapido e semplice con Audacity.
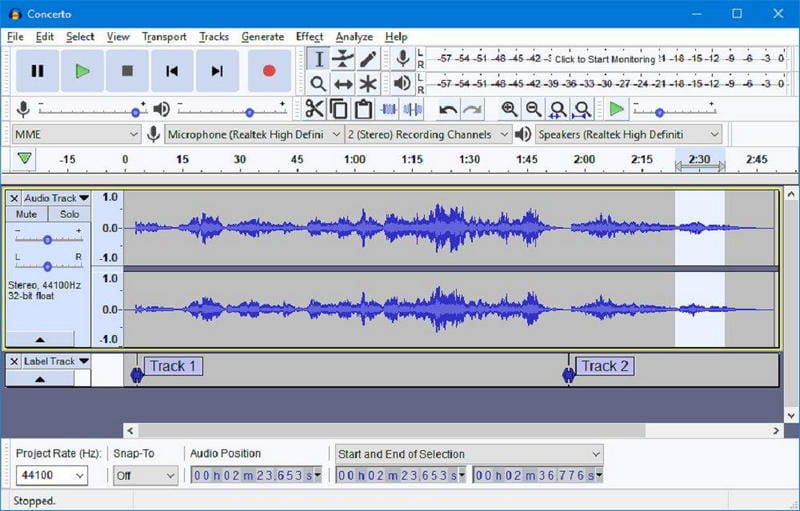
Passo 1Scarica Audacity dal sito web ufficiale di Audacity e installalo sul tuo computer.
Passo 2Utilizza un microfono USB o XLR e impostalo come dispositivo di registrazione in Audacity.
Passaggio 3Imposta i canali di registrazione e la qualità audio più adatti alle esigenze del tuo podcast.
Passaggio 4Clicca il Disco premi il pulsante e pronuncia il tuo contenuto nel microfono.
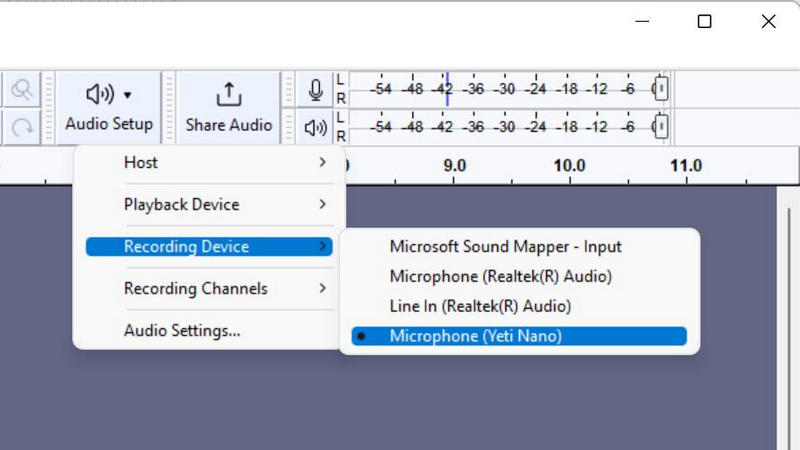
Passaggio 5 Modifica il tuo podcast per correggere eventuali errori, aggiungere musica di introduzione o effetti sonori utilizzando gli strumenti di editing di Audacity.
Passaggio 6Salva il tuo podcast esportando l'audio come file MP3 o WAV.
Metodo 3: Registrare un podcast con Adobe Audition
Con Adobe Audition, puoi ottenere un audio di qualità più professionale per i tuoi podcast. Adobe Audition include ottime funzionalità per l'editing audio, come la riduzione del rumore e il ripristino dell'audio. È anche un eccellente editor multitraccia.
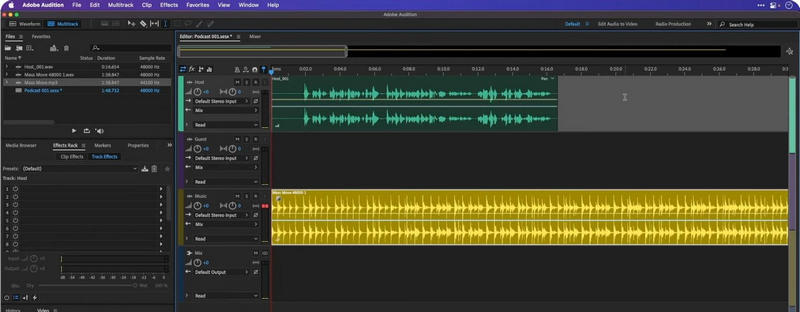
Passo 1 Scarica Adobe Audition dal sito web ufficiale di Adobe e installalo sul tuo dispositivo.
Passo 2 Apri il programma e crea e configura una nuova sessione podcast multitraccia.
Passaggio 3Usa il Hardware audio Impostazioni per selezionare microfono e cuffie.
Passaggio 4Seleziona la traccia audio su cui desideri registrare.
Passaggio 5Avvia la tua sessione podcast facendo clic su Disco pulsante.
Passaggio 6Modifica la tua sessione podcast utilizzando gli strumenti di editing di Adobe Audition e hai finito.
Parte 3. Come registrare un podcast da remoto
Riverside.fm è uno dei migliori e più affidabili siti per la registrazione remota di podcast. Invece di registrare audio e video tramite internet, registra audio e video locali di alta qualità su ogni hardware. Riverside.fm è un ottimo strumento per podcast video, webinar, talk show online e interviste perché fornisce registrazioni chiare, anche quando internet è instabile, e funziona bene insieme a strumenti come miglior registratore schermo per Mac per il backup o il supporto alla registrazione.
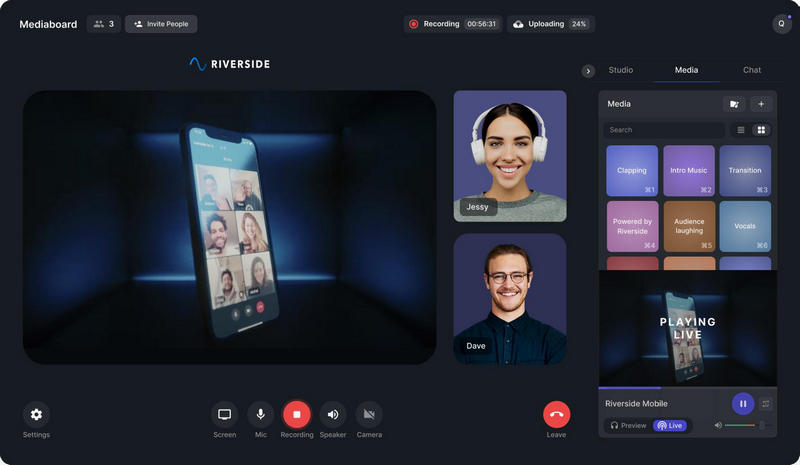
Passo 1Visita il sito Riverside.fm e crea un account. Dopo la registrazione, accedi allo studio.
Passo 2Clicca il Create Studio Fai clic sul pulsante e scegli le impostazioni del podcast. Decidi se registrare un podcast solo audio o video.
Passaggio 3Invia ai tuoi ospiti del podcast il link di invito. Possono partecipare tramite un browser web e non è necessario scaricare alcun software.
Passaggio 4Scegli il microfono, le cuffie e la webcam che preferisci prima di entrare in studio e assicurati di testare l'audio prima di uscire per verificare che non ci siano problemi tecnici.
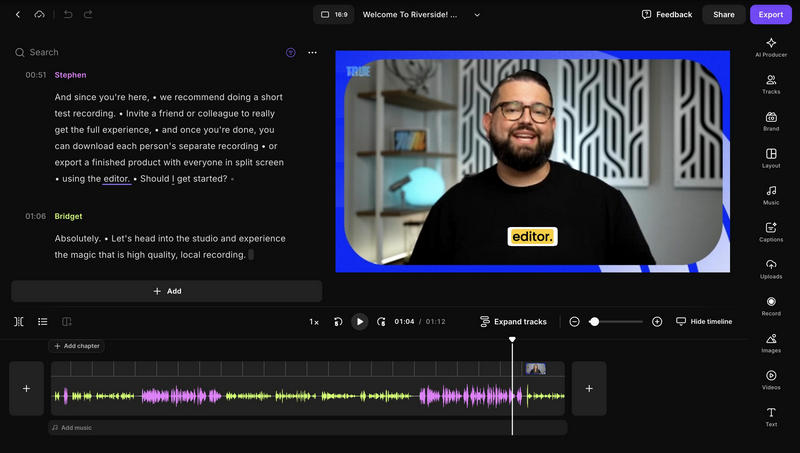
Passaggio 5Una volta pronto, fai clic su Disco pulsante. Riverside.fm cattura localmente ogni audio e video in alta qualità.
Parte 4. Come registrare un podcast su iPhone
GarageBand è l'app di riferimento per la registrazione di podcast per molti utenti iPhone che cercano un'alternativa all'app Memo Vocali integrata. Consente la registrazione multitraccia, l'aggiunta di effetti sonori e musica di sottofondo, oltre a offrire una vasta gamma di strumenti di editing.
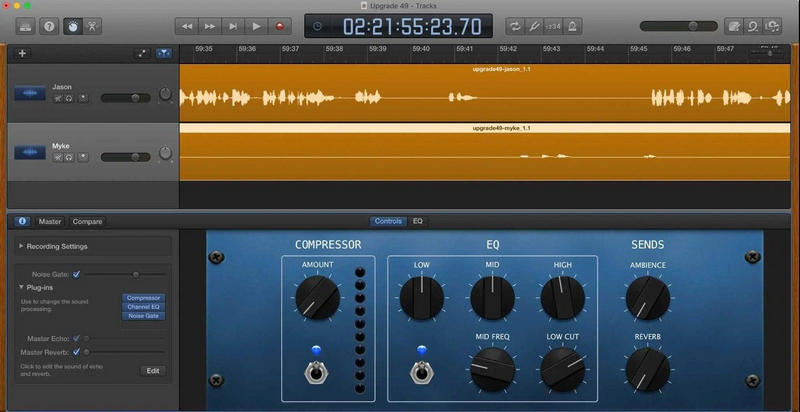
Passo 1Per scaricare GarageBand, vai sull'App Store e verifica se è già installato sul tuo iPhone. In caso contrario, installalo.
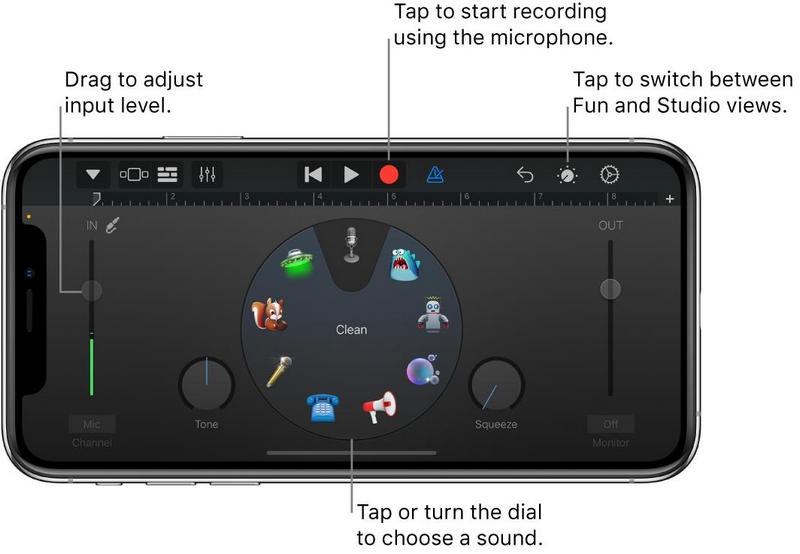
Passo 2All'apertura di GarageBand, scegli Registratore audio dagli strumenti di registrazione disponibili.
Passaggio 3I tuoi podcast avranno un suono molto più professionale se utilizzi un microfono esterno. Saranno anche più nitidi e ci saranno meno interferenze.
Passaggio 4Il monitoraggio è utile per verificare il livello del suono captato dal microfono e per assicurarsi che sia chiaro e non compresso.
Passaggio 5Puoi iniziare subito a registrare il tuo podcast toccando il pulsante Disco pulsante. La registrazione può essere interrotta mettendo in pausa e ripresa dopo averla riavviata.
Passaggio 6In GarageBand è possibile correggere gli errori e regolare i livelli audio utilizzando la funzione di ritaglio. È inoltre possibile aggiungere musica.
Passaggio 7Il podcast su cui hai dedicato tanto tempo a esercitarti, registrarlo e modificarlo può essere esportato e salvato sul tuo iPhone. Puoi anche condividerlo.
Impostazione per registrare un podcast Con l'attrezzatura e il software giusti, è facile. Puoi creare podcast dal tuo computer, da remoto con ospiti o registrare direttamente dal tuo iPhone, purché con una buona attrezzatura. In questo modo, produrrai podcast di alta qualità ogni volta.
INFORMAZIONI SULL'AUTORE

Cattura le attività sullo schermo con audio, riunioni online, video di gioco, musica, webcam, ecc.
Registrazione audio