Λογισμικό ηχογράφησης podcast καθίσταται απαραίτητο όταν τελικά αποφασίσετε να ξεκινήσετε το πρώτο σας podcast, αλλά δυσκολεύεστε με ασαφή ήχο, θόρυβο φόντου ή περίπλοκα εργαλεία ηχογράφησης. Είτε σκοπεύετε να ηχογραφήσετε σόλο επεισόδια, απομακρυσμένες συνεντεύξεις είτε podcast μέσω iPhone, αυτός ο οδηγός καλύπτει τον εξοπλισμό, τις μεθόδους ηχογράφησης και τα πρακτικά εργαλεία που απαιτούνται για τη δημιουργία επεισοδίων podcast επαγγελματικής ποιότητας.
Μέρος 1. Βασικός εξοπλισμός ηχογράφησης podcast
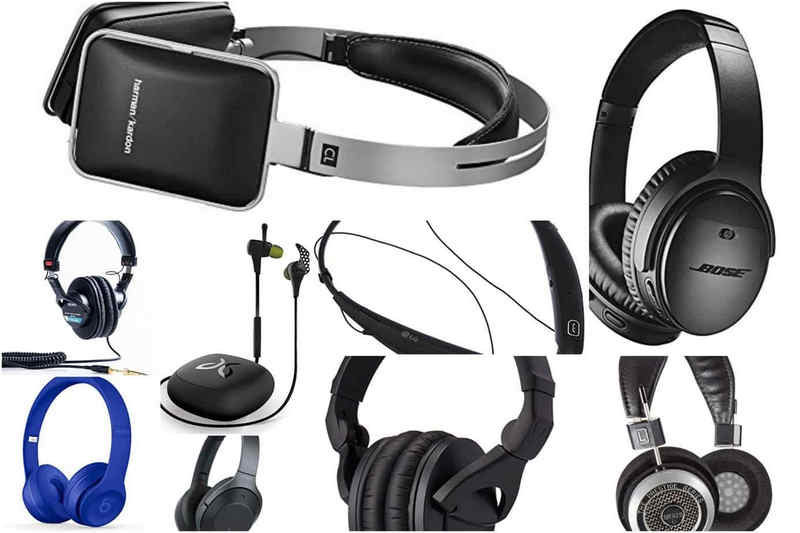
Μικρόφωνα: Η πιο σημαντική επένδυση
Η ποιότητα του ήχου σας είναι άμεσα ανάλογη με την ποιότητα του μικροφώνου που χρησιμοποιείτε για το podcast σας. Ο ισορροπημένος ήχος και η καθαρότητα διατηρούν το ενδιαφέρον των ακροατών και δημιουργούν επαγγελματικά podcast.
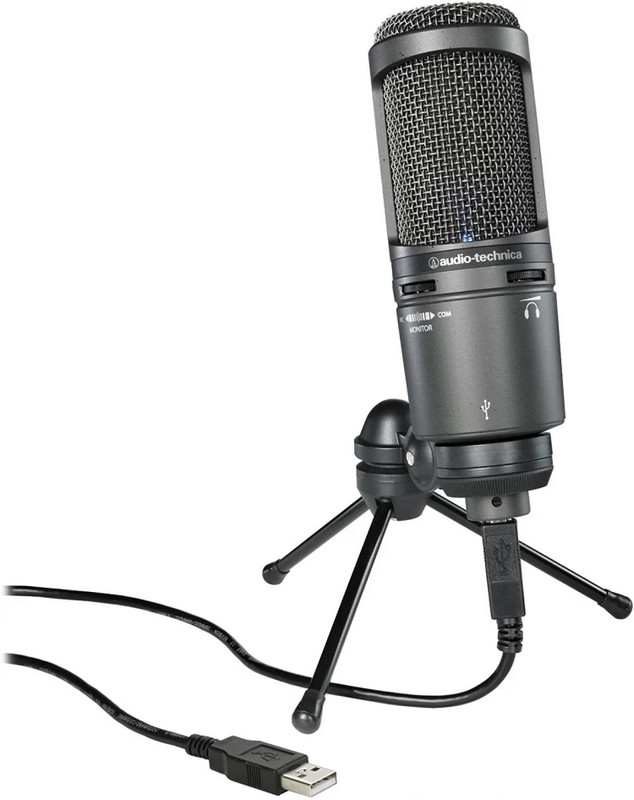
1. Μικρόφωνα USB
Όντας εξαιρετικά εύχρηστα, τα μικρόφωνα USB παρέχουν άμεση σύνδεση με τη συσκευή σας και υποστηρίζουν την ανάπτυξη απλών podcast. Γι' αυτό είναι ιδανικά για αρχάριους, καθώς είναι απολύτως κατάλληλα για διαδικτυακές συνεντεύξεις και ειδικά οικιακά στούντιο.
Μερικά κοινά μικρόφωνα USB είναι:
- Μπλε Γέτι
- Audio-Technica AT2020USB+
- Rode NT-USB
2. Μικρόφωνα XLR
Τα μικρόφωνα XLR είναι ακριβώς το αντίθετο. Παρέχουν εξαιρετική ποιότητα εισόδου ήχου και έλεγχο του ήχου σας. Πρόκειται για εξαιρετικές επενδύσεις για προηγμένες ρυθμίσεις podcasting. Διαφέρουν από τα μικρόφωνα USB με την έννοια ότι τα μικρόφωνα XLR απαιτούν μια διεπαφή ήχου ή έναν μίκτη.

Μερικά κοινά μικρόφωνα XLR είναι:
- Shure SM7B
- Rode PodMic
- Electro-Voice RE20
Διεπαφή ήχου (Για μικρόφωνα XLR)
Μια διεπαφή ήχου είναι ο ιδανικός συνεργάτης για το μικρόφωνο XLR σας, καθώς βελτιώνει την ποιότητα των ηχογραφήσεών σας και μετατρέπει τον ήχο σε ψηφιακή μορφή που ο υπολογιστής σας μπορεί να κατανοήσει. Αυτή η διαδικασία εξαλείφει επίσης ένα καλό επίπεδο θορύβου από τις ηχογραφήσεις σας και σας επιτρέπει ακόμη και να αναπαραγωγή μουσικής κατά την εγγραφή.
Μερικές καλές διεπαφές ήχου είναι:
- Focusrite Scarlett 2i2
- PreSonus AudioBox USB 96
- Universal Audio Volt 2
Ακουστικά
Η δυνατότητα παρακολούθησης του ήχου σας κατά την εγγραφή και ο έλεγχος της διαρροής ήχου ηχούς στο μικρόφωνό σας είναι μερικά από τα πλεονεκτήματα ενός ακουστικού κλειστού τύπου καλής ποιότητας.
Μερικά εξαιρετικά ακουστικά για podcast:
- Audio-Technica ATH-M50x
- Sony MDR-7506
- Beyerdynamic DT 770 Pro
Αξεσουάρ
Μία από τις απαραίτητες αγορές για τη βελτίωση της άνεσης και του ήχου σας κατά την εγγραφή είναι τα πρόσθετα αξεσουάρ.

- Φίλτρο Pop: Αυτά χρησιμοποιούνται για να μειώσουν τον ήχο του δυνατού κροτάλισμα που δημιουργούν γράμματα όπως το P και το B.
- Βραχίονας βραχίονα: Αυτά διατηρούν το μικρόφωνό σας σταθερό, ενώ παράλληλα απελευθερώνουν χώρο στο γραφείο σας.
- Ακουστικά πάνελ αφρού: Αυτά είναι ιδανικά για τη βελτίωση της ακουστικής του χώρου σας, ενώ παράλληλα ελέγχουν την ηχώ.
- Βάση αμορτισέρ: Μια βάση στήριξης ελαχιστοποιεί τους κραδασμούς και τον θόρυβο του γραφείου κατά την ηχογράφηση.
Μέρος 2. Οι καλύτερες μέθοδοι εγγραφής podcast
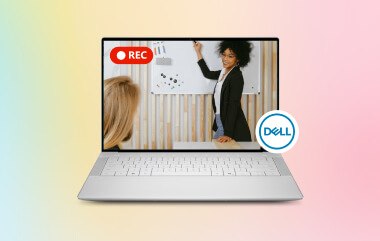
Μέθοδος 1: Εγγραφή podcast με το AVAide Screen Recorder
Ηχογράφηση podcast χρησιμοποιώντας Εγγραφή οθόνης AVAide είναι απλό και αξιόπιστο. Είναι ένα από τα καλύτερα προγράμματα που καταγράφει ταυτόχρονα την οθόνη, την κάμερα web και τον ήχο, και καταγράφει επίσης την οθόνη του τηλεφώνου σας. Το λογισμικό είναι χωρίς καθυστερήσεις και ιδανικό για απομακρυσμένες συνεντεύξεις, συνεδρίες podcast, βίντεο αντιδράσεων, εκπαιδευτικά podcast και βίντεο podcast.
- Εγγράφει ταυτόχρονα τον ήχο του μικροφώνου και του συστήματος.
- Καταγράφει μαζί την κάμερα web και την οθόνη για podcast βίντεο.
- Υποστηρίζει πλήρη οθόνη, παράθυρο ή προσαρμοσμένη περιοχή εγγραφής.
- Προσφέρει εργαλεία σχολιασμού κατά την εγγραφή.
- Εξάγει ηχογραφήσεις σε μορφές όπως MP4, MP3, AAC, FLAC και άλλες.

 Ασφαλής λήψη
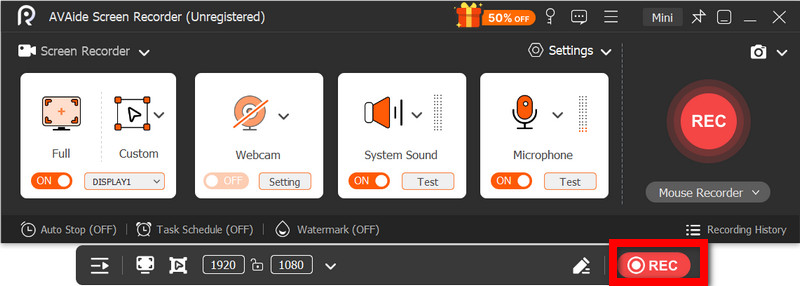
Βήμα 1Κατεβάστε και εγκαταστήστε το Λογισμικό
Μεταβείτε στην επίσημη ιστοσελίδα του AVAide για να το κατεβάσετε στον υπολογιστή σας με Windows ή Mac. Εγκαταστήστε το λογισμικό ακολουθώντας τις οδηγίες και τις υποδείξεις.
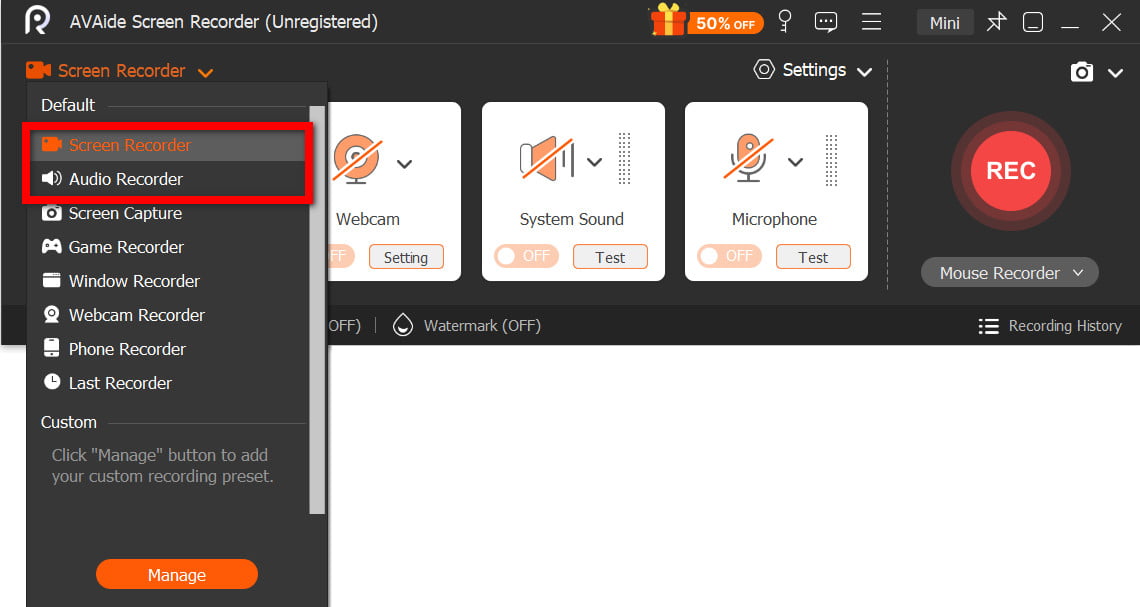
Βήμα 2Επιλέξτε συσκευή εγγραφής ήχου ή βίντεο
Ανοίξτε το λογισμικό και κάντε κλικ σε ένα από τα δύο Συσκευή εγγραφής ήχου ή Εγγραφή οθόνης, ανάλογα με το αν θέλετε να δημιουργήσετε ένα podcast μόνο με ήχο ή ένα podcast βίντεο.
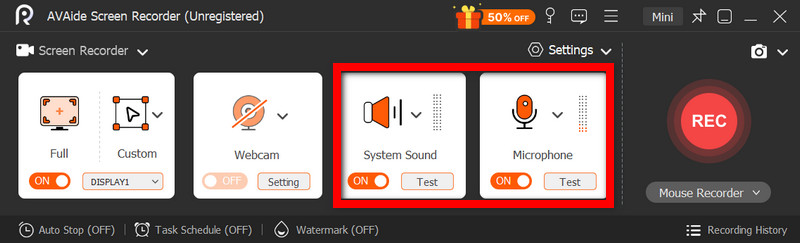
Βήμα 3Ενεργοποίηση μικροφώνου και ήχου συστήματος
Ενεργοποίηση του Μικρόφωνο για να ηχογραφήσετε τη φωνή σας. Ήχος συστήματος θα πρέπει να είναι δυνατή η ηχογράφηση διαδικτυακών συνεντεύξεων, μουσικής και ήχου από τους καλεσμένους.
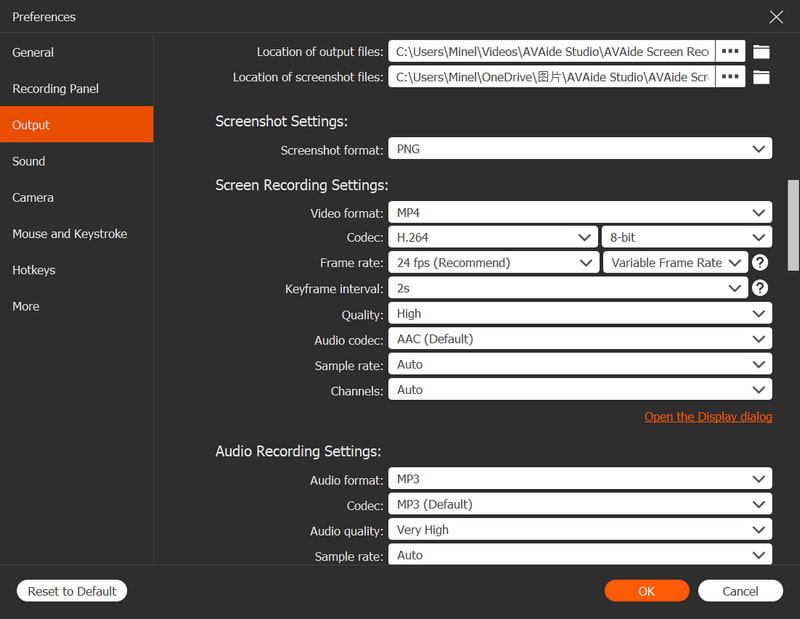
Βήμα 4Ορισμός προτιμήσεων εγγραφής
Επιλέξτε την προτιμώμενη μορφή και ποιότητα ήχου από το Ρυθμίσεις μενού. Για podcast βίντεο, ορίστε την περιοχή εγγραφής και την επικάλυψη της κάμερας web.
Βήμα 5Ρεκόρ
Αφού πατήσετε το REC , ξεκινάτε την ηχογράφηση της συνεδρίας podcast σας. Έχετε την επιλογή να προσθέσετε σημειώσεις ή στιγμιότυπα ανά πάσα στιγμή.
Βήμα 6Αποθήκευση και προεπισκόπηση
Μετά το χτύπημα του Να σταματήσει , μπορείτε να αποθηκεύσετε το podcast σας αφού περικόψετε τυχόν ανεπιθύμητες ενότητες. Μπορείτε επίσης να κάνετε προεπισκόπηση της εργασίας σας.
Μέθοδος 2: Εγγραφή podcast με το Audacity
Το Audacity είναι ένα από τα πιο δημοφιλή προγράμματα που χρησιμοποιούνται για την ηχογράφηση και επεξεργασία ήχου για podcasting. Είναι ένα δωρεάν πρόγραμμα με κωδικοποίηση ανοιχτού κώδικα που επιτρέπει στους χρήστες να ηχογραφούν ήχο και να τον επεξεργάζονται με χρήσιμες λειτουργίες όπως μείωση θορύβου, εφέ ήχου και υποστήριξη πολλαπλών κομματιών. Με αυτές τις δυνατότητες, είναι δυνατή η δημιουργία ηχογραφήσεων podcast επαγγελματικής ποιότητας γρήγορα και εύκολα με το Audacity.
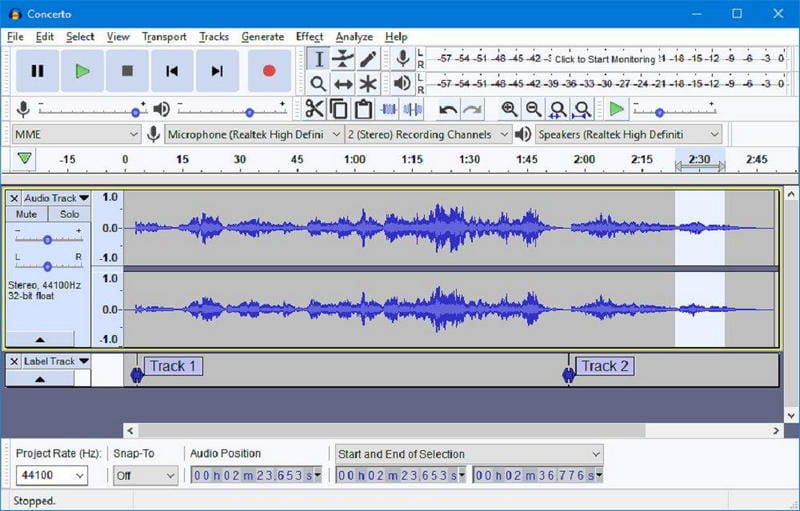
Βήμα 1Κατεβάστε το Audacity από την επίσημη ιστοσελίδα του Audacity και εγκαταστήστε το στον προσωπικό σας υπολογιστή.
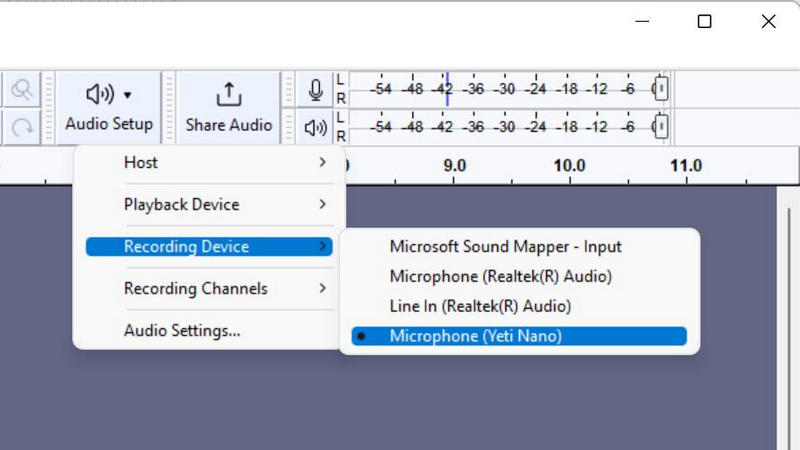
Βήμα 2Χρησιμοποιήστε ένα μικρόφωνο USB ή XLR και ορίστε το ως συσκευή εγγραφής στο Audacity.
Βήμα 3Ορίστε τα κανάλια εγγραφής και την ποιότητα ήχου που ταιριάζουν στις ανάγκες του podcast σας.
Βήμα 4Κάντε κλικ στο Ρεκόρ και δηλώστε το περιεχόμενό σας στο μικρόφωνο.
Βήμα 5 Επεξεργαστείτε το podcast σας για να αφαιρέσετε τυχόν λάθη, προσθέστε μουσική εισαγωγής ή προσθέστε ηχητικά εφέ χρησιμοποιώντας το κιτ εργαλείων επεξεργασίας Audacity.
Βήμα 6Αποθηκεύστε το podcast σας εξάγοντας τον ήχο ως αρχείο MP3 ή WAV.
Μέθοδος 3: Εγγραφή podcast με το Adobe Audition
Με το Adobe Audition, έχετε ήχο επαγγελματικής ποιότητας για τα podcast σας. Το Adobe Audition περιλαμβάνει εξαιρετικές λειτουργίες για την επεξεργασία ήχου για ένα ποιοτικό podcast, όπως μείωση θορύβου και αποκατάσταση ήχου. Είναι επίσης ένα εξαιρετικό πρόγραμμα επεξεργασίας πολλαπλών κομματιών.
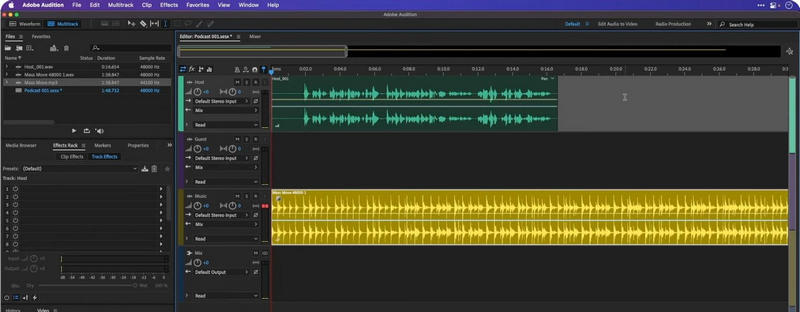
Βήμα 1 Κατεβάστε το Adobe Audition από την επίσημη ιστοσελίδα της Adobe και εγκαταστήστε το στη συσκευή σας.
Βήμα 2 Ανοίξτε το πρόγραμμα και δημιουργήστε και ρυθμίστε μια νέα συνεδρία podcast πολλαπλών κομματιών.
Βήμα 3Χρησιμοποιήστε το Υλικό ήχου ρυθμίσεις για να επιλέξετε το μικρόφωνο και τα ακουστικά σας.
Βήμα 4Επιλέξτε το κομμάτι ήχου στο οποίο θέλετε να κάνετε εγγραφή.
Βήμα 5Ξεκινήστε την συνεδρία podcast σας κάνοντας κλικ στο Ρεκόρ κουμπί.
Βήμα 6Επεξεργαστείτε την συνεδρία podcast σας χρησιμοποιώντας τα εργαλεία επεξεργασίας Adobe Audition και τελειώσατε.
Μέρος 3. Πώς να ηχογραφήσετε ένα podcast από απόσταση
Το Riverside.fm είναι ένας από τους καλύτερους και πιο αξιόπιστους ιστότοπους για απομακρυσμένη ηχογράφηση podcast. Αντί να εγγράφει ήχο και βίντεο μέσω του διαδικτύου, καταγράφει υψηλής ποιότητας, τοπικό ήχο και βίντεο σε κάθε υλικό. Το Riverside.fm είναι ένα εξαιρετικό εργαλείο για βίντεο podcast, διαδικτυακά σεμινάρια, διαδικτυακές εκπομπές και συνεντεύξεις, επειδή παρέχει καθαρές ηχογραφήσεις, ακόμα και όταν το διαδίκτυο είναι ασταθές, και λειτουργεί καλά σε συνδυασμό με εργαλεία όπως το καλύτερη εγγραφή οθόνης για Mac για υποστήριξη δημιουργίας αντιγράφων ασφαλείας ή εγγραφής.
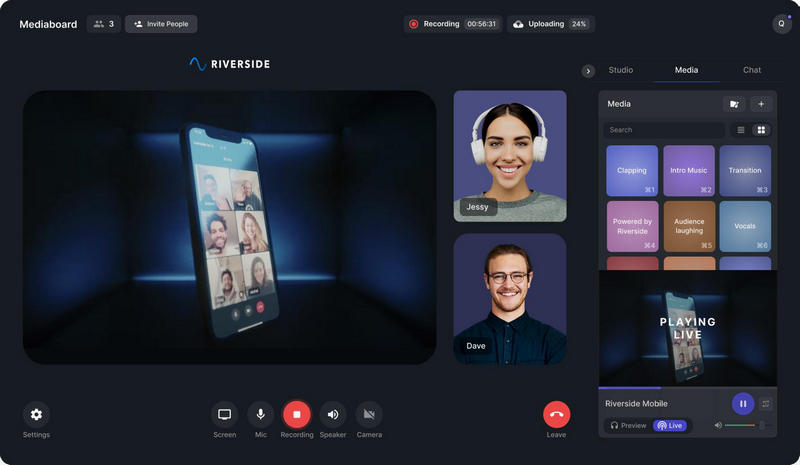
Βήμα 1Μεταβείτε στον ιστότοπο Riverside.fm και δημιουργήστε έναν λογαριασμό. Αφού εγγραφείτε, συνδεθείτε στο στούντιο.
Βήμα 2Κάντε κλικ στο Δημιουργία στούντιο και επιλέξτε τις ρυθμίσεις του podcast σας. Προσδιορίστε εάν θα ηχογραφήσετε ένα podcast μόνο με ήχο ή ένα podcast βίντεο.
Βήμα 3Στείλτε στους καλεσμένους του podcast σας τον σύνδεσμο πρόσκλησης. Μπορούν να συμμετάσχουν μέσω ενός προγράμματος περιήγησης ιστού και δεν απαιτείται να κατεβάσουν κανένα λογισμικό.
Βήμα 4Επιλέξτε το μικρόφωνο, τα ακουστικά και την κάμερα web της προτίμησής σας πριν μπείτε στο στούντιο και φροντίστε να δοκιμάσετε τον ήχο σας πριν φύγετε από το στούντιο για να βεβαιωθείτε ότι δεν υπάρχουν τεχνικά προβλήματα.
Βήμα 5Μόλις είστε έτοιμοι, κάντε κλικ στο Ρεκόρ κουμπί. Το Riverside.fm καταγράφει κάθε ήχο και βίντεο τοπικά σε υψηλή ποιότητα.
Μέρος 4. Πώς να εγγράψετε ένα podcast στο iPhone
Το GarageBand είναι η εφαρμογή ηχογράφησης podcast που χρησιμοποιούν πολλοί χρήστες iPhone και αναζητούν κάτι πέρα από την ενσωματωμένη εφαρμογή Voice Memos. Επιτρέπει την ηχογράφηση πολλαπλών κομματιών, τα ηχητικά εφέ και τη μουσική υπόκρουση, ενώ παράλληλα προσφέρει μια εντυπωσιακή ποικιλία εργαλείων επεξεργασίας.
Βήμα 1Για να κατεβάσετε το GarageBand, μεταβείτε στο App Store και ελέγξτε αν είναι ήδη εγκατεστημένο στο iPhone σας. Εάν δεν είναι, εγκαταστήστε το.
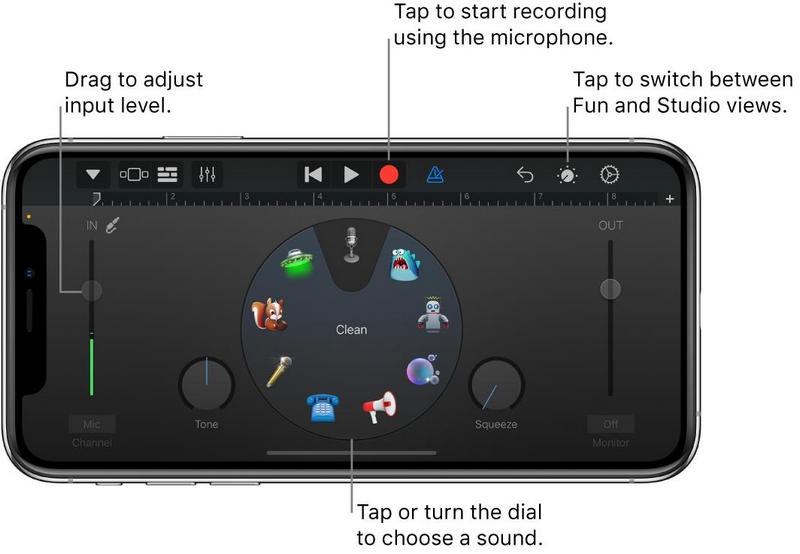
Βήμα 2Μόλις ανοίξετε το GarageBand, επιλέξτε το Συσκευή εγγραφής ήχου από τα διαθέσιμα εργαλεία εγγραφής.
Βήμα 3Τα podcast σας θα ακούγονται πολύ πιο επαγγελματικά αν χρησιμοποιείτε εξωτερικό μικρόφωνο. Θα ακούγονται επίσης πιο καθαρά και θα ακούτε λιγότερες παρεμβολές.
Βήμα 4Η παρακολούθηση είναι χρήσιμη για να ελέγχετε το επίπεδο ήχου που λαμβάνει το μικρόφωνό σας και για να διασφαλίζετε ότι είναι καθαρός και ασυμπίεστος.
Βήμα 5Μπορείτε να ξεκινήσετε αμέσως την εγγραφή του podcast σας πατώντας το Ρεκόρ κουμπί. Η εγγραφή μπορεί να διακοπεί με παύση και να συνεχιστεί μετά την επαναφορά της παύσης.
Βήμα 6Μπορείτε να διορθώσετε τυχόν λάθη και να προσαρμόσετε τα επίπεδα ήχου στο GarageBand χρησιμοποιώντας τη λειτουργία περικοπής. Μπορείτε επίσης να προσθέσετε μουσική.
Βήμα 7Το podcast για το οποίο έχετε αφιερώσει τόσο πολύ χρόνο στην εξάσκηση, την ηχογράφηση και την επεξεργασία μπορεί να εξαχθεί και να αποθηκευτεί στο iPhone σας. Μπορείτε επίσης να μοιραστείτε το podcast σας.
Ρύθμιση σε ηχογράφηση ενός podcast είναι βολικό, με τον κατάλληλο εξοπλισμό και λογισμικό. Μπορείτε να κάνετε podcast από τον υπολογιστή σας, από απομακρυσμένες τοποθεσίες με καλεσμένους ή να κάνετε ηχογράφηση απευθείας από το iPhone σας με καλό εξοπλισμό. Θα παράγετε podcast υψηλής ποιότητας κάθε φορά.
ΣΧΕΤΙΚΑ ΜΕ ΤΟΝ ΣΥΓΓΡΑΦΕΑ

Καταγράψτε δραστηριότητες οθόνης με ήχο, διαδικτυακές συσκέψεις, βίντεο παιχνιδιού, μουσική, κάμερα web κ.λπ.