If you have a playlist with untitled tracks, unknown artists, and missing album information, don't worry, you can customize all of them. This post is here to guide you through editing audio file metadata. You will discover five handy tools and easy-to-follow steps to make organizing your music collection a breeze. So, what are you waiting for? Read on to unleash the potential of your music library!
1. AVAide Video Converter
The top audio metadata editing method is to use AVAide Video Converter. Don't be confused by its name. It is a comprehensive audio and video metadata and info editor and format converter. You can edit audio file metadata, including the song title, artist name, album, composer, genre, year, track, comments, and cover. After that, you can even do small changes and convert the audio format. In a word, it is a one-stop audio metadata editing solution.
This platform supports a wide range of media file formats. It makes it a solution for users working with different types of content. The supported media file formats include OGG, MP4, M4V, MOV, MP3, WMA, ASF, WMV, WAV, AVI, FLAC, and more. This compatibility ensures that you can manage metadata for a diverse array of audio and video files.
Step 1Download and Install AVAide Video Converter from the official website for complete access. Once everything is set, run the program to get started.

FREE DOWNLOAD For Windows 7 or later
 Secure Download
FREE DOWNLOAD For Mac OS X 10.13 or later
Secure DownloadStep 2Navigate to the Toolbox tab. Look for Media Metadata Editor; it is the feature you will use to edit your file.

Step 3Click the add button to import the audio file you wish to edit the metadata of.
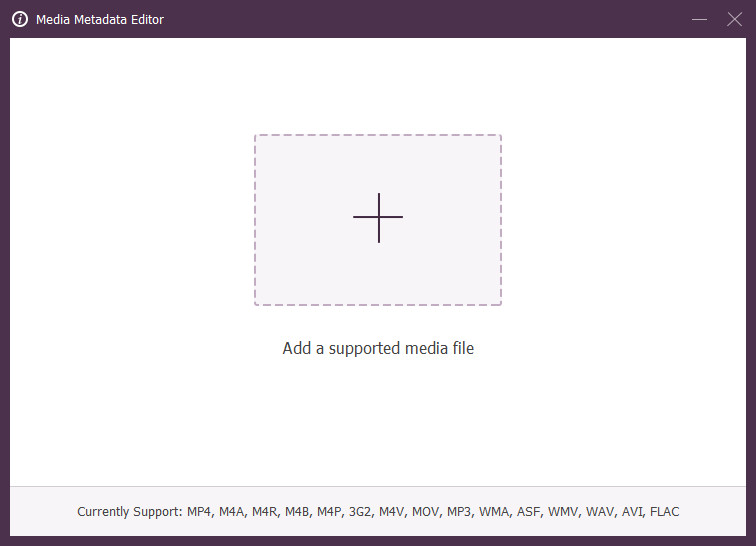
Step 4You are now directed to the main metadata editing section. You will see various fields for Title, Artist, Album, Composer, Genre, Year, Track, and Comments. Please select each associated field and enter the necessary information.
Besides that, click the (+) button under the cover frame to add a snapshot that will serve as a thumbnail for your file.

Step 5Hit the Pencil button at the top of the information fields to change the file name. Once settled, click the Save button to confirm the changes. Please check the edited file on your local file to see the changes.
2. VLC Media Player
VLC Media Player is a widely used audio and video player and works with almost all file types. It is compatible with Linux, Windows, and Mac. You can edit details like title, artist, album, and more for your audio file. The audio fingerprint feature checks an online database to identify tags. Besides that, you can incorporate album cover images into your audio files. It is a convenient platform for tweaking and customizing your audio information.
Step 1 Run the VLC Media Player on your desktop.
Step 2 Hit the Media and Open File to import the audio file.
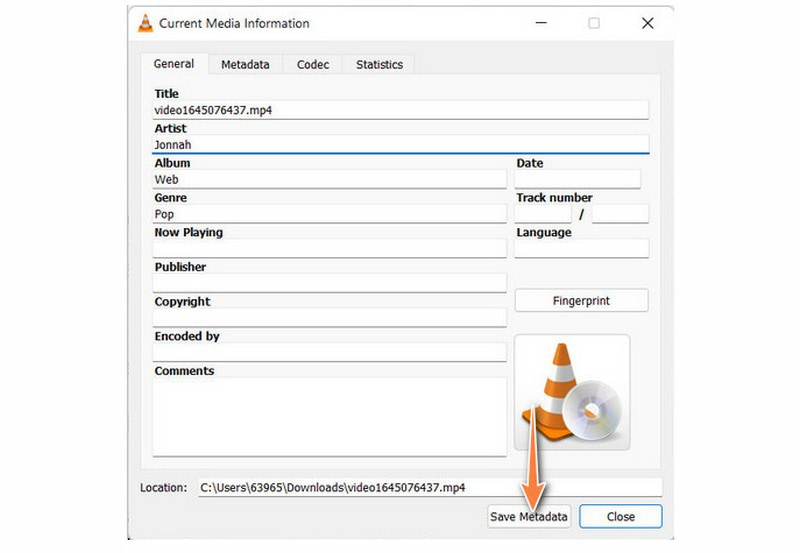
Step 3 Navigate to the Tools tab and select Media Information. Please edit details like Title, Artist, Album, etc., in the Information dialog box.
Step 4Once settled, click Save Metadata to confirm the changes.
3. TagScanner
One of the stand-out music tag editors, catering to various audio formats like OGG, MP3, FLAC, and more, is TagScanner. This program allows you to edit audio details like song titles, artists, albums, etc. The impressive part? You can apply edits to multiple files at once, keeping everything consistent. Besides that, TagScanner has a built-in audio player, allowing you to incorporate lyrics into music.
Step 1 Open TagScanner on your computer.
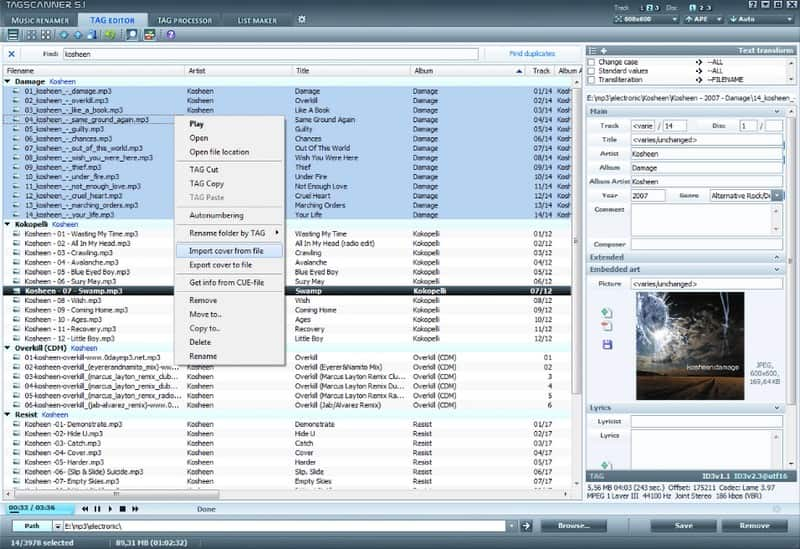
Step 2Press the Add Files button to upload your audio files to the program.
Step 3 Your audio file will be displayed on the interface. Start editing the Song Title, Artist Names, Album Details, and more to suit your preferences.
Step 4Press the Save button, and TagScanner changes your audio file details.
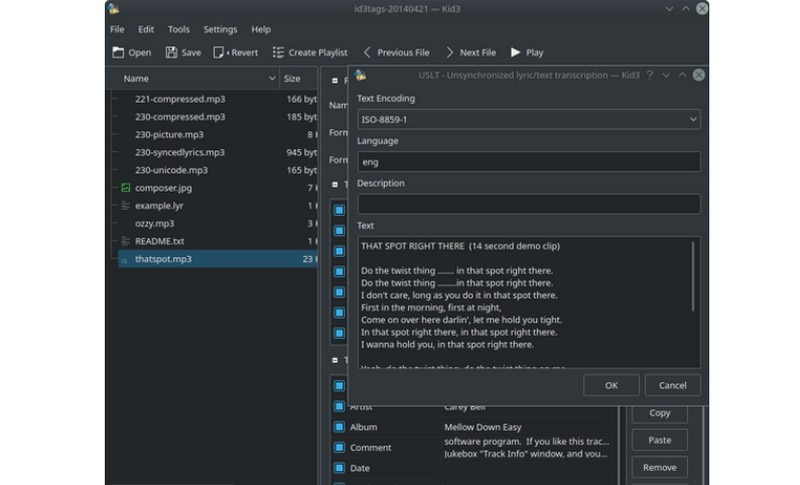
4. Kid3
Kid3 is a versatile platform that enables you to edit information in various audio file types. It is super convenient if you have many files to organize, especially if you are into sorting them by music genres. So, whether you want to correct a misspelled artist name, add album artwork, or organize your tracks in a specific order, Kid3 makes it a breeze. You can have your audio files organized with accurate and personalized metadata.
Step 1Launch Kid3 on your computer.
Step 2Hit the Add Files button or drag and drop your audio files into the interface.
Step 3Select the audio file, edit fields like Title and Artist, and double-click to make changes.
Step 4Hit the Save button after making edits. Use the platform's built-in player to preview changes.
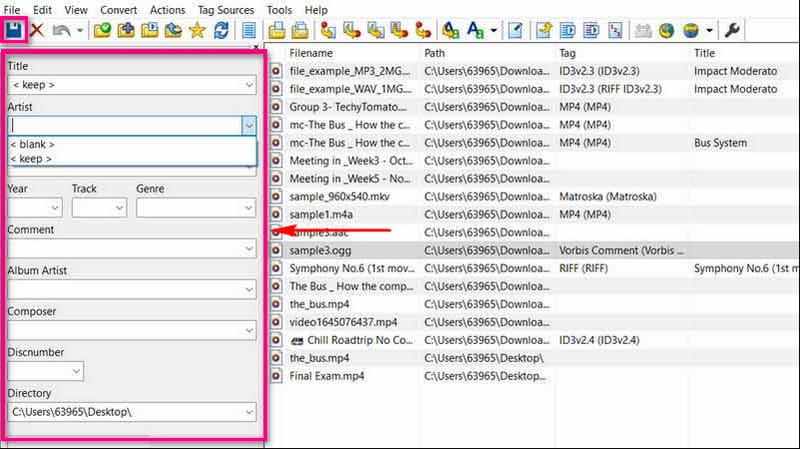
5. MP3Tag
The MP3Tag is a simple but clear audio file metadata editing tool. Its interface is just like the Windows File Explorer, and you can choose one song on the right and then edit the metadata on the left immediately. You can change details like the song title, artist name, album, and genre. You can also incorporate cool pictures that show up when you play a song. Besides that, you can edit multiple files at once, saving you time and effort. It can also convert audio file formats. However, unlike AVAide Video converter, which supports almost all audio formats, MP3Tag only supports several famous formats like MP3 and M4A.
Step 1Open MP3Tag using your computer.
Step 2Press the Add Directory button; it looks like a folder with a plus sign.
Step 3Select the folder where your file is placed. Once selected, begin editing the metadata.
Step 4Head to the left corner where the fields are placed. Please enter your desired information for Title, Artist, Year, Track, Genre, Comment, Album Artist, and more.
Step 5When done, click the Save button to confirm your changes.
FAQs about Editing Audio File Metadata
How to edit MP3 metadata?
You can use the AVAide Video Converter to do your task. Open it, head to the Toolbox tab, and select Media Metadata Editor. Import your audio file and enter the necessary information in the provided fields. When done, click the Save button to confirm the changes.
How to edit audio metadata using properties on Windows?
Find the audio file on your desktop and right-click on it. A menu will appear; click on Properties > Details tab. Here, you will see different tags related to the file. Click on each tag, like Title, Artist, Album, etc., and fill in the information you want to add or change. Once settled, press the OK button to save the changes.
How do you edit the properties of WAV files online?
Many online services provide tools for editing the tags and properties of your audio files. Examples of such services include tagmp3.net and MAZTR. These tools make it easy to edit your audio files' essential details.
Can I use the OGG file on Mac?
OGG files do not work on Apple devices. But you can make them playable on Mac using a third-party application. You can choose from AVAide Video Converter and VLC Media Player.
Does editing OGG Metadata affect the audio quality?
No! Editing OGG Metadata does not alter the actual audio content of the file. It only modifies the accompanying information. It ensures your music library stays organized.
In conclusion, you have learned the best ways to edit audio tags using the abovementioned tools. Taking control of your music metadata keeps your collection organized and makes finding your favorite tunes a breeze. If you want an easy and intuitive audio metadata editor, consider AVAide Video Converter and MP3Tag.
Your complete video toolbox that supports 350+ formats for conversion in lossless quality.