When we talk of a powerful digital audio workstation for handling multiple production files under one roof, Image-Line's FL Studio has become part and parcel of every producer's, composer's, or DJ's list worldwide. Easily formatted and helpful for users with many features, FL Studio comes easy for a beginner but has enough options for the advanced user. All the aspects required to create, record, edit, mix, and master a given audio configuration or project are available in one package. This blends with its excellent library of virtual instruments, plug-ins, and good MIDI support to present endless opportunities. Learn how to record vocals in FL Studio, by strictly following the contents below.
Part 1: How to Record Vocals in FL Studio
Developed by Image-Line, FL Studio is among the most versatile and powerful digital audio workstations (DAWs) used globally by producers, composers, and DJs. Known for its user-friendly interface and large feature suite, FL Studio caters to beginners and professionals alike.
It is a one-stop solution that gives users everything they need to create, record, edit, mix, and master. With an enormous library of virtual instruments, effects, and plug-ins combined with seamless MIDI support, FL Studio presents endless possibilities to create unique and quality soundtracks. Record audio in FL Studio by following the guide below.
Step 1The first task you want to do is to download FL Studio. Depending on your operating system, you can do that by going to their main site and downloading the appropriate file. Be aware that it is a one-time payment application.
Step 2Connect your headphones or microphone, or use your PC's default microphone. Click the Song option, then activate the main recording button. Right-click to ensure the Audio option is checkmarked; if not, click it once.
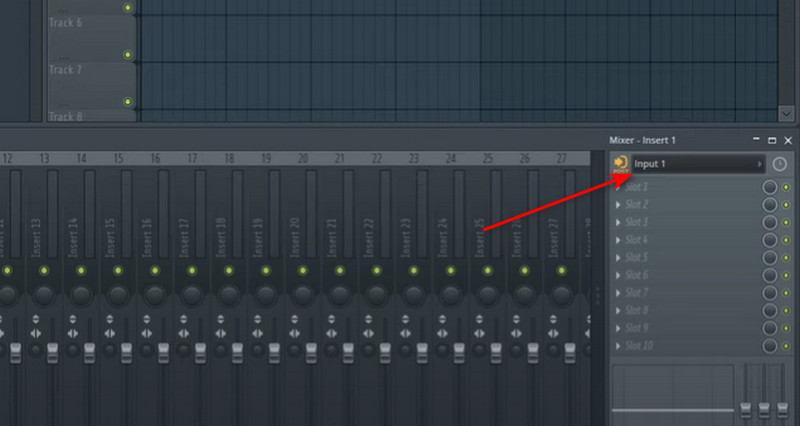
Step 3After you are done setting up your microphone and headsets, we will configure the software settings so that it will use the correct devices for inputting and outputting audio. You will see the Mixer tab on the button right of the app interface and click the input button to select an input device.
Step 4After you have selected an input device, you will be ready to record using FL Studio. Simply click the Play button to record your audio. To stop the recording, click the Stop button beside the Play button. Your audio files are stored in the application's local directory.
Part 2: The Best and Easiest Way to Record Sound for FL Studio
You might be interested in AVAide Screen Recorder. Consequently, it is multifunctional and extremely user-friendly for recording FL Studio. It records audio with what can only be described as crystal-clear quality, whereby every detail of your sound gets captured. Essentially, its interface is intuitive, simultaneously allowing the system audio and microphone input. That's why it suits music producers who naturally use FL Studio.
Its other features include the fact that it can also reduce noise and volume-adjusting, exporting in multiple formats to suit your every purpose. Be it vocal, instrument, or even live sound sessions, this AVAide Screen Recorder offers the best and easiest solution for getting high-quality audio recordings to boost your FL Studio production workflow. Learn how to record audio for FL studio in the best way possible by following the steps below.
Step 1Download and Install Software
The first thing you need to do is to download the application. Do that by clicking the download button available below. After downloading the app, launch it by clicking it on your desktop. Then, select Audio Recorder.

FREE DOWNLOAD For Windows 7 or later
 Secure Download
FREE DOWNLOAD For Mac OS X 10.13 or later
Secure DownloadStep 2Toggle Settings
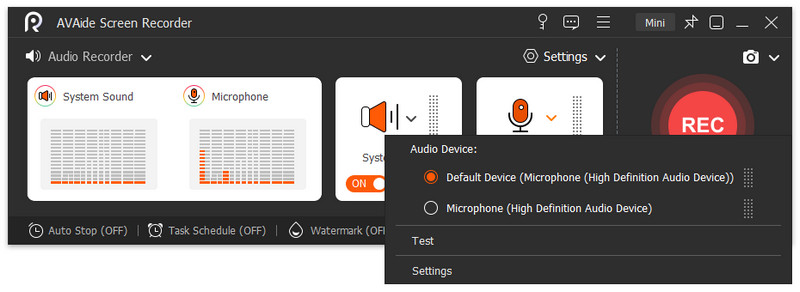
You will see the main interface of the application after launching it. Select the Microphone panel, and you can set the input device you want to use. After selecting the microphone, make sure you also turn on the microphone by clicking the On/Off button.
Step 3Record Quality Audio
After you have toggled all the necessary settings, you can start recording quality audio in FL Studio. Click the REC button to start recording. After recording, you can upload all the audio to FL Studio or any program you use. Also, your quality audio files are saved in the app's local directory.

Part 3: How to Record Vocals in FL Studio with OBS
FL Studio and OBS work more than well when you want to record quality audio and video. With strong music production features, FL Studio has become much more powerful with OBS, one of the most powerful tools for video recording and streaming. By putting them together, vocals can be recorded while the whole production process can be captured for tutorials, live sessions, or content sharing. This sets a great mark for musicians, producers, and streamers trying to improve their workflow. When correctly set, this powerhouse couple delivers consolidated, professional-grade audio and video recordings, streamlining content creation and music production.
Step 1First, you need to download and install OBS. You can go to their official site and download their installer. After installing, launch it, go to your desktop, and open the software.
Step 2After that, you need to set up OBS and FL Studio. To set up FL Studio, launch it and click Options > Audio Settings. Then, select an audio driver compatible with OBS. To set up OBS, create a new scene, insert FL Studio, and click Sources > + > Audio Input Capture. Doing this will capture perfect audio with the use of the two software.
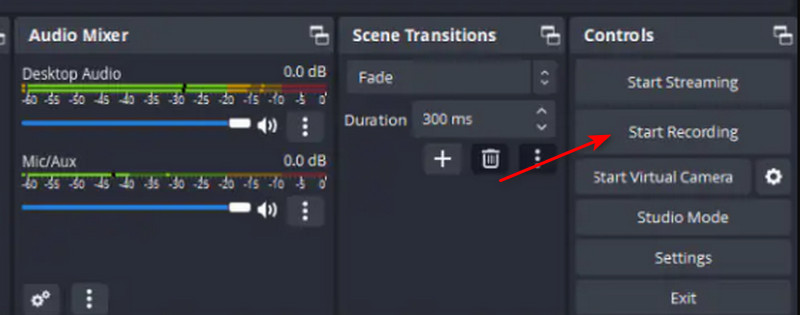
Step 3After setting up all the required options, you can start recording. Click Start Recording on the main panel of OBS to record audio. Your recorded audio will be in today's local application directory.
FL Studio and OBS do interact quite well. Still, there are some downsides one has to consider- one major such thing is latency, wherein both programs treat audio separately, thus making both records of vocals and instrumentals in time delay. Also, using the ASIO driver with FL studio would also be tricky to configure in OBS because ASIO monopolizes the audio device to capture sound from OBS, so it requires some additional setup.
In addition, performance issues may arise when running both programs simultaneously, as they consume a lot of CPU and RAM, potentially leading to lag, stuttering, or even crashes on low-end systems. If you encounter this issue, we recommend following the steps in Part 2.
Using FL Studio to capture your own music or record for entertainment can be quite hard when you are not used to the software. We hope we have guided you well. Feel free to share this article so your friends can learn how to record sound in FL Studio.
Record screen, audio, webcam, gameplay, online meetings, as well as iPhone/Android screen on your computer.