Do you have a stack of old VHS tapes collecting dust, packed with memories? It is common knowledge that VHS tapes became a relic of the past, and digitalizing the content from it is a relatively easy task because you can simply play it on your computer and record it. In that way, you can digitize your VHS content. Find out how to record VHS on a computer and all the necessary things before you hit the record button.
Part 1: What You Need to Record VHS to a Computer?
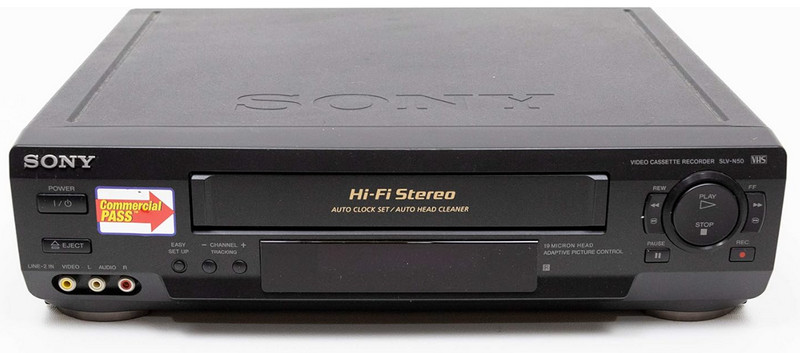
1. VHS Player
Before you can do a VHS capture, the working VHS player used in the project is the first essential item. If you don't have one with you, you can try to get a better model at a thrift shop or other Internet site. Ensure it's in good working order, as bad players can ruin a tape or make mistakes on recording. A VCR/DVD combination is also possible, but a standalone VCR is often best for a specific VHS to digital transfer process.
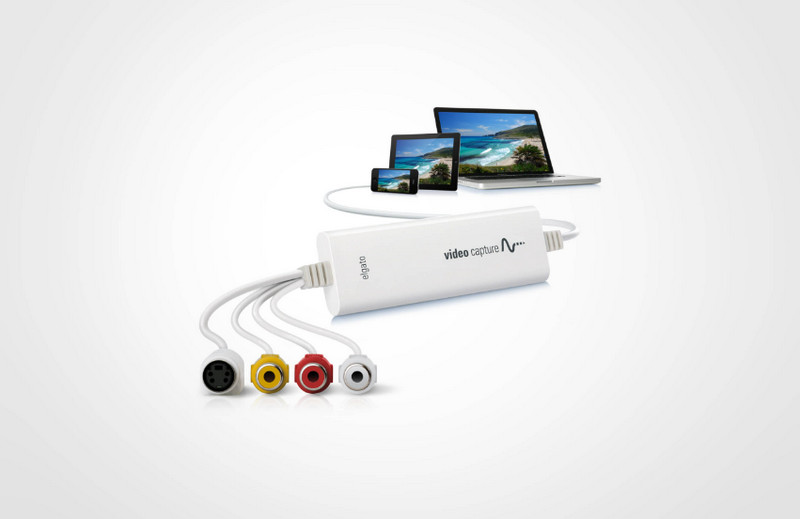
2. Capture Device
A video capture device is a middleman that connects a VHS player with your computer. Most of these devices use USB ports, supplying your computer with video and audio signals from the VHS player. Online video-capturing devices are available. Commonly used are the USB capture device, the Elgato Video Capture, and Roxio Easy VHS to DVD. The primary thing of these VHS capture cards is to focus on compatibility since both Windows and Mac should be easily set up with a capture device.
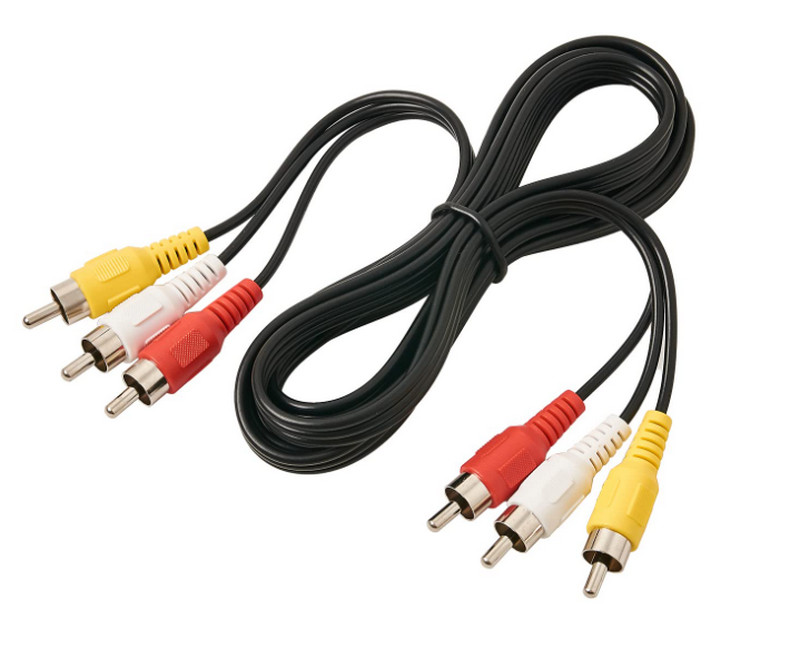
3. RCA Cable
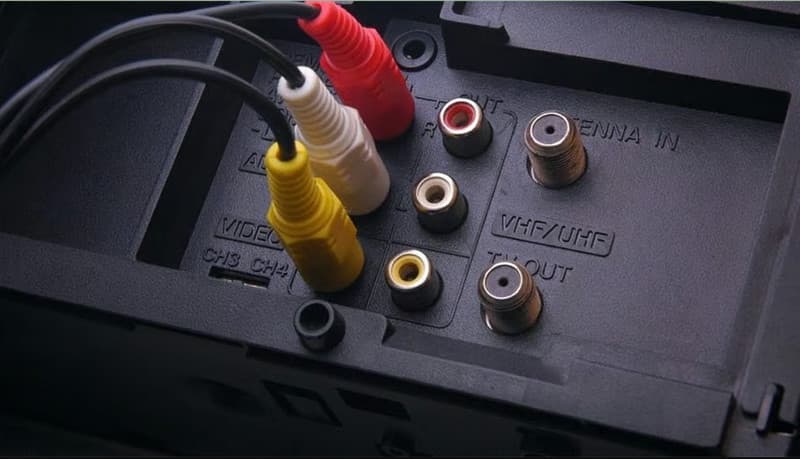
VHS capture requires one set of RCA cables with three connectors; red, white and yellow connectors plug into both the VHS player and the capture device. Video is transmitted through the yellow connector, while red and white are used for audio. Check cables, especially regarding their condition. Blunt connectors pose problems to the audio or video file when transferring between devices.
4. PC with High-Processing & Great Disk Space
When recording the videos shot in VHS tapes, you end up with big files, so check for the space left on your computer. A computer with a little more RAM and suitable processors with more cores will aid in managing video processing and or freezing during recording. Of course, if you have more than one or two tapes that you will digitize, separating at least 500 GB of free space of the drive is necessary for the editing process.
5. Screen Recording App
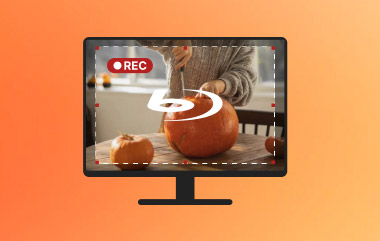
Almost all capture devices have software to assist you or record and store VHS on a computer. Suppose your capture device does not come with its VHS capture software to capture it on a computer. In that case, you can obtain recommended third-party apps such as AVAide Screen Recorder. It should enable you to record in any format easily recognizable by all systems, including MP4 or AVI.

FREE DOWNLOAD For Windows 7 or later
 Secure Download
FREE DOWNLOAD For Mac OS X 10.13 or later
Secure DownloadPart 2: How to Record VHS to PC with Detailed Steps
How to record VHS to PC? After gathering all the important things you need for recording, do now the setup we have included here and the steps.
Step 1Use the RCA cable to connect the VHS player to the capture device that will connect it to the computer. Plug the connectors into the corresponding color-coded ports on the VHS player. Ensure that the cables are snug and secure to avoid issues while recording.
Step 2Link the USB end of the capture device to the port of your PC, and it should be plug-and-play, which means the computer will easily recognize it. If not, follow the prompt that appears to install the drivers it needs to get it recognized by the PC.

Step 3Open your chosen screen recording app and set the necessary settings, such as the recording area and sound system. After that, rewind the VHS tape to the starting point of the video you want to capture and click the Record button to initiate the process.

Step 4When the VHS tape has reached the end of the footage you want to record, click the stop button to save the recorded footage to your PC. Polish it with the available editing feature on the recorder and export it. With that, you have learned how to use the best open-source video recorder.

Part 3: How to Convert VHS to Other Formats on Your PC Quickly
After doing the VHS video capture, there are instances that the final format it is saved is not universally supported, so sending or attaching it to an email might become problematic. That is where AVAide Video Converter comes in handy because of its powerful conversion process. AVAide embraces a wide range of formats as an input and gives you even wider support for output. Plus, the settings on each format can be instantaneously changed based on your needs, which means you can set the highest video quality as an output if you want to. Want to try using this? Then, follow the guide that we have here.
Step 1Before anything else, click the download button below to get the official version of this ultimate converter on your Windows or Mac. Follow the required installation process and click Start Now to activate the converter.
FREE DOWNLOAD For Windows 7 or later
Secure DownloadFREE DOWNLOAD For Mac OS X 10.13 or later
Secure DownloadStep 2Next, click the Add button to import the VHS video file you recorded earlier on your PC and click Open after selecting it.

Step 3Click the drop-down button from the Output Format and go to Video. Here, choose the MP4 format since it is the most compatible video format on all devices, platforms, and social media sites. Select the MP4 settings you want to achieve and click it.

Step 4After that, click the Convert All button to initiate the converting process. With that, you have now turned the recorded VHS footage into the most compatible one with this MP4 video converter.

With the instructions in this article, learning to record VHS tapes on a computer became simpler and straightforward. However, you will need all the materials mentioned above before performing the recording you will need for your VHS footage. Additionally, if the VHS-recorded footage is incompatible with other devices, use the video converter we added here to process and make it compatible.
Record screen, audio, webcam, gameplay, online meetings, as well as iPhone/Android screen on your computer.