Finding your best moments in Overwatch can be confusing if you do not know where they are saved. This guide explains where Overwatch highlights are saved and how to access them easily. You will learn how to find your clips, change their storage location, and organize them for quick viewing. We also show ways to record gameplay without lag, so you never miss a play. By the end, you will know how to save, manage, and enjoy your favorite Overwatch highlights with ease.
Part 1: How to Find and View Overwatch Highlights in the Game
If you are wondering where Overwatch saves highlights, it is actually simple to locate and manage your best moments in the game. Follow these steps to view and save your highlights:
Step 1Open your Career Profile from the main menu, then click History. Here you will see Highlights, Game Reports, and Replays, all in one place.
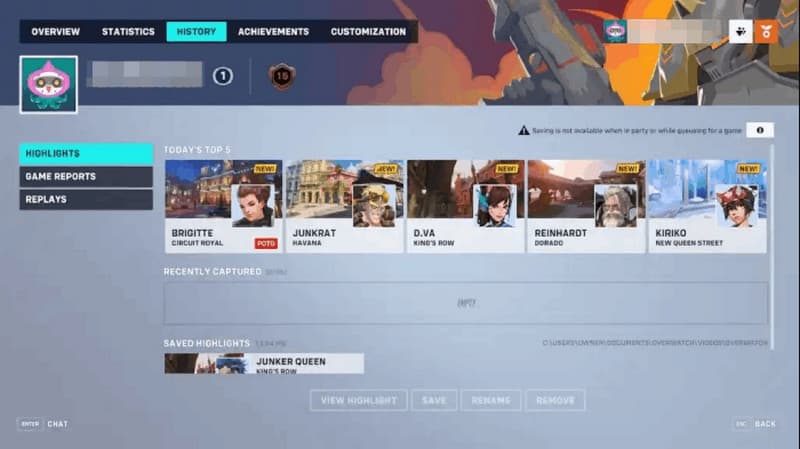
Step 2Click Highlights to see your clips. At the top, you will find Today’s Top 5 highlights, including achievements like High Score, Lifesaver, and Sharpshooter. These highlights are automatically generated during your matches and are stored for 24 hours before being replaced by new clips.
Step 3You can also record highlights manually. Go to Controls > Request Highlight and press the button to capture the last 12 seconds of your gameplay. The clip will appear in Recently Captured, letting you quickly review your action-packed moments.
Step 4To save a highlight permanently, right-click the thumbnail and select Save. A window will open where you can adjust video settings such as resolution, frame rate, and quality. Click Save again, and the recorded video will be stored in Saved Highlights, ready for sharing or editing.
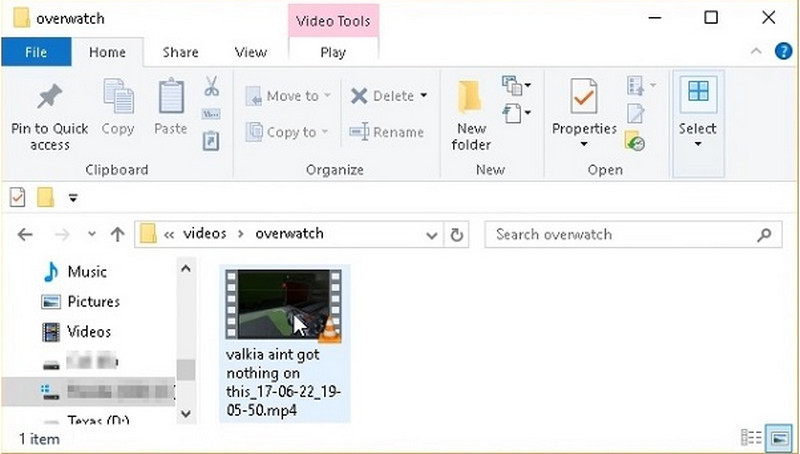
Step 5Once saved, you can find your highlights on your PC under Documents > Overwatch > Videos > Overwatch. From here, you can move them to a custom location or organize them for easy access.
Part 2: Where Are Overwatch Highlights Saved?
Saving your Overwatch highlights lets you keep your best moments and share them later. The save locations and methods vary by platform, so it is important to know where Overwatch highlights save and how to manage them. Here is a detailed guide for PC, Xbox, and PS5.
1. File Location on PC
On PC, Overwatch 2 saves highlights by default in your Documents folder. You can view, record, and download highlights directly from the game, showing that yes, you can save highlights in Overwatch on PC.
Step 1Open File Explorer and go to: C:Users[YourUsername]DocumentsOverwatchVideosOverwatch
This is where your highlights are stored by default.
Step 2Open Overwatch 2 and go to your Career Profile, then click History. Select Highlights to see your Top 5 daily clips or manually recorded clips.
Step 3To manually record a highlight, go to Controls > Request Highlight and press the button to capture the last 12 seconds. Your clip will appear in Recently Captured.
Step 4To download a highlight, right-click the video thumbnail, adjust resolution and quality if needed, and click Save. Your saved clip will now appear in Saved Highlights, ready for editing or sharing.
2. File Location on Xbox
On Xbox, Overwatch 2 does not save highlights within the game. You need to use the console’s capture features to record gameplay. This is another way to answer how to download Overwatch highlights.
Step 1While playing, press the Xbox button on your controller to open the guide. Navigate to Capture & Share.
Step 2Select Start Recording to capture your gameplay. Press the Xbox button again and select Stop Recording when finished.
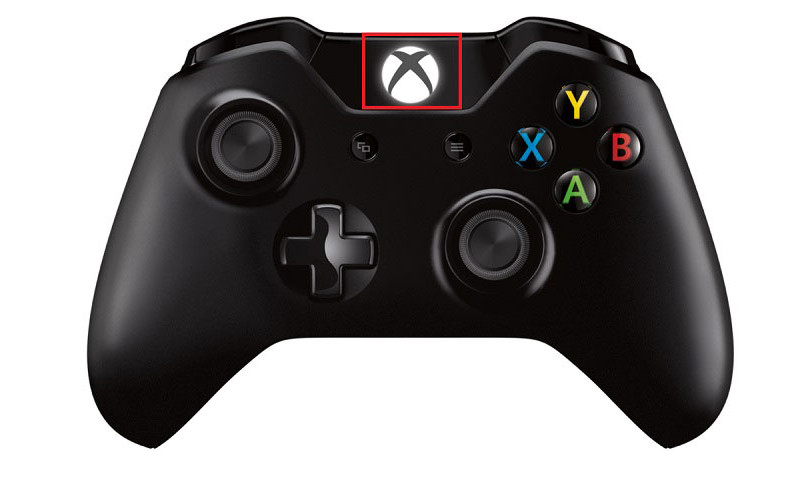
Step 3Your recorded clips are saved in the Capture Gallery, where you can view or download them. This confirms that you can save highlights in Overwatch on Xbox using system captures.
3. File Location on PS5
On PS5, you can save highlights using the console’s capture system, which answers the question Can you save highlights in Overwatch on PlayStation.
Step 1Press the Create button on your DualSense controller.

Step 2Select Save Recent Gameplay. Choose the duration of the clip you want to save, e.g., last 15 minutes.
Step 3Access your saved clips in the Media Gallery from the PS5 home screen.
Step 4From the Media Gallery, you can organize, view, or download your highlights.
Now that you have found the recorded Overwatch gameplay you have, go to the next part, wherein we teach you how to change the location, so that you can access it more easily.
Part 3: How to Change the Location of Overwatch Highlights
If you want to save your Overwatch 2 highlights to a different folder, here’s a quick guide on how to change the Overwatch 2 highlight save location on PC. By following these steps, you can easily set your preferred folder for all future highlights.
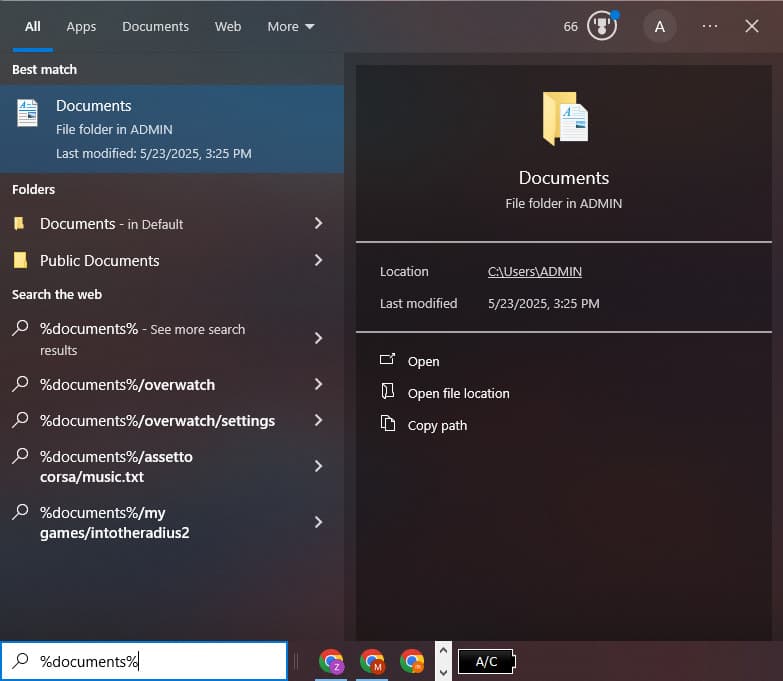
Step 1Close Overwatch 2 completely. Press the Windows key, type %Documents%, and press Enter to open your Documents folder.
Step 2Go to OverwatchSettings and open the Settings_v0.ini file with a text editor. Find the [MovieExport.1] section or make it if it does not exist, and add your desired folder path like this: VideoPath = C:YourPreferredFolder
Step 3Save the file and launch Overwatch 2. Your highlights will now be saved to the new location. If you decide to use the best game recorder to record your gameplay, then its location will be different from here.
Part 4: Record Your Overwatch Gameplay Without Lag
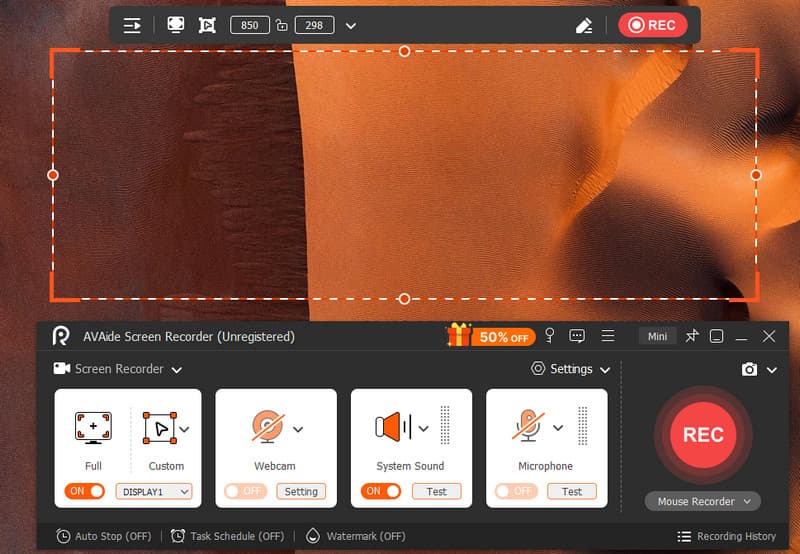
If you want to capture your best moments and never miss a highlight received from Overwatch, using a reliable screen recorder is essential. We recommend AVAide Screen Recorder for smooth, high-quality gameplay recording. This tool lets you overlay your webcam and microphone, so you can add commentary or reactions while playing.

FREE DOWNLOAD For Windows 7 or later
 Secure Download
FREE DOWNLOAD For Mac OS X 10.13 or later
Secure DownloadIt supports recording in original quality or even 4K resolution, and it can record long gaming sessions without lag or distortion. The software is lightweight and stable, making it easy to manage your recordings. Once you finish recording games on Steam or similar, you can quickly share your highlights on social media or with friends.
Saving and recording your Overwatch gameplay is easy. Knowing where Overwatch highlights save helps you find your clips quickly. You can also use AVAide Screen Recorder to record without lag. It lets you add your webcam and microphone and capture high-quality videos. Whether it is an automatic highlight or a highlight requested for Overwatch, these steps help you keep your best moments safe. Now you can watch, share, and enjoy all your top plays anytime.
Record screen, audio, webcam, gameplay, online meetings, as well as iPhone/Android screen on your computer.