How to take a screenshot on a Lenovo? Well, taking a screenshot on Lenovo is among the required skills and processes that can help you capture important information, save content, and share visuals for later reference. Whether you are using your Lenovo laptop, desktop, or tablet, there are many ways you can take a screenshot. In this guide, we will offer all the methods you can follow to capture your Lenovo screen effectively. So, to explore the capturing process, start by reading everything in this article.
Part 1. How to Take Screenshots on All Lenovo Laptops
Want to learn how to screenshot on a Lenovo laptop? The good thing here is that there are many ways for you to capture your screen. To explore the methods, check all the details below.
Method 1. Screenshot on Lenovo Using PrtSc Key
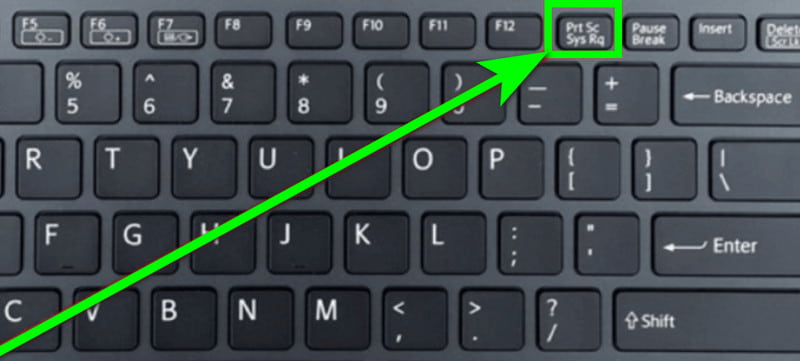
The classic way to capture your screen on a Lenovo laptop is by using the Print Screen (PrtSc) key from your keyboard. This process is simple since it will only take a few clicks to get the captured screen. To start the capturing process, you must proceed to the information you want to capture. After that, click the PrtSc key. Then you can open the Paint or MS Word software and press Ctrl + V to paste the image. Once done, start the saving process.
Method 2. Screenshot on Lenovo Using Alt PrtSc
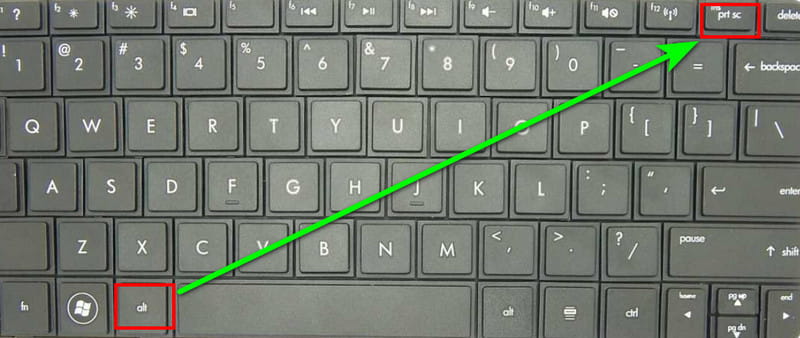
You want to capture the only active window? In that case, you can use the Alt + PrtSc keys. This process is helpful and ideal when you want to focus on one program without including background clutter. After pressing the keys, you can now save the captured screen on the Paint app or another image editor.
Method 3. Screenshot on Lenovo Using Windows + PrtSc
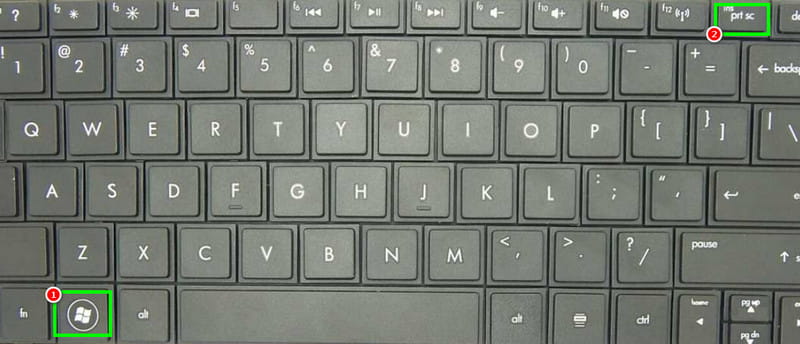
To learn how to take a screenshot in a Lenovo laptop with Windows 10, you can press the Windows + PrtSc keys. This process is ideal if you want to save a full-screen screenshot directly as a file in your screenshots folder. The best part here is that you don't have to paste it into any image editor. Lastly, it is the quickest method to capture and store screenshots without extra steps.
Method 4. Screenshot on Lenovo Using Windows + Shift + S
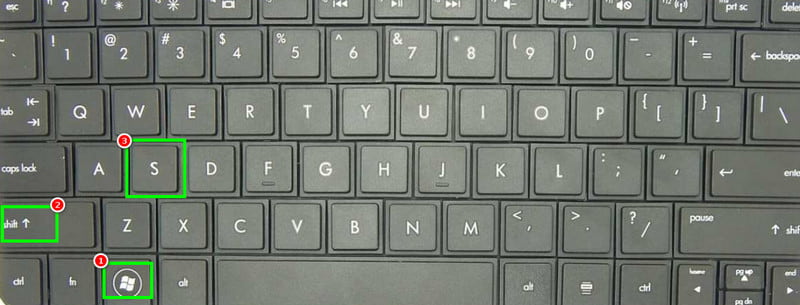
You can also use the Sniping tool from your Lenovo laptop. To capture your screen, you have to press the Windows + Shift + S keys on your keyboard. These shortcut keys can open the Snipping tool, letting you select a portion of your screen to capture. You can also choose freeform, rectangular, window, or full-screen. After that process, you can already paste the captured screen on your preferred platform.
Method 5. Screenshot on Lenovo Using Game Bar Screenshot
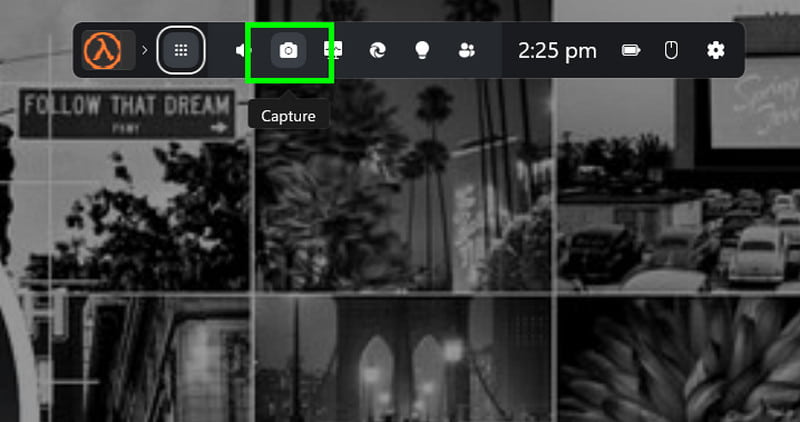
Want to learn how to screenshot on a Lenovo Thinkpad? Then, you can also use the Windows Game Bar. This tool is not just ideal for recording gameplay. You can also access its screenshot feature to capture your screen. To start the capturing process, press the Windows + G keys. When the Game Bar shows up, tap Capture to take a screenshot. You can view your screenshots in the Video > Captures folder.
Method 6. Screenshot on Lenovo Using AVAide Screen Recorder
When using your Lenovo laptop, you can also use AVAide Screen Recorder. With its Snapshot feature, you can smoothly take a screenshot with the best image quality. What we like here is that the process of capturing your screen is simple. You can even take a screenshot of your preferred screen area. In addition, the software can offer various annotation tools. You can add text, highlights, arrows, and shapes directly to your screenshots. Lastly, you can save the screenshot in various formats, such as JPG, PNG, and BMP, for easy sharing.
To learn how to screenshot on a Lenovo computer or laptop, you can follow the instructions below.
Step 1Download AVAide Screen Recorder on your Lenovo laptop. Then install it to begin the capturing process.

FREE DOWNLOAD For Windows 7 or later
 Secure Download
FREE DOWNLOAD For Mac OS X 10.13 or later
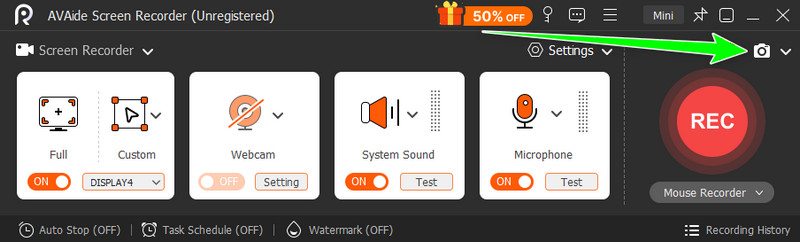
Secure DownloadStep 2From the interface, you must click the Camera/Snapshot icon to begin the capturing process. Use your cursor to take a screenshot of your preferred screen area.
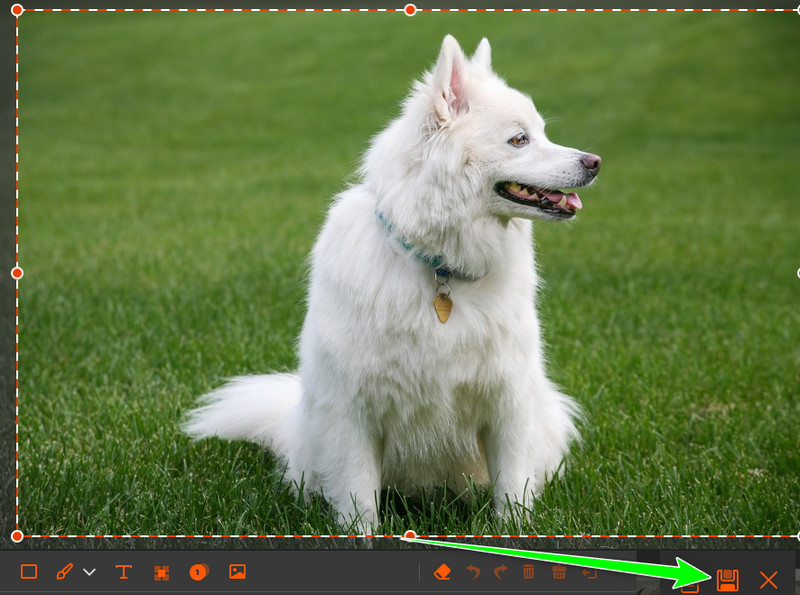
Step 3After that, you can use various annotation tools. You can add text, arrows, shapes, etc. Hit the Save button to begin saving the captured screen.
Part 2. How to Screenshot on Lenovo Windows 7
Do you want to learn how to take a screenshot on a Lenovo Windows 7? The good thing here is that capturing your screen is simple since it has the same process as shown in the previous part. Some of the keys are:
- PrtSc - capture the whole screen.
- Alt + PrtSc - capture the only active window.
- Snipping Tool - to capture the screen in a square, free-form, rectangular, or full-screen.
Part 3. Lenovo-Specific Screenshot Shortcuts
Check here and learn more about the Lenovo-specific shortcuts for an easier capturing process.
ThinkPad Screenshot Shortcuts
- PrtSc - Captures the entire screen > paste into Paint or Word.
- Alt + PrtSc - Captures the active window only.
- Fn + PrtSc (on some models) - Required if PrtSc is combined with other functions.
- Windows + PrtSc - Captures the whole screen and saves automatically in Pictures > Screenshots.
Lenovo Yoga Screenshot Shortcuts
- Windows + PrtSc - Entire screen capture saved to the Pictures folder.
- Windows + Shift + S - Launch Snip and Sketch for custom area capture. When using Windows 7 or 8, use the Snipping Tool.
- Fn + PrtSc - If PrtSc is secondary on the key.
- Touchscreen gesture - Swipe three fingers down to capture the screen.
Lenovo Chromebook Screenshot Methods
- Ctrl + Show Windows - Full-screen screenshot.
- Ctrl + Shift + Show Windows - Choose a region to capture.
- Ctrl + Alt + Show Windows - Capture the active window.
Lenovo Tablet Screenshot
- Power + Volume Down - Press together to take a screenshot on the current screen. Once done, the capture screen will automatically be saved in the Gallery or Photos app.
Part 4. Troubleshooting Common Screenshot Problems
Come here and learn some of the troubleshooting processes you can do when encountering problems while taking a screenshot.
PrtSc Key Not Working
Solution: If the PrtSc is not working well, there are times when you have to press Fn + PrtSc. This way, you can capture your screen.
Screenshot Not Saving Automatically
Solution: When using Windows 7, screenshots do not save images. After capturing the screen, you have to open the Word or Paint app to paste the image.
Blank Screenshots
Solution: This issue happens when capturing protected content. To capture the screen, you can use an excellent screen recorder, like VAide Screen Recorder, to take a screenshot effectively.
If you want to capture the screen on a Lenovo, there is no doubt that this guide can give you all the methods you can use. You even learned some of the troubleshooting process when encountering a screenshot problem. Plus, if you want the best screenshot tool that can help you capture anything from your screen, feel free to access AVAide Screen Recorder. This program ensures that you can capture your screen with the best image quality for a better viewing experience.
ABOUT THE AUTHOR

Record screen, audio, webcam, gameplay, online meetings, as well as iPhone/Android screen on your computer.