Have you ever seen those annoying pixelated blocks in your photos messing up the beauty of your pictures? No worries! This post is here to help you remove mosaic and make your photos clear and vibrant again. We will present how to eliminate those unwanted pixelations and show you some easy ways. It will help you bring back lost details and make your pictures more attractive.
If you have been wondering how to remove mosaic, keep reading. Your journey to having awesome pictures begins right here!
Part 1: What Is a Mosaic on Photo
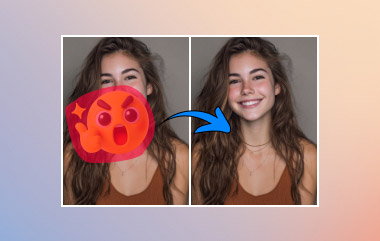
A mosaic on a photo is a blurring or pixel-blocking effect used to hide or censor a part of an image, such as human face, brand, or something sensitive. It breaks the original image part into large square blocks of color, removing fine details and making the content difficult or impossible to see clearly.
If possible and needed, you can remove mosaic on a photo to make the entire photo looks nice and beautiful, not just for purpose of revealing what's under the mosaic. This article offers 4 ways that can help you try to remove mosaic on a photo.
Part 2: How to Remove Mosaic in Adobe Photoshop
Adobe Photoshop is a widely used image editing platform known for its powerful features. It contains the ability to remove mosaic censor from photos.
One of Photoshop's standout features is the selection and masking functionalities. It enables you to target specific areas of your photo precisely. It makes it easy to remove unwanted mosaic censors. You gain control over the editing process by selecting the mosaic-affected region. Indeed, it is fantastic for making your photos stunning but might be challenging for beginners to use.
Below are the steps on how to remove a mosaic from a photo using Adobe Photoshop:
Step 1First, download and install Adobe Photoshop on your desktop. Once installed, open the program. Then, upload your photo using the drag-and-drop method or the import option.
Step 2Import your photo by applying the drag-and-drop method or the import section.
You will find a set of tools on the left side of the screen. Choose the one for selecting areas. Click on Filter, select Noise, and choose Despeckle. Repeat this process 3 to 10 times based on your photo. It helps remove minor irregularities.
Step 3Still in the Filter menu, click Noise and choose Reduce Noise. Modify the settings until you get the desired blur level in the chosen mosaic area. Please use the preview option to fine-tune the effect.
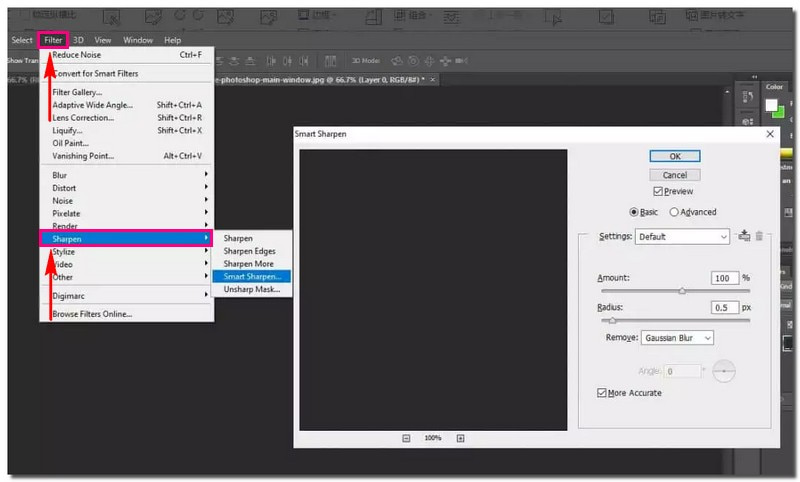
Next, click Filter again, then Sharpen, and choose Smart Sharpen. Increase the Amount and decrease the Radius to enhance the sharpness of your image.
Step 4Pick the Clone Stamp Tool from the tools on the left. Modify the hardness and size of the tool. Press the Alt key, click on a color in the picture, and then release Alt. Click on the mosaic-blurred area to remove mosaic on photo, using the color you selected as a replacement.
Step 5Finally, click on File and choose Save or Save As. Pick your desired format and destination to save the photo free from the mosaic on your computer.
Part 3: How to Remove Mosaic with insMind Unblur Image
Photoshop is difficult to use. Is there an easier alternative to remove mosaic? You can try insMind Unblur Image. It can quickly remove mosaic and unblur your images. As an online tool, it can also remove mosaic on photos in batch, up to 30 images per time. Check how to use this AI-powered mosaic remover free online.
Step 1Go to the official website of insMind Unblur Image and click the Upload a photo button to upload your mosaic image.
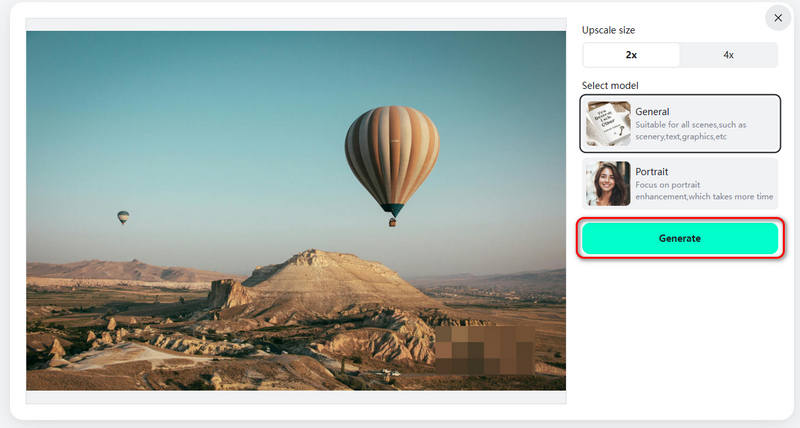
Step 2It will detect your image as a general photo or portrait photo. What you need to do is just click the Generate button. Then, insMind Unblur Image will remove mosaic on your photo quickly.
Part 4: How to Remove Mosiaic with Fotor Unblur Image
Fotor is also a popular online photo processing platform. It can help you remove mosaic on any photo. When you want to remove mosaic on portrait, it offers special tools to deal with it easily, such as Magic Eraser. The entire workflow is also very understandable. Check how to remove mosaic on photo with Fotor Unblur Image.
Step 1Go to Fotor Unblur Image official webpage and click the Upload Your Image button to upload your photo with mosaic.
Step 2After uploading, Fotor will automatically remove mosaic on your photo. You just need to wait for the process to finish. Then, you can download the photo locally.
Part 5: How to Upscale Images to Remove Mosaic-Like Blurriness
Your go-to remove mosaic online solution for transforming small and blurry images into clear, sharp masterpieces is AVAide Image Upscaler. It is accessible through any web browser. The best part? It is entirely free of charge. No hidden fees or subscriptions are required.
This platform is designed to improve the quality of your images. It is by upscaling them, removing mosaic-like blurriness, and bringing out the finer details. Besides that, it enables you to enlarge them by 2×, 4×, 6×, and even up to 8×. After sharpening, witness more details emerging from pixelated or damaged images. Rest assured that watermarks will not be added to your enhanced images. Feel free to use the results without any unwanted markings.
Below are the steps on how to upscale images to remove mosaic-like blurriness using AVAide Image Upscaler:
Step 1Open your web browser and access AVAide Image Upscaler's official website.
Step 2Hit the Choose a Photo button to upload your desired image to enhance the visual appearance. Besides that, you can upload photos in batches if you have many pictures to upscale.

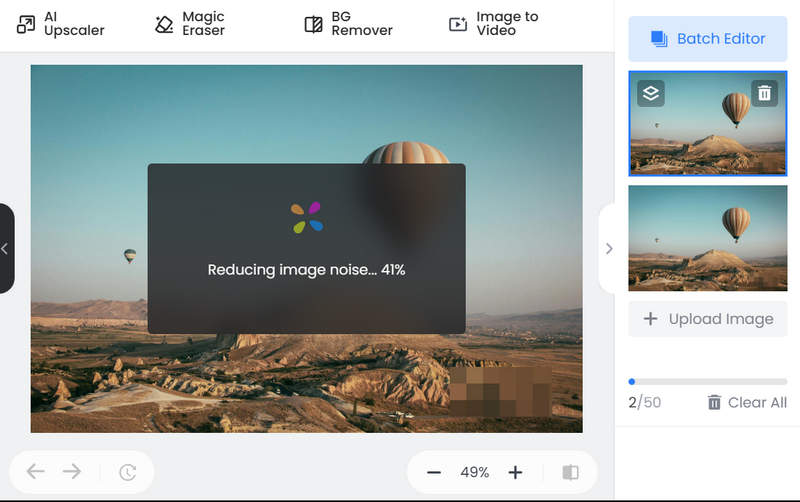
Step 3AVAide Image Upscaler will process your imported image. It says it will render high-quality photos for preview, so please wait a moment.
You can see your original image from the left preview screen and the upscaled image on the right preview screen. The mosaic-like blurriness has been removed, as shown in the output. Do not worry about the watermark embedded in the upscaled image. Once you save it, the watermark will be automatically removed.
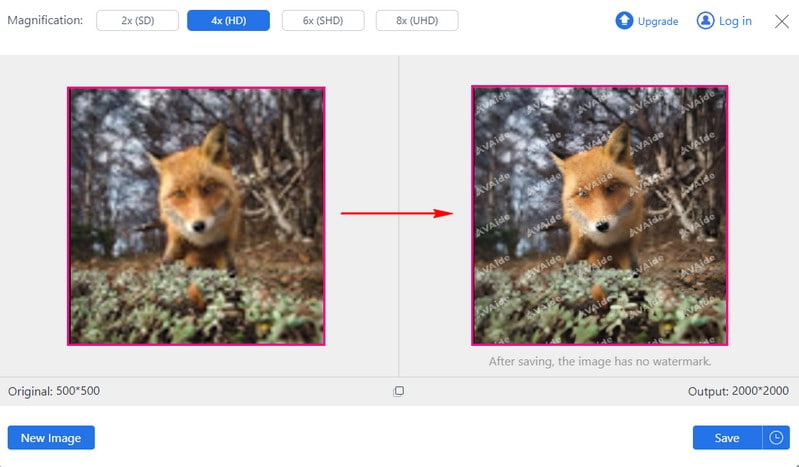
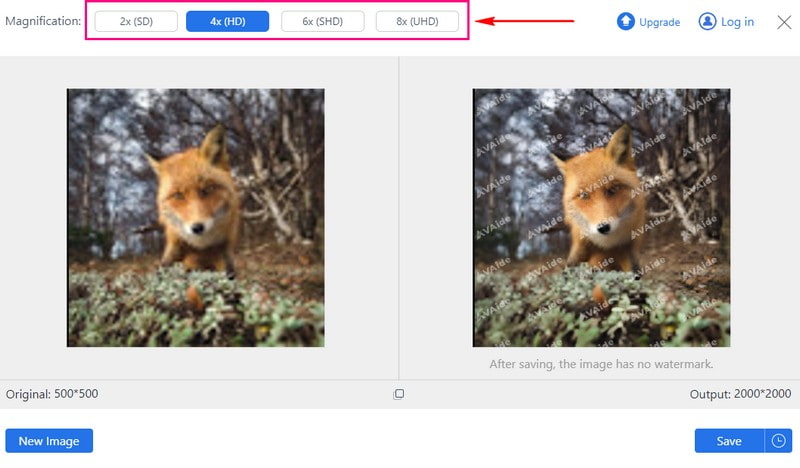
Step 4Head to the Magnification option and select 2×, 4×, 6×, or 8×, depending on your preference. It determines how much larger you want a photo to become than the original size.
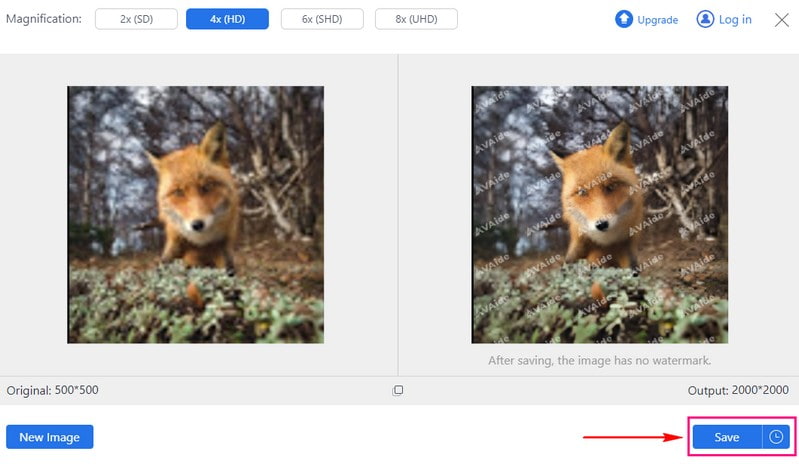
Step 5When done, hit the Save button to download your upscaled image without a watermark.
There you have it! You have learned how to remove mosaics from pictures online using AVAide Image Upscaler. A piece of cake, right? Head to your local folder, and check your upscaled photos!
Part 6: FAQs about Removing Mosaic
Can I remove mosaic on video?
If a video has a mosaic, you cannot use a video editor to remove mosaic. However, you can use AI to remove mosaic from video. AI can remove mosaic from a video frame by frame and fill in the missing details using generative content. Therefore, AI actually generate a new video without mosaic that's quite the same as the original video.
Can removing mosaics from photos or images affect the quality of the picture?
Yes! Taking away mosaics from photos can mess with how good the picture looks. It is better to do this, primarily if the mosaic covers a big part. It might make the picture lose some details or not look as clear.
Does removing mosaics from a photo or image always result in a perfect restoration?
No! Removing mosaics from a photo may not make it look perfect again. This is especially true if the mosaic covers a lot of the picture. You might lose some details or how clear it is, so it is not a guaranteed fix.
Is AVAide Image Upscaler an AI mosaic removal?
Yes! AVAide Image Upscaler is an AI-powered platform that can help you remove mosaics from images. It employs smart technology to make your pictures clearer by removing unwanted pixelation. It makes enhancing your photos easy and efficient, even for those without extensive editing skills.
How to remove mosaic using Inpaint?
Start by opening Inpaint. Next, press the Open option in the toolbar section. Choose the censored image you want to fix and open it in the program. The photo will show up in the main window.
You can mark the censored or pixelated area using the Pencil or Magic Wand option. Inpaint will retouch it to make it look normal. It will recover details from the surrounding pixels. It makes the entire image appear as if it was never censored.
You have discovered how to remove mosaics from pictures online and offline with four excellent mosaic remover tools. Removing mosaics from pictures holds numerous benefits, restoring clarity and detail to obscured areas.
For a more advanced and AI-driven solution, consider AVAide Image Upscaler. This innovative platform employs artificial intelligence to eliminate mosaic-like blurriness from photos. Experience the power of AI in photo editing and enhance your images with ease.

Our AI technology will automatically enhance the quality of your images, remove noise and fix blurry images online.
PROCESS NOW