Images look fine at first, but problems appear when you try to use them in a document, banner, or print. Often, the issue is size, not the photo itself. Stretching it the wrong way removes detail and makes pixels show. To make the image bigger and keep it clear, you need the right tools. This article shows simple and practical solutions. It starts with fast online tools and moves to advanced software. Each section helps you pick the best method and keep your image sharp and usable.
Part 1: The Easiest Way to Make an Image Bigger Free Online
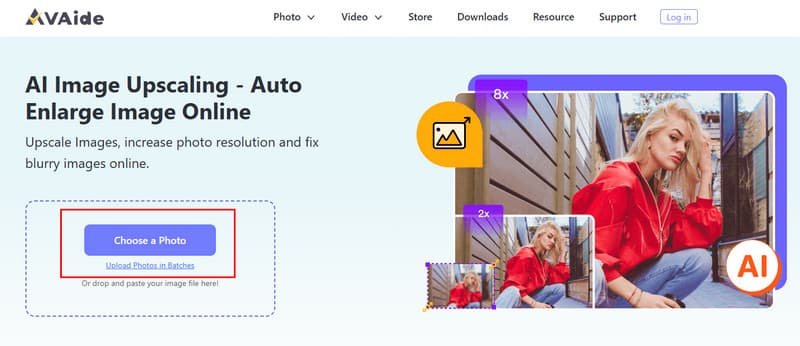
Online upscalers vary in quality, and many either add blur or limit output unless you pay. After testing several browser-based tools, AVAide Image Upscaler stands out for its balance of speed and clarity. It allows you to make a picture bigger by up to 8×, with options for 2×, 4×, and 6× scaling. When testing, there were no details left dirty, and no apparent artifacts at the edges. The tool is all online, no installations needed, and no forced upgrade is enforced. The following section details its application in steps to achieve optimal outcomes.
Step 1Firstly, you need to go to its official website and click the Choose a Photo button to import the image you want to make bigger. Also, you can do a drag and drop here if you want to.
Step 2 After uploading, the app will automatically process the image as you upscale it. On the Magnification, you can choose the magnification level you want to apply to the uploaded image.
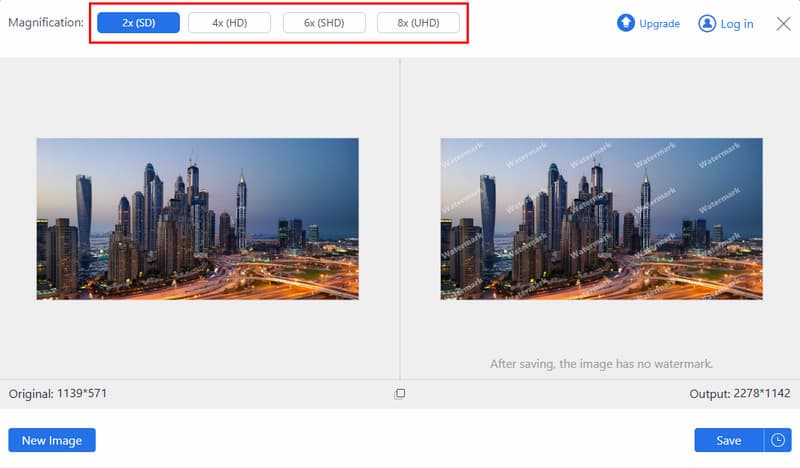
Step 3Once the app is done making the image bigger without losing quality, you can click the Save button to get the final output.
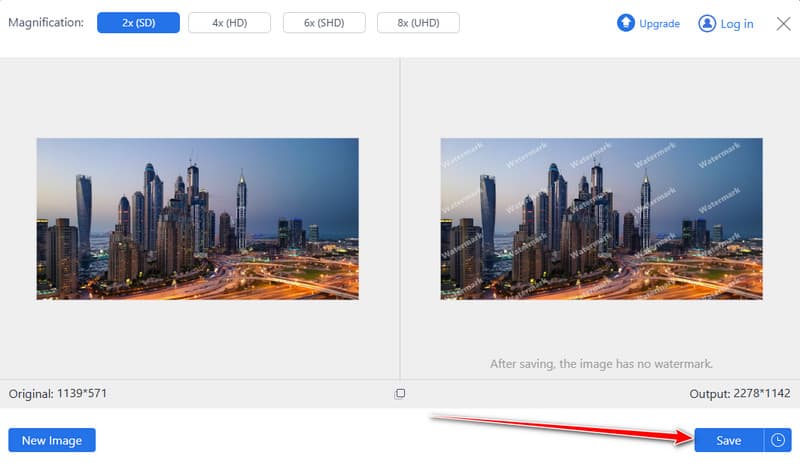
This web tool is a fast and easy 4k image upscaler. It makes images bigger while keeping them clear. No installation or sign-up is needed. It is perfect for social posts, documents, or quick edits.
Part 2: How to Make an Image Bigger in Photoshop
Photoshop also provides greater control over the online tools, a factor that makes it a good option for the user who desires to produce more accurate results. This technique is aimed at resizing, preservation of details, and sharpness of light in order to minimize quality degradation. If you want to learn how to make a picture bigger while keeping edges clean and details sharp, this approach provides reliable results using built-in Photoshop features before exporting the final image.
Step 1Open your image in Photoshop. Go to Image, then click Image Size to access the resizing panel.
Step 2Set the new width and height, keeping the increase within double the original size. Set the resolution to about 100 Pixels per Inch. Under Resample, choose Preserve Details 2.0 to reduce quality loss.
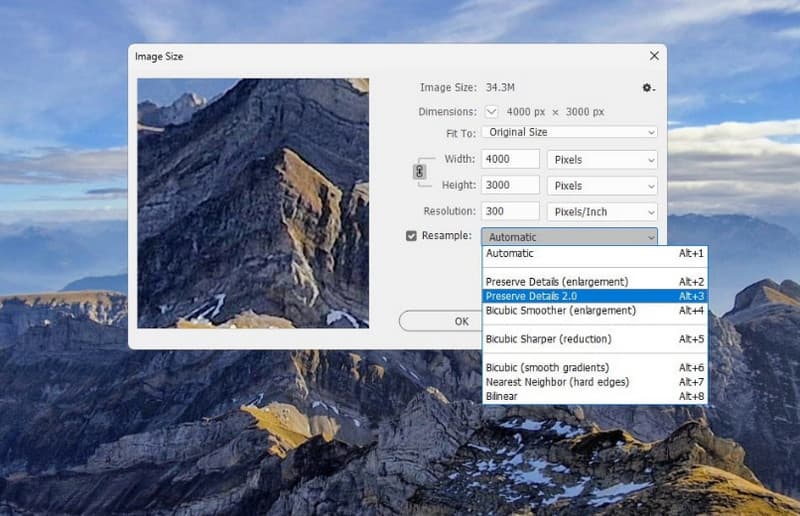
Step 3Transform the image layer to a Smart Object. Duplicate the layer, open Blending Options, and set the blend mode to Soft Light.
Step 4Apply the High Pass filter under Filter, then Other to sharpen edges. Adjust lightly, then export the image using the Export option.
Photoshop gives you full control to make a photo bigger without losing quality. Using Image Size, Preserve Details, and light sharpening keeps edges sharp and details clear. If the final result appears to be blurry, then use it again to unblur the photo in Photoshop, as it solves the problem immediately. This ensures your enlarged image is crisp and ready for any project.
Part 3: How to Make an Image Bigger with GIMP
GIMP is a free desktop image editor that offers strong resizing control without paid features. It is a viable option for users who require quality results without having to use professional software. In case you wish to know how to make a photo bigger without damaging edges, this is the best way because it depends on the correct scaling and interpolation technique to minimize the visible pixel damage and then save the final photo.
Step 1Launch GIMP and open the image you want to enlarge. Click the Image in the top menu, then select Scale Image to open the resizing window.
Step 2Enter the new width and height values. Adjust the resolution if needed. Under Interpolation, choose NoHalo to help preserve details during enlargement.
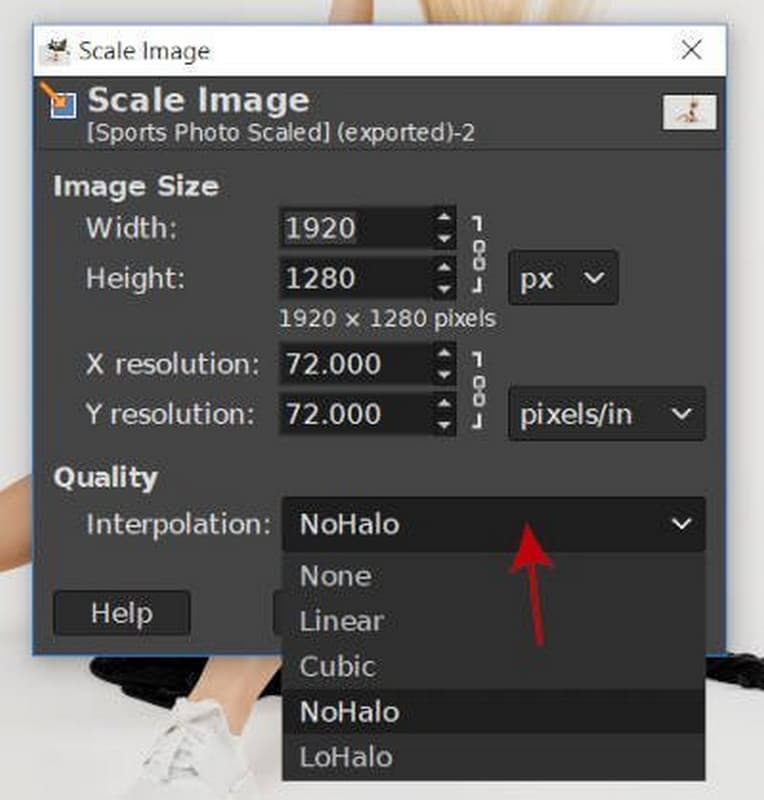
Step 3Click Scale to apply the changes. Once satisfied, export the image to save the larger version.
GIMP is a free tool to make a photo that is compressed bigger without losing too much detail. The ScaleImage function and NoHalo interpolation allow you to enlarge pictures without rough edges. This would be the best solution when users require quality results but do not wish to buy paid software. When you scale and then export the image, you see that your final image is ready to be utilized in any project.
Part 4: How to Make an Image Bigger with Image Resizer
Image Resizer is a simple online tool built for quick image scaling. It works well when you need fast results without editing features or software downloads. The tool focuses only on size adjustment, which keeps the process clean and easy to follow. If you are looking for how to make images bigger without dealing with complex settings, this method offers a direct solution that maintains visual quality for basic resizing tasks.
Step 1Open Image Resizer in your browser and upload the image you want to enlarge.
Step 2The tool opens the resize panel automatically. Enter the new dimensions or adjust the size using percentage values.
Step 3Open the export settings and select your preferred format, such as JPG, PNG, WEBP, or keep the original format.
Step 4Click Resize Image to process the file, then download the resized image to your device.
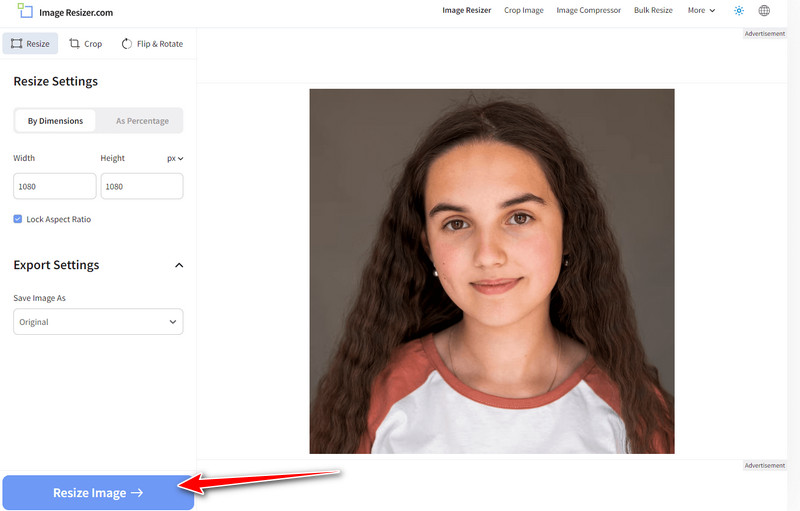
Image Resizer is a fast and simple way to make an image bigger online. It takes only a few clicks to upload, resize and download the enlarged image. It is good with social media, presentations or even urgent edits where you need results at that time. This is an ideal tool to use for beginners or any person who would prefer to have a simple solution without any complicated programs.
Part 5: How to Make an Image Bigger with Topaz Labs
Topaz Labs employs image enhancement using AI-based technology to upscale images with high-quality detail recovery. It is able to analyze texture, edges and noise, unlike simple resizers, to create lost information upon enlargement. This makes it a good option with the photos that require a better quality output as in the form of prints or professional photographs. If you are wondering how do you make a picture bigger without heavy blur, this tool focuses on intelligent upscaling rather than simple stretching.
Step 1Visit the official Topaz Labs website and open the Image Enlarger tool. Click Upload and import the image you want to upscale.
Step 2Choose the upscale factor based on how much larger you want the image to be. Preview the result to avoid over-enlargement.
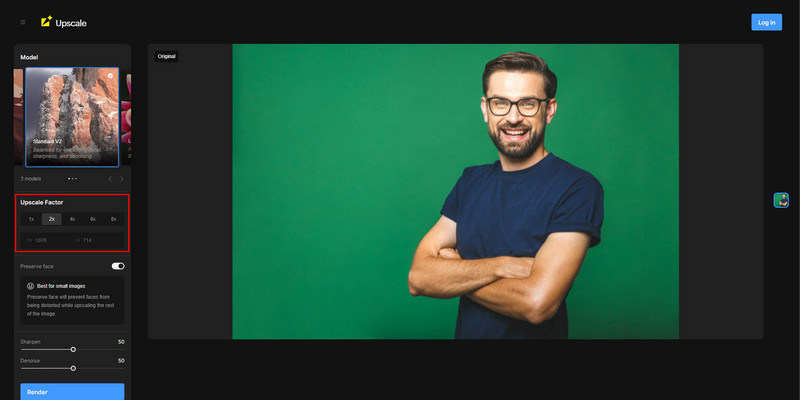
Step 3Once the settings are finalized, click Render to process the image. After rendering finishes, download the enhanced and enlarged file.
Topaz Labs provides an intelligent method to make photo bigger without losing quality. Its upscaler is an AI machine that reconstructs details, minimizes blur, and preserves textures in their natural state. This is best suited to prints or professional shots that would need a higher resolution. In case you have some compressed files or have low-resolution pictures, this tool can be used to restore clarity even when increasing the size, as this will provide a polished and crisp finish.
Making images larger can be challenging without losing clarity. This guide shows how to make a photo bigger with the help of quick online programs and professional software, such as AVAide, Photoshop, GIMP, Image Resizer, and Topaz Labs. Both of the options retain the details differently, and you can decide which one suits you better for social posts, documents, or work-related projects and maintain your pictures bright and clear.

Our AI technology will automatically enhance the quality of your images, remove noise and fix blurry images online.
PROCESS NOW