An apparent picture can alter the perception of individuals regarding any project. However, most photos are lost in detail before you have even begun editing them. A file can be compressed by small sensors, old cameras, and high-speed file transfers, which makes it look soft. The result of these issues is blur, noise, and weak detail. The good news is that the confusion can be restored by using simple means. In this guide, you will learn how to improve the resolution of an image on any device. The next sections cover upscaling, free online tools, Photoshop steps, and mobile methods that can help restore sharp detail.
Part 1: What Is Image Upscaling?
Image upscaling is the method of enlarging a photo while keeping it clear and sharp. A small or low-quality image holds limited detail, so older tools often produced blurry or blocky results when you tried to increase the resolution of image files. The software had to stretch the pixels, which only made the flaws easier to see.
Upscaling today is done in a much different manner. Instead, smart algorithms and AI are used in modern programs to examine the photo and guess what detail would be present in the larger version. Rather than stretch, the tool will create new pixels that will be similar in texture, edges, and patterns to those in the image. Such characteristics as Super Resolution in Photoshop and Lightroom can make a photo four times bigger without any noise. This gives you a larger, sharper image that is far more useful for printing, editing, and sharing. If you want to know more about how to make existing photos high resolution.
Part 2: How to Increase Image Resolution Free Online
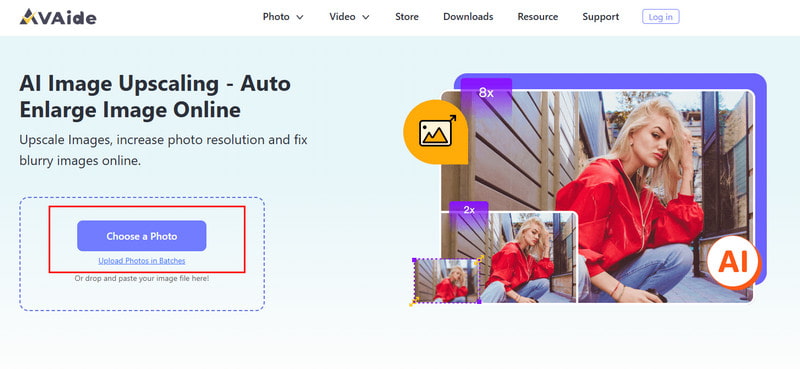
A simple way to increase photo resolution is to use an online tool. AVAide Image Upscaler is a reliable choice that works without installing software. It lets you enlarge images by 2x, 4x, 6x, or 8x. While upscaling, it automatically sharpens edges, reduces noise, and corrects colors to keep your photos clear and natural.
The tool also supports batch processing so that multiple images can be enhanced at once. This makes it ideal for users who need faster results without complex steps. AVAide Image Upscaler delivers larger, sharper, and cleaner images, making online photo enhancement simple and effective.
Step 1Open a new tab on your browser and search for the official page of the AVAide Image Upscaler. Then, click the Choose a Photo to upload the image you want to increase the resolution of.
Step 2Once the image is loaded on the web tool, you can preview the upscaled version. Then, choose the Magnification level you want to use to increase the picture resolution.
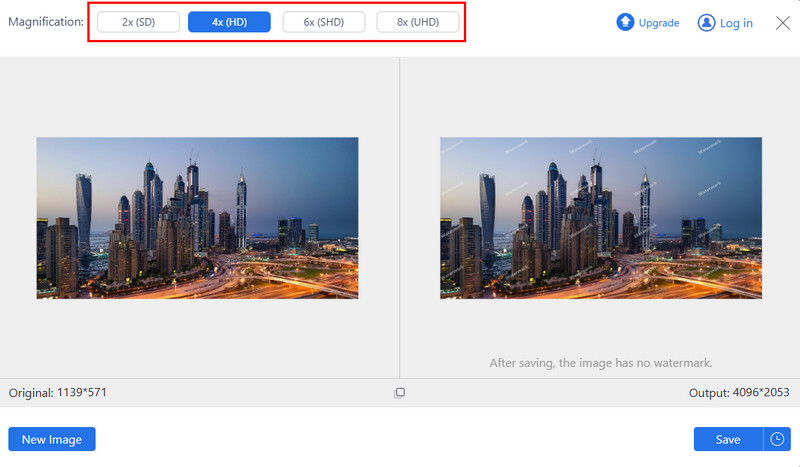
Step 3Now that you are satisfied with the upscale version, click the Save button.

AVAide Image Upscaler makes it simple to know how I can increase the resolution of an image online. It enlarges photos while sharpening edges, reducing noise, and correcting colors. Batch processing allows you to enhance multiple images at once. This tool is perfect for anyone who wants clear, high-quality images quickly without installing software or dealing with complicated steps.
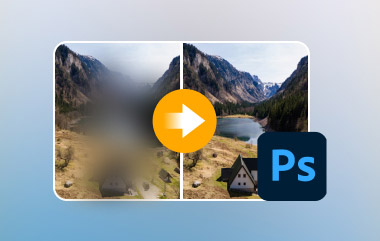
Part 3: How to Increase Image Resolution in Photoshop
When you enlarge an image using Photoshop, you are able to control both the size and detail. Particularly, it can be used to prepare images to use as prints, posters, or high-quality digital images. You can edit the resolution by scaling pixels without distorting the photo by editing the pixel dimensions and clicking on the Resample option. Here is a clear step-by-step process on how to increase the resolution of an image:
Step 1Open your image in Photoshop. Go to Image > Image Size.
Step 2To keep the current ratio of Width to Height, ensure the chain icon linking these properties is activated. Under Dimensions, enter values for Width and Height. The new file size appears at the top of the Image Size dialog box, with the old file size in parentheses.
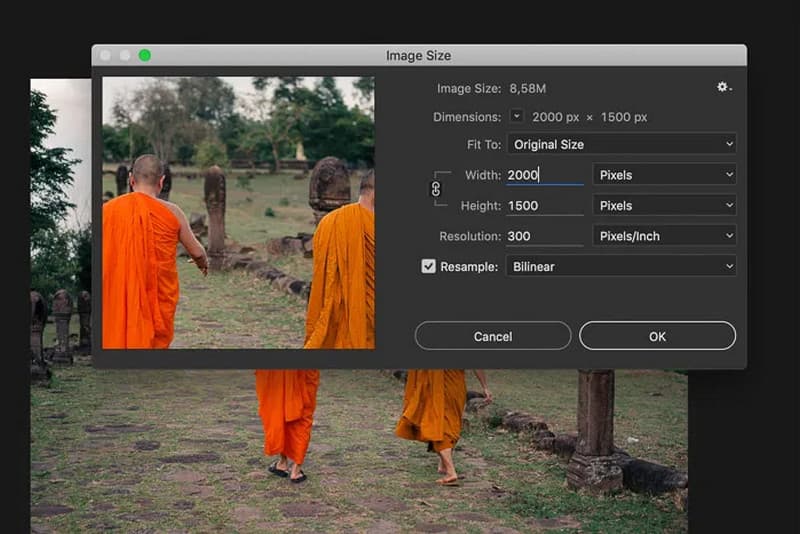
Step 3Select Resample and choose an interpolation method to adjust the pixels. If your image has layers with styles applied, select Scale Styles under the gear button to scale the effects. This option works only if Constrain Proportions is selected.
Step 4After adjusting all settings, click OK to apply the changes and resample your resized image.
Photoshop gives precise control over how to increase photo resolution. By adjusting pixel dimensions and using the Resample option, you can enlarge images without losing proportions. Scale Styles helps maintain effects on layered images. This method works well for prints, posters, or any project that needs professional-quality photos.
Part 4: How to Increase Image Resolution on Android and iPhone
Before looking at specific apps, it helps to know that an image resolution increaser can make your photos sharper, clearer, and more detailed. These mobile tools use AI to enlarge images, remove noise, and adjust colors automatically. Whether you use Android or iPhone, the right app can save time and improve low-resolution photos quickly. Here are two top choices for mobile users.
1. Pixelbin
Pixelbin is a reliable image resolution enhancer for Android users. It enlarges photos with the help of AI without blurred details. The app softens edges, diminishes noise, and enhances color balance, turning low-resolution photos into sharper and more natural ones. Pixelbin also has batch processing, which can be used to process more than one image at a time. The ease of its interface makes it user-friendly to the beginner group and an individual who requires swift outcomes on the fly.
Step 1Download and install Pixelbin from the Google Play Store. Open the app and tap Upload Image to select your photo.
Step 2Choose the upscaling level 2x, 4x, or 8x. Tap Enhance to let the AI improve the photo.
Step 3Review the result, and save the enhanced image to your device.
Pixelbin makes it easy for Android users to how to increase picture resolution. With AI-powered upscaling, it sharpens edges, reduces noise, and improves colors while keeping images natural. Batch processing allows multiple photos to be enhanced at once. Overall, Pixelbin is a fast and beginner-friendly solution for anyone who wants clearer, sharper images without complex steps.
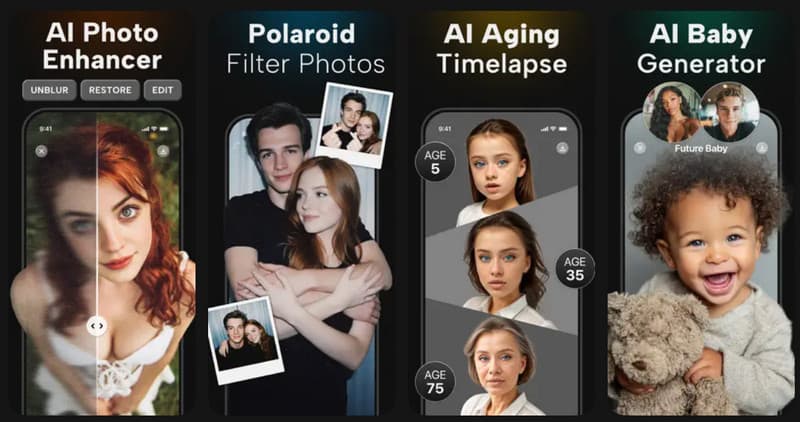
2. PhotoApp: AI Photo Enhancer
PhotoApp is an intelligent solution enhancer in iPhone users. It can increase image resolution with a single tap while sharpening details, removing noise, and adjusting colors automatically. The app works well for portraits, group photos, or older images that need a quality boost.
Step 1Download PhotoApp from the App Store. Open the app and tap Import Photo.
Step 2Let AI auto-adjust or choose an enhancement level to increase image resolution.
Step 3Tap Enhance to process the photo. Save or share the enhanced image directly from the app.
PhotoApp offers a simple way for iPhone users to learn how to improve image resolution. It enhances photos with a single tap, sharpening details, reducing noise, and adjusting colors automatically. This app works well for portraits, group shots, or older photos needing a quality boost. PhotoApp is a practical, easy-to-use tool for improving mobile photos quickly and effectively.
Part 5: 5 Things You Should Not Do When Upscaling an Image
Upscaling can help fix blurry photos, but mistakes can stop you from getting real improvements. If your goal is how to make existing photos high resolution, avoid these common errors that reduce image quality.
1. Poor-Quality Source
A very small or heavily compressed image limits what any tool can do. When trying to increase the resolution of picture files, missing detail cannot be fully restored. Always use the highest-quality version of the photo you have.
2. Enlarge the Image Too Much
Many users try to figure out how to increase the resolution of an image by jumping to very large sizes. This often causes blur, noise, or unnatural textures. Upscale only to the size you need.
3. Relying on Simple Resizing Tools
Basic resizing only stretches pixels. It does not truly enhance photo resolution and often makes images look soft. Use AI or smart upscaling tools designed to rebuild detail instead.
4. Ignoring Noise and Visual Flaws
Upscaling can make grain, blur, and compression marks more noticeable. If you want to know how to make a photo higher resolution, always check for noise and clean it up when needed.
5. Skip Preview and Comparison
Never save the final image without reviewing it. Compare the original and upscaled versions side by side to confirm the process actually improved clarity and detail.
Avoiding these mistakes helps ensure better results when enhancing images and makes the upscaling process more effective overall. If you feel that your image looks grainy or blurry due to the increasing resolution, then use an image resolution enhancer to fix it.
Improving image clarity is easier today with modern tools and software. Whether using an online tool like AVAide Image Upscaler, Photoshop on a computer, or mobile apps on Android and iPhone, you can increase detail, sharpen edges, and reduce noise. Choosing the right method for your device ensures better results and saves time. By following the steps in this guide, anyone can learn how to improve the resolution of a photo easily, making images sharper, clearer, and ready for printing, sharing, or professional use.

Our AI technology will automatically enhance the quality of your images, remove noise and fix blurry images online.
PROCESS NOW