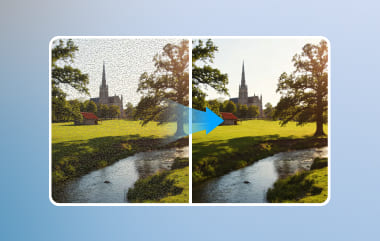
When your image looks grainy, speckled, or less clear due to low light, that is called image noise. It often appears when you use a high ISO setting, shoot with a small sensor, or apply heavy compression to the image you are capturing. Though other noises are easy to correct with appropriate techniques, excessive reduction can remove important details. With the right approach, you can learn how to apply image noise reduction and gain a deeper understanding of it.
Part 1. What Is Image Noise?
1. Definition:
What is image noise? It refers to unwanted grain, speckles, or random color variations that appear in the photo you captured. Low light, high ISO settings, long exposure times, or camera sensor limitations often cause it. When these causes appear in the image, it may look rough, blurry, or less detailed. While some of the noises are natural in digital photography, applying it too much can lose its quality, and more importantly, the details will become harder to see.
2. Causes of Image Noise:
- High ISO settings
With this, your camera became sensitive to light, but it can also create grainy and color noise. - Low light conditions
Unlike High ISO, when the camera does get enough light, it may produce noise while trying to brighten the images you have captured. - Long exposures
The longer the shutter speed, the more digital noise appears, especially if you are capturing images at night and other dark scenes. - JPEG compression
Compression not only changes the file size, but it also affects the overall quality of an image. Using heavy compression creates unwanted artifacts and reduces fine details in your picture. - Small sensors
Old cameras use a small camera sensor, which results in capturing less light and leads to more noise, especially in low-light situations.
3. Types of Image Noise:
- Luminance Noise
This noise appears as a random mixture of brightness, and it's like fine BnW grain across the image. - Chromatic Noise
With this noise, it appears as unwanted RGB and other colored spots, especially in dark areas. - Gaussian Noise
When there is a Gaussian distribution, you will see a random variation in pixel brightness and color. It can be caused by electronic interference or sensor limitations. - Salt and Pepper Noise
There are white and black pixels scattered on your image, and it appears random because of the transmission errors or sensor problems.
Part 2. How to Reduce Image Noise
1. AVAide Image Upscaler (Online)
AVAide Image Upscaler is a well-known AI upscaler that has been developed to help you with every photo noise reduction that you need. With the power of advanced AI, it analyzes the problem, fixes it, and gives you the result as fast. There is no need for you to sign up before you use it, making the process straightforward. Learn how it works here;
Step 1Go to the website of this app by searching for it on your browser. Then, click the Add Your Image to upload the image you want to reduce the noise.

Step 2Wait until the processing is done, on your left side, you are able to see the preview of your image, and on the right side is the result. Choose the magnification level you want to apply to your image.
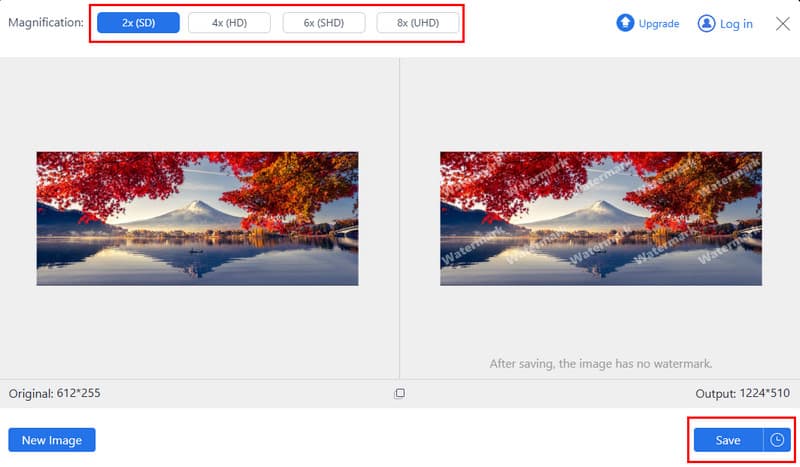
Step 3Now that you are satisfied with the result, click the Save button.
2. Fotor (Online)
Fotor is another picture noise removal tool that you can use to fix every noise that is on your image. It has a dedicated free photo enhancer online with AI that you can use to denoise an image and remove the noise and grains from it. But if you intended to adjust the noise removal manually, you can do so by toggling the sliders option for it. Simple but effective.
Step 1Tick the Upload Image to import the picture you are dealing with.

Step 2After uploading, the app will automatically edit it for you. Click Download and choose the option you want.
3. Topaz DeNoise AI (Desktop)
Topaz DeNoise AI is what we can call a dedicated image noise reduction software, and it is designed to clean up grain and unwanted noise while keeping important details sharp. However, the technicalities on how to use it might overwhelm you, especially if you start with a basic noise reduction tool. Overall, it is a great tool with sophisticated looks.
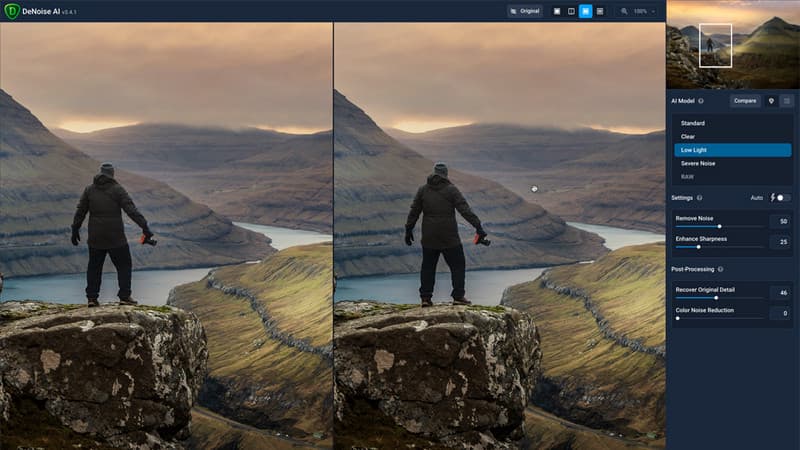
Step 1Launch the Topaz DeNoise AI that you downloaded on your PC and click Browse to import the image you are about to edit.
Step 2Here, you can choose an AI model to help you fix the image noise that you have. It offers a Standard and up to Severe Noise fixing. Toggle the Auto, or you can manually set it via adjusting the slider.
Step 3Apply enhancement by dragging the slider for Recover Original Detail and Color Noise Reduction, then save the final output
4. Adobe Lightroom Classic (Desktop)
Adobe Lightroom Classic provides built-in noise reduction tools that let you remove noise from images while keeping the editing process within the same workflow. It has a feature where you can control the luminance and color noise to determine how much you want to reduce it. If you are a photographer, this is a good choice for those who already have handled Lightroom.
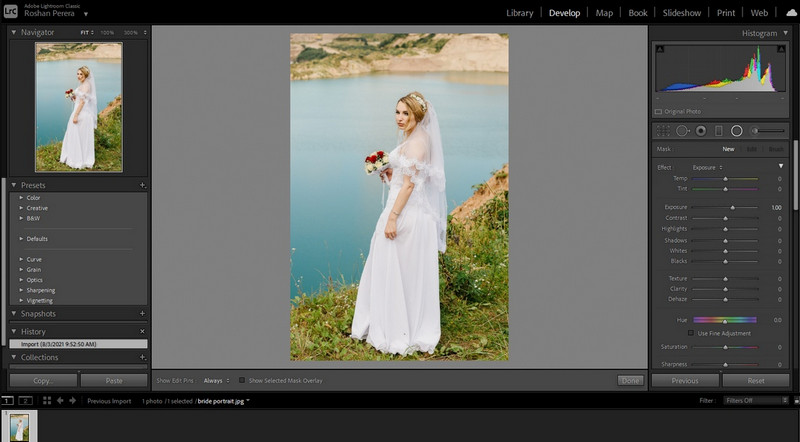
Step 1After downloading it, create a Catalog and go to the Library to open the photos folder on your computer and import them into it.
Step 2Go to the Basic Panel under the Develop tab to adjust the global properties of the image, such as Temperature, Tint, Exposure, Highlights and Shadows, Clarity, and Vibrance. In addition, you can use local adjustments like Masking or Healing/Spot Removal to remove blemishes and fix the area.
Step 3Go to File > Export, choose the output format, and export it.
5. Built-in Photos App (iPhone)
Built-in Photos App on iPhone can help you improve the photos that you have captured with visible grain and unwanted artifacts. While it is not a dedicated image noise remover, its adjustment tools can improve the overall image quality without you downloading an additional app. It is best for quick correction with minor improvements.
Step 1Go to the Photos app, and open the image that you want to edit. Then, click Edit in the upper or lower corner of your screen, and click the Adjust sidebar.
Step 2Go to the Noise Reduction and slide the slider to the right to decrease the graininess and low-light that is present in your image.
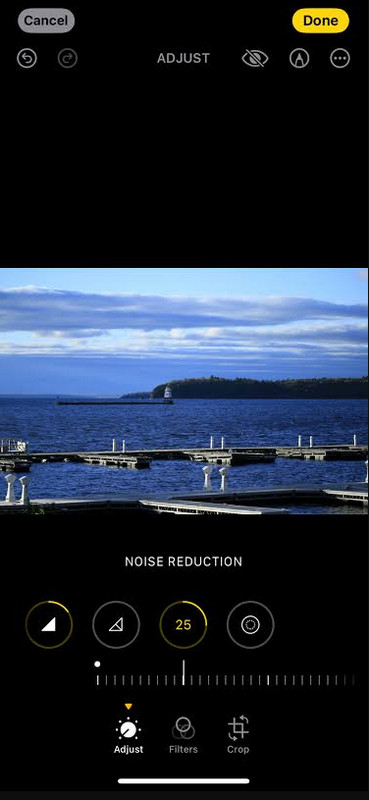
Step 3Click Done when you are finished editing.
Part 3. Troubleshooting Common Noise Reduction Issues
1. Image Looks Plastic or Waxy After Noise Reduction
When noise reduction is set too high, your photos can look plastic-y or waxy. This happens because the natural skin texture and details with the noise have been removed. Reduce the noise reduction strength and keep some natural texture in the image to avoid this, and you can also use sharpening or detail recovery to fix it.
2. Color Noise Remains While Luminance Noise Is Gone
There are times when luminance noise disappears while colored spots remain visible. This usually happens because these things are adjusted separately. Increasing the color and chroma noise reduction slightly, and avoiding setting it too high because it can lead to dullness.
3. Details (Textures, Hair) Are Lost
Strongly applying the noise reduction can harm the fine details that are in your image. Try to lower the reduction level and use detail or texture control to preserve them. You can also apply sharpening, but remember to keep it moderate to avoid creating new artifacts in your image.
4. Noise Reduction Is Too Slow
AI processing noise reduction can certainly take time because it requires more processing power. Close unnecessary apps and reduce the resolution if you only need a smaller output to help you save some processing time. Using a computer with a capable GPU can make the processing faster in the supported software.
5. Cannot Remove Noise Without Blurring the Image
Too much noise is an eyesore, yet there are images that have too much noise, and applying a standard noise reduction turns the image blurry. Try using a lower noise reduction strength and process the image in multiple stages instead of applying a heavy setting all at once
Part 4. FAQs of Image Noise Reduction
Does reducing image noise lower the image quality?
It can happen if the reduction is too strong. Excessive processing may remove fine details and make the image look different from the original. Using moderate settings can help maintain a natural appearance while removing the noise.
Should I sharpen the image after reducing noise?
It is highly suggested that after you reduce the image noise from your image, you need to sharpen it afterward. Sharpening the image online can bring back the lost fine details of your skin, hair, and facial features that have been processed to reduce image noise. Applying it carefully to restore important edges and details without making the remaining noise more visible.
Can image noise be removed completely?
Removing the noise completely is not always the best because it can affect the important details in your image. It is better to find a balance between noise reduction and detail preservation.
Now, you have learned what image noise is and why it affects the overall images that you have. With the help of the image reduction tools, you can fix the problem, but remember not to go overboard in using them because it can lead to loss of details. Share your thoughts with us and let us discuss them!
ABOUT THE AUTHOR


Our AI technology will automatically enhance the quality of your images, remove noise and fix blurry images online.
PROCESS NOW